Warning: These procedures should be completed by senior network administrators only. Completing it successfully requires knowledge of and access to Azure Active Directory for your environments.
Before configuring the Single Sign-On feature in Broadsign Ayuda, you must properly set up the Okta authorization service.
To configure Okta:
- Sign up in https://developer.okta.com/signup/.
- Click Activate My Account in your email and use the authentication information to log in.
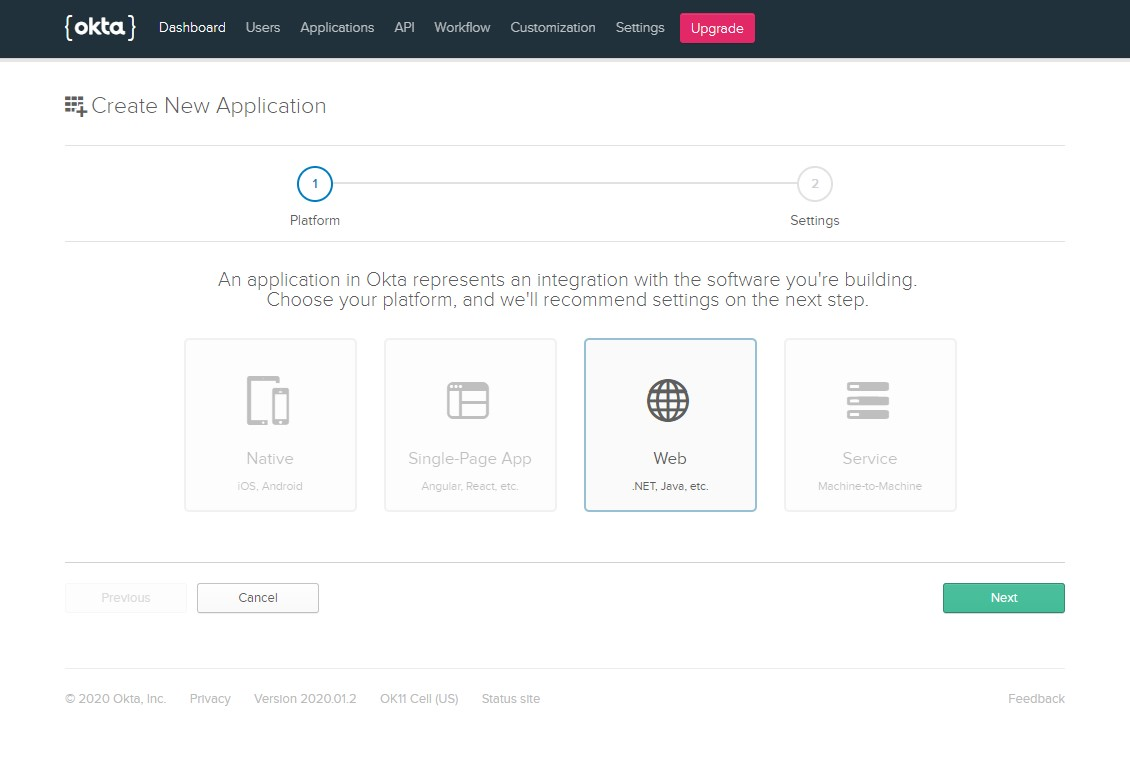
- Once logged in, access the Applications tab and click the Add Application button.
- In the next page, select Web .Net, Java… and click Next.
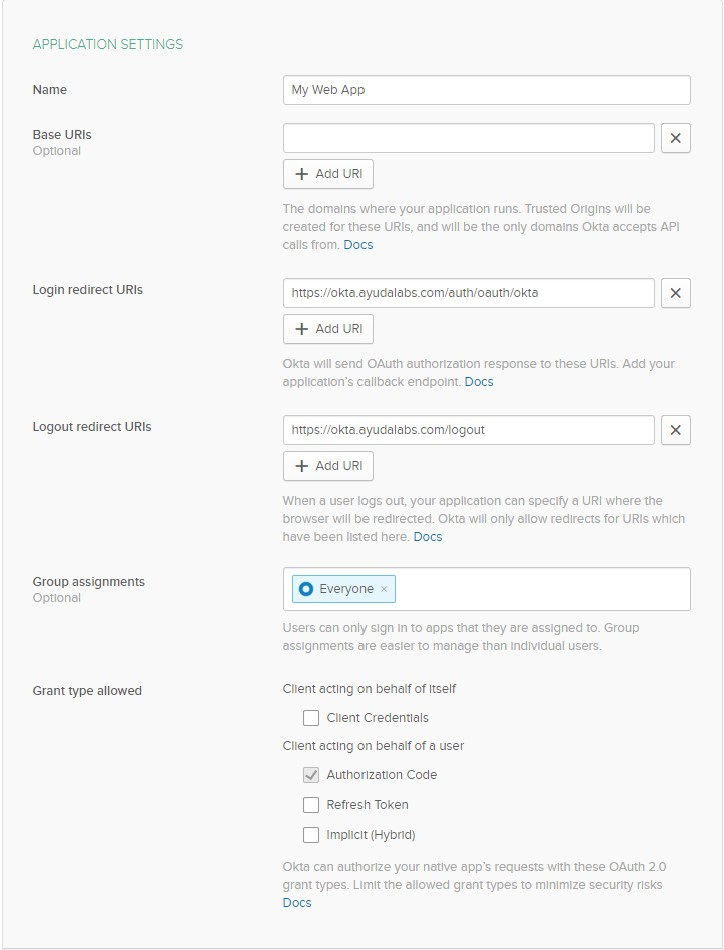
- Enter the following information:
- Click Done.
Note: The user name (Email) you create in Okta should be the same as the user name created in Splash.
An email including the user name and a temporary password will be sent.
This opens the Application Settings page.
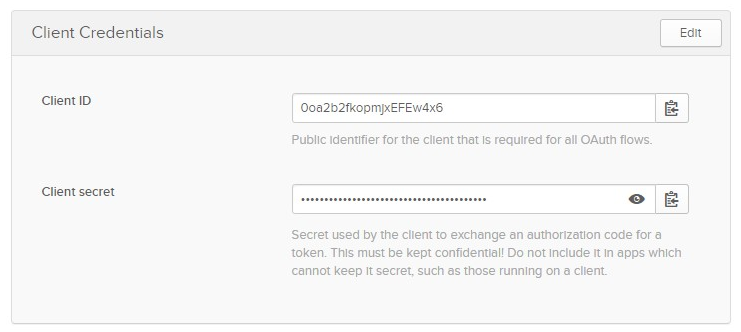
Client Credentials are generated, which will be used in Web App’s Okta configuration:
Note: There should be just one active application at a time, so you might need multiple Okta accounts for more than one instance.
Once the Okta authorization service has been configured, you must configure and enable the Single Sign-On feature in Broadsign Ayuda.
To configure Broadsign Ayuda Admin:
- Log into Splash with administrator rights.
- Select Admin, then Authentication, and SSO.
- Click Okta.
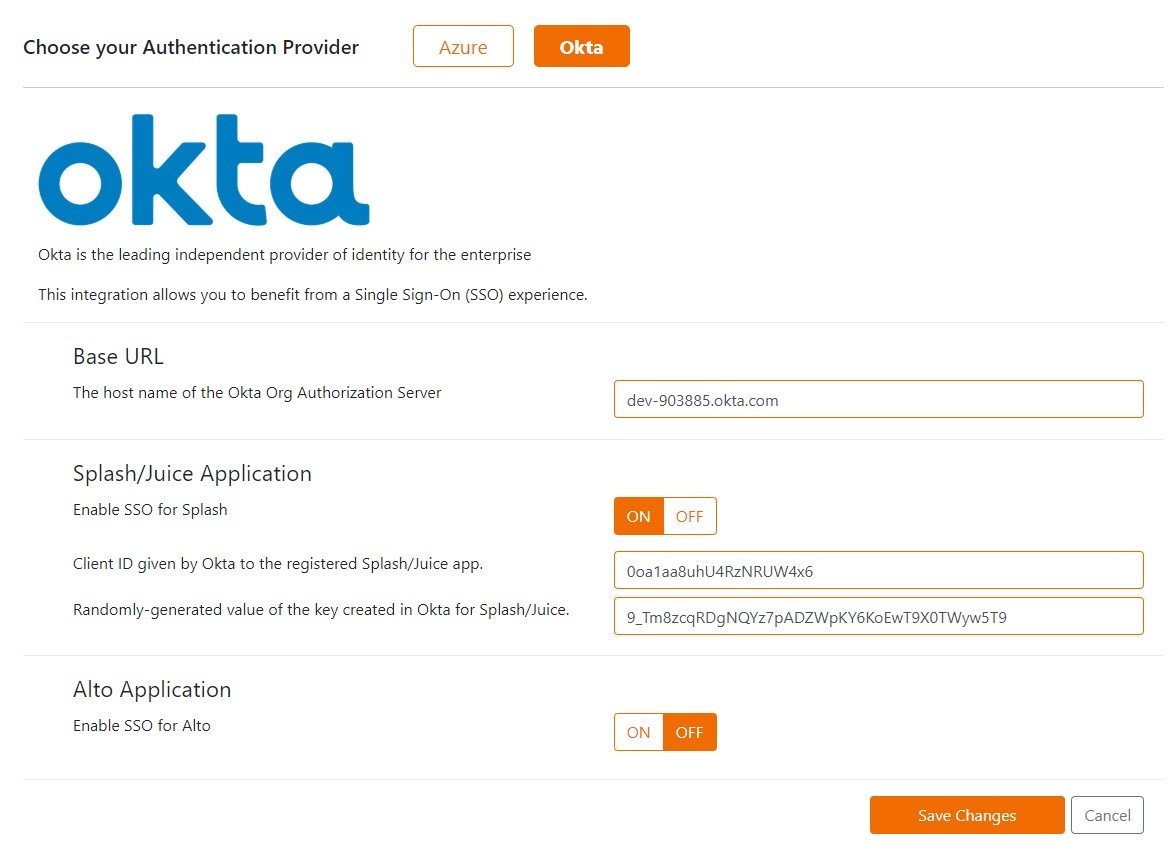
- Enter the following information:
- The Client ID is given by Okta to the registered Splash/Juice app.
- Randomly-generated value of the key created in Okta for Splash/Juice.
- Click Save Changes.
If the SSO tab is not available, you can also use the following URL:
{DomainName}/config#/
For example: https://okta.ayudalabs.com/config#/.
| Parameter | Description |
| Base URL |
Copy the domain from your Okta page’s address bar and insert it in Base URL. It normally looks like: dev-{number}.okta.com. |
| Splash/Juice Application |
Enable SSO for Splash/Juice. Use the Client ID and Client Secret in Step 6 of Configure Okta for the following: |
| Alto Application |
Enable SSO for Alto. Use the same Client ID and Client Secret in Step 6 of Configure Okta. |

If everything is configured properly, the configuration is saved without any error.
You can then open Splash and log in Okta. You will be automatically be redirected to Splash.
Note: For some specific situations like just after creating a new instance or restarting Web apps in Mamba/Azure portal, saving the Okta configuration might return an error only for the first attempt and will save it in the next attempts.
Each time changes in configuration page is saved, make sure that the new AppSetting values are applied to the specific instance. You might need to restart the related Web Apps in Azure to apply the new AppSetting values.


