This page describes how to add folders and set up content sharing in Broadsign Publish.
Once you have configured your user groups and users, the next step is to share content.
Sharing content with your editors is an important part of your domain setup. It ensures that all members of a user group have the same content to work with.
The following tasks can be performed:
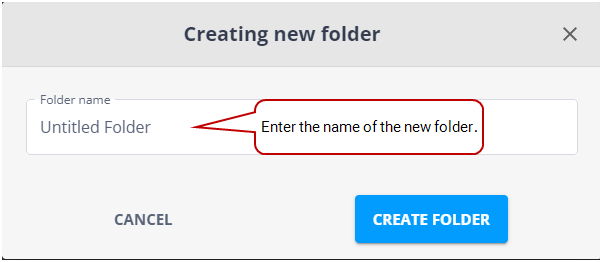
- Add folders to host content (see Add Folders)
- Move content to a folder (see Move Content to a Folder)
- Share content with other users (see Share Content)
- Share a screen (see Share a Screen)
You can move content to folders to organize your content. Moving a file will share it with everyone who has access to your selected destination.
To move content to a folder:
- On the Your Library page, select the content to move.
- Select an individual item by clicking its check box.
- Select multiple items by clicking each of their check boxes.
- Select multiple consecutive items by clicking the first item, pressing Shift, and clicking the last item.
- Select a folder by clicking its check box. All the content items in that folder will be selected.
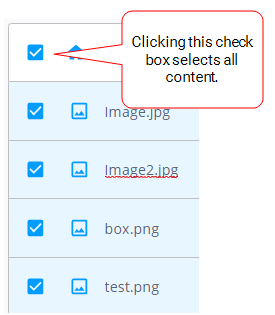
- Select all content items by clicking the check box above the list of content.
- Click the
 icon.
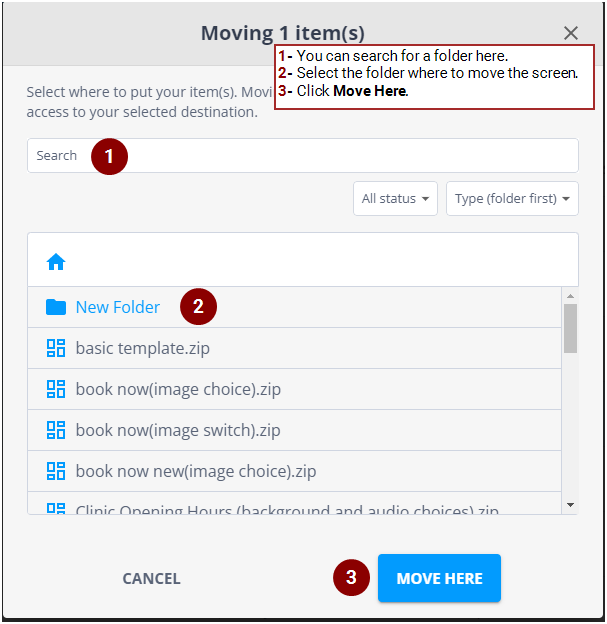
icon. - In the window that is displayed, select the folder where to move the content.
- Click Move Here.
You can:
You can share content with other users. The content can be images, videos, templates, or folders. You can also define the level of access for each user and user group.
Note: Only users with the Can change asset share permission can share content. If you need this permission, contact your domain administrator. For more information, see Share Permissions.
To share content:
- On the Your Library page, select the content to share.
- Select an individual item by clicking its check box.
- Select multiple items by clicking each of their check boxes.
- Select multiple consecutive items by clicking the first item, pressing Shift, and clicking the last item.
- Select a folder by clicking its check box. All the content in that folder will be selected.
- Select all content items by clicking the check box above the list of content.
- Click the
 icon.
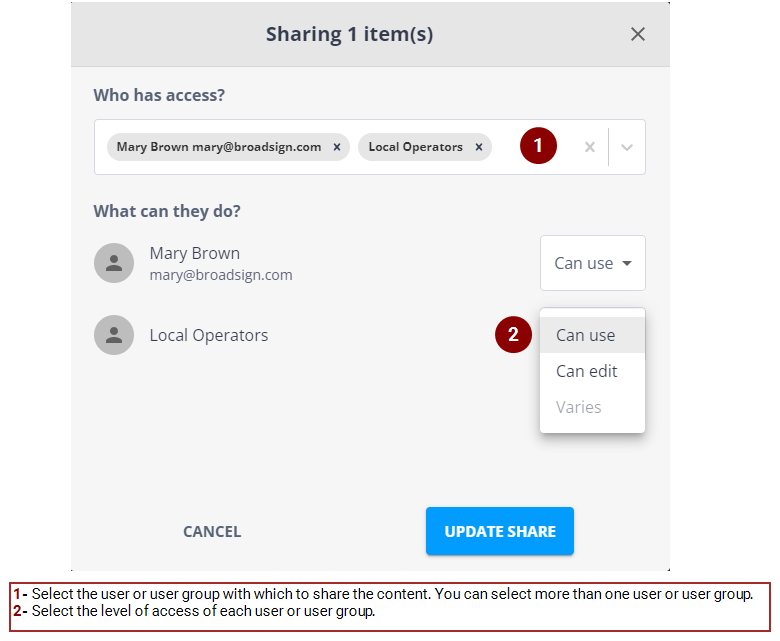
icon. - In the window that is displayed, do the following:
- Select the users and user groups with which to share the content. You can select more than one user or user group by clicking them one after the other.
- If you want to remove the share for a user or user group, click the x next to this user or user group to remove them from the list.
- Select the level of access of each user or user group. You have the following choices:
- Click Update Share.
You can:
Sharing a folder does not affect the sharing status of individual content items in that folder. For example: image1.jpg is in Folder-A and it is already shared with someone. If you share Folder-A with that same person, they now have access to all content items in that folder. Now, if you decide later to remove the share on Folder-A, that person will still have access to image1.jpg, but no longer to all the other content items in the folder.
| Level of Access | Description |
| Can edit |
The user can move, delete or rename content. |
| Can use | The user can only use the content in a message. The content cannot be moved, deleted or renamed. |
Having two levels of access allows you to share content that specific users cannot change and some content that they can change. You can thus control the difference between managed service and default content and your users do not end up changing or deleting content also available to other users.
If every user in a group has the Can change asset share permission, the group has the Can edit level of access. Otherwise, the group has the Can use level of access and the users with different permissions are listed independently. For more information, see Users and Groups Permissions.
If multiple files are selected with different levels of access, the level of access is Varies and the user can select a single option for all selected files. It is also possible to remove or add users to the multi-selected files.
You can share screens and screen groups with other users or user groups.
Note: Only users with the Can change screen share permission can share a screen or a screen group. If you need this permission, contact your domain administrator. For more information, see Share Permissions.
To share screens or screen groups:
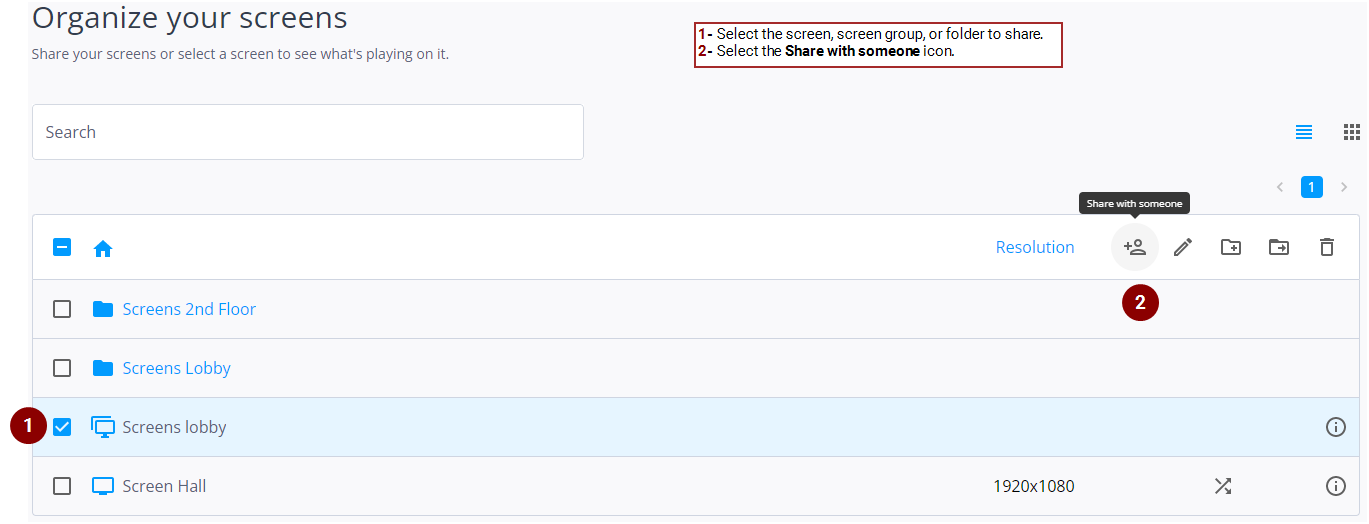
- On the Your Screens page, select the screens or screen groups to share.
- Select an individual screen or screen group by clicking its check box.
- Select multiple screens or screen groups by clicking each of their check boxes.
- Select multiple consecutive screens or screen groups by clicking the first screen, pressing Shift, and clicking the last screen.
- Select a folder by clicking its check box. All the screens and screen groups in that folder will be selected.
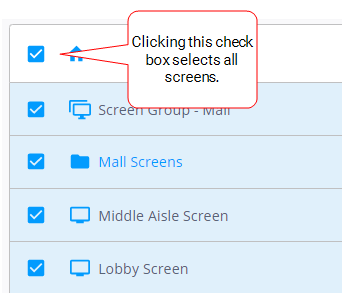
- Select all screens and screen groups by clicking the check box above the list of screens.
- Click the
 icon.
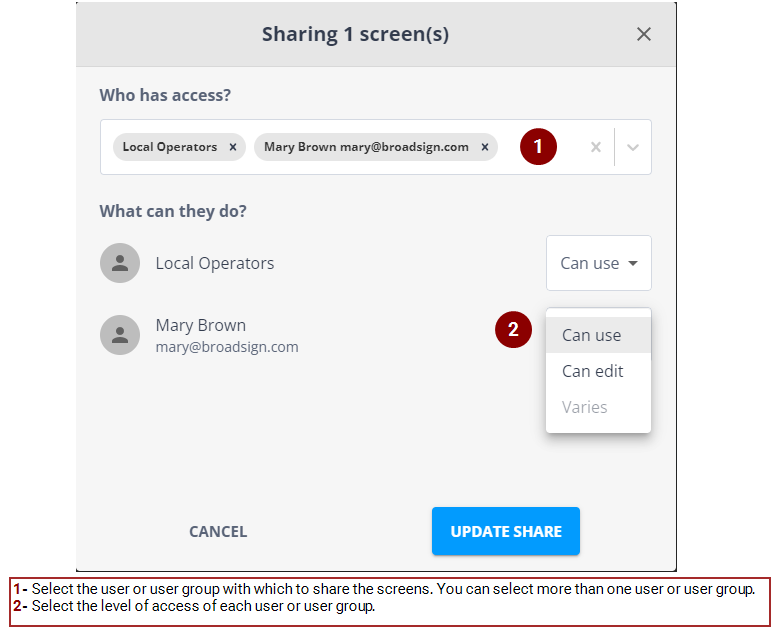
icon. - In the window that is displayed, do the following:
- Select the users and user groups with which to share the screens or screen groups. You can select more than one user or user group by clicking them one after the other.
- If you want to remove the share for a user or user group, click the x next to this user or user group to remove them from the list.
- Select the level of access of each user or user group. You have the following choices:
- Click Update Share.
You can:
Sharing a folder does not affect the sharing status of individual screens in that folder.
For example: Screen 1 is in Folder-A and it is already shared with someone. If you share Folder-A with that same person, they now have access to all screens in that folder. Now, if you decide later to remove the share on Folder-A, that person will still have access to Screen 1, but no longer to all the other screens in the folder.
| Level of Access | Description |
| Can edit |
The user can move, delete or rename screens or screen groups. |
| Can use | The user can only use the screens or screen groups. They cannot be moved, deleted or renamed. |
Having two levels of access allows you to share screens or screen groups that specific users cannot change and some screens or screen groups that they can change. You can thus control the difference between managed service and default content and your users do not end up changing or deleting screens also available to other users.
If every user in a group has the Can change screen share permission , the group has the Can edit level of access. Otherwise, the group has the Can use level of access and the users with different permissions are listed independently. For more information, see Users and Groups Permissions.
If multiple screens or screen groups are selected with different levels of access, the level of access is Varies and the user can select a single option for all selected files. It is also possible to remove or add users to the multi-selected screens.


