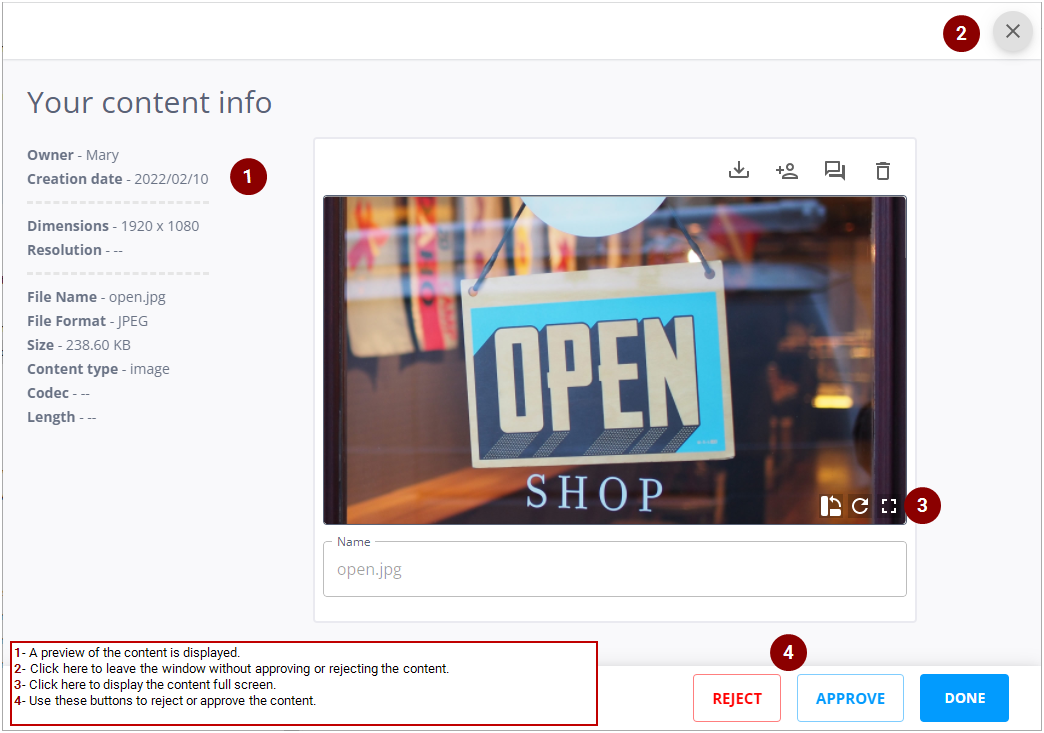
This section describes how to approve content in Broadsign Publish.
No content can be added to a message without being approved.
Broadsign Publish allows some specific users to perform the following tasks:
- Approve or reject content that was uploaded (see Approve or Reject Content).
- Approve or reject content that was uploaded after receiving an email requesting an approval (see Approve or Reject Content from Email).
Note: Only users with the Can approve content permission can approve content. If you need this permission, contact your domain administrator. For more information, see Users and Groups Permissions.
Once content has been uploaded, it must be approved. Even once approved, content can be later on rejected.
Note: Administrators and Network Operators typically have the Can upload without approval permission, which means that any content they upload is automatically approved. For more information, see Assets Permissions.
You can use the mobile version of Broadsign Publish to approve content directly from your mobile. The process is the same as Approve or Reject Content.
It is possible to configure a user to receive email notices that new content has been uploaded and is ready for approval. This email has the following information:
- Who has uploaded the content.
- The name of the content uploaded.
- A link to log into Broadsign Publish to approve or reject the content.
Configuring a user to receive email notifications involves defining this user as the manager of other users.
To configure a user to receive email notifications:
-
On the Broadsign Publish interface, click the Publish Admin link at the top right of the window.
The Domain Dashboard opens:
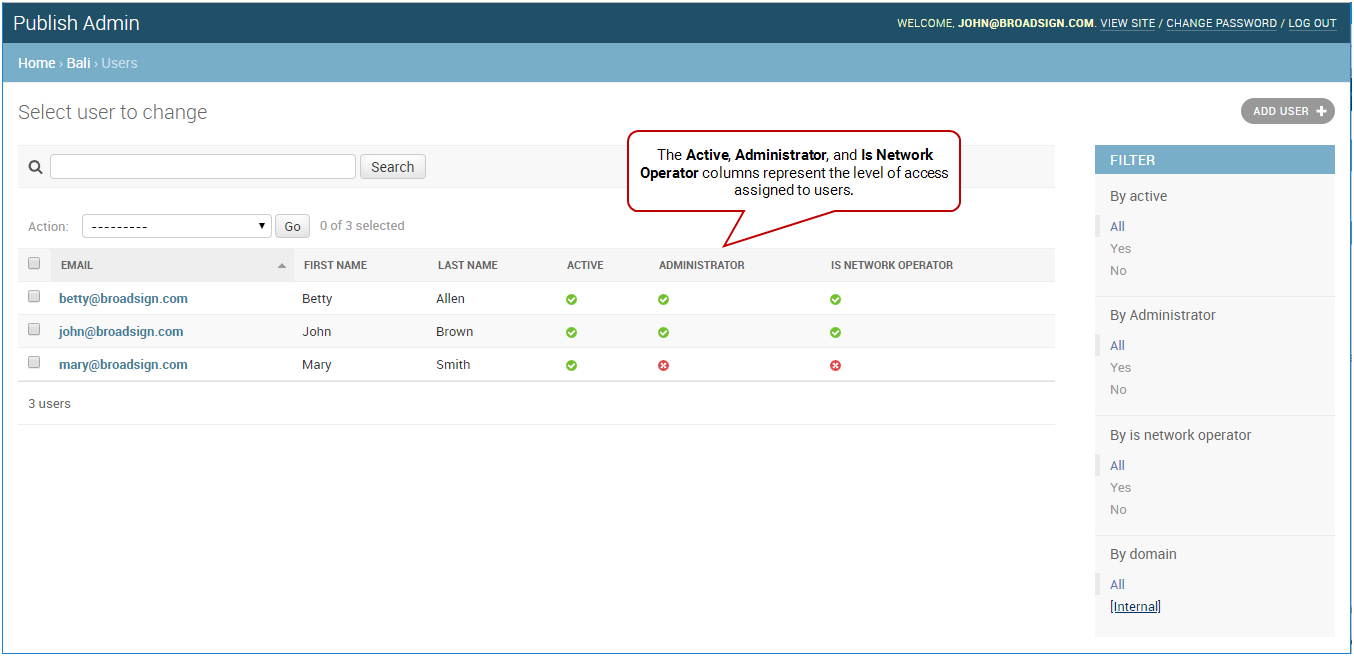
- Under Accounts, click Users.
- On the Users page, click the user to which assign management rights. The Change user page opens.
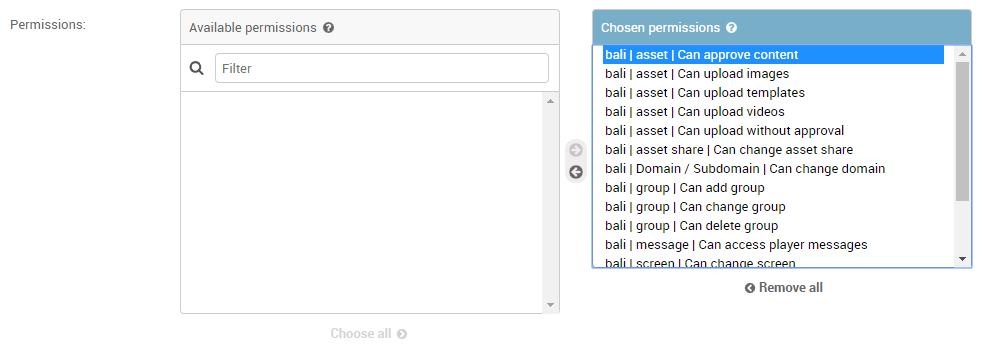
- Under Permissions, navigate to the Permissions section. Ensure that the user has the Can approve content permission, otherwise this user will receive emails without being able to approve.
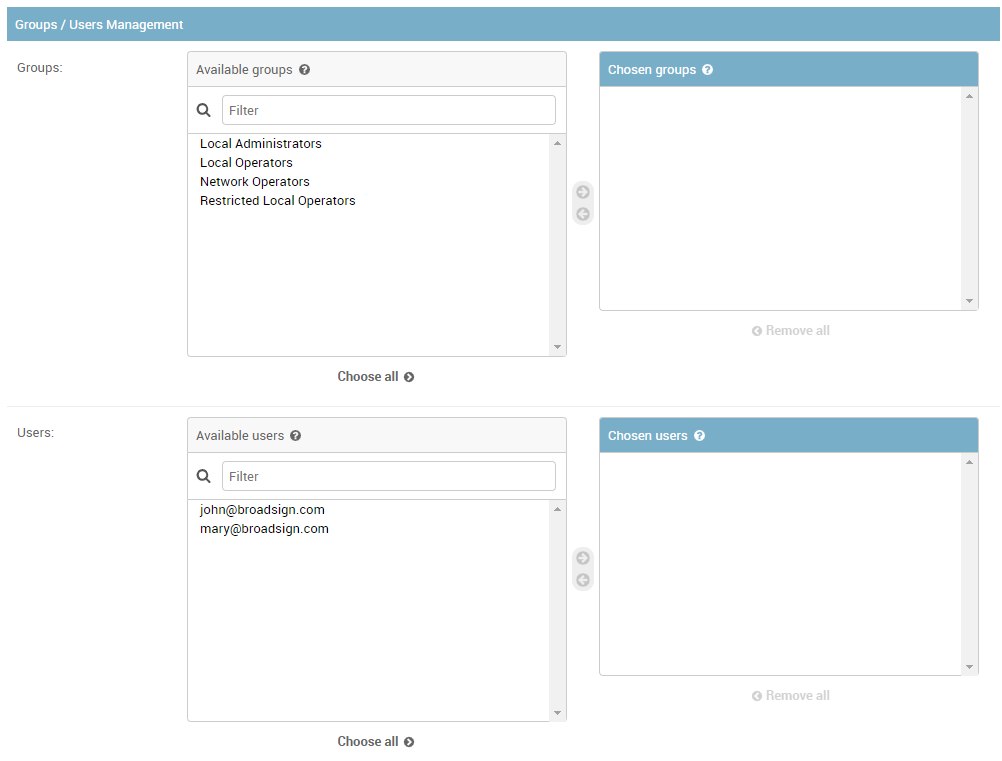
- Navigate to the Groups / Users Management section.
- In the Groups part, select which groups the user will manage. This will make the user approving any content that users part of the managed groups will upload.
- In the Users part, select which users the user will manage. This will make the user approving any content that the managed users will upload.
- Click one of the Save buttons:
- Save and add another: Saves the current user settings and prompts you to add another.
- Save and continue editing: Saves the current user settings and allows you to continue editing it.
- Save: Saves your changes and returns you to the Users page.
The Users page opens.


