 minute read
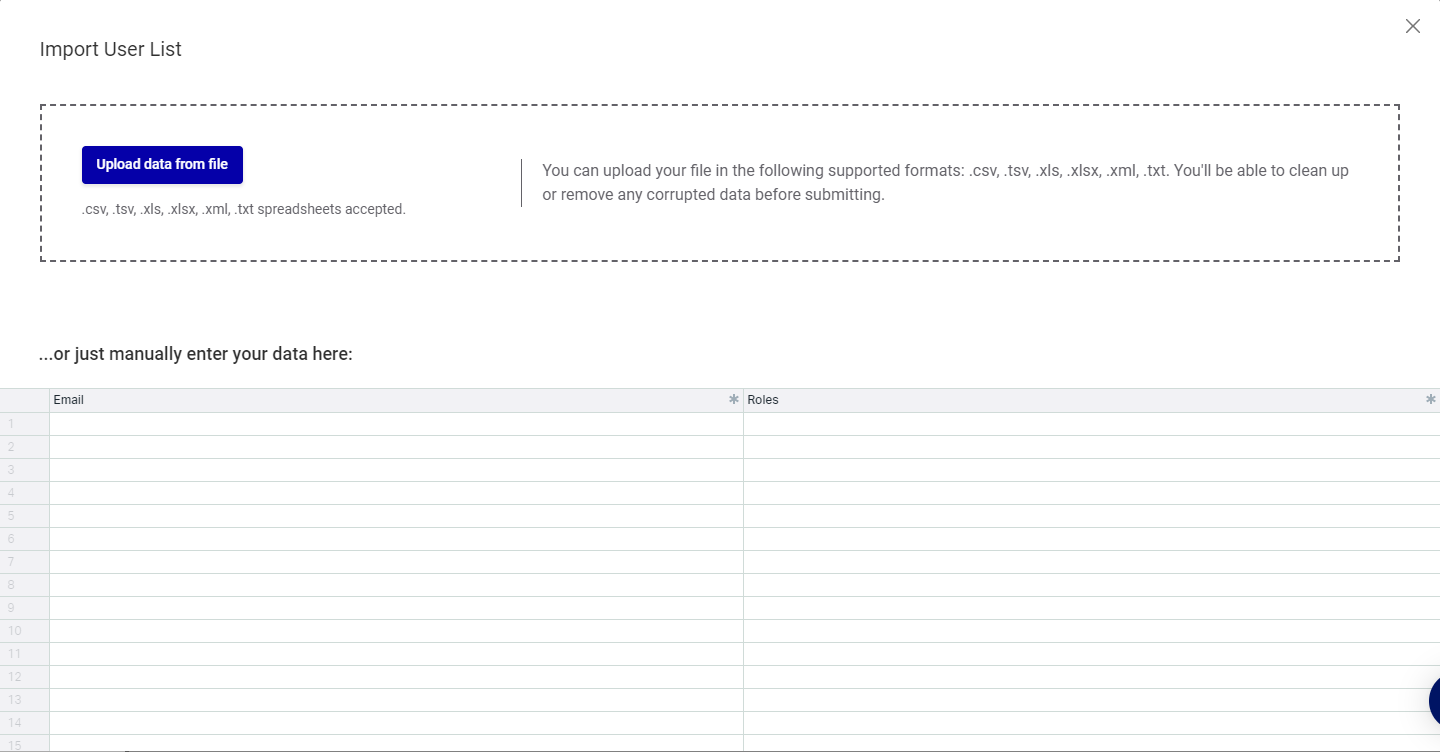
You can import an existing list of users from a file.
Note: The User Management page is available to users with the Admin role. See User Permissions for more information.
To import a list of users, you will need to create a users list data file with the appropriate data.
You can upload any .csv, .xls, or .xlsx file.
You can clean up or remove any corrupted data before submitting.
The Upload a File screen allows you to select your users data file and upload it in the system.
To upload the users data file:
User Management
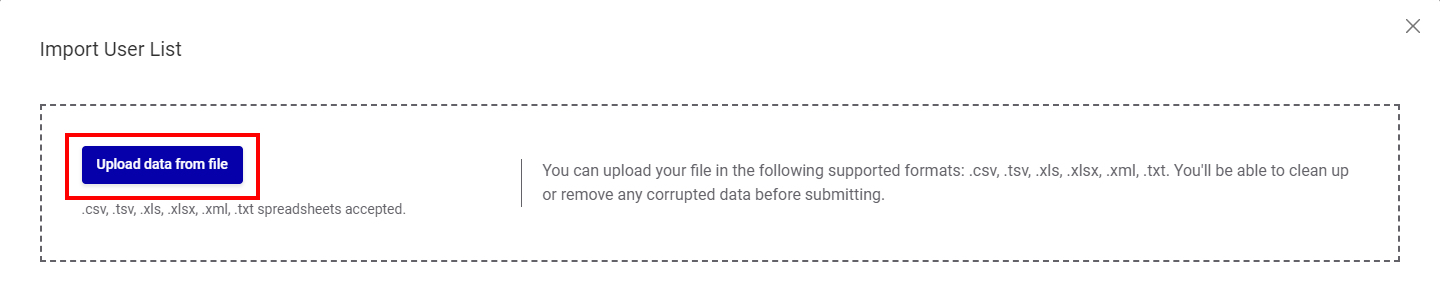
- In the User Management list, click Import User List.
- Click anywhere in the right, grey part of the window.
- Navigate to your data file and select it.

The Import a File window is displayed.
You can upload any .csv or Excel file, as long as it has at least one row and one record per row.
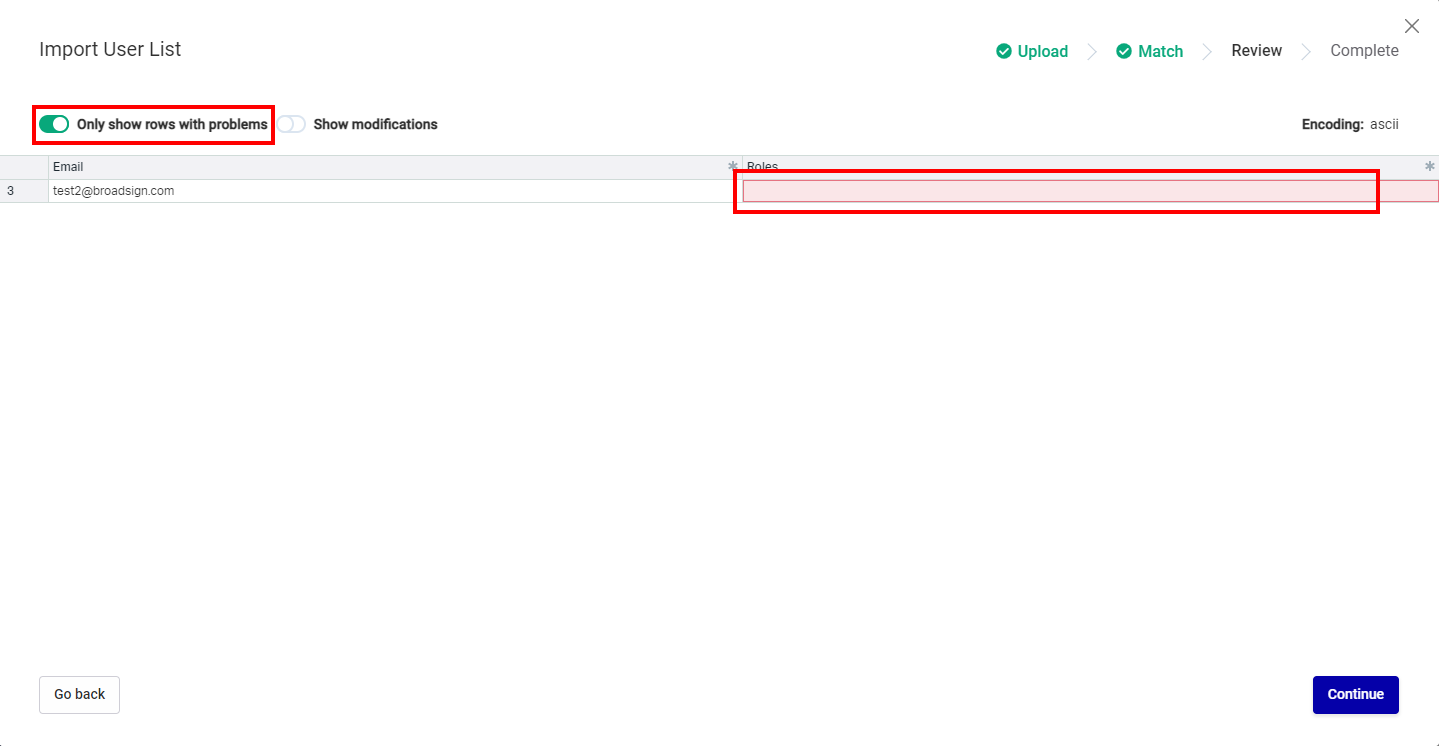
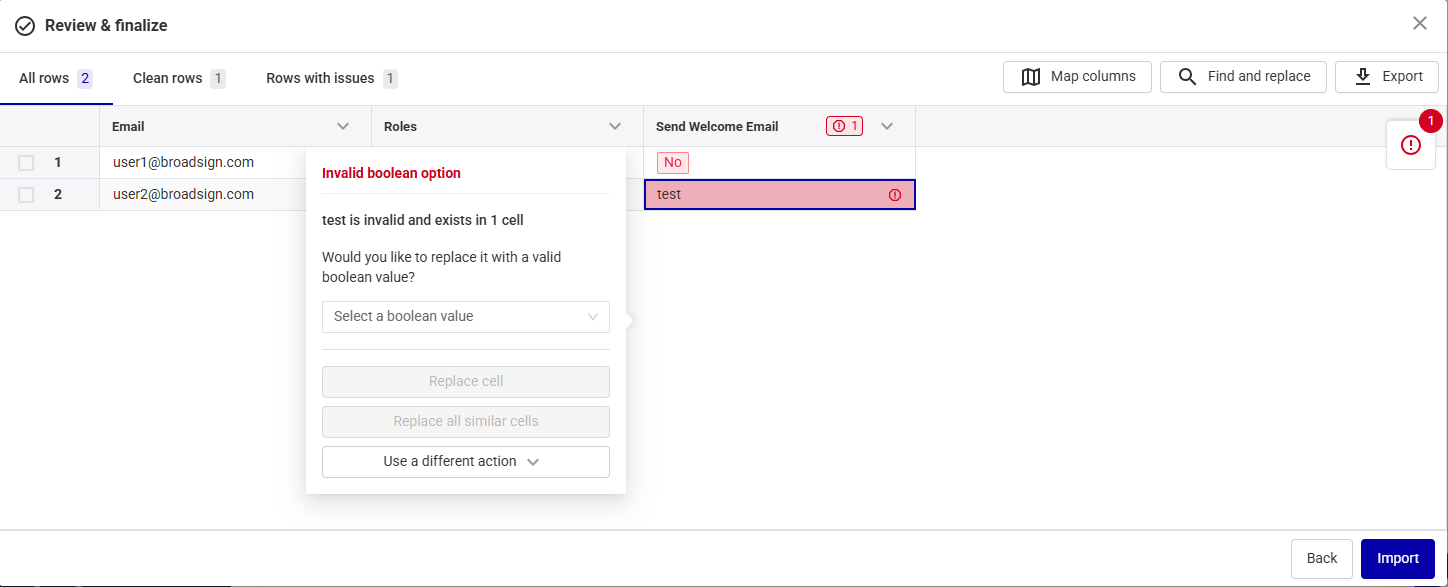
The Review & Finalize screen allows you to check the imported users data to ensure accuracy.

Column Details
| Column Name | Description |
|---|---|
|
Email address of the users. |
|
| Roles |
Roles associated with the users. You can add several roles, separated by by ";". The list of roles depend on the products that you have. The roles assigned to the user will define what they will see in the Broadsign Platform. See User Permissions for a list of roles and their assigned privileges. |
Review and Edit Data
You can do the following in the Review & Finalize screen:
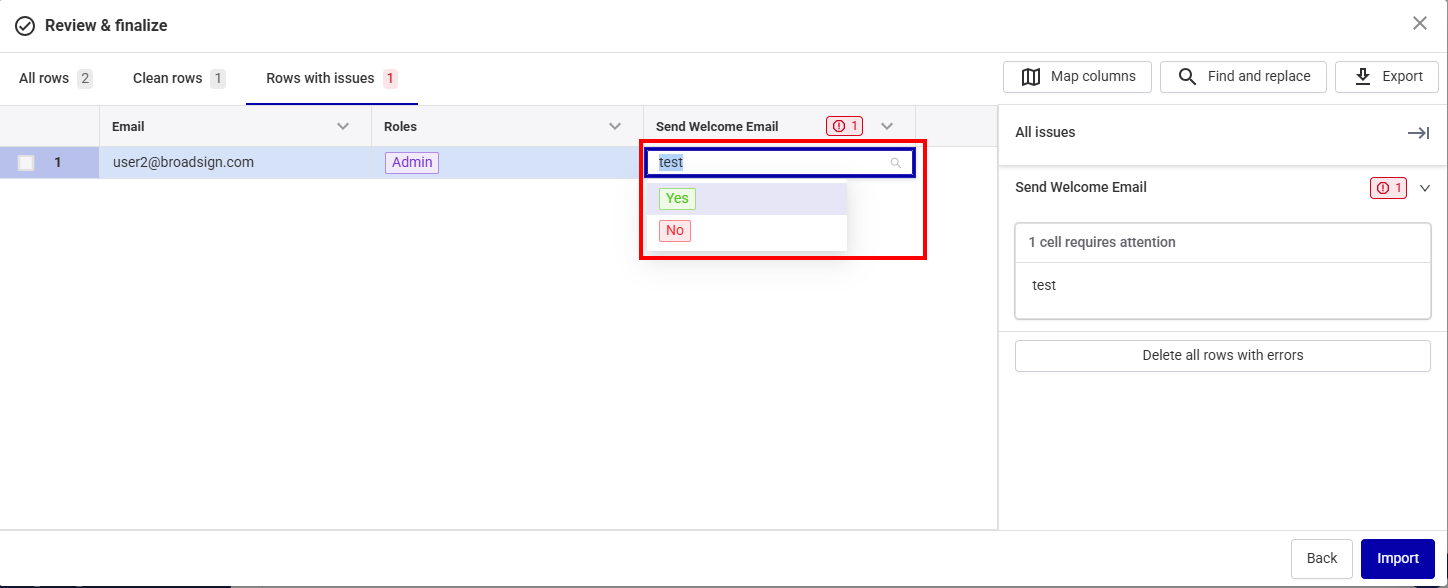
- Edit User Data – Make changes to the user data in the table by double-clicking the cell to edit. For information on the values accepted for each cell, see Column Details.
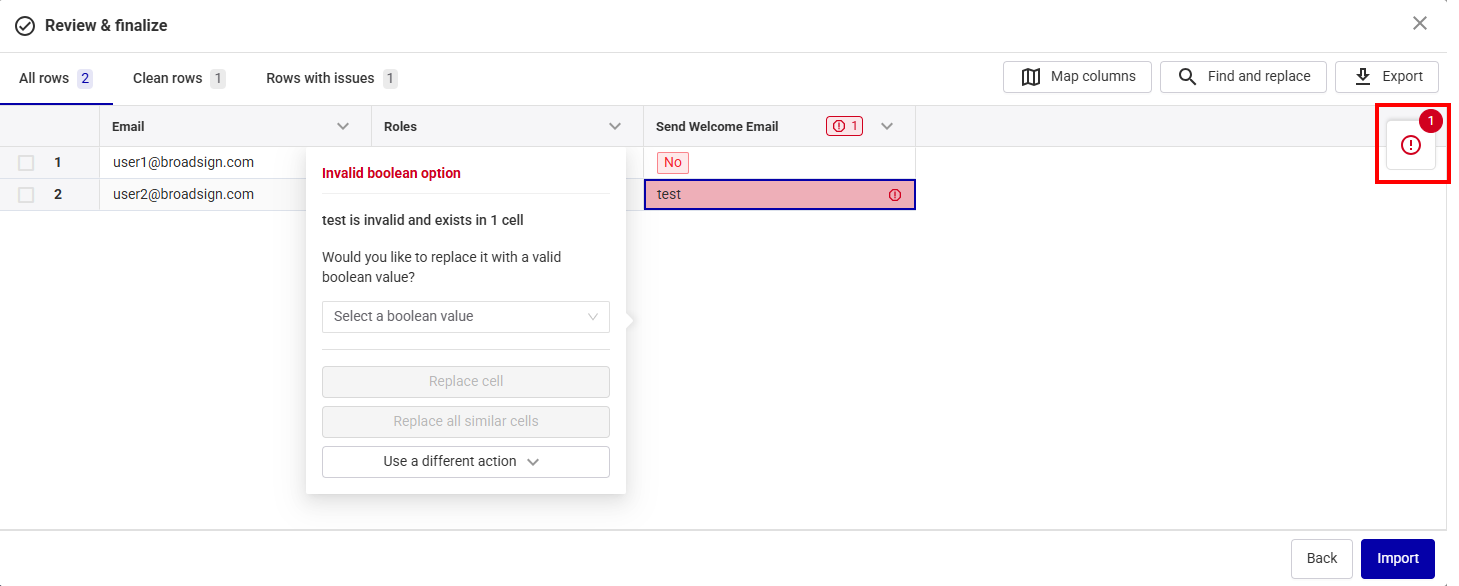
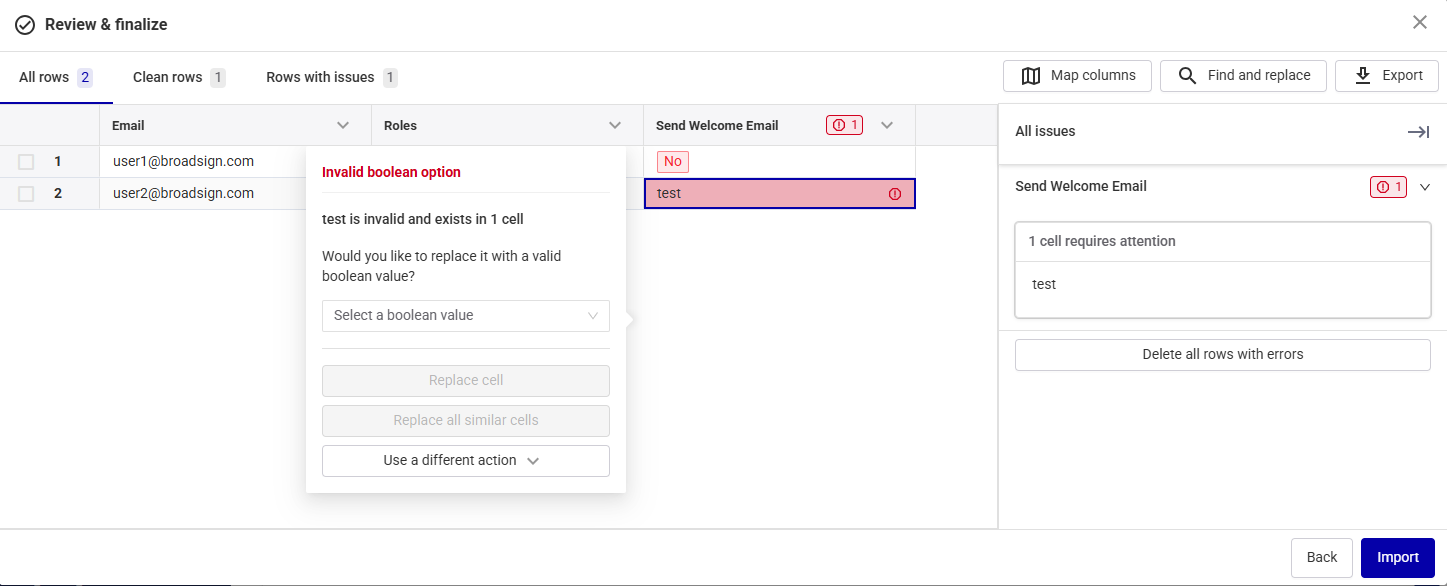
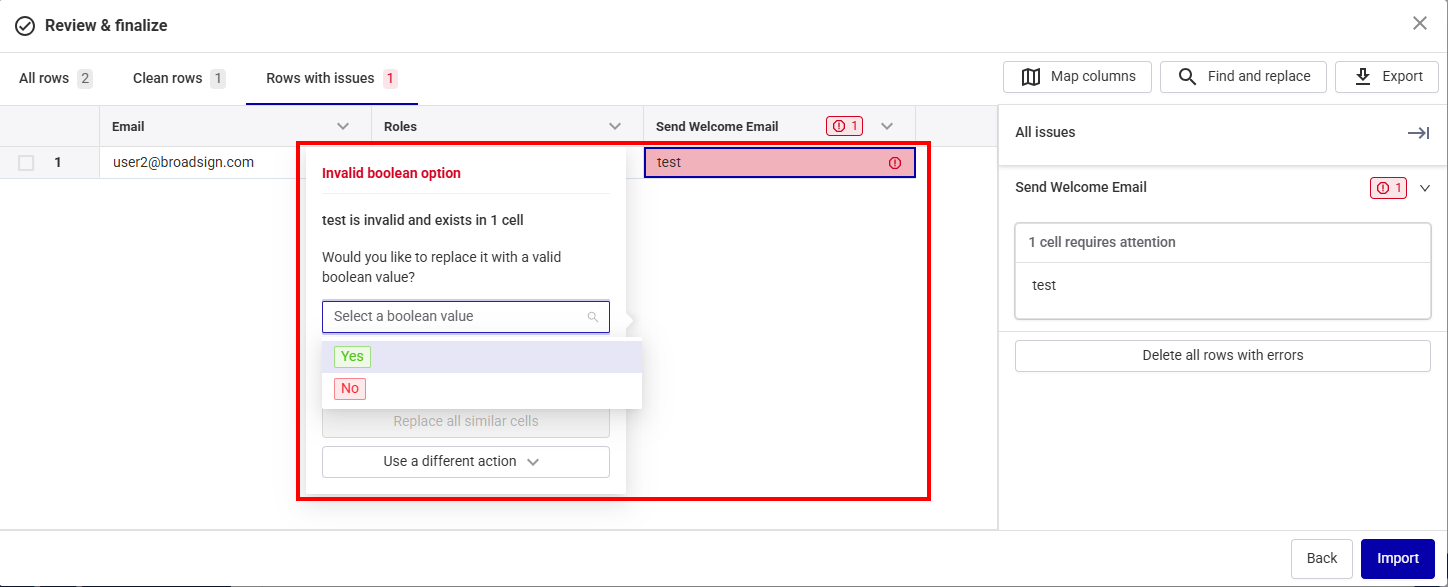
- Display Issues – Show only the rows with issues by clicking Rows with issues.
- In the main part of the Review & Finalize screen, where problematic cells are highlighted.
- In the All issues pane after clicking the red circle icon, which lists all issues. Clicking an issue automatically takes you to the corresponding cell in the imported file to fix it.
- Correct Errors – Correct a problematic cell:
- Click a cell with an issue to get information on the problem and correct it.
- Double-click a problematic cell to edit it. The cell displays the possible values.
- Enter Missing Data – If information is missing, type the correct value in the corresponding cell. The cell is displayed in red if you enter an incorrect format. A pop up explaining the issue appears. Use the pop up to correct the error.
- Map Columns – If one or more columns are not properly mapped, see Map Columns.
Issues in your imported file are displayed in red in two locations:
Map Columns
If columns are not mapped correctly, use the Map columns button. The Map columns pane shows if your data columns match the required template columns.
- If all columns match, click the Apply mappings button at the bottom of the screen.
- If columns do not match, select the corresponding column from the Template Columns drop-down menu and click Apply mappings.
- To exclude a column from your file, click the Delete icon next to it and then click Apply mappings.
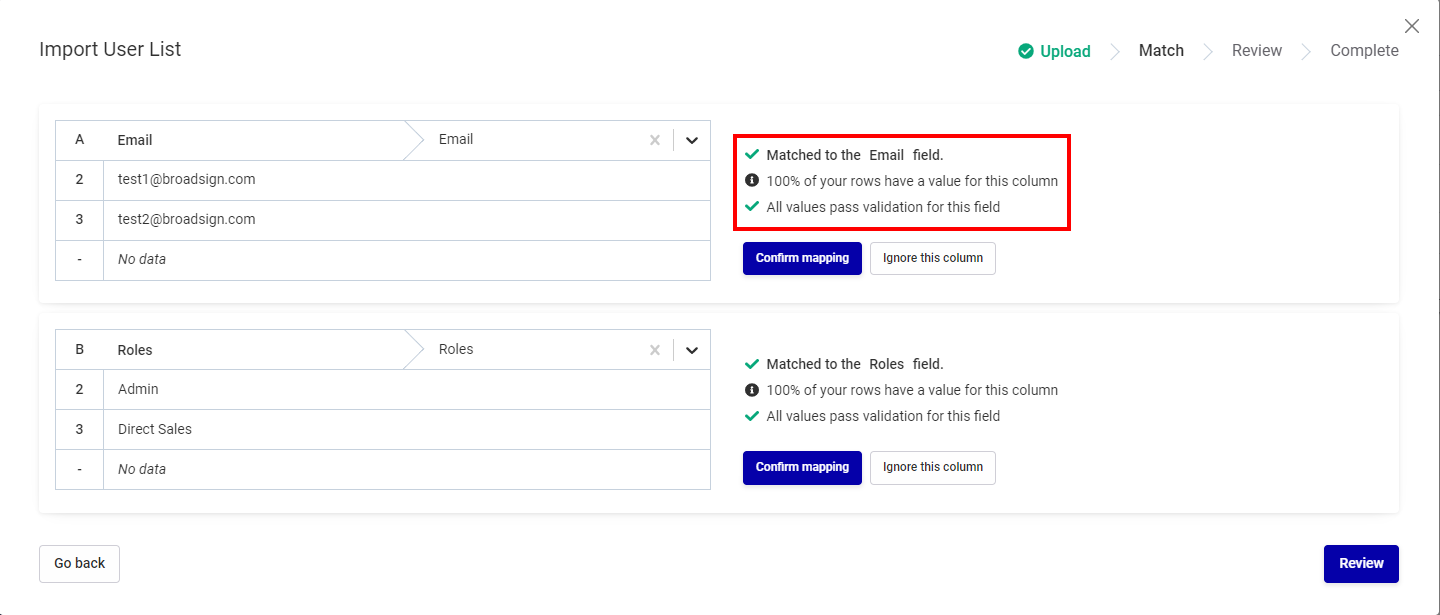
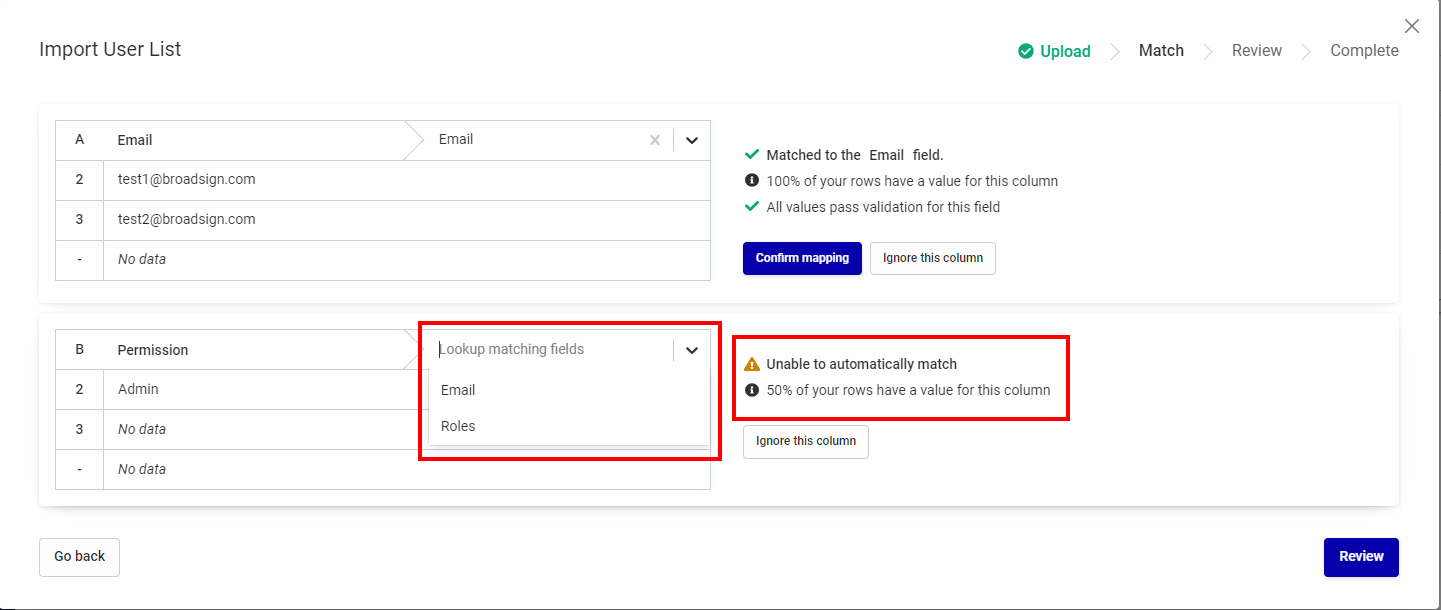
This is useful for templates with extra columns that are not provided by Broadsign.
Import Data
When finished, click the Import button. If you still have issues in your data, the button is not available.
The Broadsign Platform finishes the import process. A successful import means that all the data provided has been checked and is compliant.
The users are added to the User Management list.
