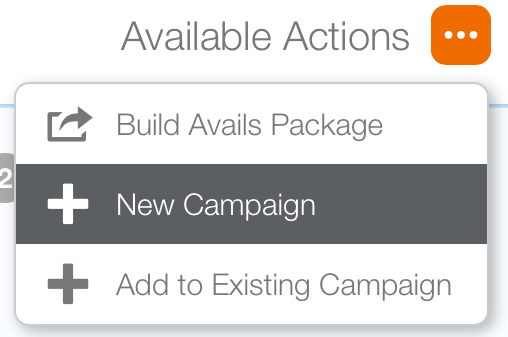
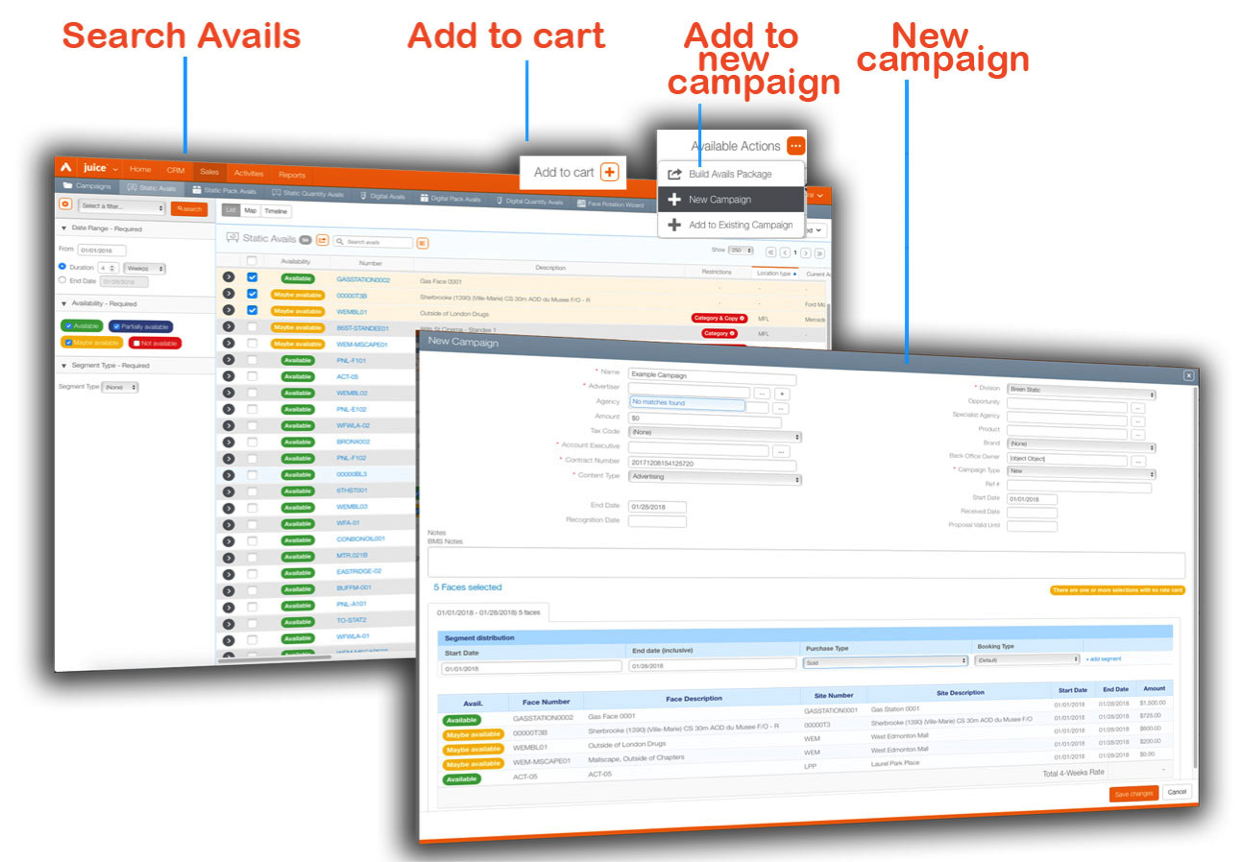
To add inventory you have added to your cart to a new campaign:
- Click the Available Actions drop down menu.
- Choose New Campaign.
-
Billing Schedule Template – Choose a billing schedule from the drop down menu. The options available will be different for each Broadsign Ayuda customer.
-
Contact – Choose the person at the agency or customer to whom the invoice must be sent.
-
Customer – Identify the customer from the configured list of contacts in your Broadsign Ayuda deployment.
-
Address – Choose the address where the invoice must be sent.
- Click Save changes.
- Enter the required information. Scroll down to edit the purchase type and booking types if necessary.
- Click Save.
This opens the New Campaign window.
This is where the fundamental parameters for the campaign are set. Many of the fields are optional, the mandatory ones are:
Status messages will be presented as the campaign is updated. The main campaign record window for that campaign will be shown. From here you can continue to edit the campaign.
Otherwise, close this window to return to the previous filter search window.
What's Next?
The status needs to be changed to Contracted to be able to schedule digital content or for static postings to be created. This is usually done by a sales administrator. However, what is more likely is that it would be modified.
