The AutoChart feature allows you to chart multiple faces to a segment based on what inventory attribute is assigned to the face and the segment that you are charting. AutoChart will assign one face per site.
Note: AutoChart is available for both digital and static faces.
To use AutoChart:
- Within Splash, click Scheduling.
- Click the Campaigns tile.
- Locate the needed campaign.
- Open the campaign record.
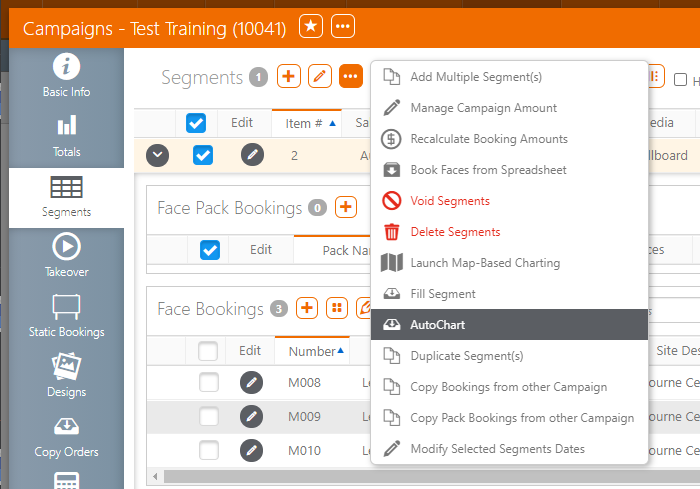
- Click the Segments tab in the navigation bar on the left.
- Select one or more segments.
- Click the
 button.
 - In the menu that is displayed, select Autochart.
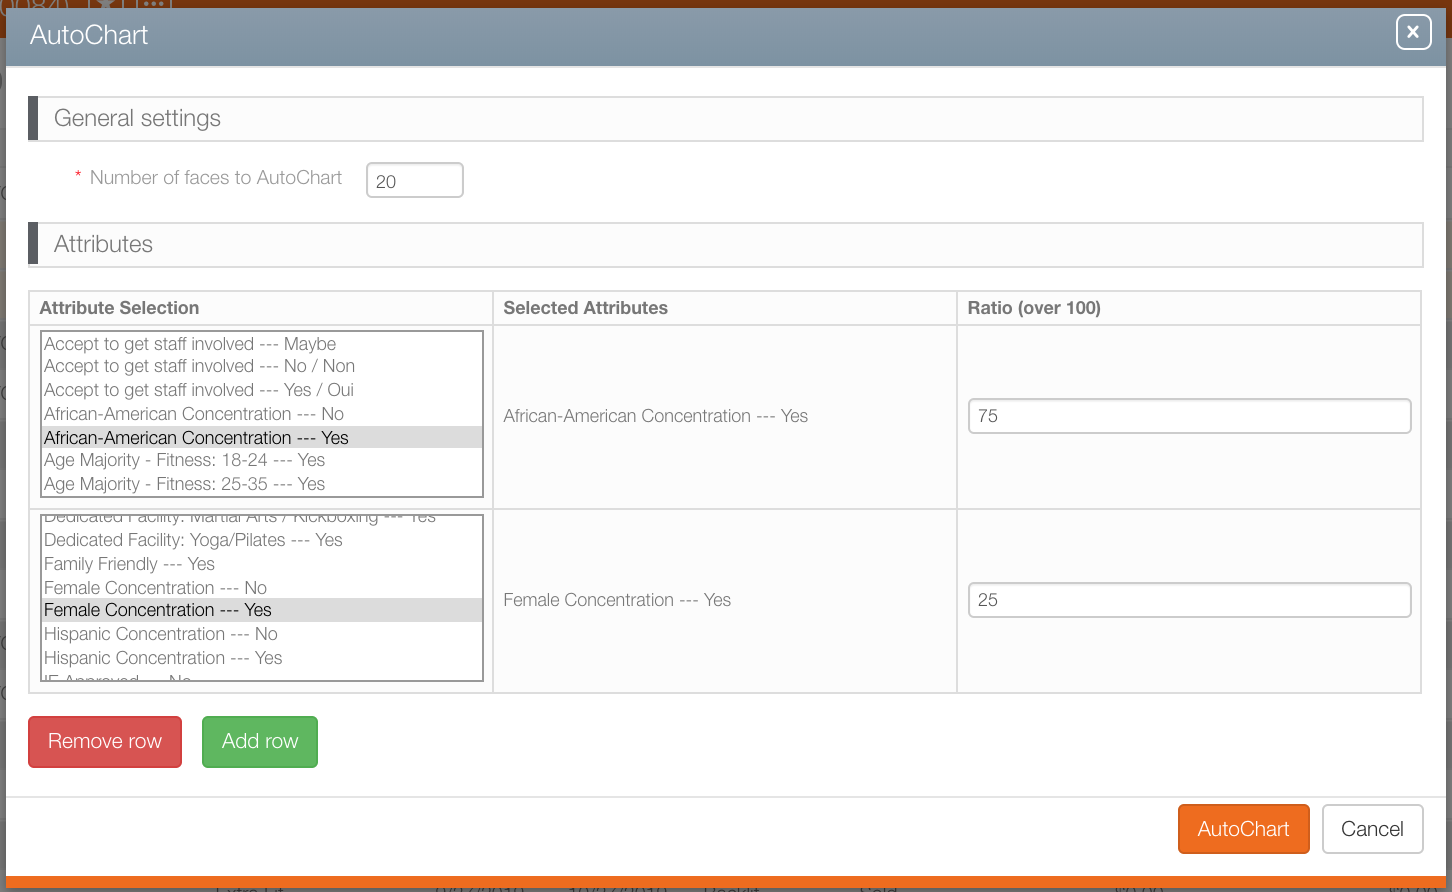
- In the General Settings section, set the number of faces to AutoChart.
- You can put a number that is less than the target criteria value and it will pick the number that you asked.
- You can put a number much higher than the target criteria value and it will only chart up to the target criteria value.
- In the Attributes section, select the inventory attribute(s) that you want to chart.
- Click the AutoChart button.
If you viewed the campaign recently, it might be in the recently viewed entries beneath the Campaigns tile.
![]()
Note: Selecting AutoChart will automatically create digital booking lines for your segments (with the default values).
The AutoChart window is displayed.
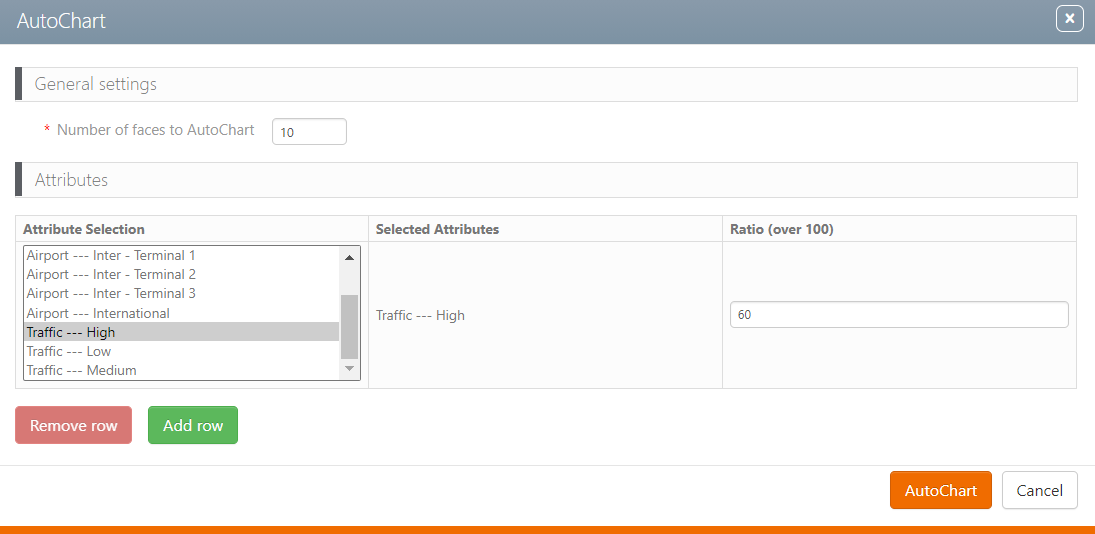
If you have a target criteria value set at the segment levels:
You can add a mixture of different attributes with different percentages, as long as all the percentages add up to a total of 100%.
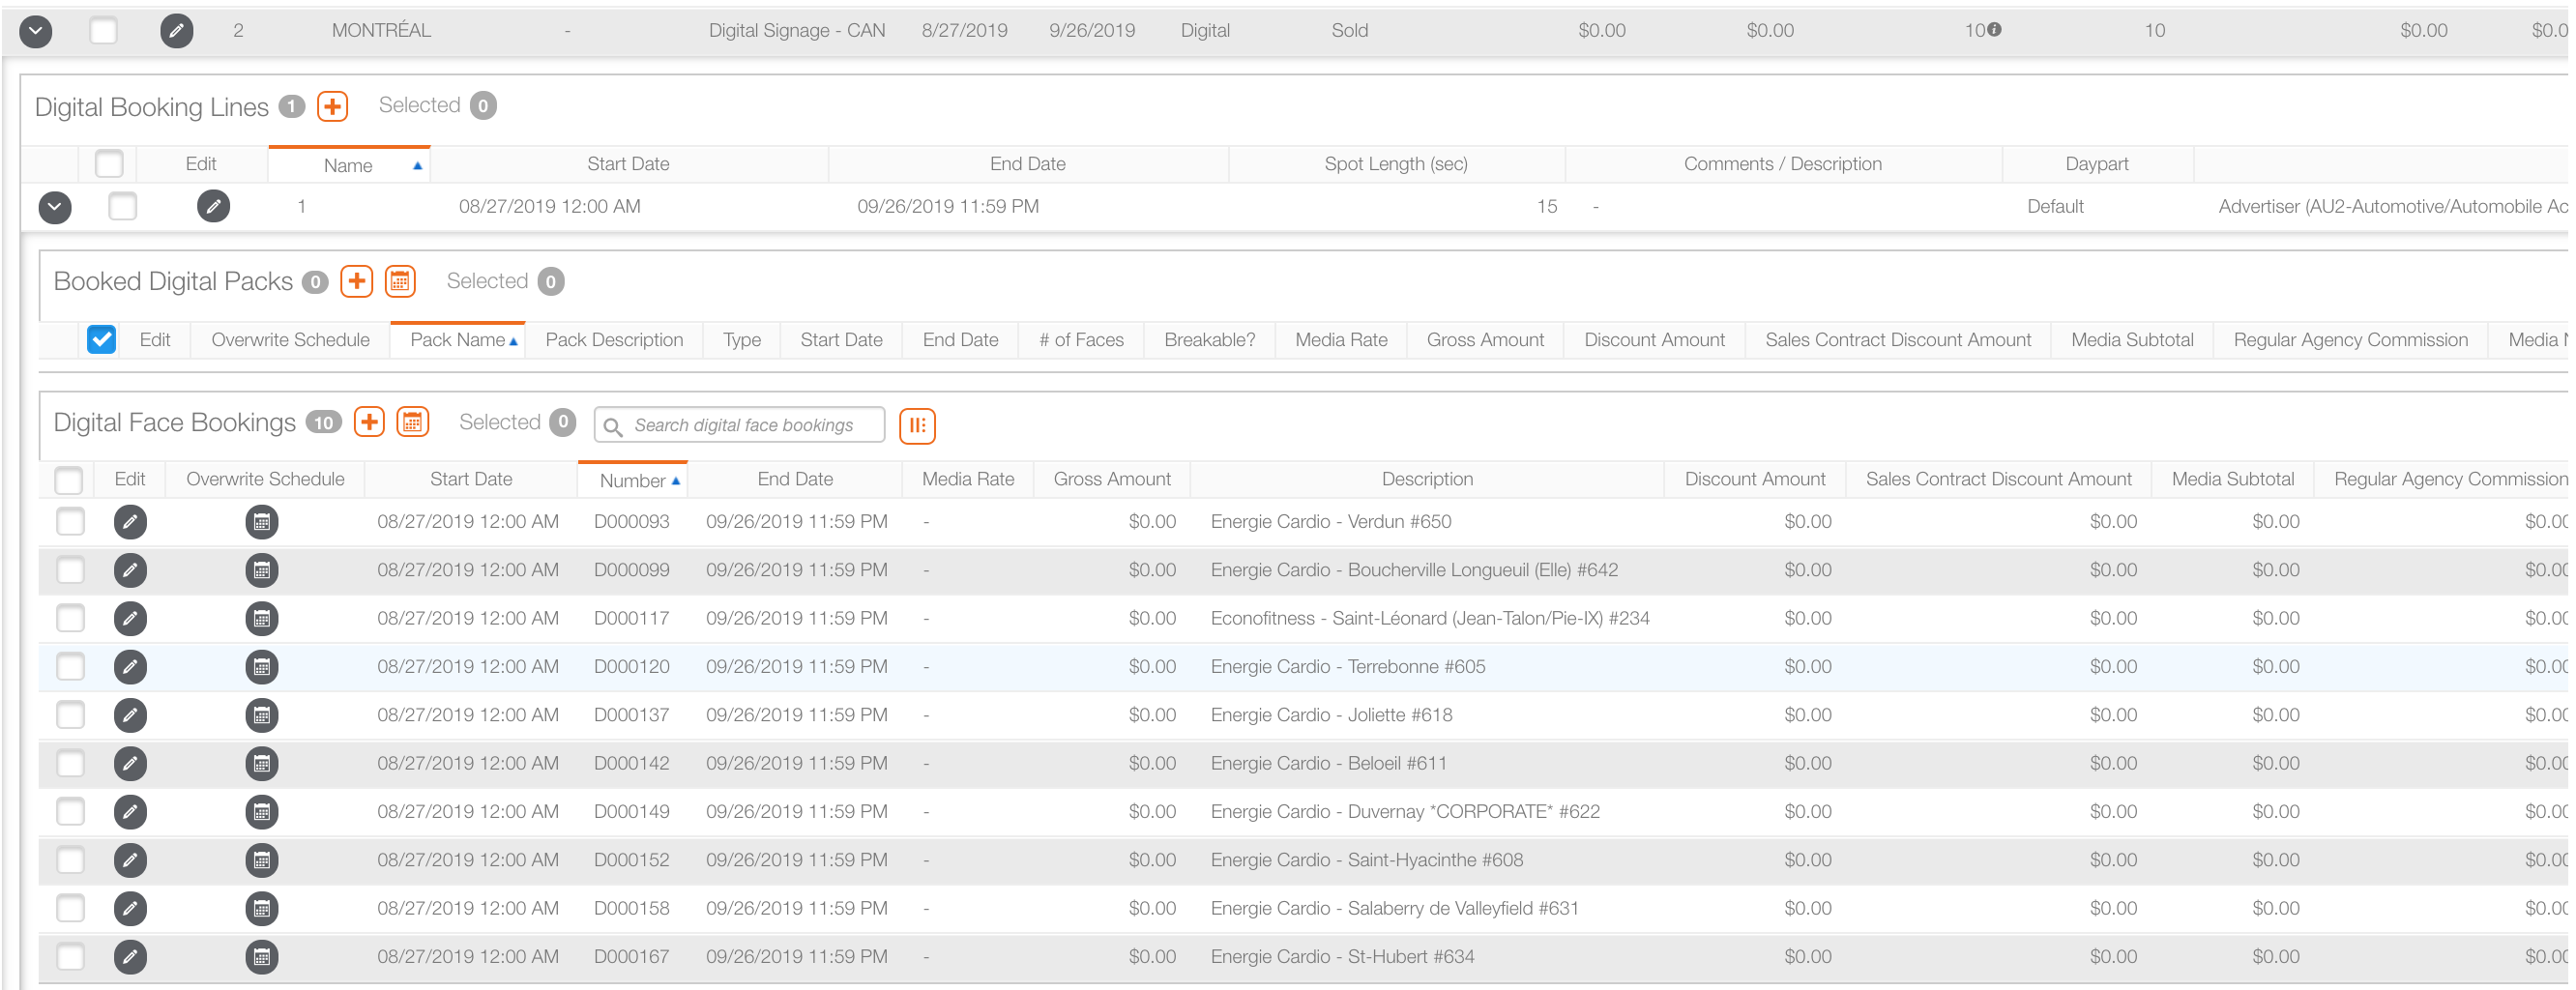
The AutoChart feature creates the digital booking line (with the defaults) and adds the face bookings, one per site.
Note: AutoChart will add another digital booking line if you already have one there.