Attributes are additional customer specific labels. For example, attributes can be used to create networks of inventory, portrait or landscape may be configured as attributes, or any other custom data element needed.
Attributes may be created throughout the system and assigned to the following entities:
- Advertisers
- Agencies
- Bundles
- Campaigns
- Companies
- Faces
- Face Packs
- Finance
- Interests
- Inventory
- Leases
- Lessors
- Locations
- Personnel
- Posting Companies
- Sites
- Vehicles
- Vendors
- Zones
Uses for Attributes
Sales users working on proposals might want to know the Billing Reference of their Advertisers or Agency. Administrators might create an Attribute called Advertiser (or Agency) Billing Reference with a Number Value Type (if the reference ID includes only numbers).
Alternatively, if the number contains text characters, an alpha-numeric attribute could be created. Another use for attributes would be to create networks of inventory. Or to add portrait or landscape orientation.
Attributes are a powerful tool for customization.
When are Attributes Created
Attributes are typically configured at implementation and do not change frequently. However, adding new attributes can be accomplished easily by administrators.
Follow these steps to add attributes.
To add an attribute:
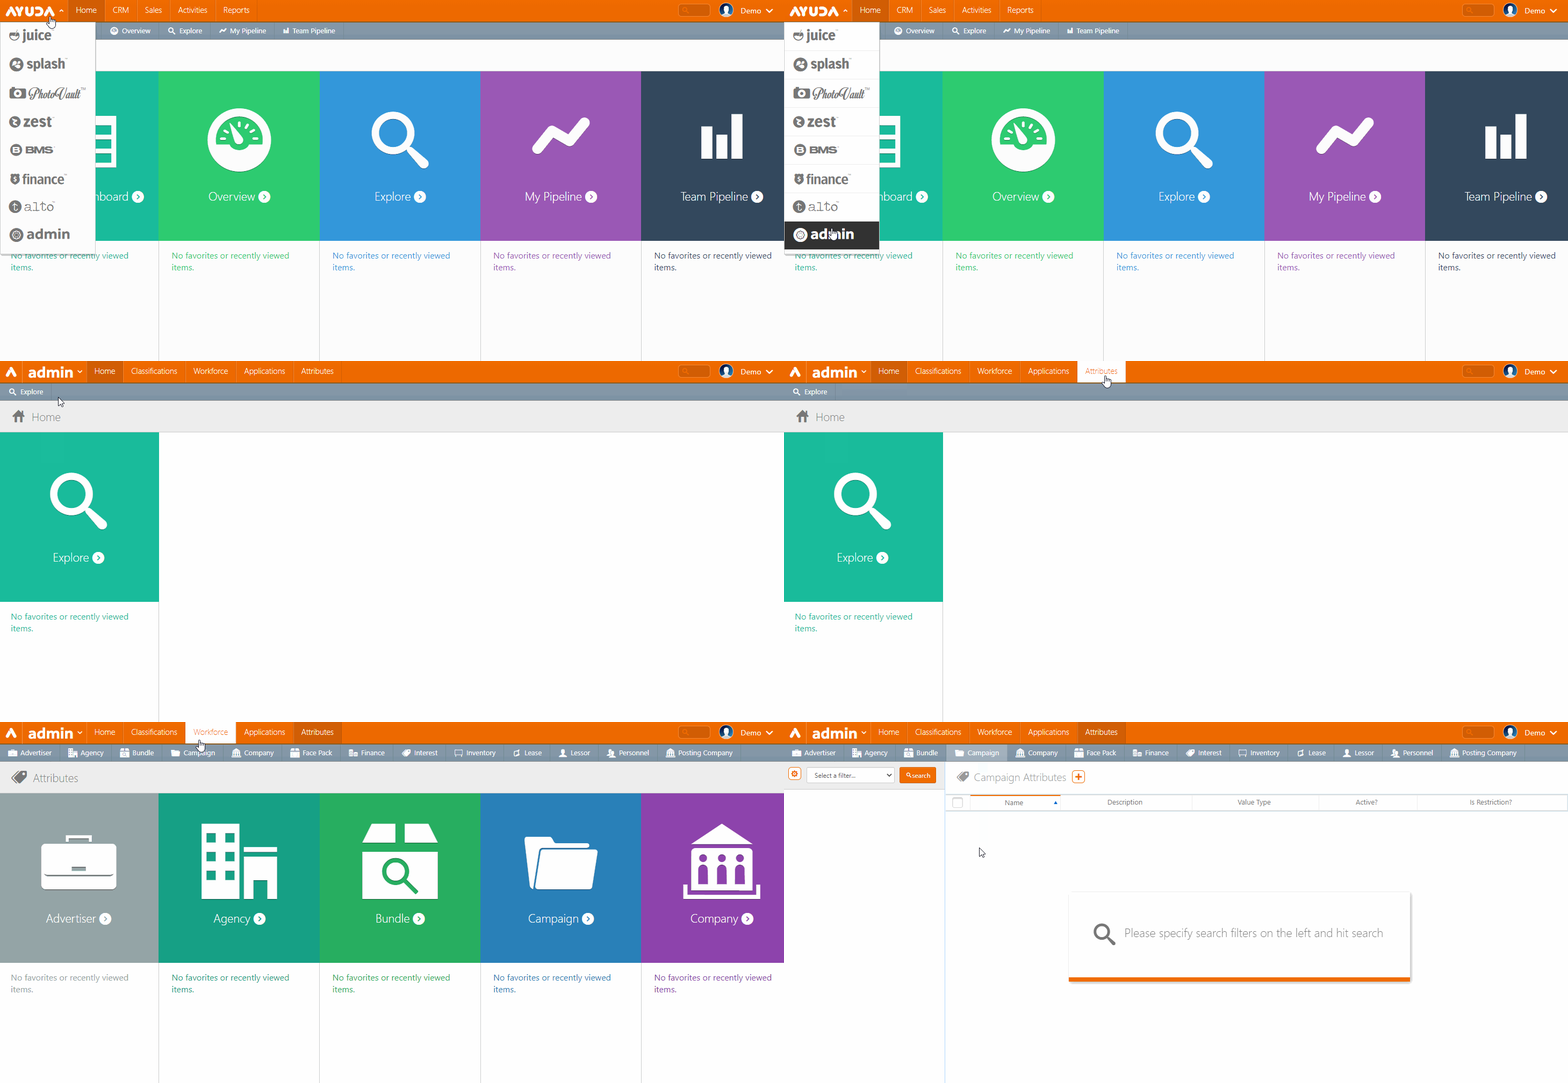
- Log in to Broadsign Ayuda.
- Select Admin, Attributes, and then any of the tiles available.
- Click the
 icon to create a new attribute.
 - Enter a Name and Description so that the attribute's purpose is clear.
- Select a Value Type.
- Select a Property Type – Choose where this attribute will be applied. The options presented will be different for each Broadsign Ayuda customer, but examples may include:
- Multiple Choice
- Number
- Text
- If you want to use the attribute as a Filter, check the Is Restriction box.
- Select a Property Type – Choose where this attribute will be applied. The options presented will be different for each Broadsign Ayuda customer, but examples may include:
- Advertiser
- Interest
- Agency
- Lease
- Bundle
- Lessor
- Campaign
- Personnel
- Face Pack
- Posting Company
- Finance
- Vendor
- Enable the Active check box so that the attribute is usable.
- Click Save Changes.
For this example, we will add an attribute to a Campaign, so we will click the Campaign tile. Adding attributes for all other entities is the same.
This presents a filter search window.
This presents the Add Campaign Attributes dialogue box.
See Add Multiple Choice Attributes for more information.
Attributes with Number or Text Value Types work the same way. Once they are created, their Basic info page is displayed. No further action is required.
The Property Type must match with the area to which you want to create an Attribute. In this example, we are creating a Campaign Attribute. The Property Type must be Campaign.
Follow these steps to add a multiple choice attribute.
To add a multiple choice attribute:
- Select the Multiple Choice option in the Add Inventory Attributes dialogue box (see Add Attributes).
- Click Save Changes.
- Within the Properties record, click the Property Elements tab in the navigation bar on the left.
- Click the
 icon to create the options to be included in this multiple choice attribute.
 - Enter a Name and choose the attribute to which it applies.
- If a different attribute is needed, click the Ellipse (...) button to select a different attribute.
- Ensure that the Active check box is selected, otherwise the multiple choice option will be created but not available.
- Click Save Changes.
- Repeat the process until all of the needed multiple choice options are created for this attribute.
The screen refreshes. The Properties record has a new tab for creating the attribute's multiple choice options.
![]()
This presents the Add Property Element dialogue box.
By default, the current attribute is selected.
Now that the options for the multiple choice item are created the next step is to indicate where these attributes apply. Without selecting where the attribute is to be used, it will exist but not become active. See Assign Attributes.
Once Attributes are created and Active, they can be used in the software. To continue our example, let's take a Campaign Attribute. Since it is a Campaign Attribute, you will be able to use it at the Campaign level.
To assign attributes:
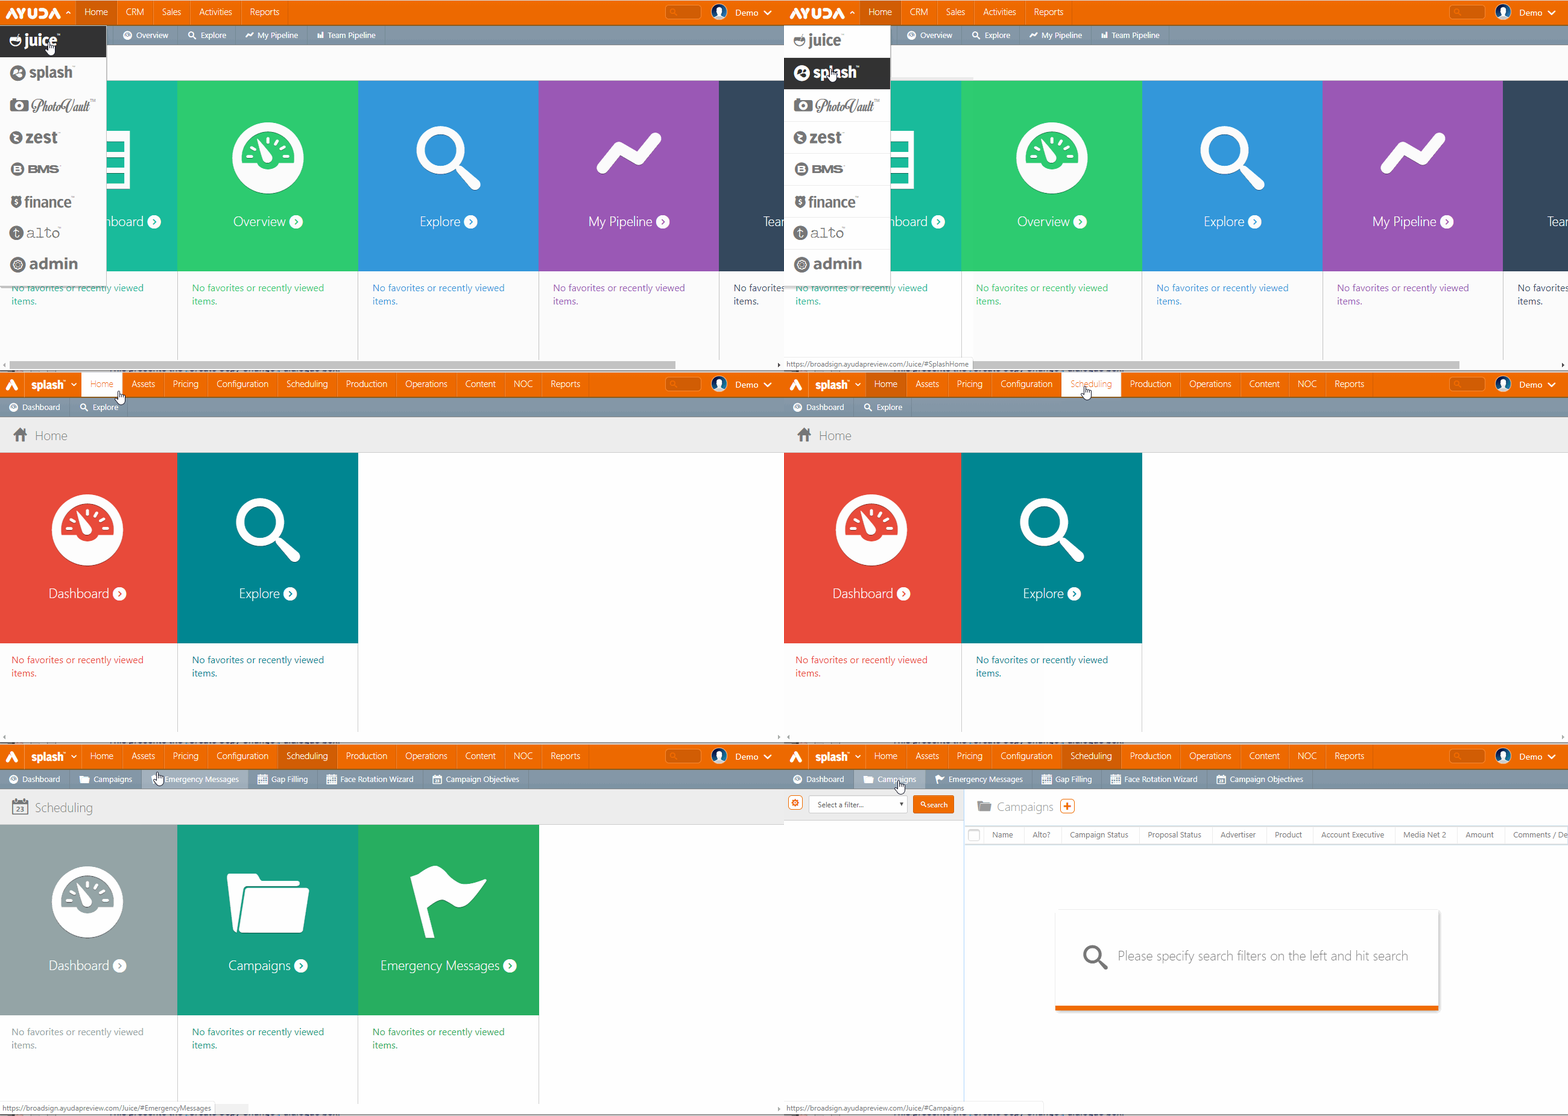
- Within Splash, choose Scheduling and then click the Campaign tile.
- Create a filter to locate the Campaign to which the attribute must be applied and click Search.
- Locate the Campaign in the search results then double-click it.
- Scroll down the tabs on the left and select Attributes.
- Click the
 icon to associate an Attribute to this Campaign.
 - Select the needed attribute from the Attribute drop-down menu and provide a value for it in the Value field.
- Enter a Start Date for the attribute to take effect.
- Click Save Changes.
This presents a filter search window.
This opens the Campaign record's Basic Info screen.
![]()
This refreshes the screen to show which attributes have been selected. If there is an existing attribute, click it to edit it and select.
This opens the Add Attribute dialogue box.
The example here is of a face.
Note: For multiple choice attributes, the value will become a drop-down menu showing the multiple choice attribute example attributes created above.
For example:
The Start Date can be the present date, a past date or a future date. It is up to you to decide on the Attribute validity.
Inventory Attributes can be very useful when Faces are located in Shopping Centers, for instance. They allow the Asset Manager to know which type of shops are located near the Faces. The Asset Manager can then schedule the Advertising content accordingly.
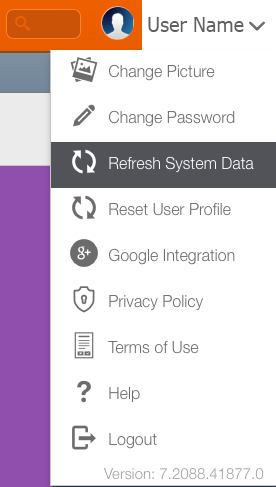
Tip: It is recommended to perform a Refresh System Data procedure once you have created your attributes, as described in Refresh System Data.
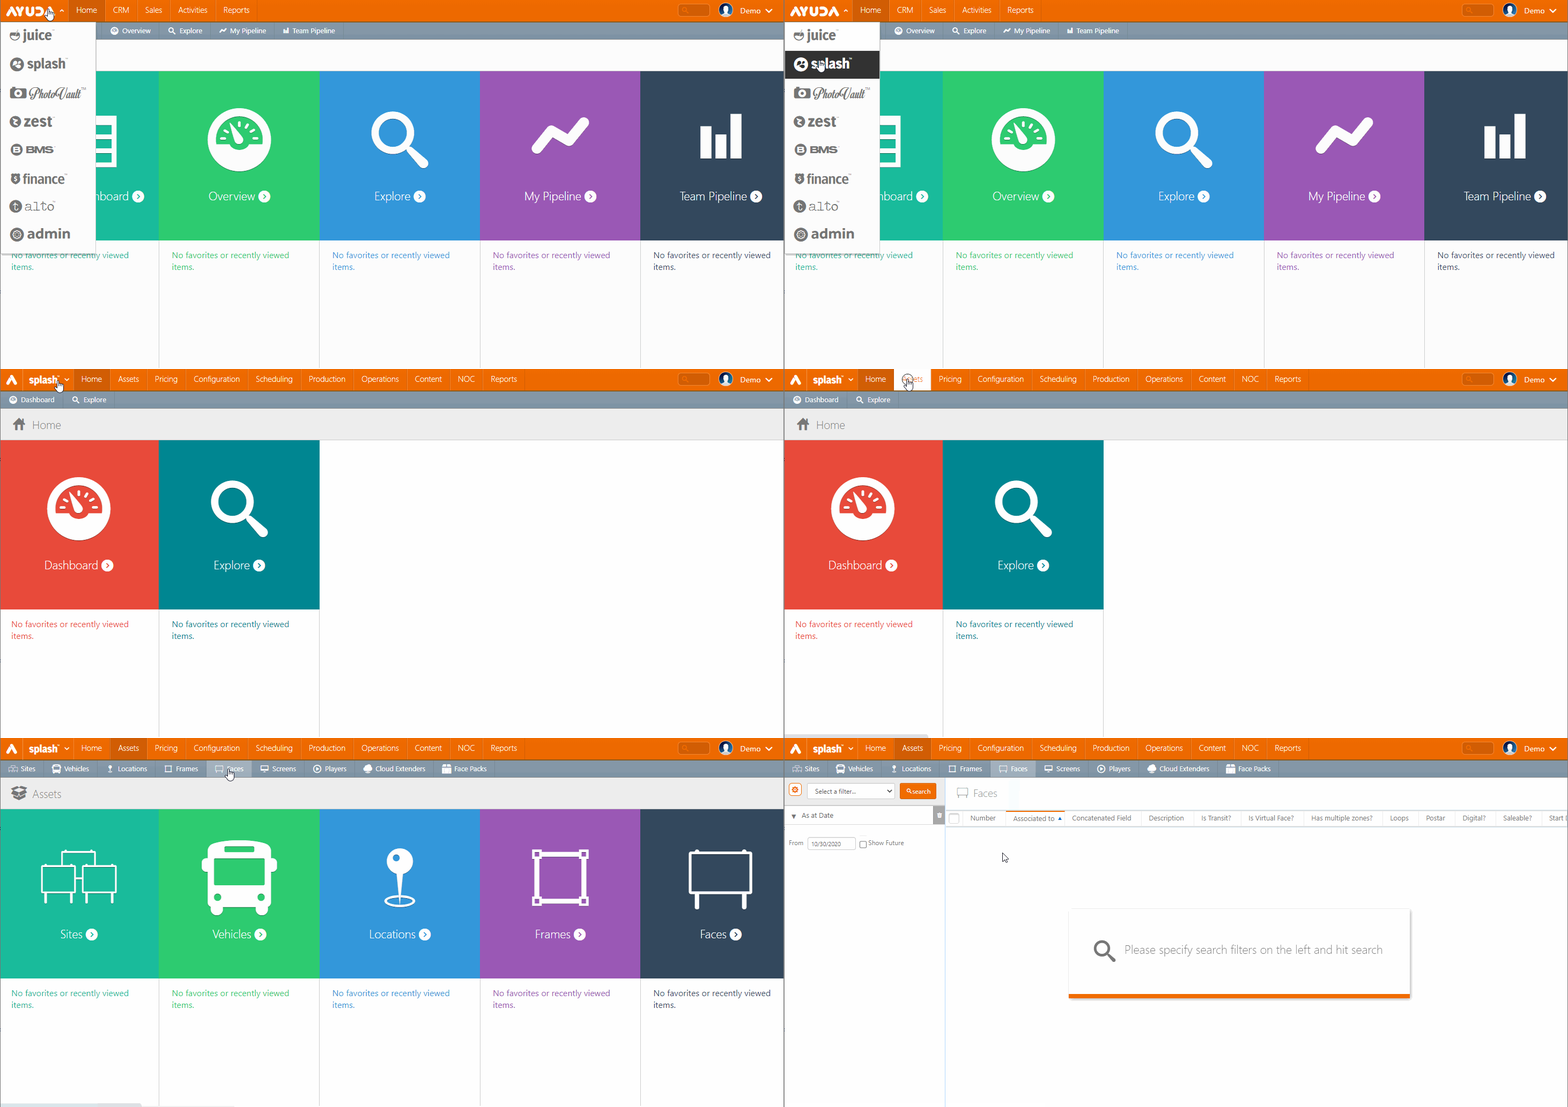
- Within Splash, choose Assets and then click the Faces tile.
- Create a filter to locate the digital face to which the attribute must be applied and click Search.
- Locate the face in the search results then double-click the face.
- Scroll down the tabs on the left and select Attributes.
- If there is an existing attribute, double-click it to edit it, select it and then click the
 icon to delete it, or click the
  icon to assign an attribute to this element in the system, in this example, a face.
 - This opens the Add Attribute dialogue box.
-
Select the necessary attribute from the Attribute drop down menu and provide a value for it in the Value field.
- Enter a Start Date for the attribute to take effect.
- Click Save Changes.
This presents a filter search window.
This opens the face record's Basic Info screen.
![]()
This refreshes the screen to show which attributes have been selected.
For multiple choice attributes, the value will become a drop-down menu showing the attributes created above. For example:
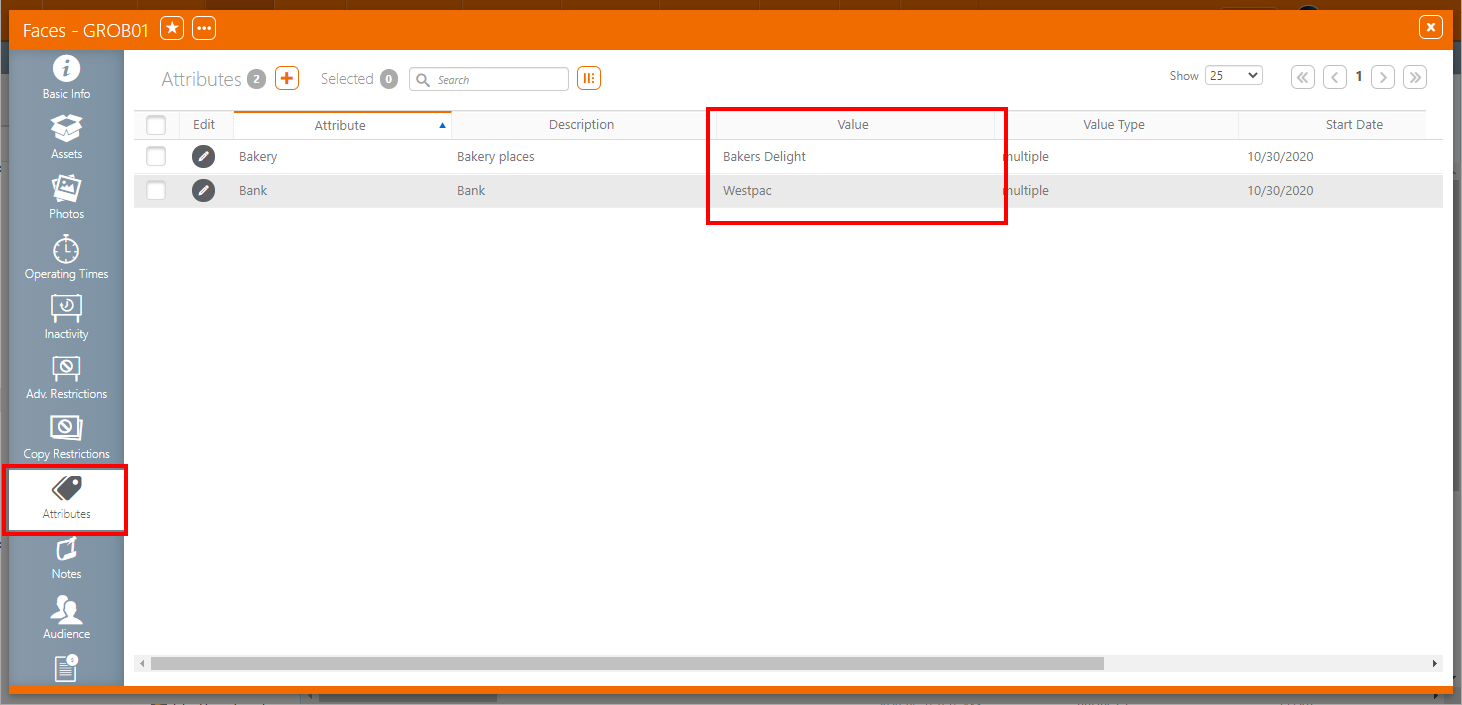
Here, we assigned two Attributes: Bank and Bakery with the respective Value of Bakers Delight and Westpac.
In other words, thanks to these Attributes, you know that the Face is located near a Bakers Delight Shop and near a Westpac branch.
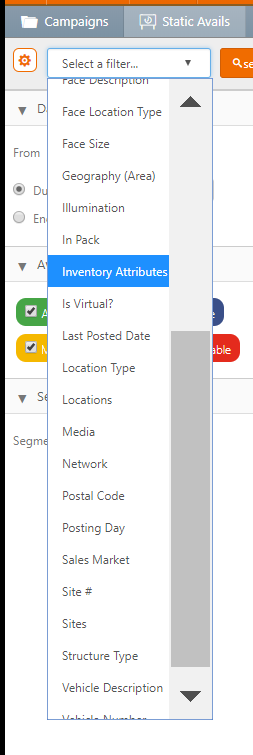
When looking for Avails, you can use the Inventory Attributes search filter to Target or Avoid Faces that are located near Banks, for instance.
For example, you are looking for a Face to advertise for a Bank competitor to Westpac. Therefore, in the Search Filters, look for Inventory Attributes.
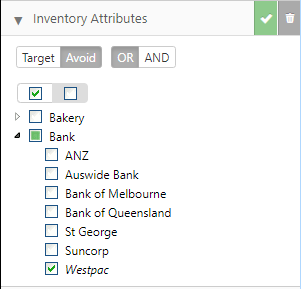
Then, select to Avoid the Westpac Attribute:
Your search will therefore display all the Faces that do not have the Westpac Attributes and are not located near a Westpac branch.

