Divisions are used to indicate internal corporate units for your company. For example, digital and static products may run by separate divisions. Or your company may use different divisions for different territories or countries.
When creating campaigns, a division must always be selected. Each Broadsign Ayuda customer must therefore have at least one division. Divisions are created by Broadsign Ayuda system administrators during deployment but new divisions can be crated in the Administration tool and old ones edited.
Note: Divisions are variants of the Broadsign Ayuda basic corporate record.
To create or edit divisions:
- Log into Admin, click Workforce, and then the Divisions tile.
- To create a team, press the
 button.
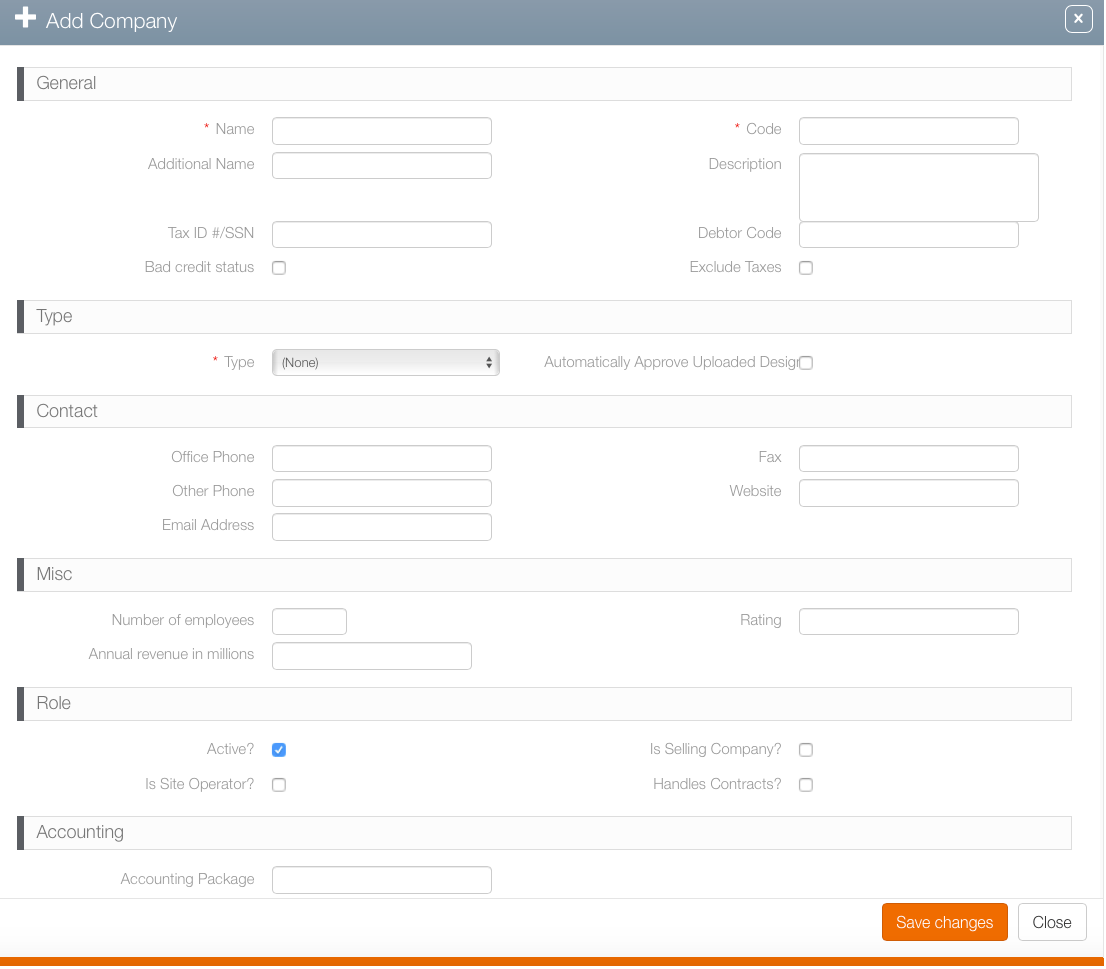
 - Fill out the following mandatory fields:
- Name – Enter a name for the division.
- Code – Enter a code for identifying the division for external processes and products.
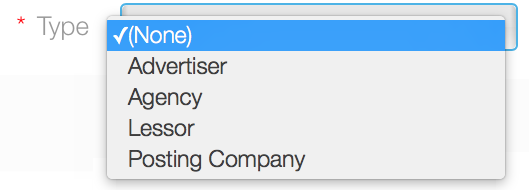
- Type – The default types are advertiser, agency, lessor and posting company. This is an informational flag used to help sort divisions.
- If applicable, fill out the following optional fields:
- Additional Name – A second name may be added that clarifies the division's role.
- Description – A free-form text field for notes about the division.
- Tax ID / SSN – Identifiers for tax purposes.
- Debtor Code – Assign incoming money to a specific account. This feature is typically used by the finance department.
- Bad Credit Status – Enabling this prevents users from creating proposals/contracts if the account is flagged with a bad credit status. Broadsign Ayuda also has an API so that external systems can be aware when this check box has been enabled.
- Automatically approve uploaded design – This feature can be used to automatically approve content in this division for firms that otherwise have mandatory approval processes.
- Contact – Office phone, other phone number, e-mail address, fax and web site are optional fields for communication.
- Misc – Number of employees, rating and revenue are features not typically used for divisions.
- Role – Describe the division with the check boxes: Is Active, is site operator, is selling company, or if it handles contracts
- Accounting – Indicate the accounting package used.
- Click Save changes.
This presents a filter search screen listing all configured teams in your deployment.
This presents the Add Company dialogue box.
The Active check box must be enabled for the division to be used.


