Vendors are business to business companies that usually provide a service that you, internally, do not have. For example, a Vendor could be a printing company that supplies all your printed materials for posting purposes.
You can assign Vendor Types to a Vendor, but it is not mandatory. For example, you can have a Vendor Type set to 'Printing' and assign it to all of the Vendors with which you do business to print posters.
To locate vendors:
Static Campaigns
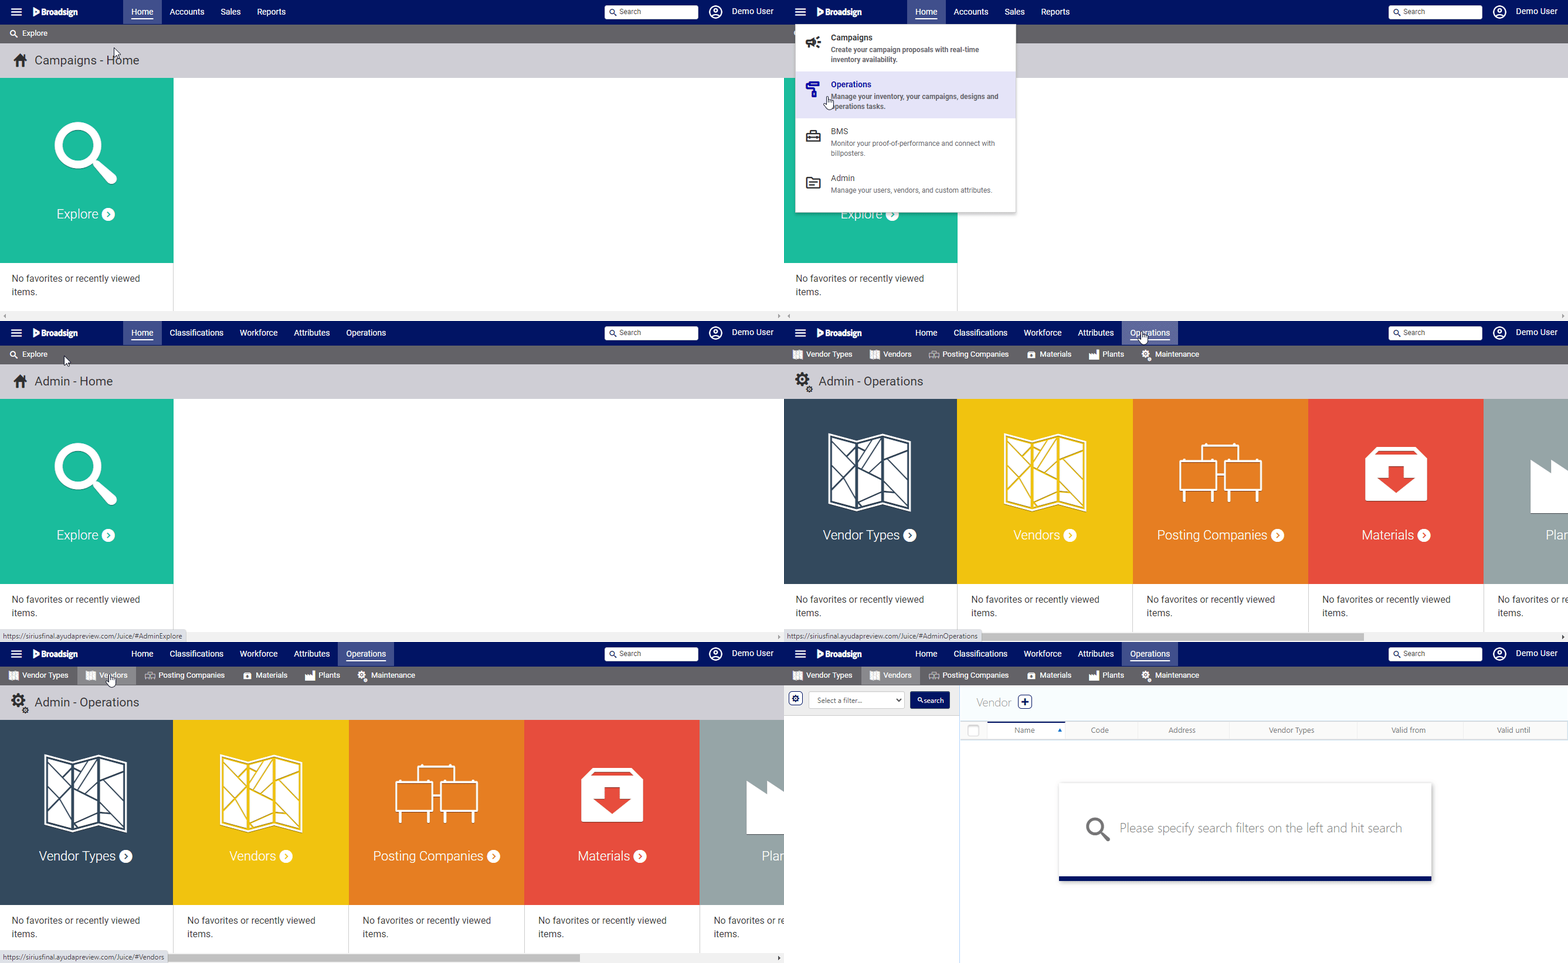
- Access Administration in the top-left menu, click the Operations tab, and then the Vendors tile.
- Click Search.
- If applicable, click the
 button to add new Vendors.
 - Click Save changes.
This presents the filter search window.
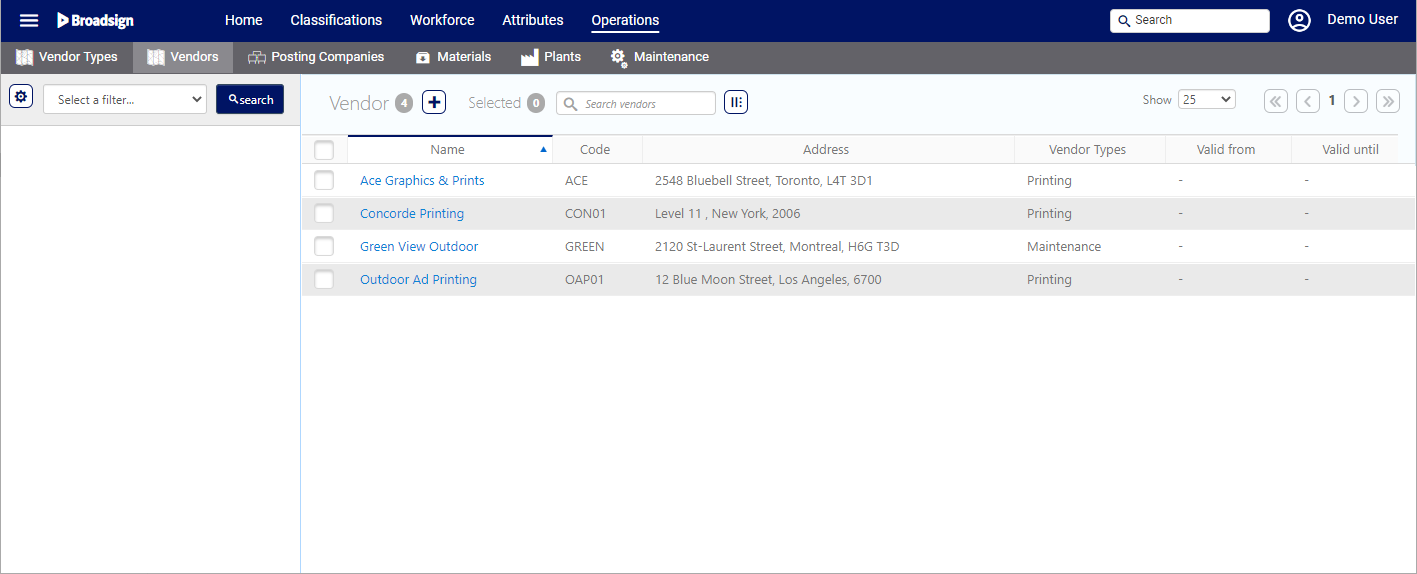
The screen will refresh to show the list of Vendors available.
This presents the Add Vendor window.
You can add as many sorts of Vendors as you want. However, make sure that the Code for each Vendor is unique.
You can add a physical address for the business company that provides the service.
To add an address to a vendor:
Static Campaigns
- In the Vendor record, click the Addresses tab in the left navigation bar.
- Click the
 button to add an address.
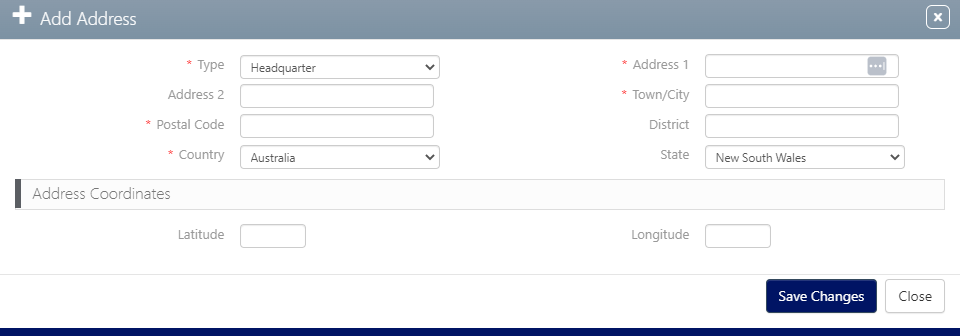
 - Type – Headquarter or Mail.
- Address 1 – Enter the civic address.
- Town/City – Enter the municipality.
- Postal Code – Enter the district information.
- Country – Enter the nation state.
- Address 2 – Additional address information.
- District – Enter the District information.
- State – Select a state according to the Country selected.
- Latitude and Longitude coordinates.
- Click Save changes.
![]()
This presents the Addresses screen.
This presents the Add Address dialogue box.
Mandatory information is:
Additional information is:
The contact is the individual within the business that you talk to.
Contacts may be created throughout the system and linked to the following entities:
- Accounts
- Campaigns
- Plants
- Posting Companies
- Sites
- Vendors
To link a contact to a vendor:
Static Campaigns
- In the Vendor record, click the Contacts tab in the left navigation bar.
- Click the
 button to link a contact to this Vendor.
 - Choose the contact to link by selecting the check box next to it, then click the Link button.
- Click the
 button to edit the Contact Type, and select the type of contact required. For example, it could be Primary or Payment.
 - Click Save changes.
![]()
This presents the Contacts screen.
This presents a filter search screen for available contacts.
Note: Make sure that the contact has a valid email address.
Attributes are additional customer specific labels that you can assign to the Vendor. For example, portrait or landscape may be configured as attributes. Demographic breakdowns may be another attribute. Attributes can then be used as filters, restrictions or sorts.
To add an attribute to a vendor:
Static Campaigns
- In the Vendor record, click the Attributes tab in the left navigation bar.
- Click the
 button to add an Attribute to this Vendor.
 - Select an Attribute to add to the Vendor.
- Enter a Value for your attribute.
- Enter a Start Date and, optionally, an End Date.
- Click Save changes.
![]()
This presents the Attributes screen.
This presents the Add Attribute dialogue box.
You can assign Vendor Types to a Vendor, but it is not mandatory.
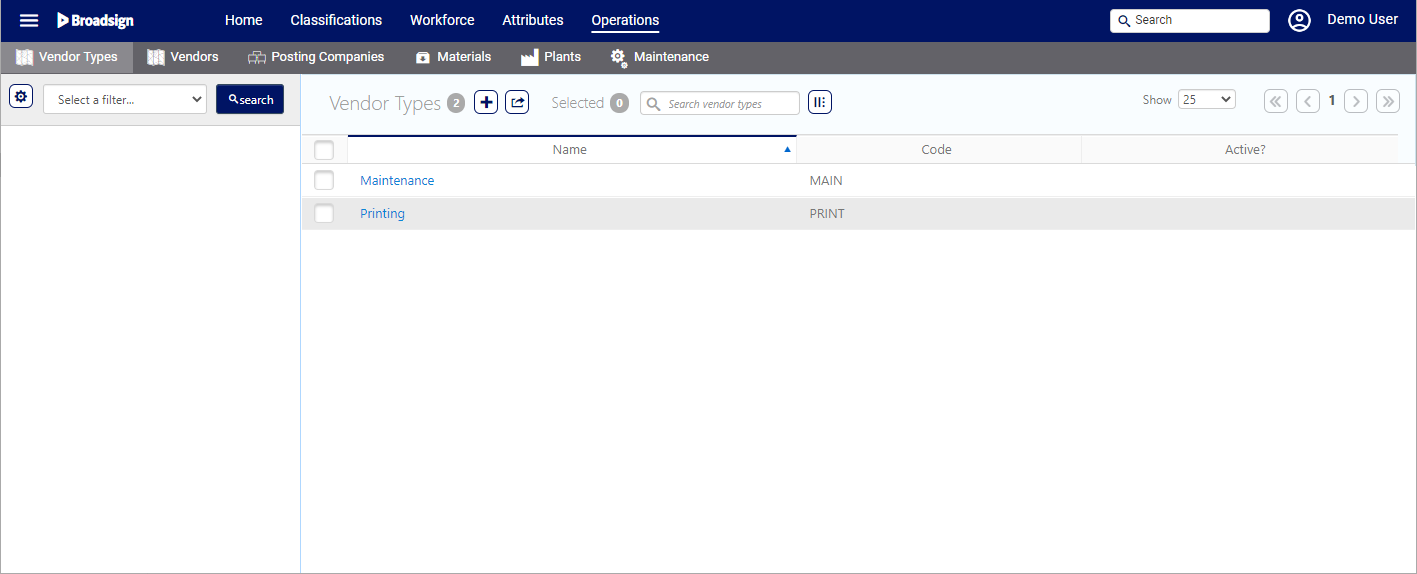
To locate vendor types:
Static Campaigns
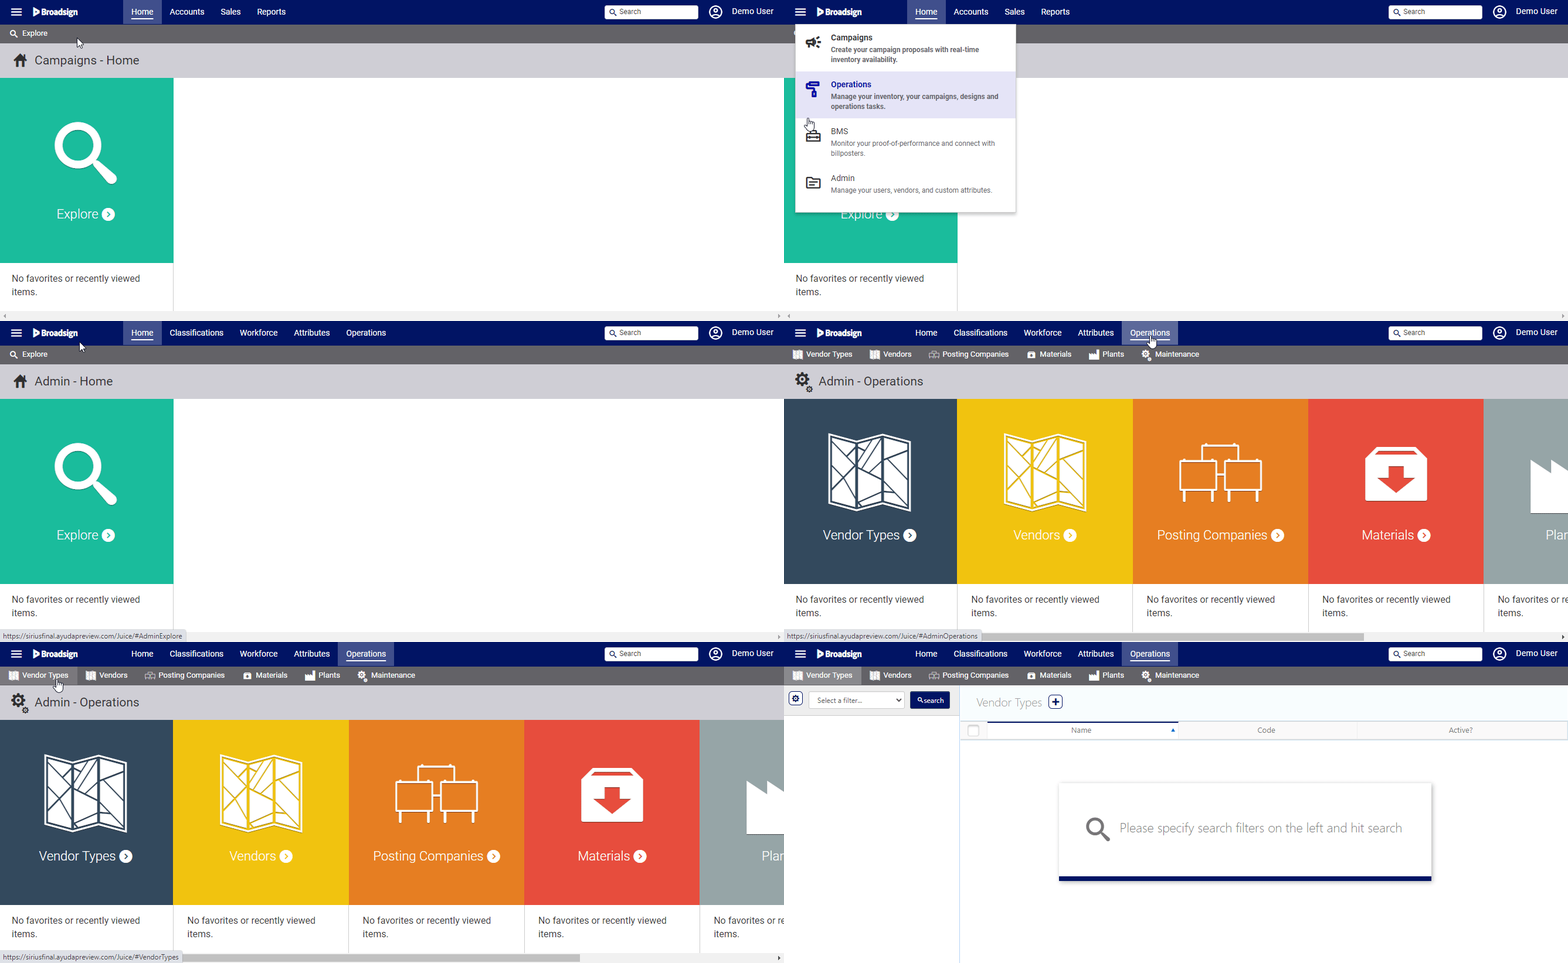
- Access Administration in the top-left menu, click the Operations tab, and then the Vendor Types tile.
- Click Search.
- If applicable, click the
 button to add a Vendor Type.
 - Click Save changes.
This presents the filter search window.
The screen will refresh to show the list of Vendor Types available.
This presents the Add Vendor Types window.
You can add as many Vendor Types as you want. However, make sure that the Code and Name for each Vendor Type is unique.
You can assign Vendor Types to a Vendor, but it is not mandatory. For example, you can have a Vendor Type set to 'Printing' and assign it to all of the Vendors with which you do business to print posters.
To link a vendor type to a vendor:
Static Campaigns
- In the Vendor record, click the Vendor Types tab in the left navigation bar.
- Click the
 button to link a vendor type to this Vendor.
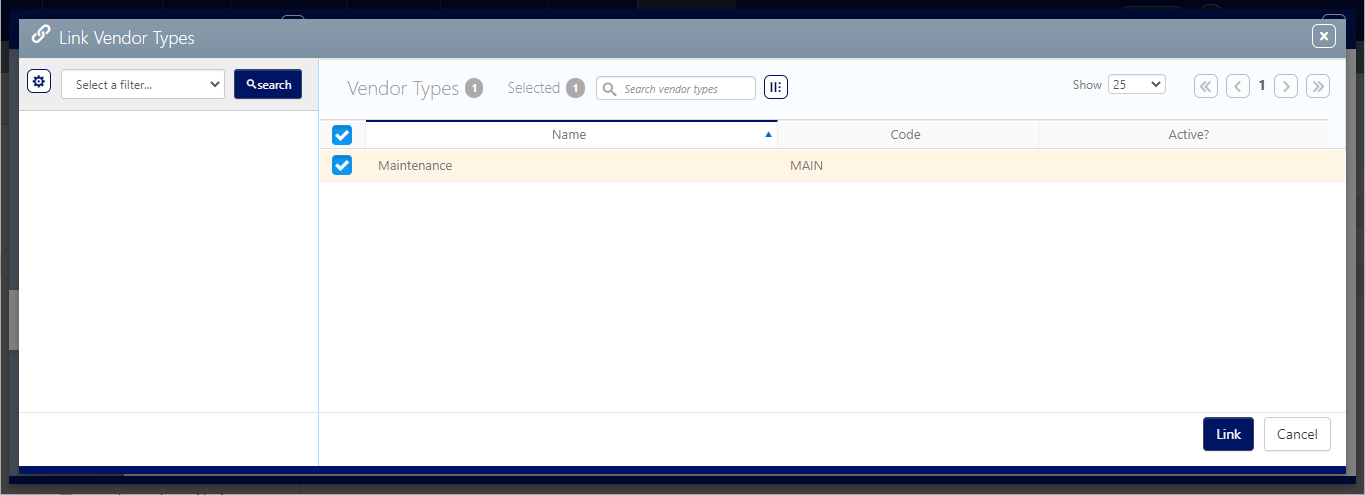
 - Choose the vendor type to link by selecting the check box next to it, then click the Link button.
- Click Save changes.
![]()
This presents the Vendor Types screen.
This presents a filter search screen for available vendor types.
