Vehicle
Static Operations
A Vehicle is an asset in the Static Operations module. Vehicles are part of the inventory asset hierarchy. It is usually a child of the Site, and the parent of one or more Faces.
You can batch import Vehicle data by using the Static Operations Data Import tool. For more information, see Update Static Operations Data.
To locate Vehicles:
Static Operations
- Access Operations in the top-left menu, click the Assets tab, and then the Vehicles tile.
- Click Search.

This presents the filter search window.
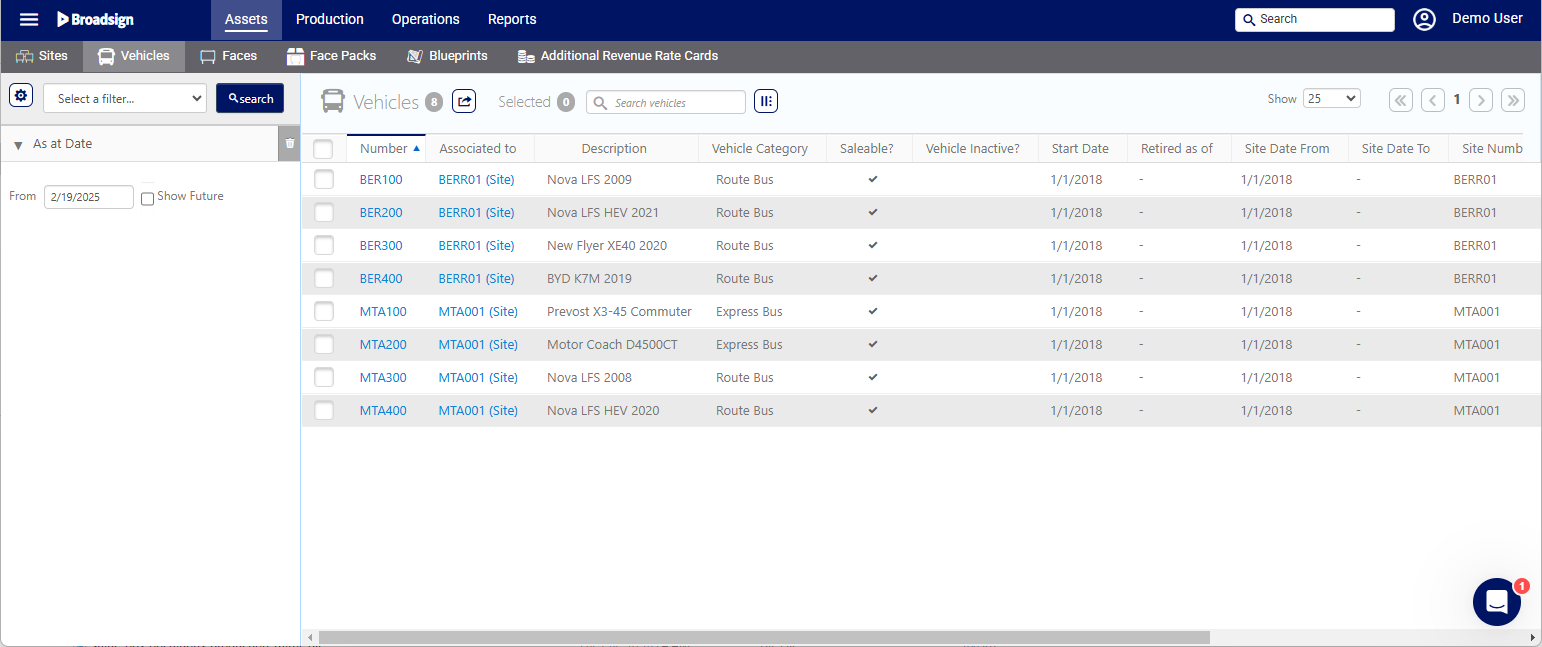
The screen will refresh to show the list of Vehicles available.
You can add a Vehicle to a Site that has the Transit Site Type.
Note: A Vehicle inherits all attributes from its parent asset, which is the Site. For more information, see Asset Inheritance.
To add a Vehicle:
Static Operations
- Access Operations in the top-left menu, click the Assets tab, and then the Sites tile.
- Click Search.
- Click the Site Number of the Site to which add a Vehicle.
- Within the Site record, click the Assets tab in the left navigation bar.
- Click the
 icon next to Available actions, then select Add Vehicle.
 - Enter the following mandatory information:
- Number – Unique number that identifies this Vehicle. Must be unique per Site.
- Description – A free form description to explain the Vehicle. This field is searchable.
- Site Date From – Date as of when the Vehicle is present at that site.
- Click Save Changes.

This presents the filter search window.
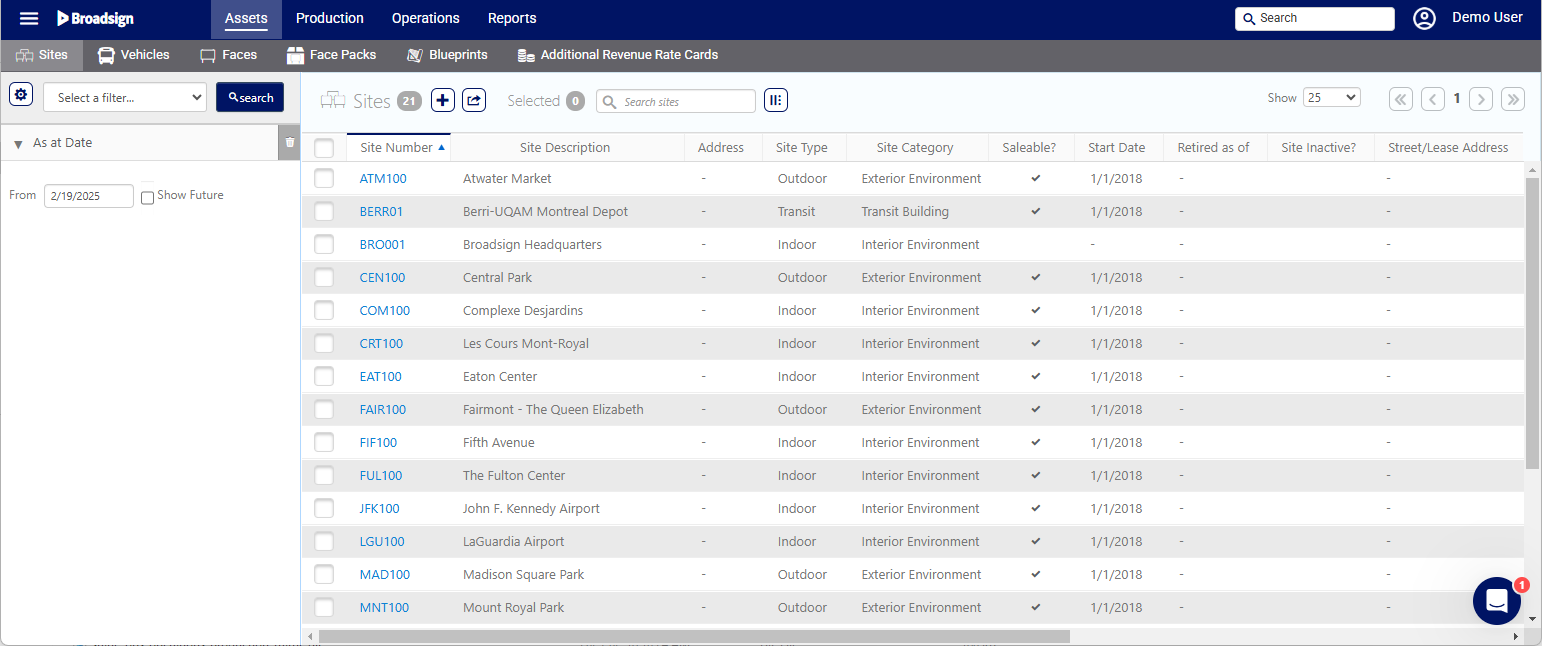
The screen will refresh to show the list of Sites available.
This presents the Site's Basic Info page.

![]()
This presents the site's details. This includes a flowchart illustrating the parent child relationship between the site and faces that it contains.


This presents the Add Vehicle window.

You can create a new Vehicle by copying an existing one. The copy will retain the same information, except for the Vehicle Number and Description.
To copy a Vehicle:
Static Operations
- Locate the vehicle to copy and open its record.
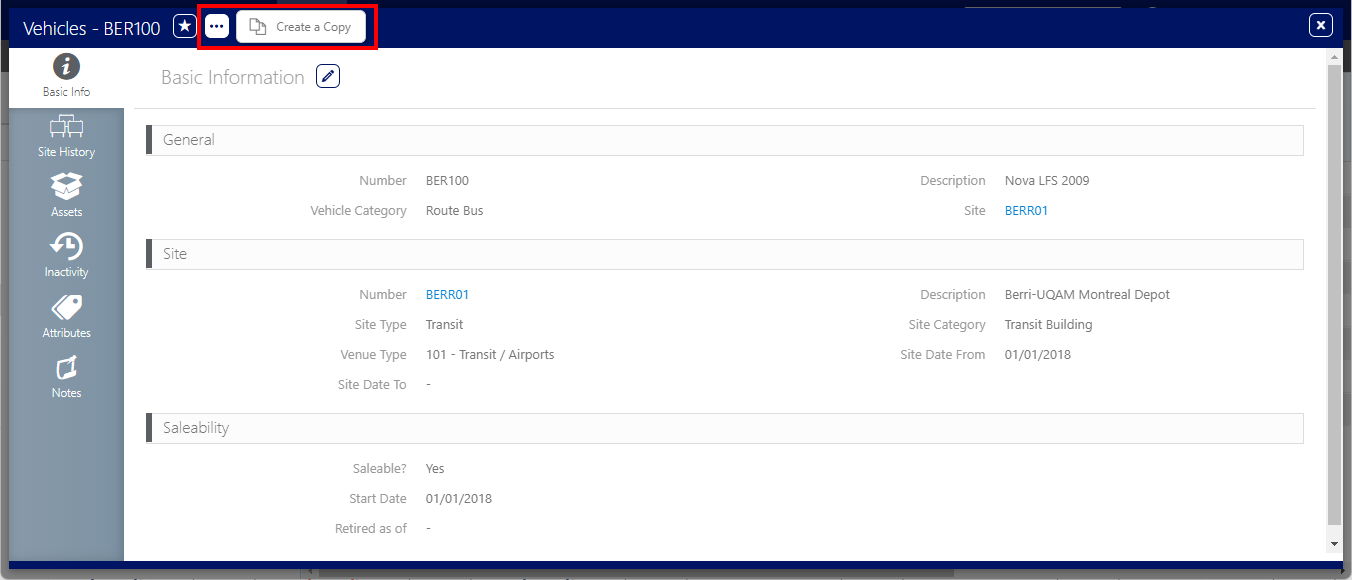
- Within the Vehicle record, click the
 button at the top of the window, and then Create a Copy.
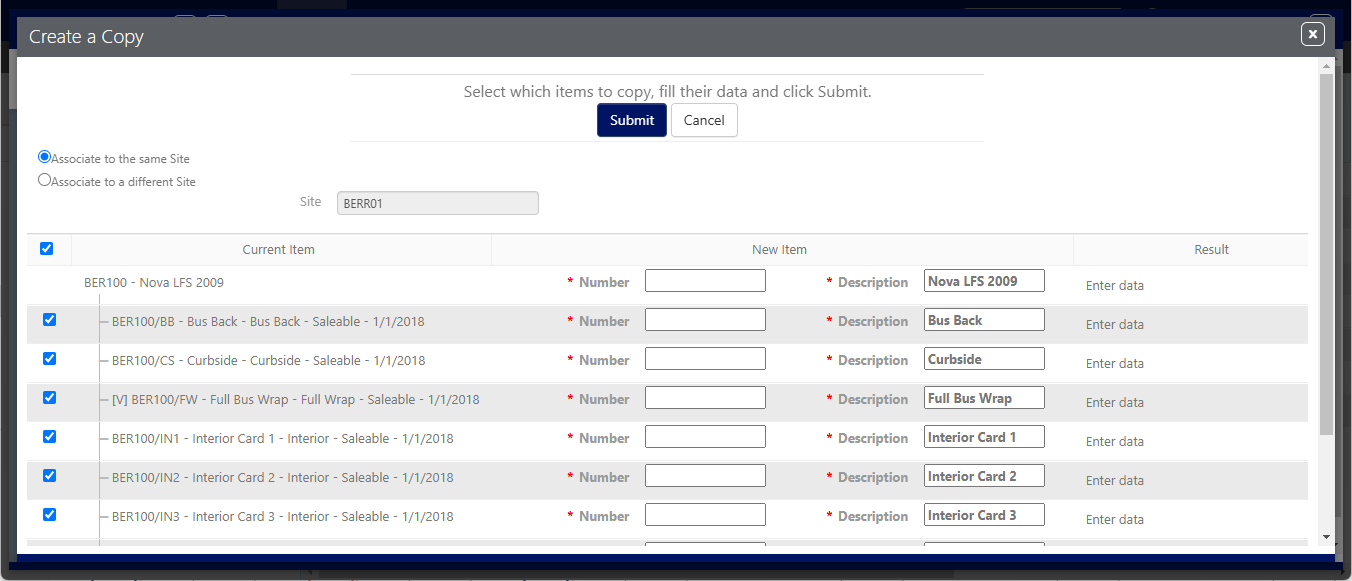
 - Select whether you want the copied Vehicle to be associated with the same Site or to another Site by selecting Associate to the same Site or Associate to a different Site.
- Select which Faces you want to use for the Vehicles.
- Enter a new Vehicle Number and Description for each of the selected Faces.
- The Number cannot be empty.
- If the Description is empty, the system will use the same description as the copied Vehicle.
- Click Submit.
This presents the Create a Copy window.
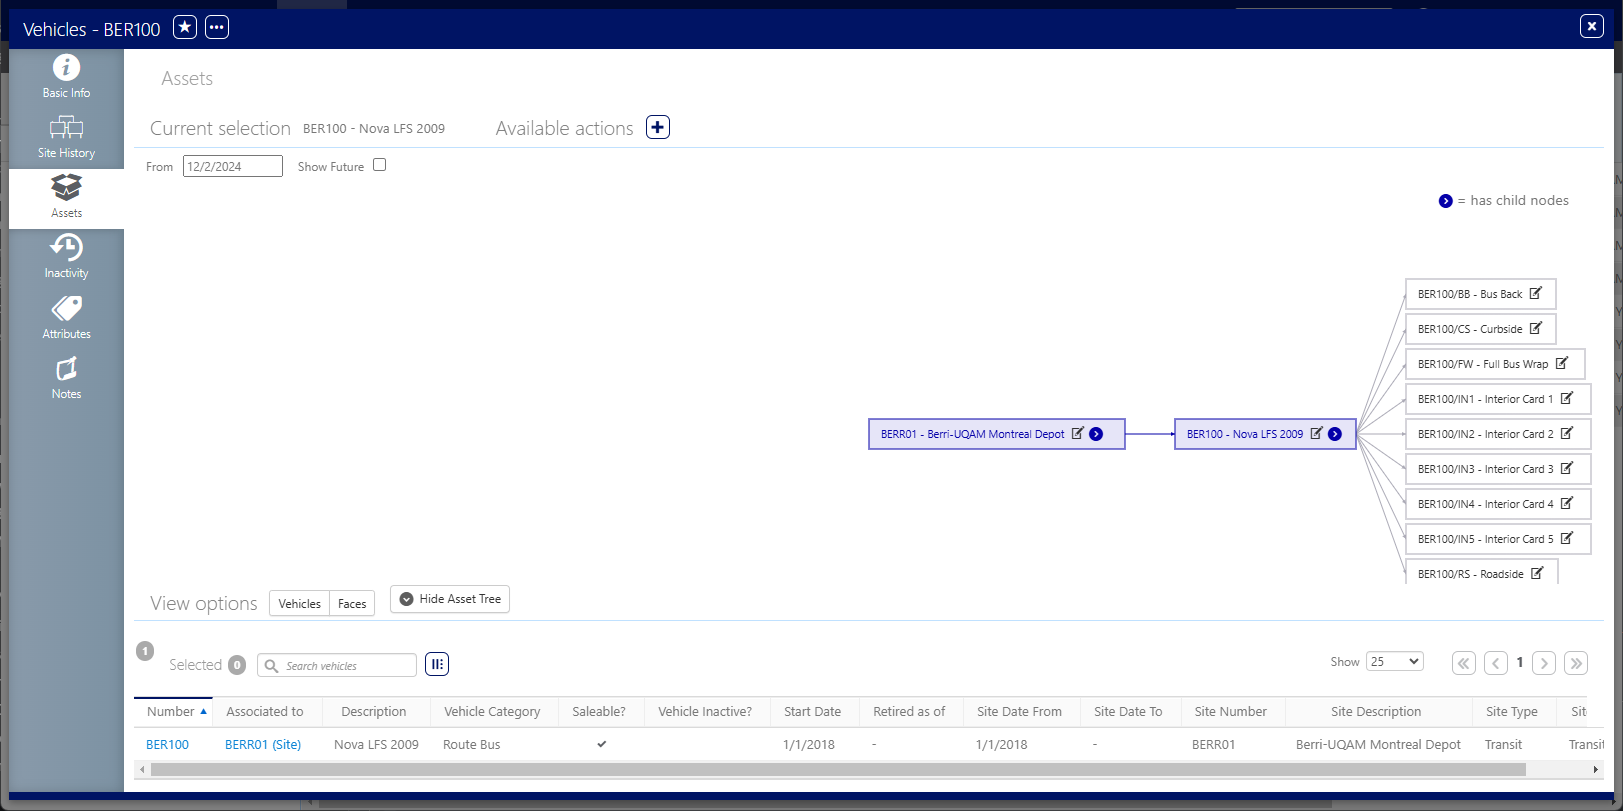
Within the Vehicle record, click the Assets tab in the left navigation bar.
![]()
This presents the Vehicle's details, including a flowchart illustrating the parent child relationship between the Vehicle and any Faces that it contains.
Once your Vehicle has been created, you can add one or more Faces to it.
To add Faces to a Vehicle:
Static Operations
- In the Vehicle tile, locate the Vehicle to which add a Face by using its Vehicle Number.
- Open the Vehicle by clicking the Vehicle Number.
- Within the Vehicle record, click the Assets tab in the left navigation bar.
- Click the icon next to Available actions, then select Add Face.
- Enter the following mandatory information:
- Face # – Unique number that identifies this Site. Must be unique per Site.
- Face Description – A free form description to explain the Face. This field is searchable.
- Media Group – Each customer has a different hierarchy of media groups. These are used to organize the inventory of assets into logical groups. For example, all bus shelters might be one group and restaurants might be another.
- Media – The media format of your face.
- Saleability/Start Date – The Face will be available for sale starting at this date.
- Saleability/Face Retired Reason – Enter a date in the Retired as of field. This enables the Face Retired Reason drop-down menu. Select a reason from it. The reasons will differ for each client.

-
Click Save Changes.
This presents the Vehicle's Basic Info page.

![]()
This presents the Vehicle's details, including a flowchart illustrating the parent child relationship between the Vehicle and any Faces that it contains.

This presents the Add Face window.

Vehicles are moveable Assets. For example, Buses are regularly moved from Depot to Depot, not necessary within the same Area or City.
Using the Site History feature, the Vehicles do not need to be retired, just 'moved' to another Depot or Site.
To move Vehicles to another Site:
Static Operations
- Locate Vehicles and open the Vehicle to move.
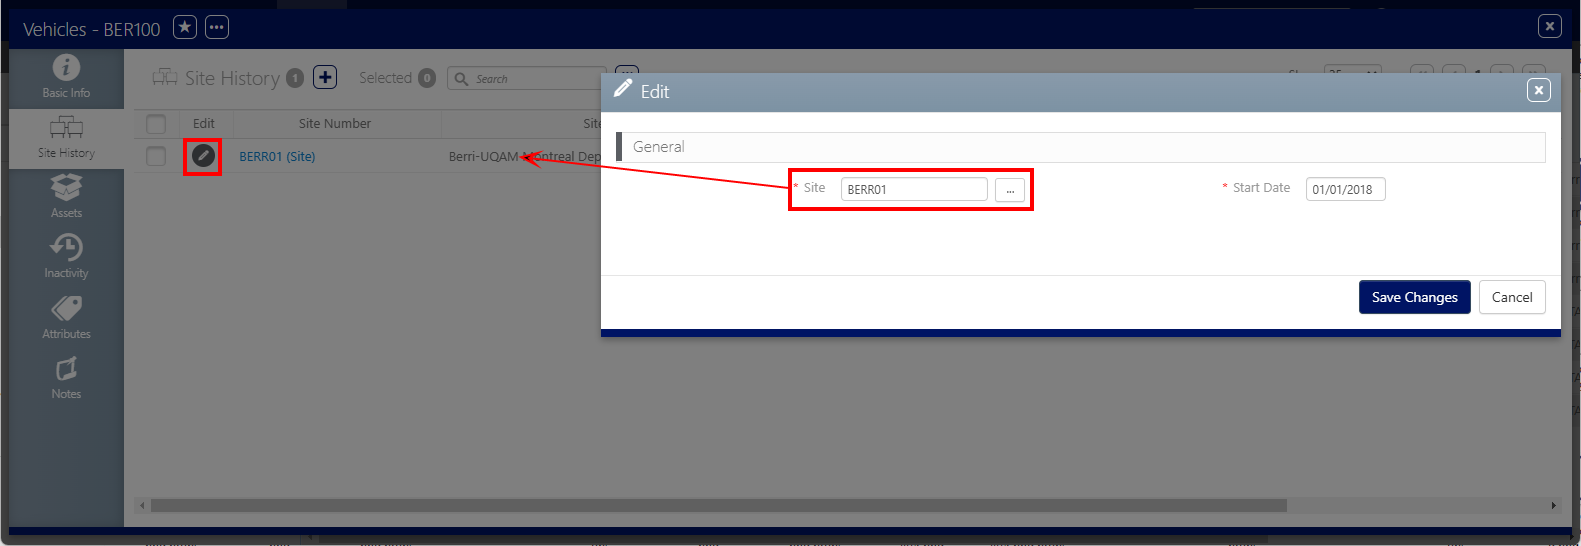
- Within the Vehicle record, click the Site History tab in the left navigation bar.
- Click the
 button to edit the Vehicle history.
 - Select another Site to where move the Vehicle, then click Save Changes.
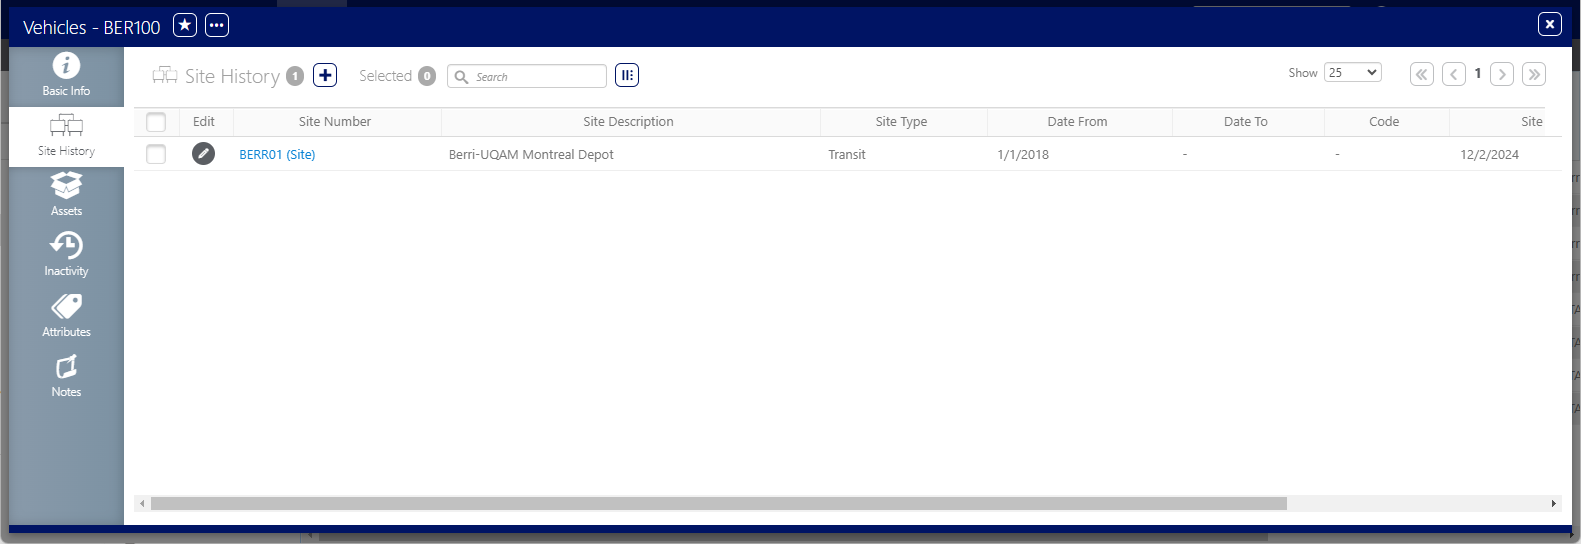
![]()
This presents the Vehicle's Site History, which lists who edited the Vehicle record and when as well as when it was created.
This presents the Edit window.
Once associated to another Site, all Assets will be moved to the new Site.
