The Mandatory Design Approval feature offers the option of having a mandatory content/design approval by a secondary person within the Broadsign Ayuda Platform. It applies to both Static and Digital content.
Note: To enable the Mandatory Design Approval feature, contact Broadsign Services.
Mandatory Design Approval
The Mandatory Design Approval feature prevents uploading and scheduling to play or installing unapproved content or design. A mandatory secondary person must approve all new content or designs before they are approved for play. It applies to both Static and Digital content.
When this feature is applied for your instance:
- All designs that are already uploaded will keep the current status. All designs that were approved in the past will remain approved, and all rejected designs will remain rejected.
- All designs that have a Pending Approval status will remain at that status.
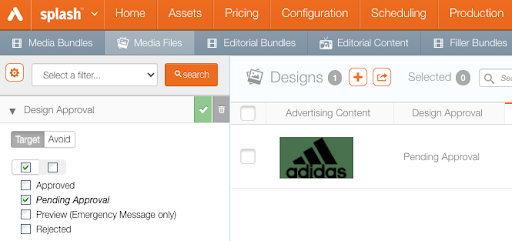
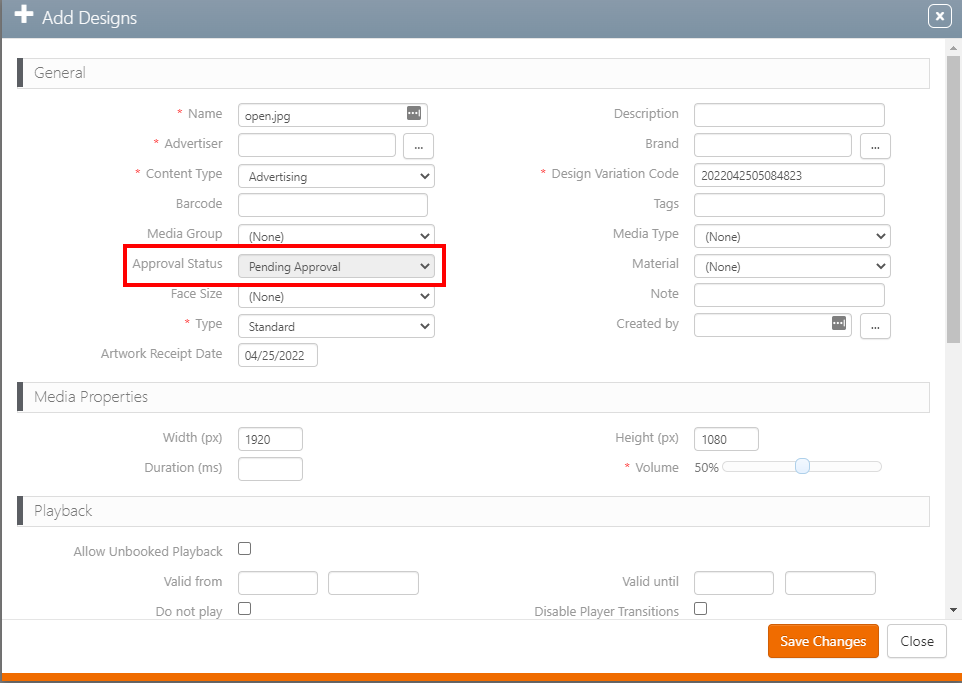
- All new designs uploaded will inherit the Pending Approval status by default.
Note: The system does not create a work order for a design that has the Pending Approval status.
- If a Campaign is not contracted, then no work orders are generated.
- If a Campaign is Contracted, then the work order can only be generated by the system on an Approved Design.
The Approval process will be triggered as soon as a design is created in the system. A design can be created from the following paths:
- Juice → Campaigns → Design tab
- Splash → Campaigns → Design tab
- Splash → Content → Media Bundles → File tab
- Splash → Content → Media Files
- Splash → Content → Editorial Content
- Splash → Content → Filler Content
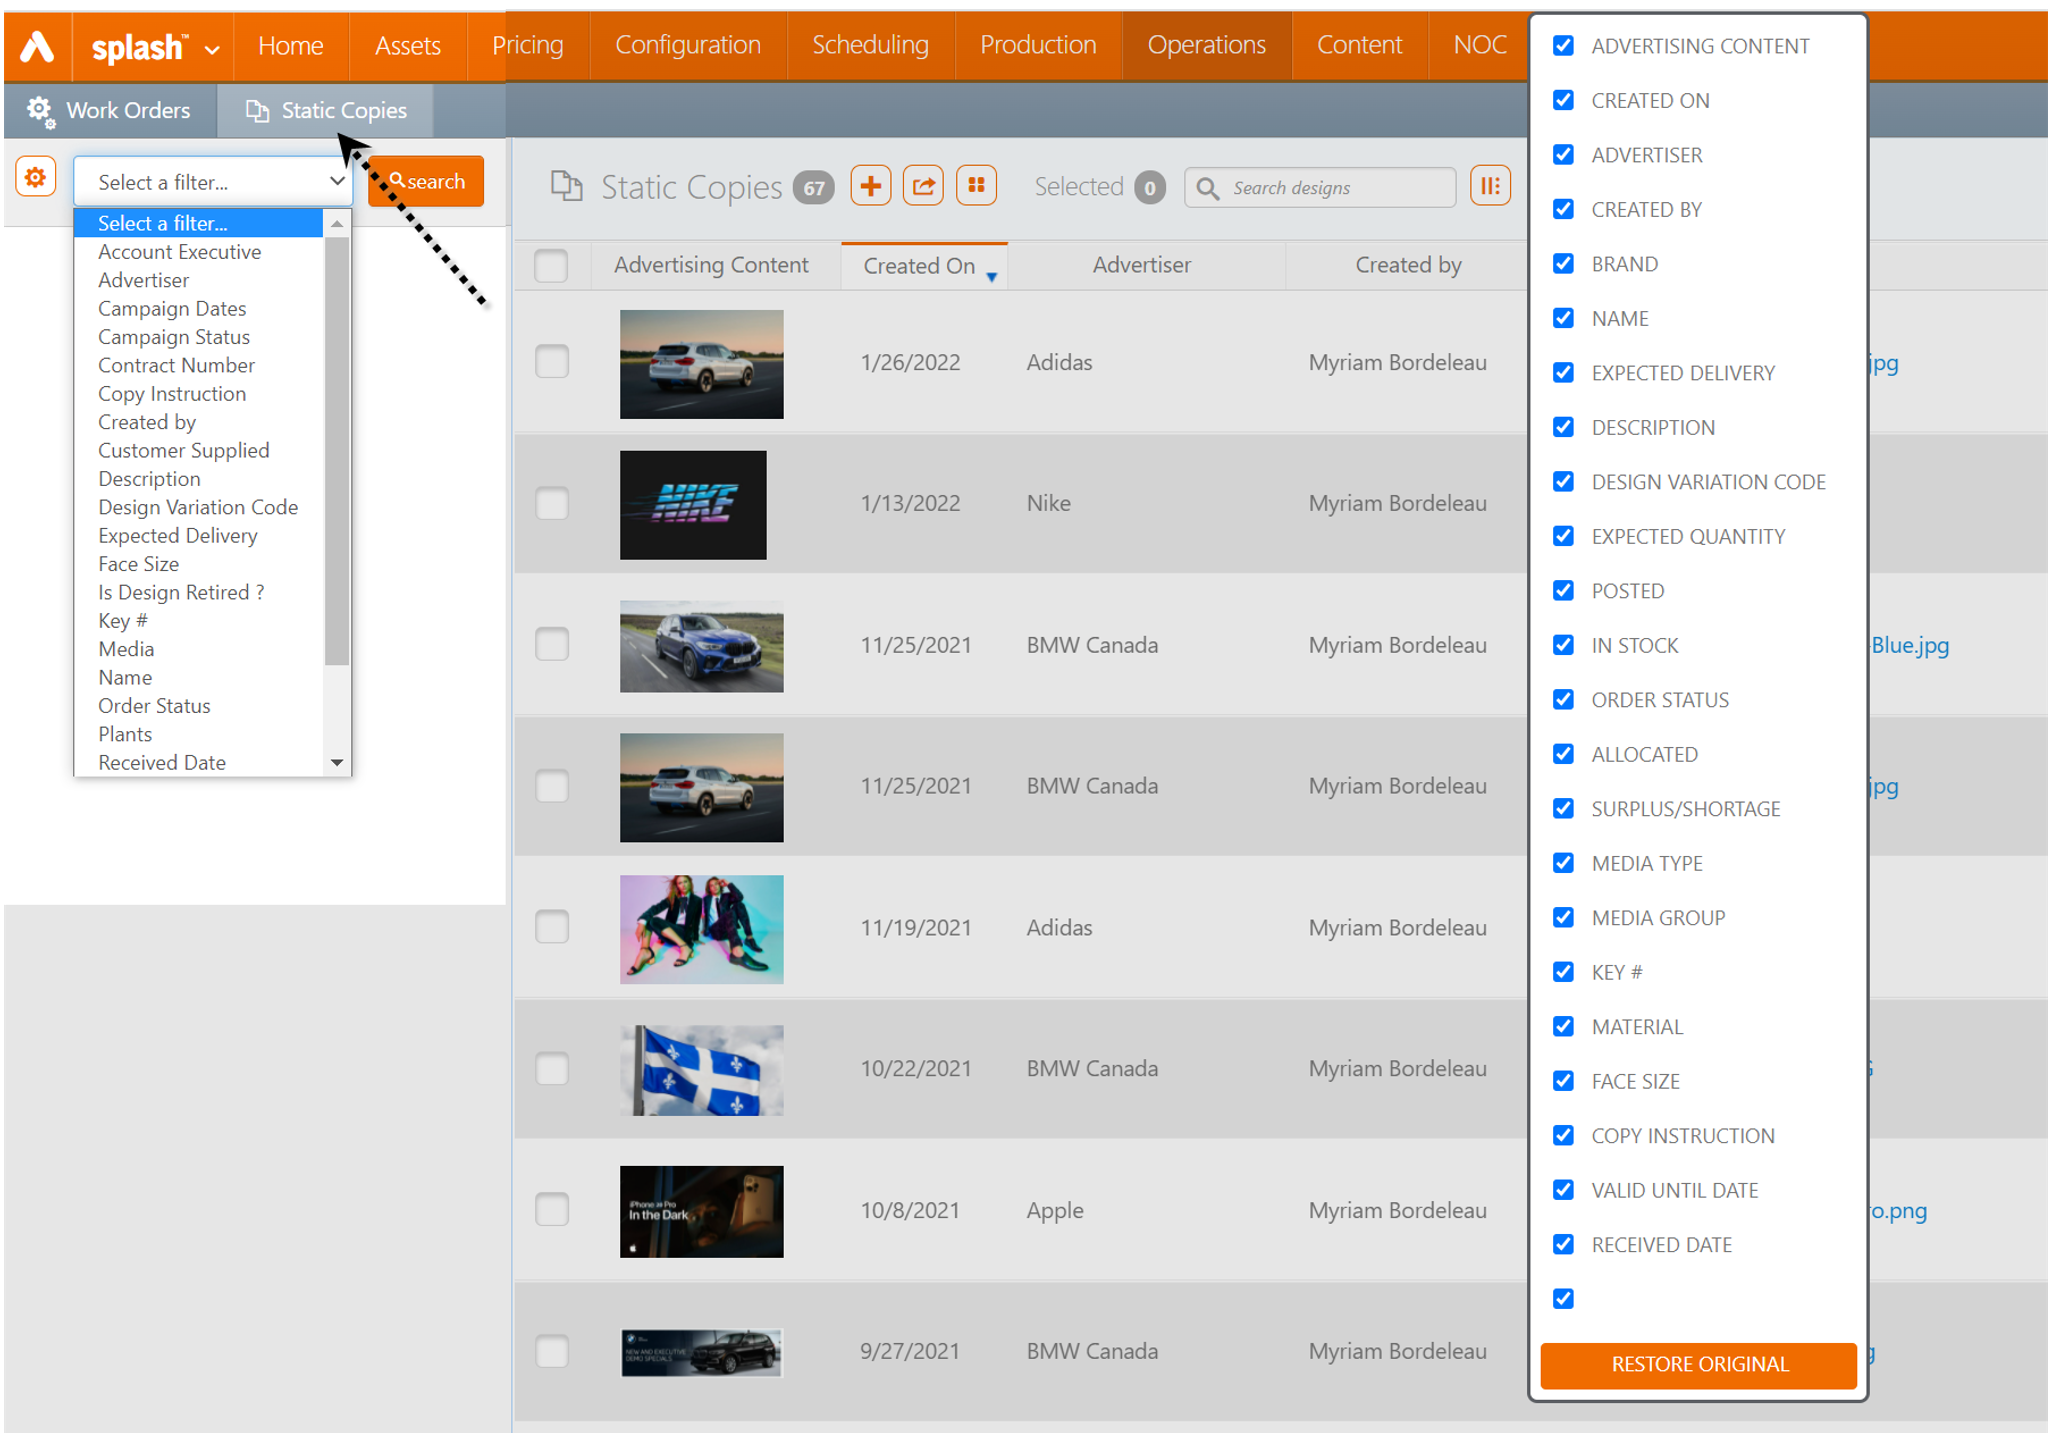
- Splash → Operations → Static Copies
You can create a design with or without uploading a file to the design, depending on where you choose to create the design.
Tip: When a design was created without a file, you can still upload an image at a later date by using the Attachments tab in the design details.
Note: PDFs that are uploaded as an image for a design will not be rendered in the interface.
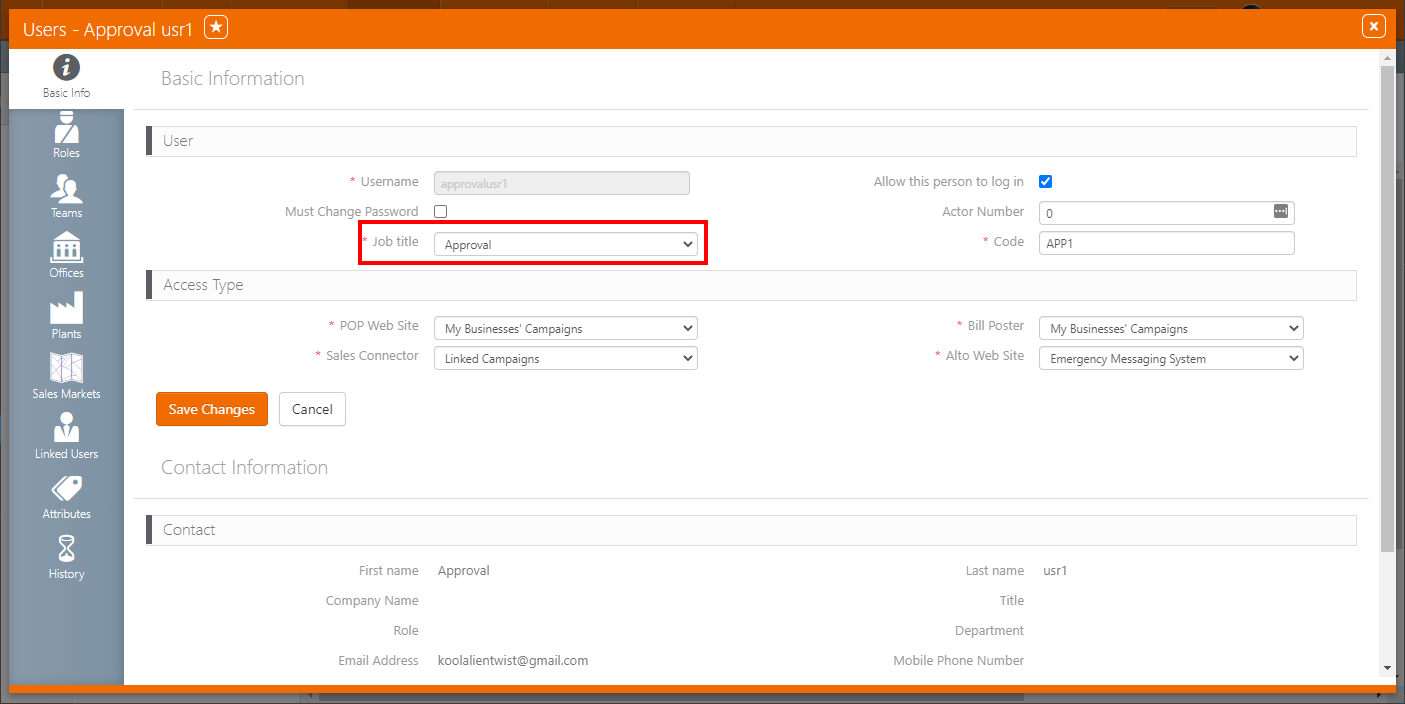
You must define a list of users who can approve designs by assigning them the Approval job title.
The user who uploaded or created the design will not be on the list of possible approvers for their designs when requesting content approval.
The following video describes how to add approvers for the Mandatory Design Approval feature:
Mandatory Design Approval – Set up List of Approvers
To set up the list of approvers:
- In Broadsign Ayuda, log into Admin. Click the Workforce menu item, and then the Users tile.
- Select a user who will approve designs or content.
- In the Basic Information tab, click the
 icon to edit the user information.
 - Select Approval as the Job Title for the user who will approve designs or content.
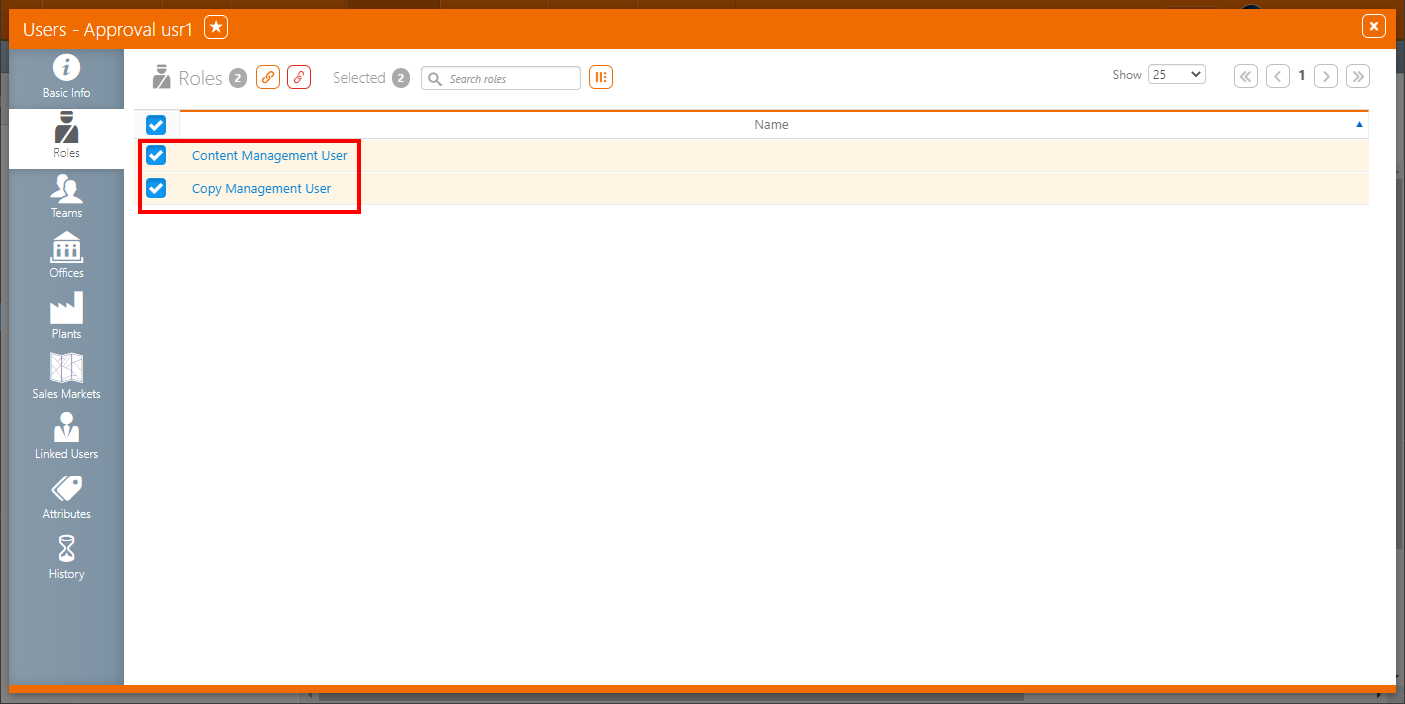
- Click the Roles tab.
- Be sure to check the Copy Management User (to access Static Copies) or Content Management User (to access Digital Media files) roles.
This presents a filter search window.
Tip: You can also create a user by clicking the  icon in the Users page. See Adding Users for more information.
See Roles Overview for more information.
All new designs that are uploaded or created, including the ones identified as fillers, will be set to the Pending Approval status.
To use the file, Digital and Static users must send an Approval Request to a secondary person that can approve the creative.
The following video describes how to request content approval:
Mandatory Design Approval – Request Content Approval
To request content approval:
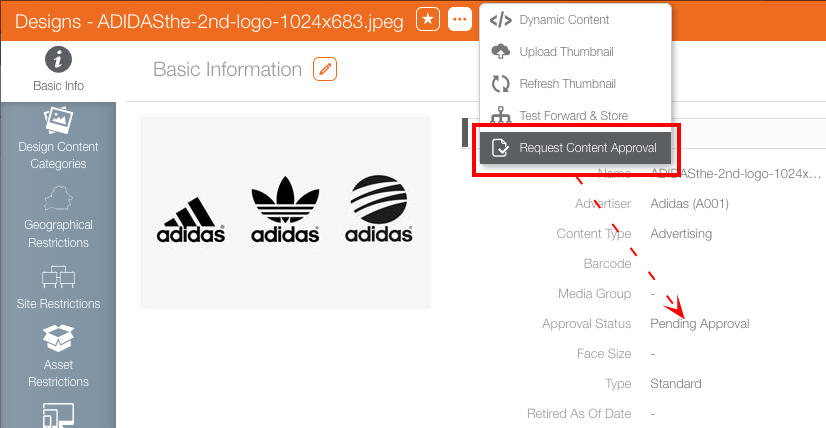
- Open the specific static or digital design for which you want to request content approval.
- In the Basic Info tab, click the
 icon at the top.
 - In the menu that is displayed, select the Request Content Approval option.
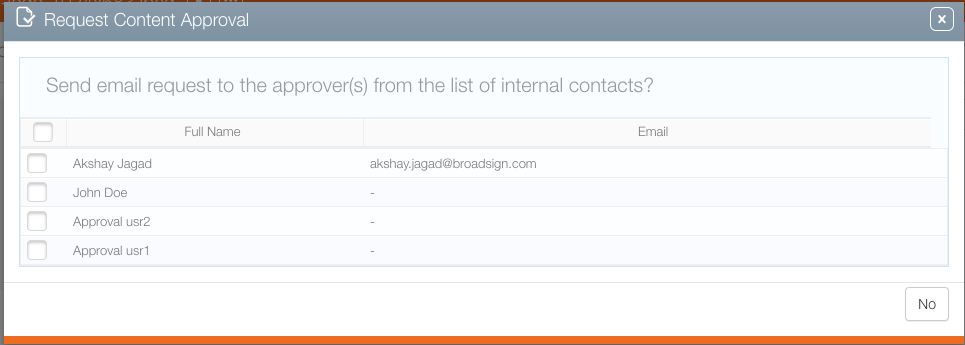
- Select the contact and click Yes to confirm the email request.
For example, for a digital design:
The Request Content Approval window is displayed.
The system will display the contact detail of the Content Approval contacts that you have set up (see Set up the List of Approvers).
Note: A user cannot approve any of their uploaded or created design.
A pop-up will indicate that the email(s) have been sent successfully.

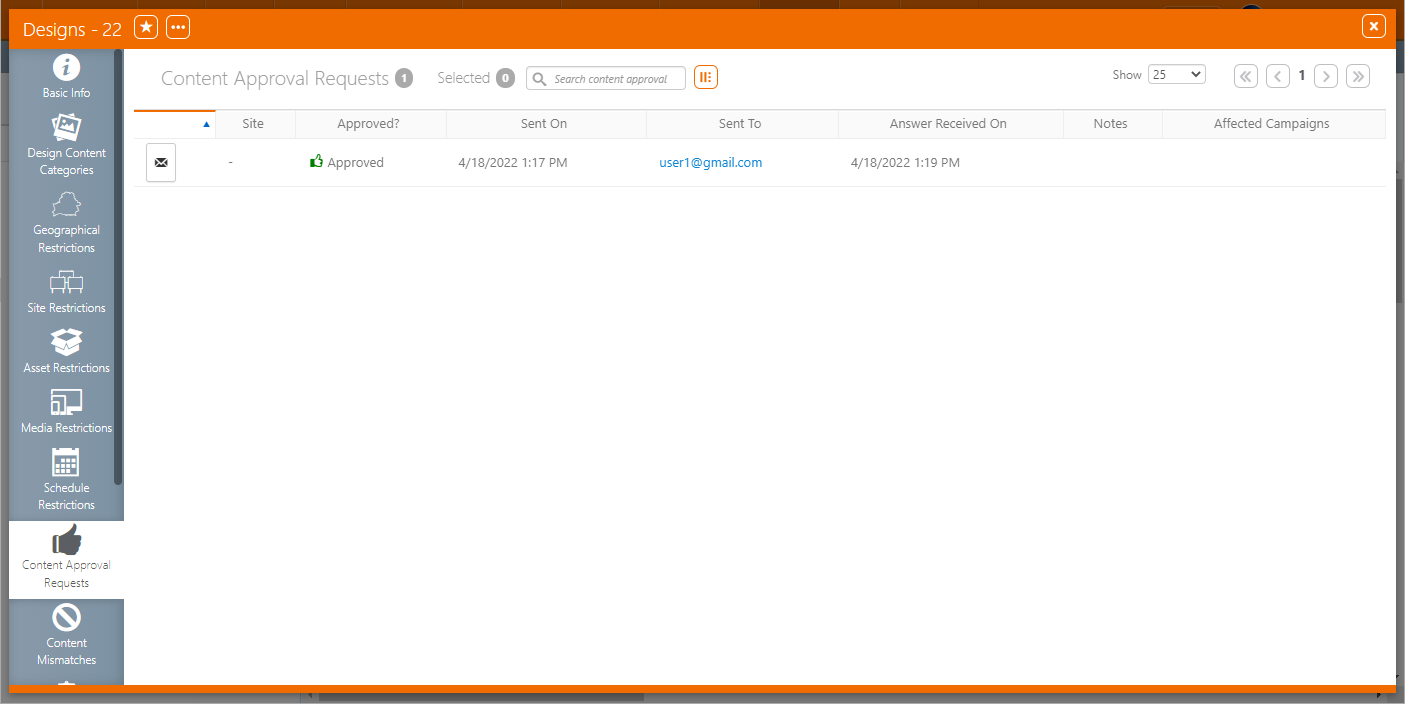
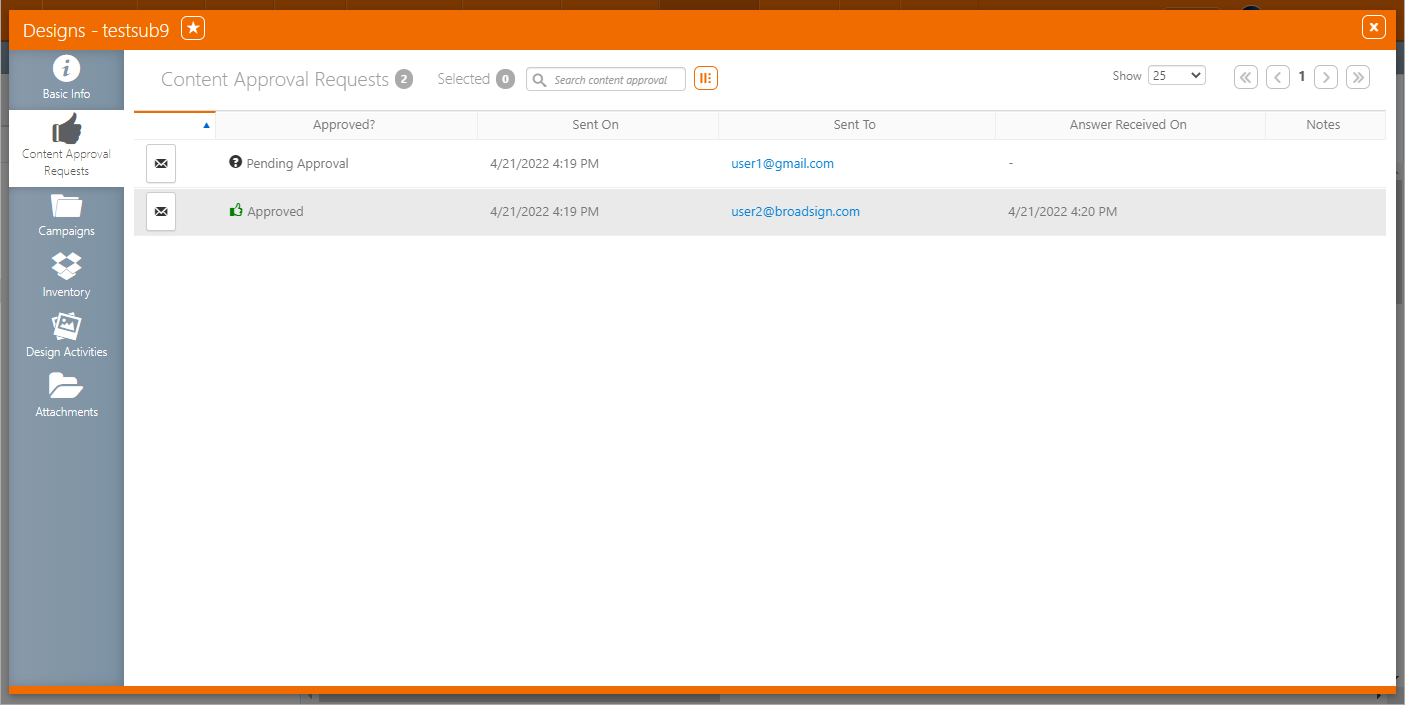
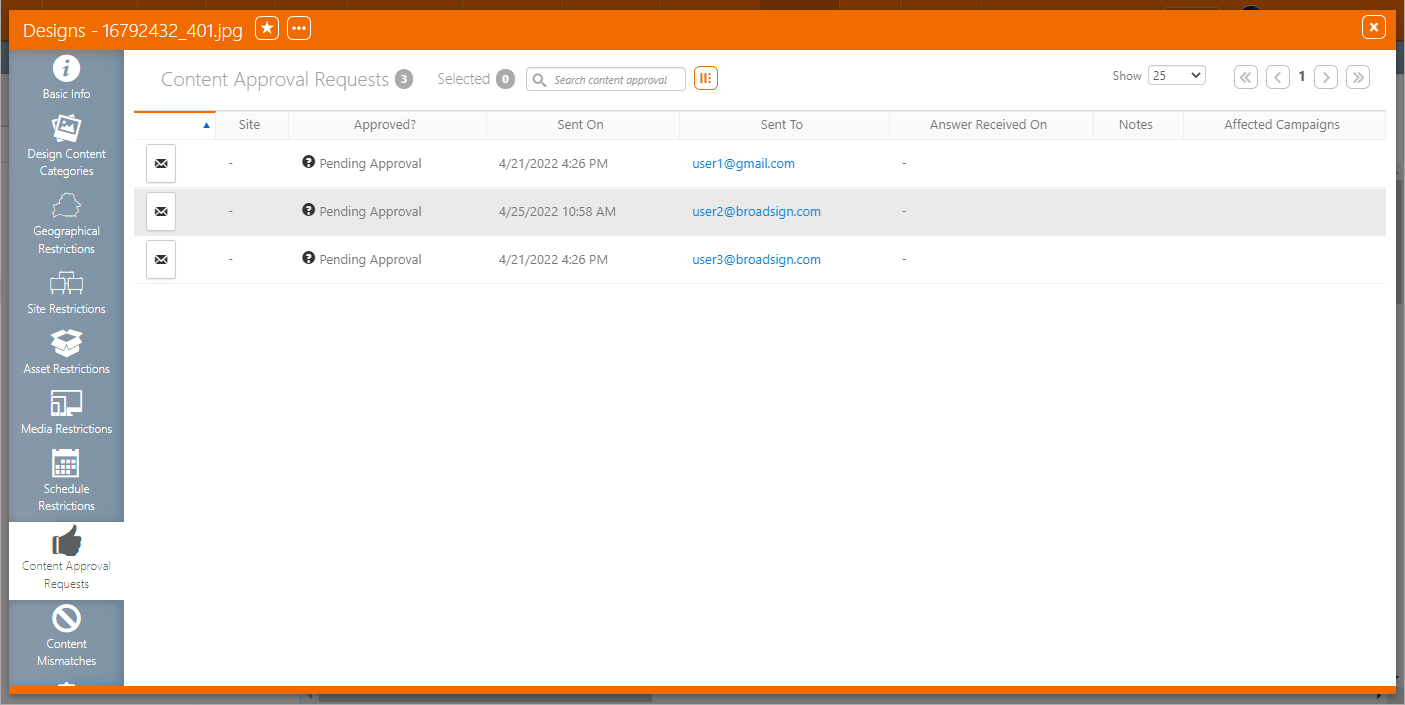
Once the email has been sent, you can see the status of the customer Approval in the design itself, by clicking the Content Approval Requests tab (Content Approval Requests Tab Details and Info).
Note: If you have requested approval from several users and some of them approve or reject the content, the last to approve or reject the design takes precedence over the others.
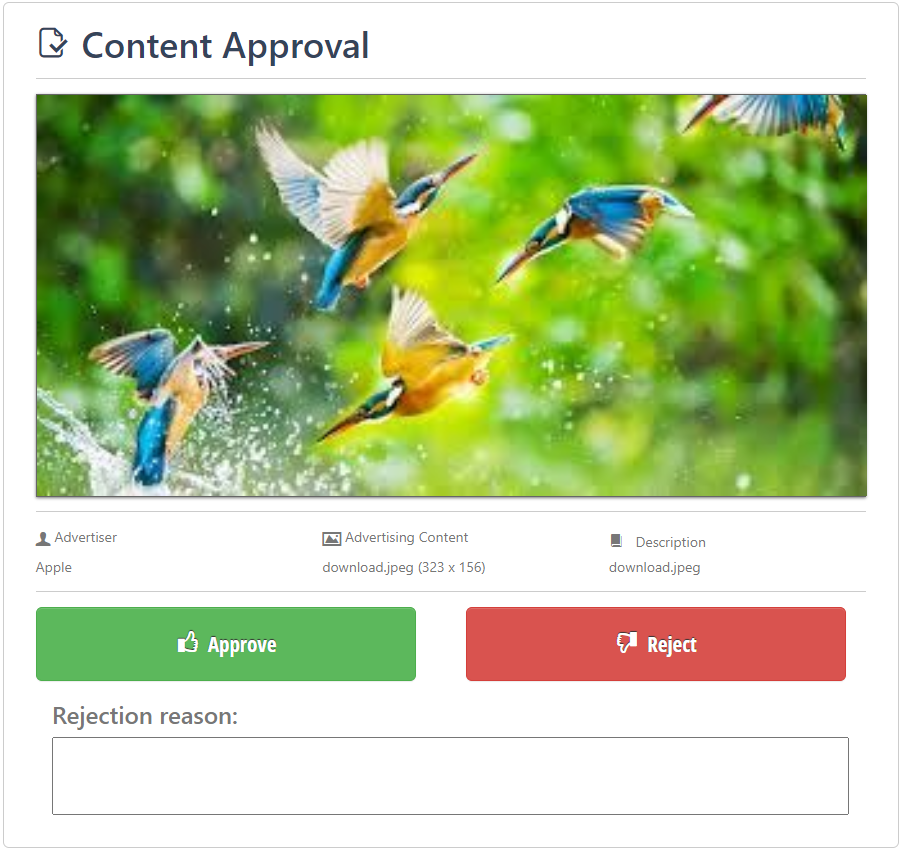
Once a user has requested approval on a design, the selected Approver receives an email. The email received by the Approver will look like the following:
Note: Users can modify the email before sending it over.
The following video describes how to approve or reject a design:
Mandatory Design Approval – Approve or Reject a Design
To approve or reject a design:
- Click the here link in the email to access the design to be approved.
- Either click Approve or Reject. Give Rejection reasons if necessary.
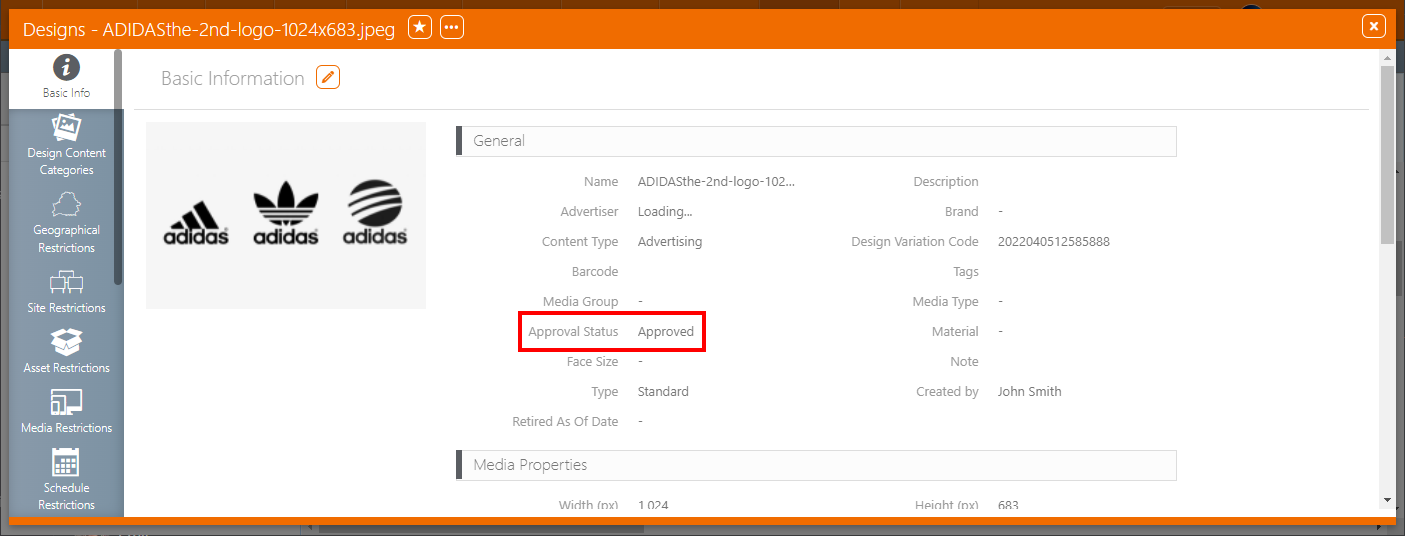
Once the Approver approves the content or design, it shows as Approved and can play or have work orders generated.
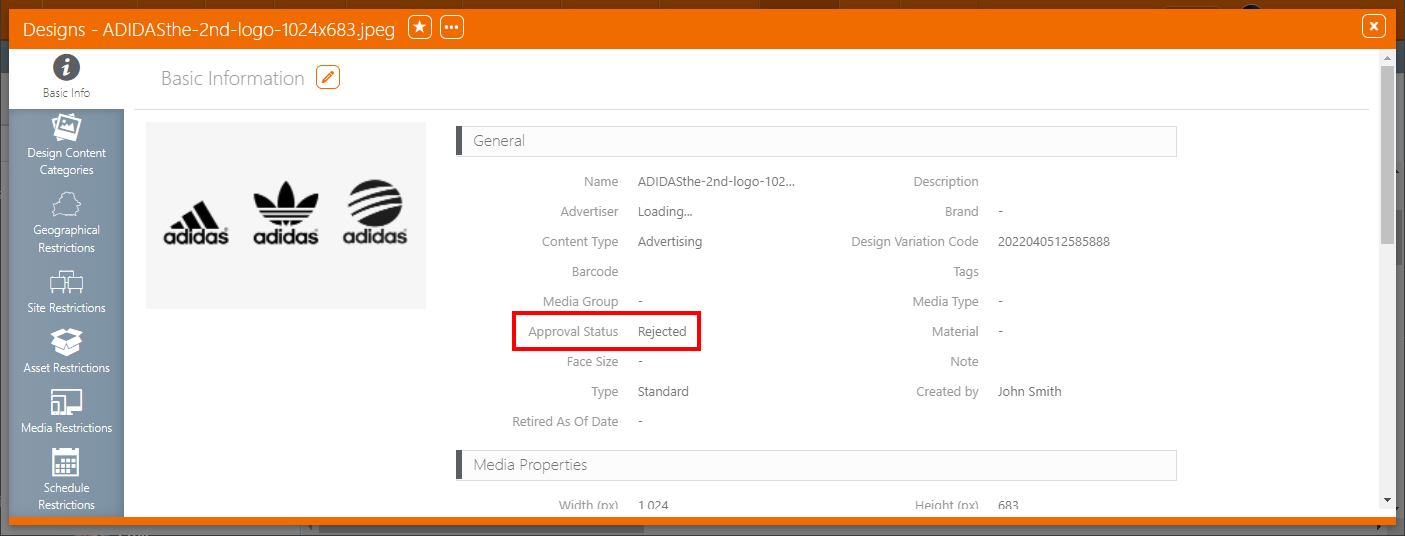
If the Approver rejects the content or design, it is listed as Rejected and cannot play and will continue to not have work orders generated.
If you have an Approval set as a job title, you can approve several designs at the same time. You do not need to have received an email request to approve or reject designs.
Note: A user cannot approve any of their uploaded or created design.
Note: The status from a bulk approve (Accepted or Rejected) is not logged in the Content Approval Requests tab of a design.
To bulk approve designs:
If you have an Approval set as a job title, you can approve several static copies at the same time. You do not need to have received an email request to approve or reject designs.
Note: A user cannot approve any of their uploaded or created design.
Note: The status from a bulk approve (Accepted or Rejected) is not logged in the Content Approval Requests tab of a design.
To bulk approve designs:
When the Site Design Approval workflow is used, the Content Approval Requests tab of the design is populated with the necessary approval information.
- The Site column remains empty.
- The Notes column contains the rejection reason if the design was rejected.
- The Affected Campaigns column displays the Sales Contract # in which the design was assigned or scheduled.
- The Resend Approval Request
 button allows you to re-send the approval email to the corresponding email address.
The following is an example for a digital design:
The following is an example for a static design:


 or
or  icon.
icon.
