This page describes how to add users to the Broadsign Ayuda system.
- In Broadsign Ayuda, log into Admin. Click the Workforce menu item, and then the Users tile.
- Click the
 icon next to Users to create a new user.
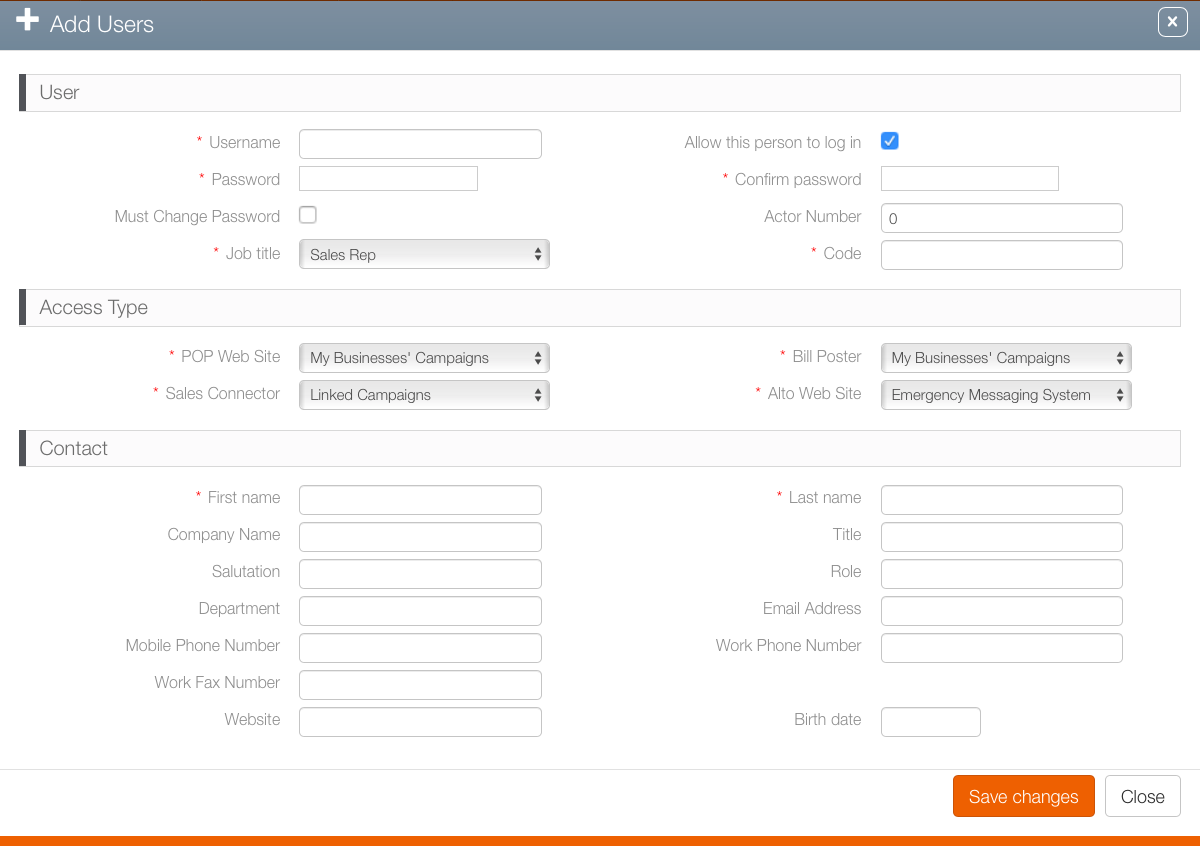
 - Enter the following mandatory information:
- User Name – This must be unique.
- User First Name and Last Name.
- Password – Broadsign Ayuda passwords must be at least 10 characters, include at least one upper and one lower case charter, and at least one number. Enter the password a second time in the Confirm Password field.
- Job Title – Choose a job title from the drop down menu. Job titles are informational labels only. (Actual permissions are set in the Roles section of the Workforce section of Admin.)
- Code – Each user must have a unique employee code. Also used for invoicing purposes to identify the account representative when transferring invoices.
- Access Type – There are four mandatory information access types: Pop Web Site, Sales Connector, Bill Poster and Alto Web Site. Each of these must be configured using the drop down menus:
- My Business Campaign – Records that are this user's direct responsibility.
- My Linked Campaigns – Campaigns where users share supervisory responsibility. For example, a sales rep's manager would be linked to the rep's sales proposals and campaigns.
- Power User – This provides special administrative powers and is not needed by most users.
- Emergency Message System – For more about this special feature, see information about Alto.
- Ensure that the Allow this person to log in check box is enabled.
- Click Save Changes.
This presents a filter search window.

This presents a new user with a blank user record.
Note: If SSO is enabled, then the user name is managed by the SSO functionality.

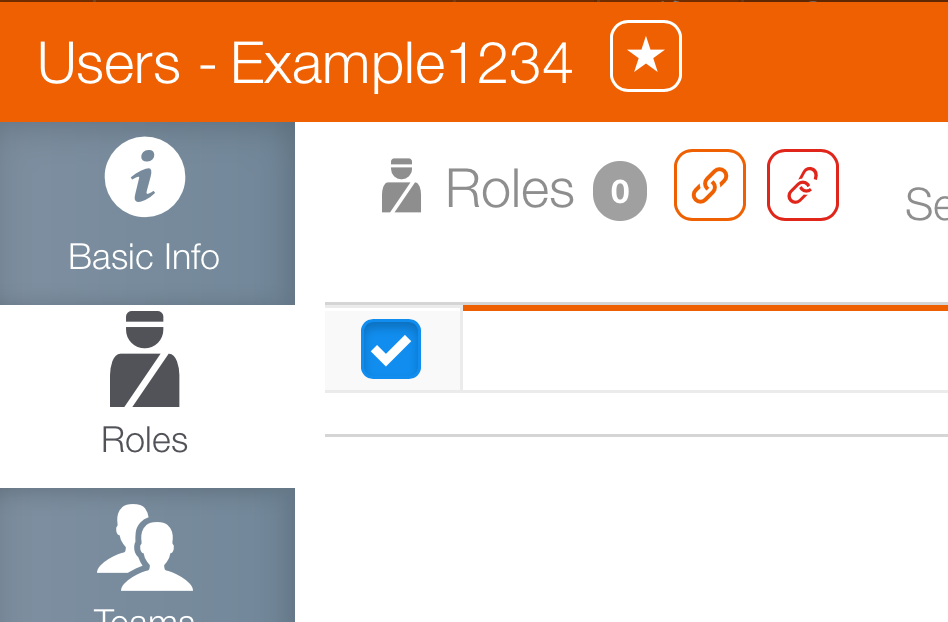
The user record has been created. However, no roles have been assigned to it. If the user logs in now, he or she will not be able to do anything. The next step is to assign roles to the user.
The Add a User Record window closes and presents this new user's Basic Information screen. Click the Roles tab to assign roles to this new user.


