POST is a mobile app for Bill Posters to manage the work orders that they have been assigned. With POST, Bill Posters have access to the list of postings and take downs that they need to carry out. All updates done in the app are reflected in the system, and vice-versa, in real-time.
POST is an app available on Android and iOS.
Note: The POST App does not support “dark mode”.
Before using POST, complete the following prerequisites:
- Create Bill Poster users and assign them the POST App user role (Set up a Bill Poster User).
- Create Campaigns with static face bookings with a status set as 'contracted' (Create Work Orders).
- Assign Bill Poster users to Work Orders, Faces, or Sites (Assign Bill Posters to Work Orders / Faces / Sites).
Note: When using Posting Companies (Contractor), instead of a Bill Poster (Employee), a new user must be created to give access to the POST App.
Follow this procedure to create a Bill Poster user and assign it the POST App user role:
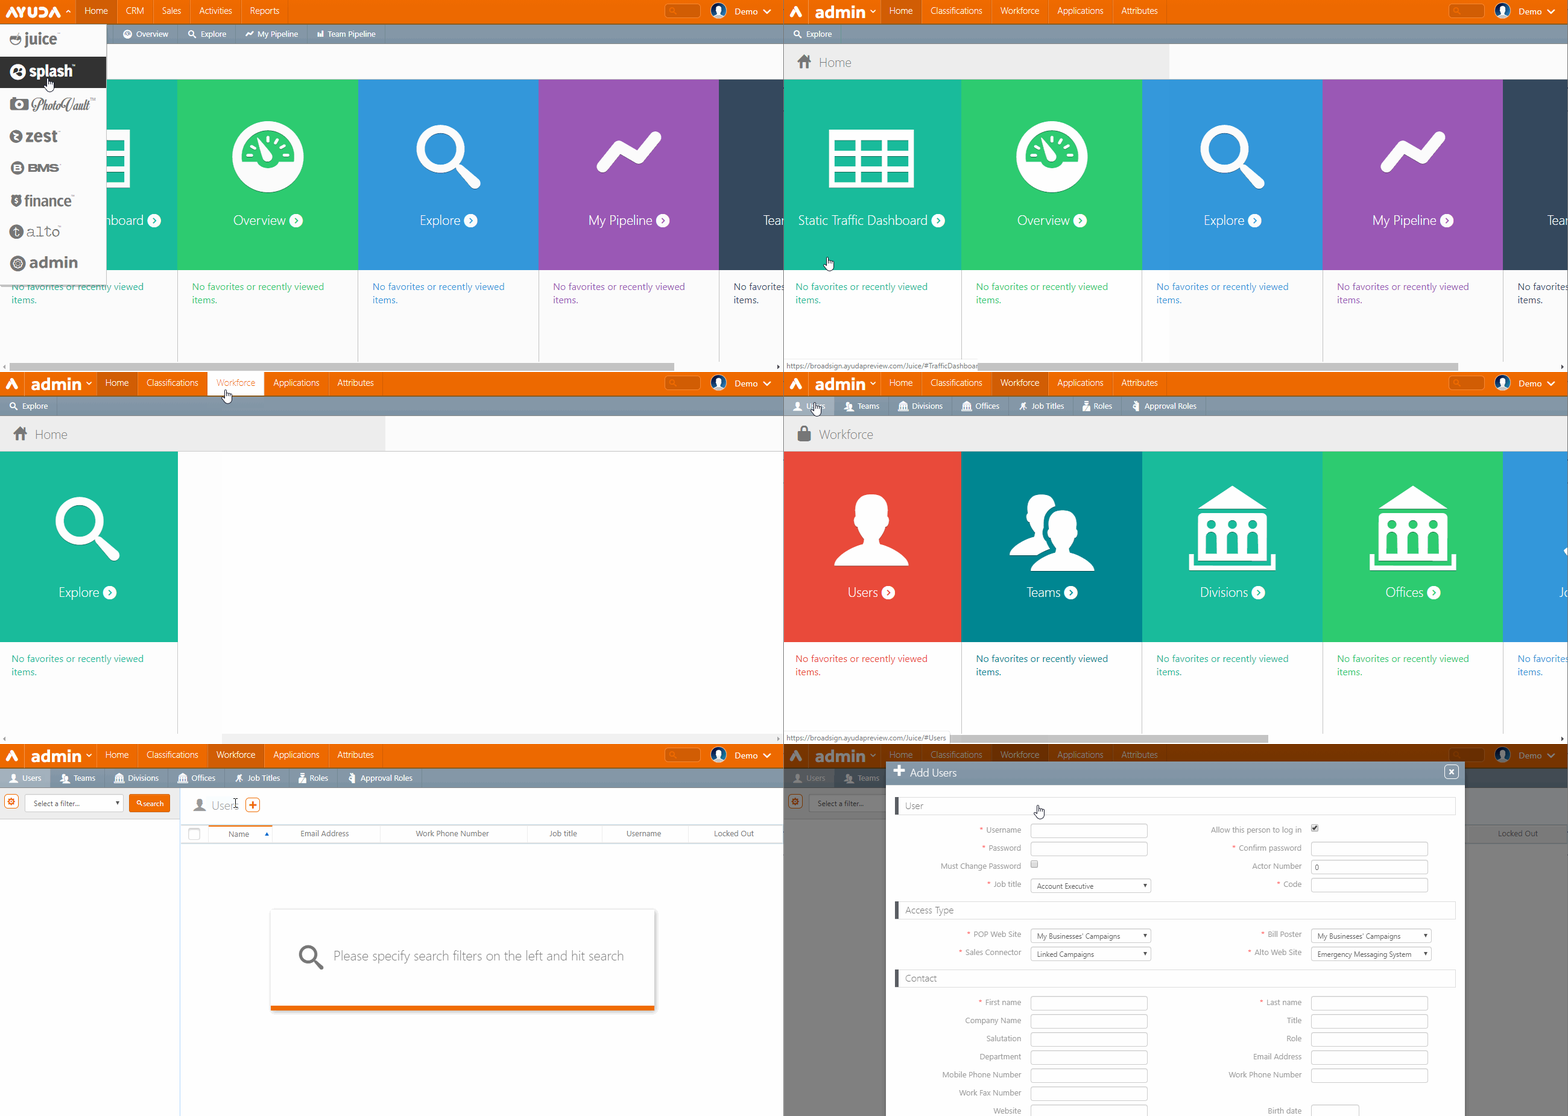
- In Admin, click the Workforce menu item, and then the Users tile.
- Click
 to create a user.
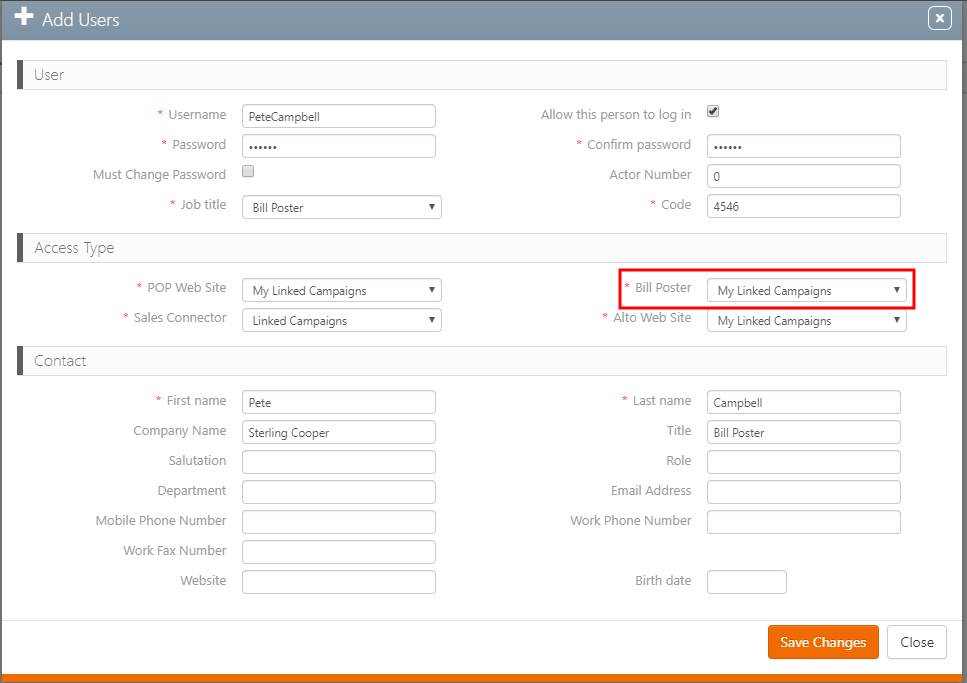
 - Enter the following mandatory information:
- Username
- Password
- Job Title: Bill Poster
- User Code
- Access Type
- My Linked Campaigns – Users can only see and search for their own campaigns and those of users to which they are linked.
- My Business Campaigns – Users can only see and search campaigns that have them as a contact.
- Power User – Users have access to all campaigns.
- First name and Last name of the Bill Poster
- Click Save changes.
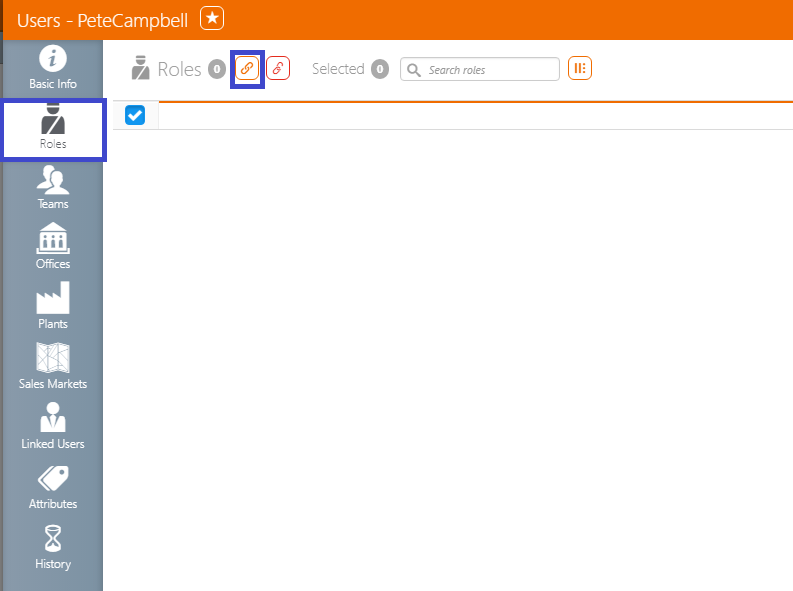
- Open the user that you have created.
- Select the Roles tab, then click
 to link roles to your user.
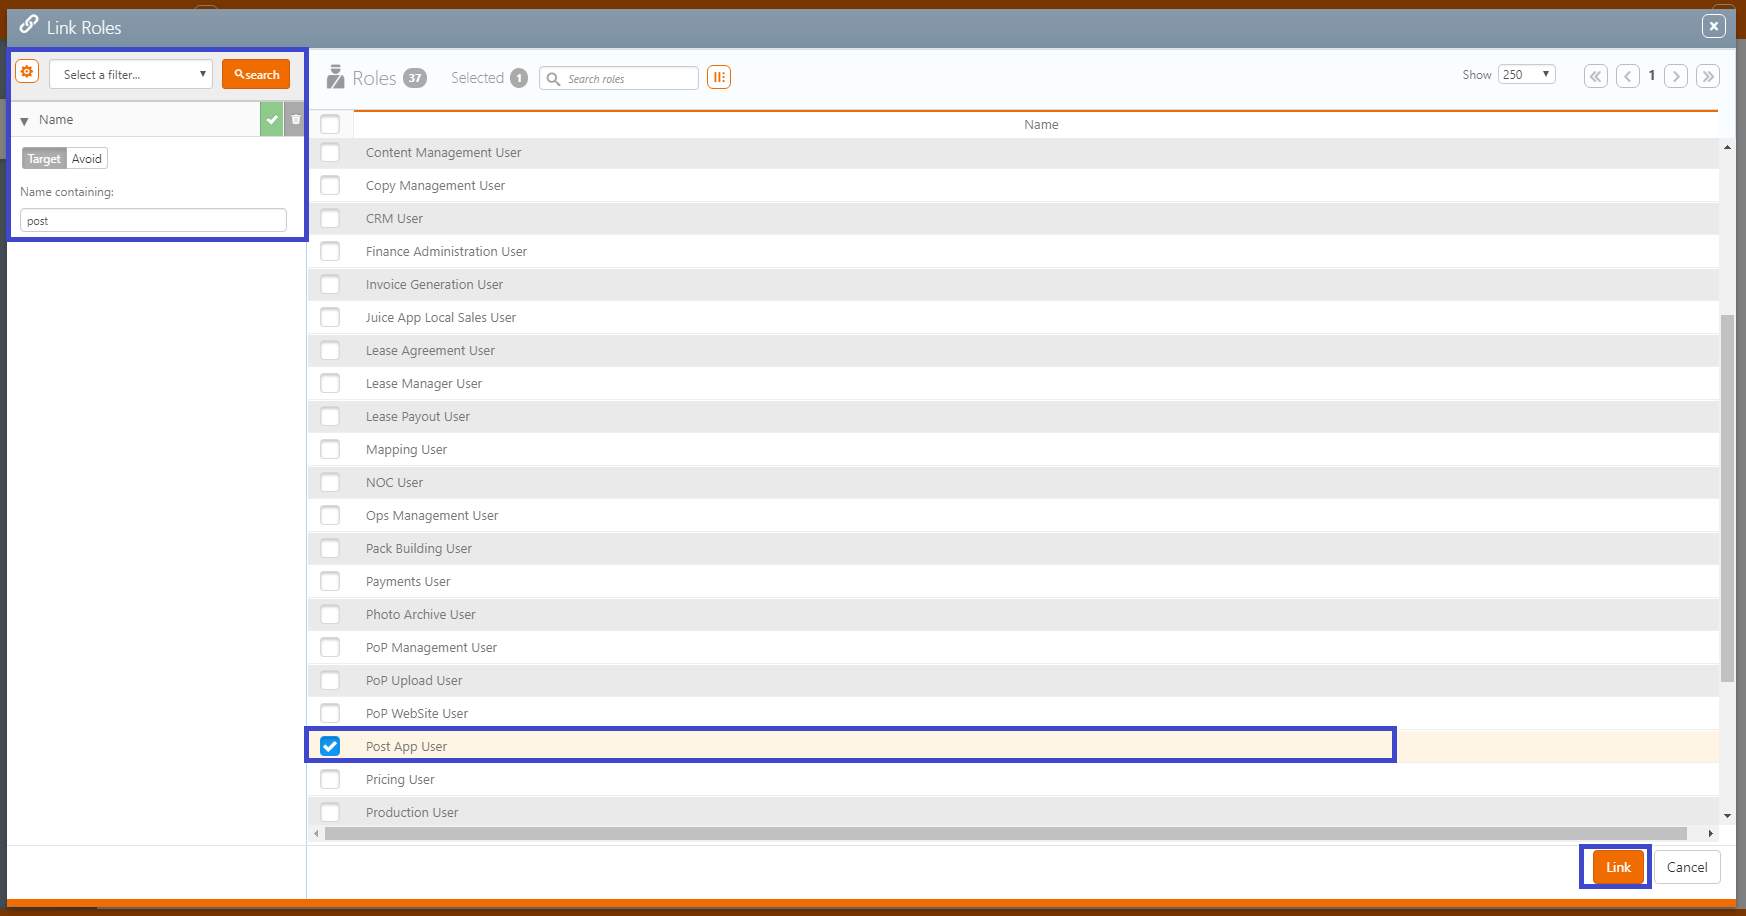
 - Perform a search by Name filter. In the Name containing field, enter 'post'.
- Select the Post App User and click Link.
The following Access Types are available for a Bill Poster:
Note: The linked user will not be able to see the campaigns of the other if the other is not linked to them as well.
Other Contact information is not mandatory but can be added.
You must now allow the Bill Poster to use the POST app.
Note: Make sure that you either select to show 250 items or you go on the next pages, as all roles might not be on the same page.

Now that your new Bill Poster user has been created, you can assign it to Work Orders, on a Face-level, or even on a Site-level.
For more information on how to create a campaign, see Creating Campaigns from Scratch.
For more information about campaigns, see Campaign Fundamentals.
To create work orders:
- Make sure that you have at least one design assigned to your bookings.
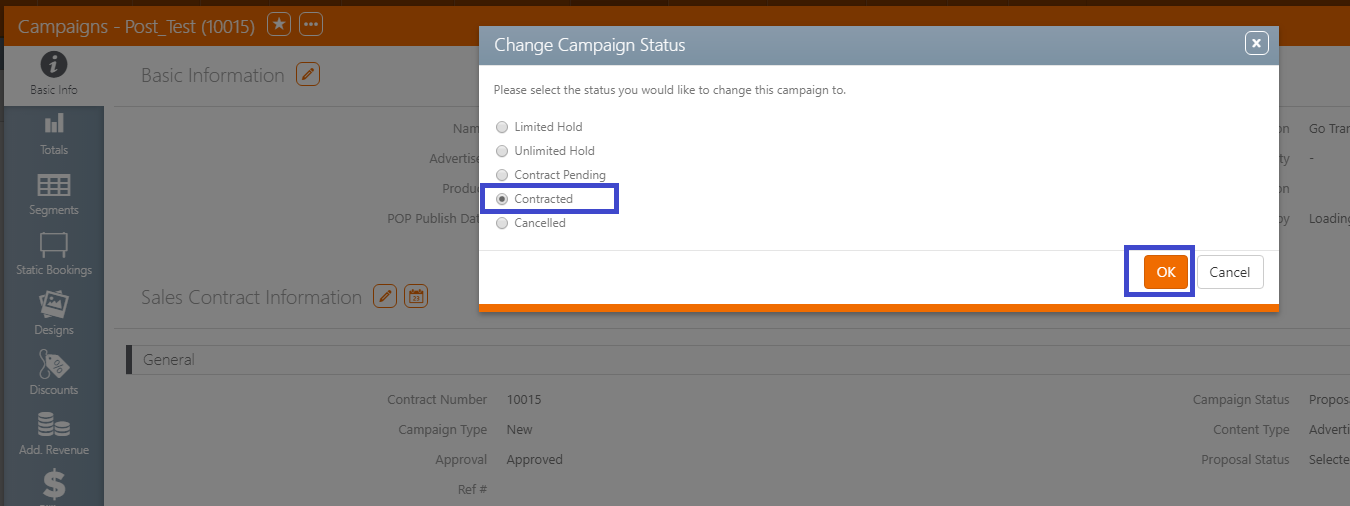
- When all your bookings are done and you have a design assigned to them, click
 on your Campaign level, then select Change Campaign Status and Contracted.
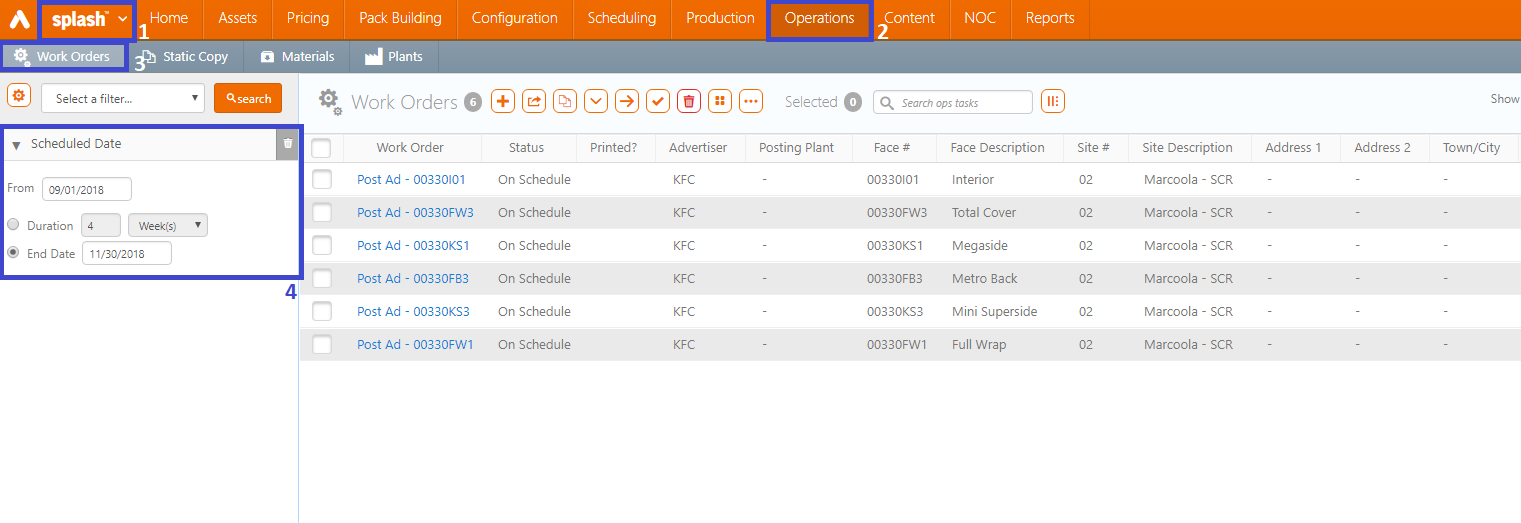
 - To see your Work Orders, in Splash, click the Operations menu item, then the Work Orders tile.
- Filter your search.
- If you want to assign your Bill Poster to several Work Orders at the same time, do the following:
- In Splash click the Operations menu item, then the Work Orders tile.
- Select all the Work Orders of your choice.
- Click the Bulk Edit
 icon.
icon. - In the Bill Poster drop-down menu, select the Bill Poster of your choice.
For more information about how to upload design, see Uploading Designs within Static Campaigns.
Note: Even if your Campaign is already Contracted, you can still change or add segments and Face Bookings, and also Change your Design.
Tip: Now that your Campaign is Contracted, Work Orders for your Face Bookings have been triggered.
The example below filters according to scheduled dates:
Now that you have both a Bill Poster user and a Contracted Campaign with Face Bookings and Design, you can decide to assign this Bill Poster to either:
- The Work Orders of the Campaign – The Bill Poster will only be assigned to the Work Orders of this specific Campaign.
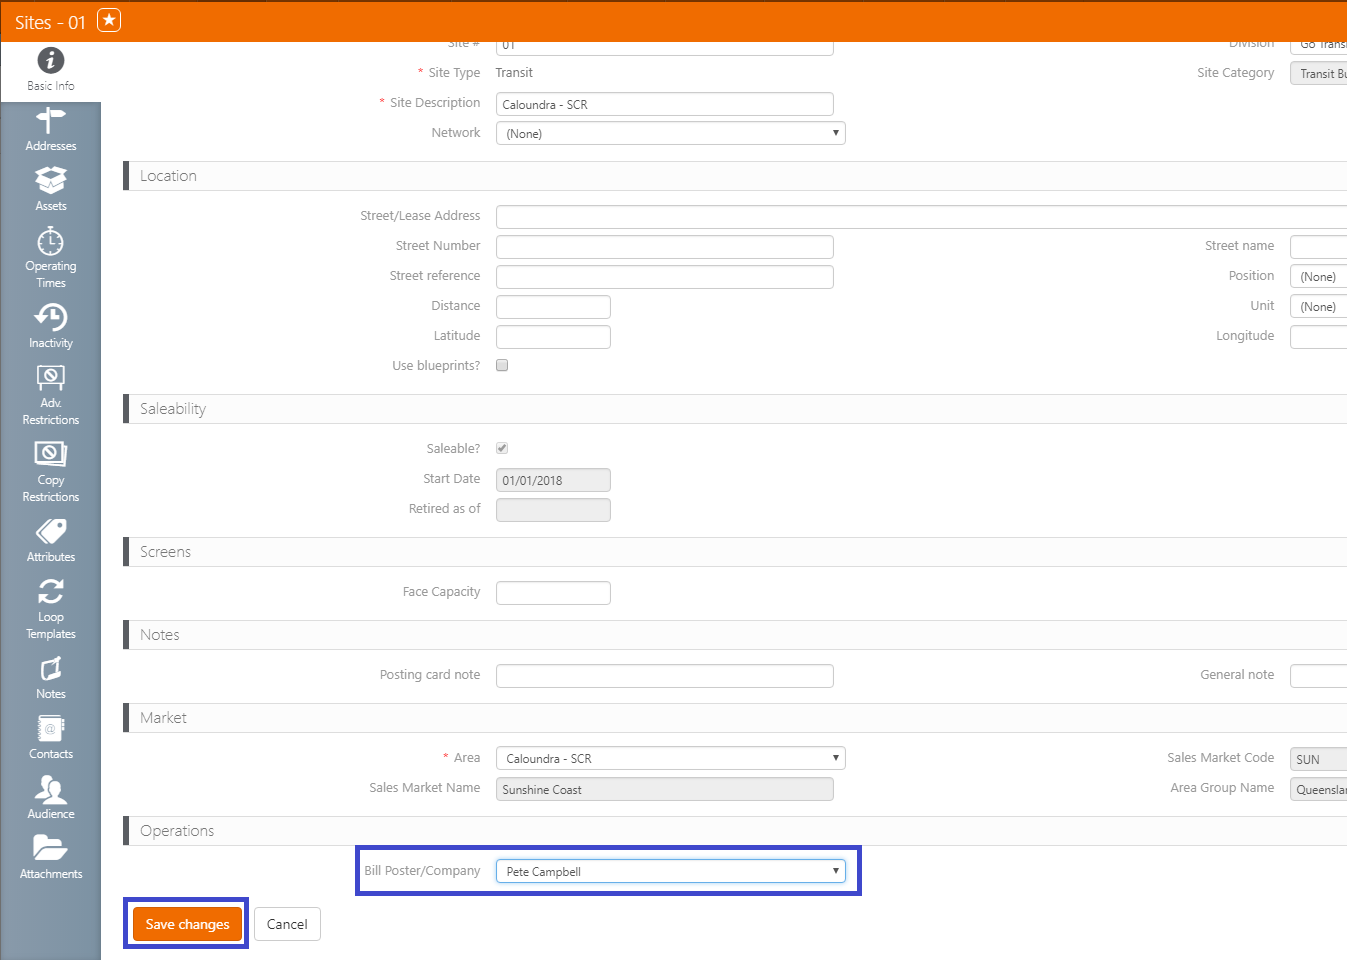
- Sites – The Bill Poster will be assigned to all the faces included in the Site for an unlimited period of time.
To assign a Bill Poster on Work Orders:
- In Splash, click the Operations menu order, and then the Work Orders tile.
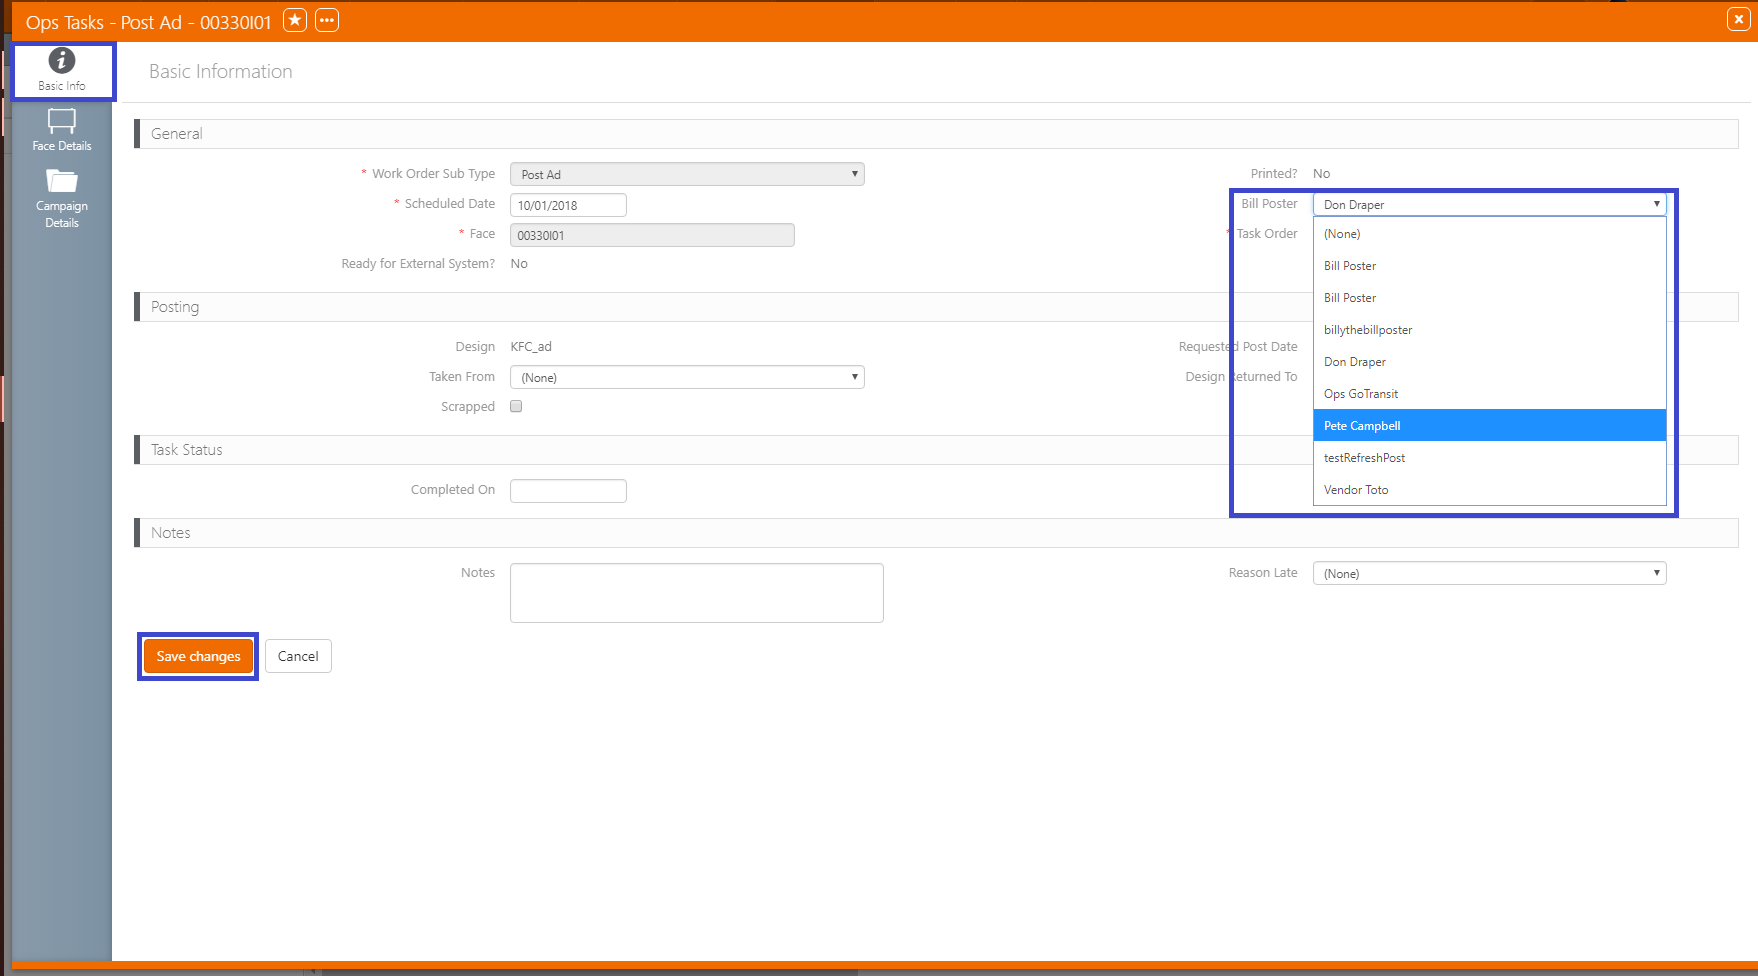
- Click the Work Order of your choice.
- Click the
 icon.
icon. - In the Bill Poster drop-down menu, select one for this Work Order.
- Click Save changes.
The Work Order page is displayed on the Basic Info tab.
To assign a Bill Poster on sites directly:
Download the POST App via the Play Store or the App Store.
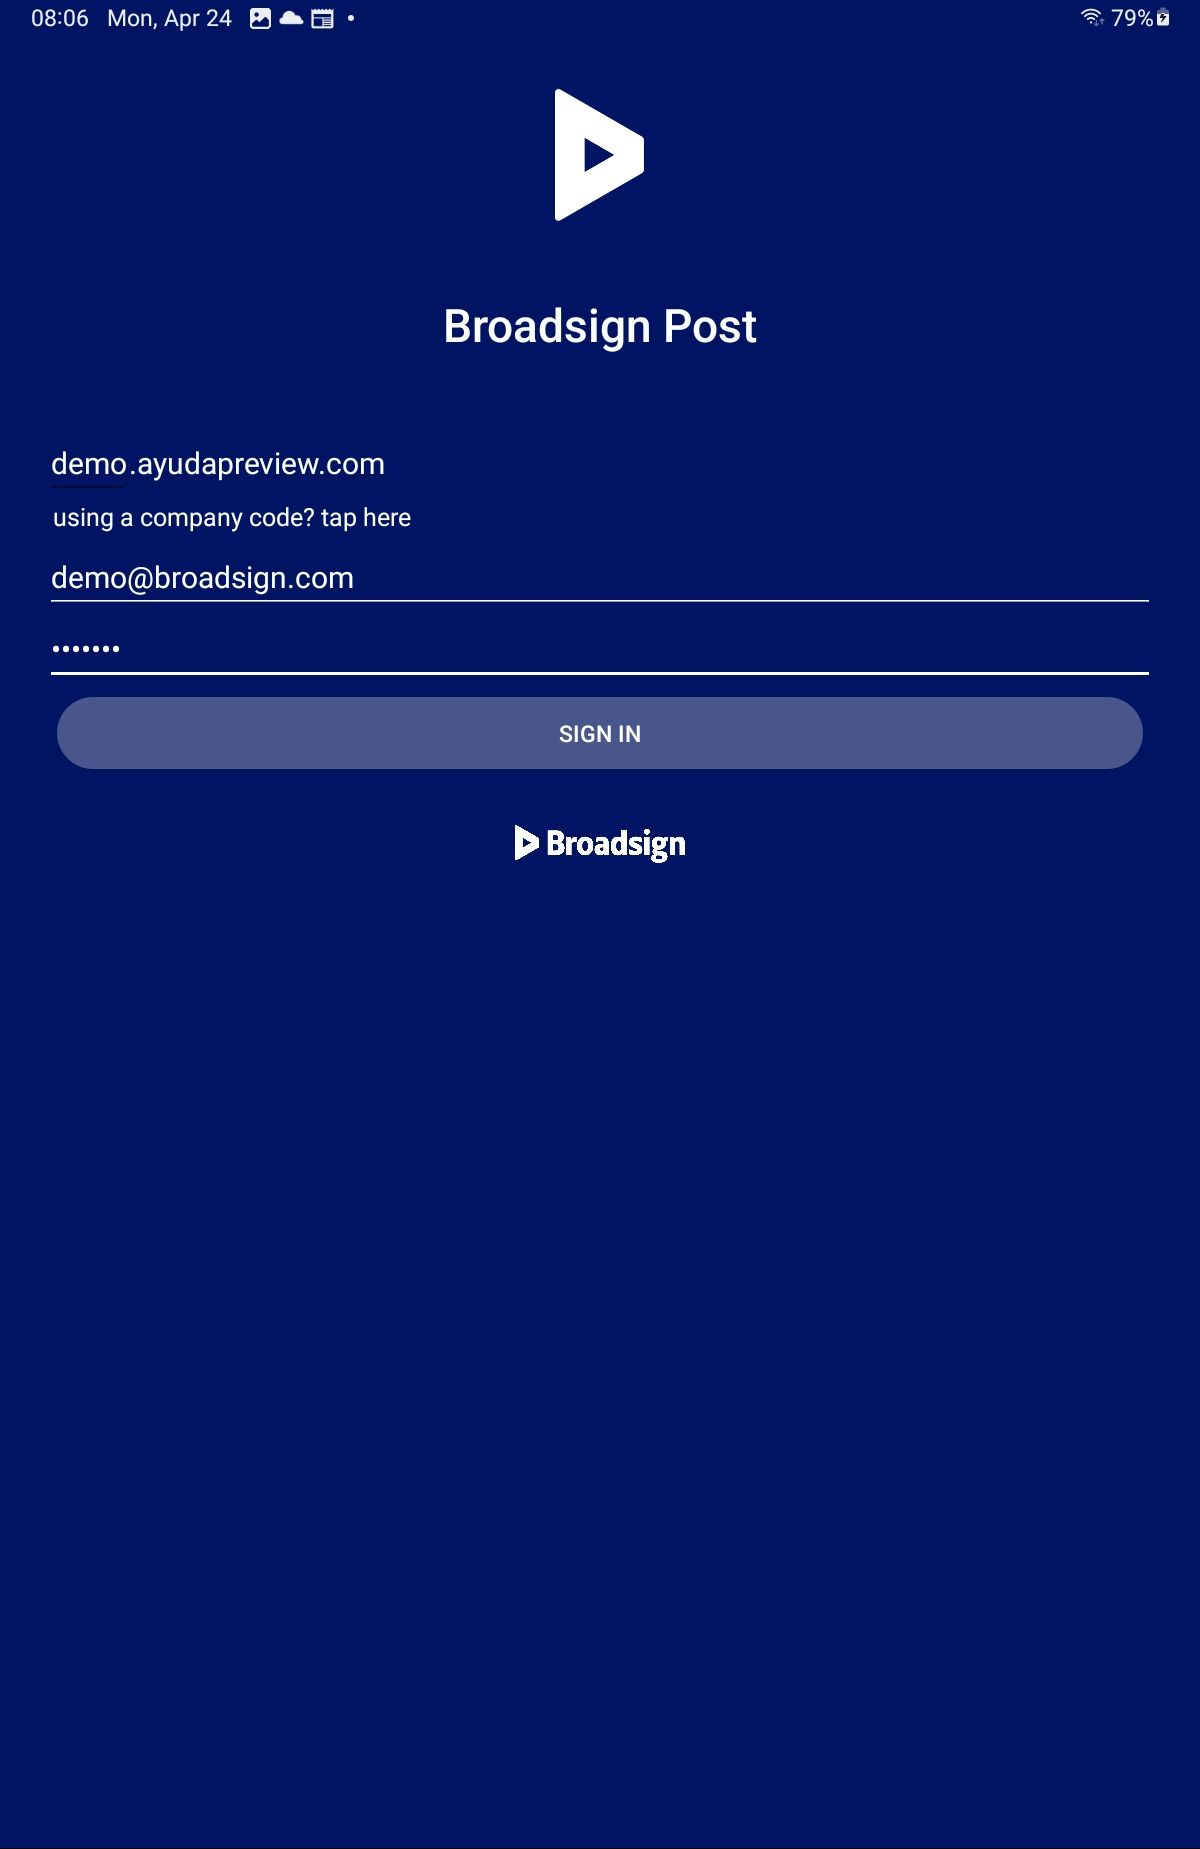
To sign in, you must enter the following information:
- Company code – The Web Address of the Broadsign Ayuda Platform of your company. The address is usually as follows: companyname.ayudacloud.com.
- Username – Username given to the Bill Poster user in Broadsign Ayuda (see Set up a Bill Poster User for more information).
- Password – Password set up for the Bill Poster user in Broadsign Ayuda (see Set up a Bill Poster User for more information).
Note: When creating a user in Broadsign Ayuda, you can tick the box Must change password, which will allow the Bill Poster to choose their own password afterward.
When all three steps are filled, tap SIGN IN.
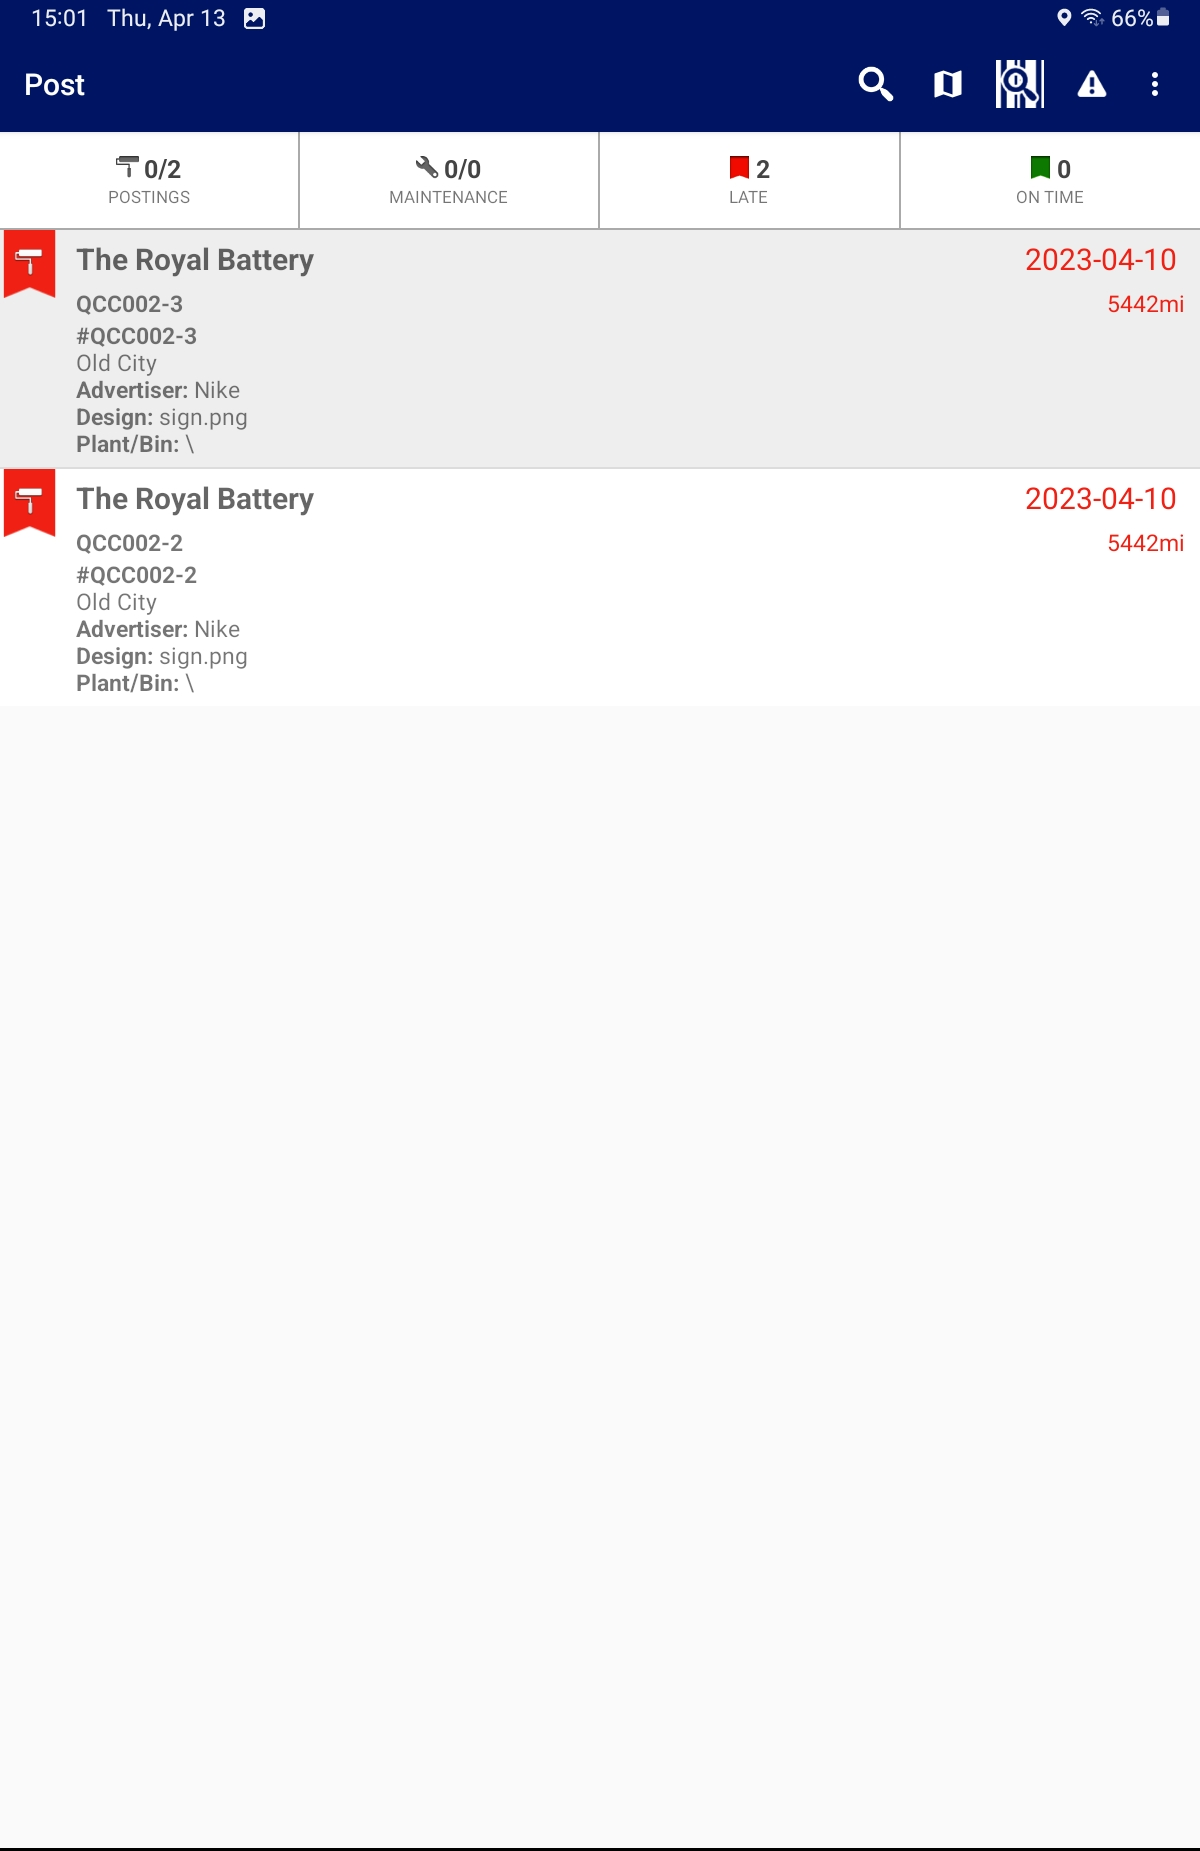
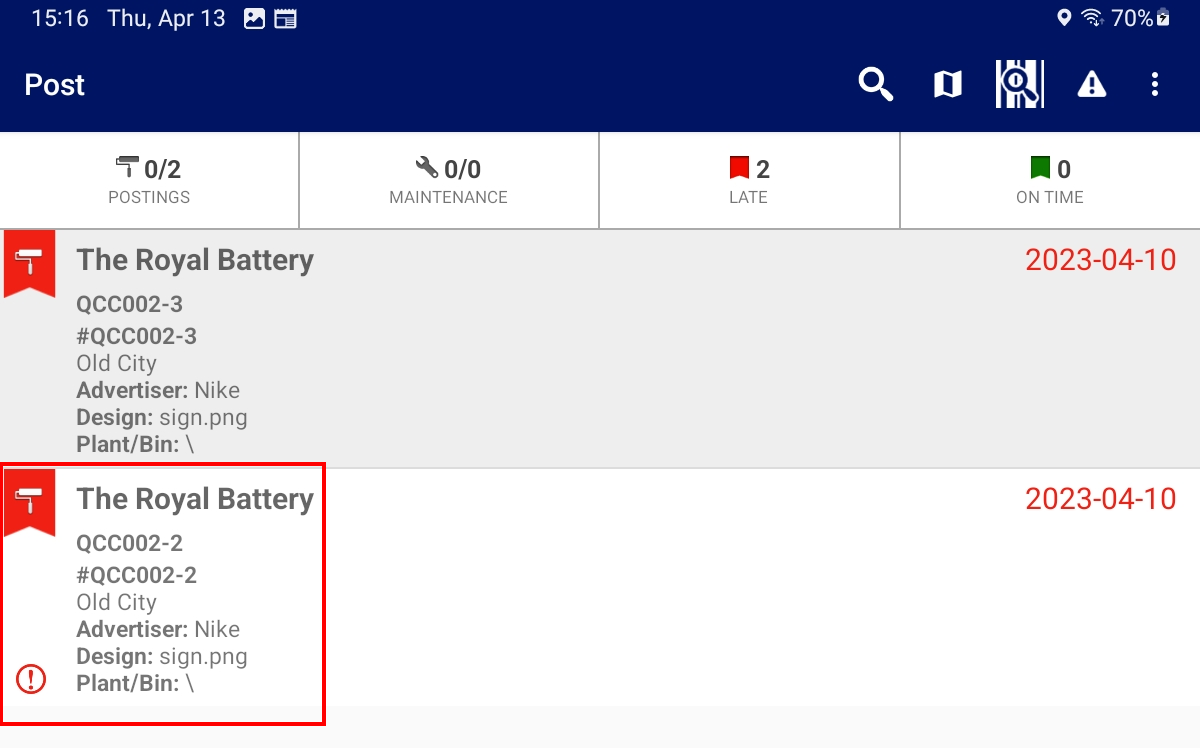
The POST app main interface offers the following sections:
| Section | Description |
| Postings | Posting tasks assigned to the logged Bill Poster. |
| Maintenance | Maintenance tasks for damaged Faces assigned to the logged Bill Poster. |
| Late | Postings or Take Down tasks that are still to be carried out after their due date. |
| On Time | Postings and Take Downs that are to be carried out. |
The POST app main interface also offers the following icons:
| Icon | Description |

|
Allows the Bill Poster to search for a specific Face. |

|
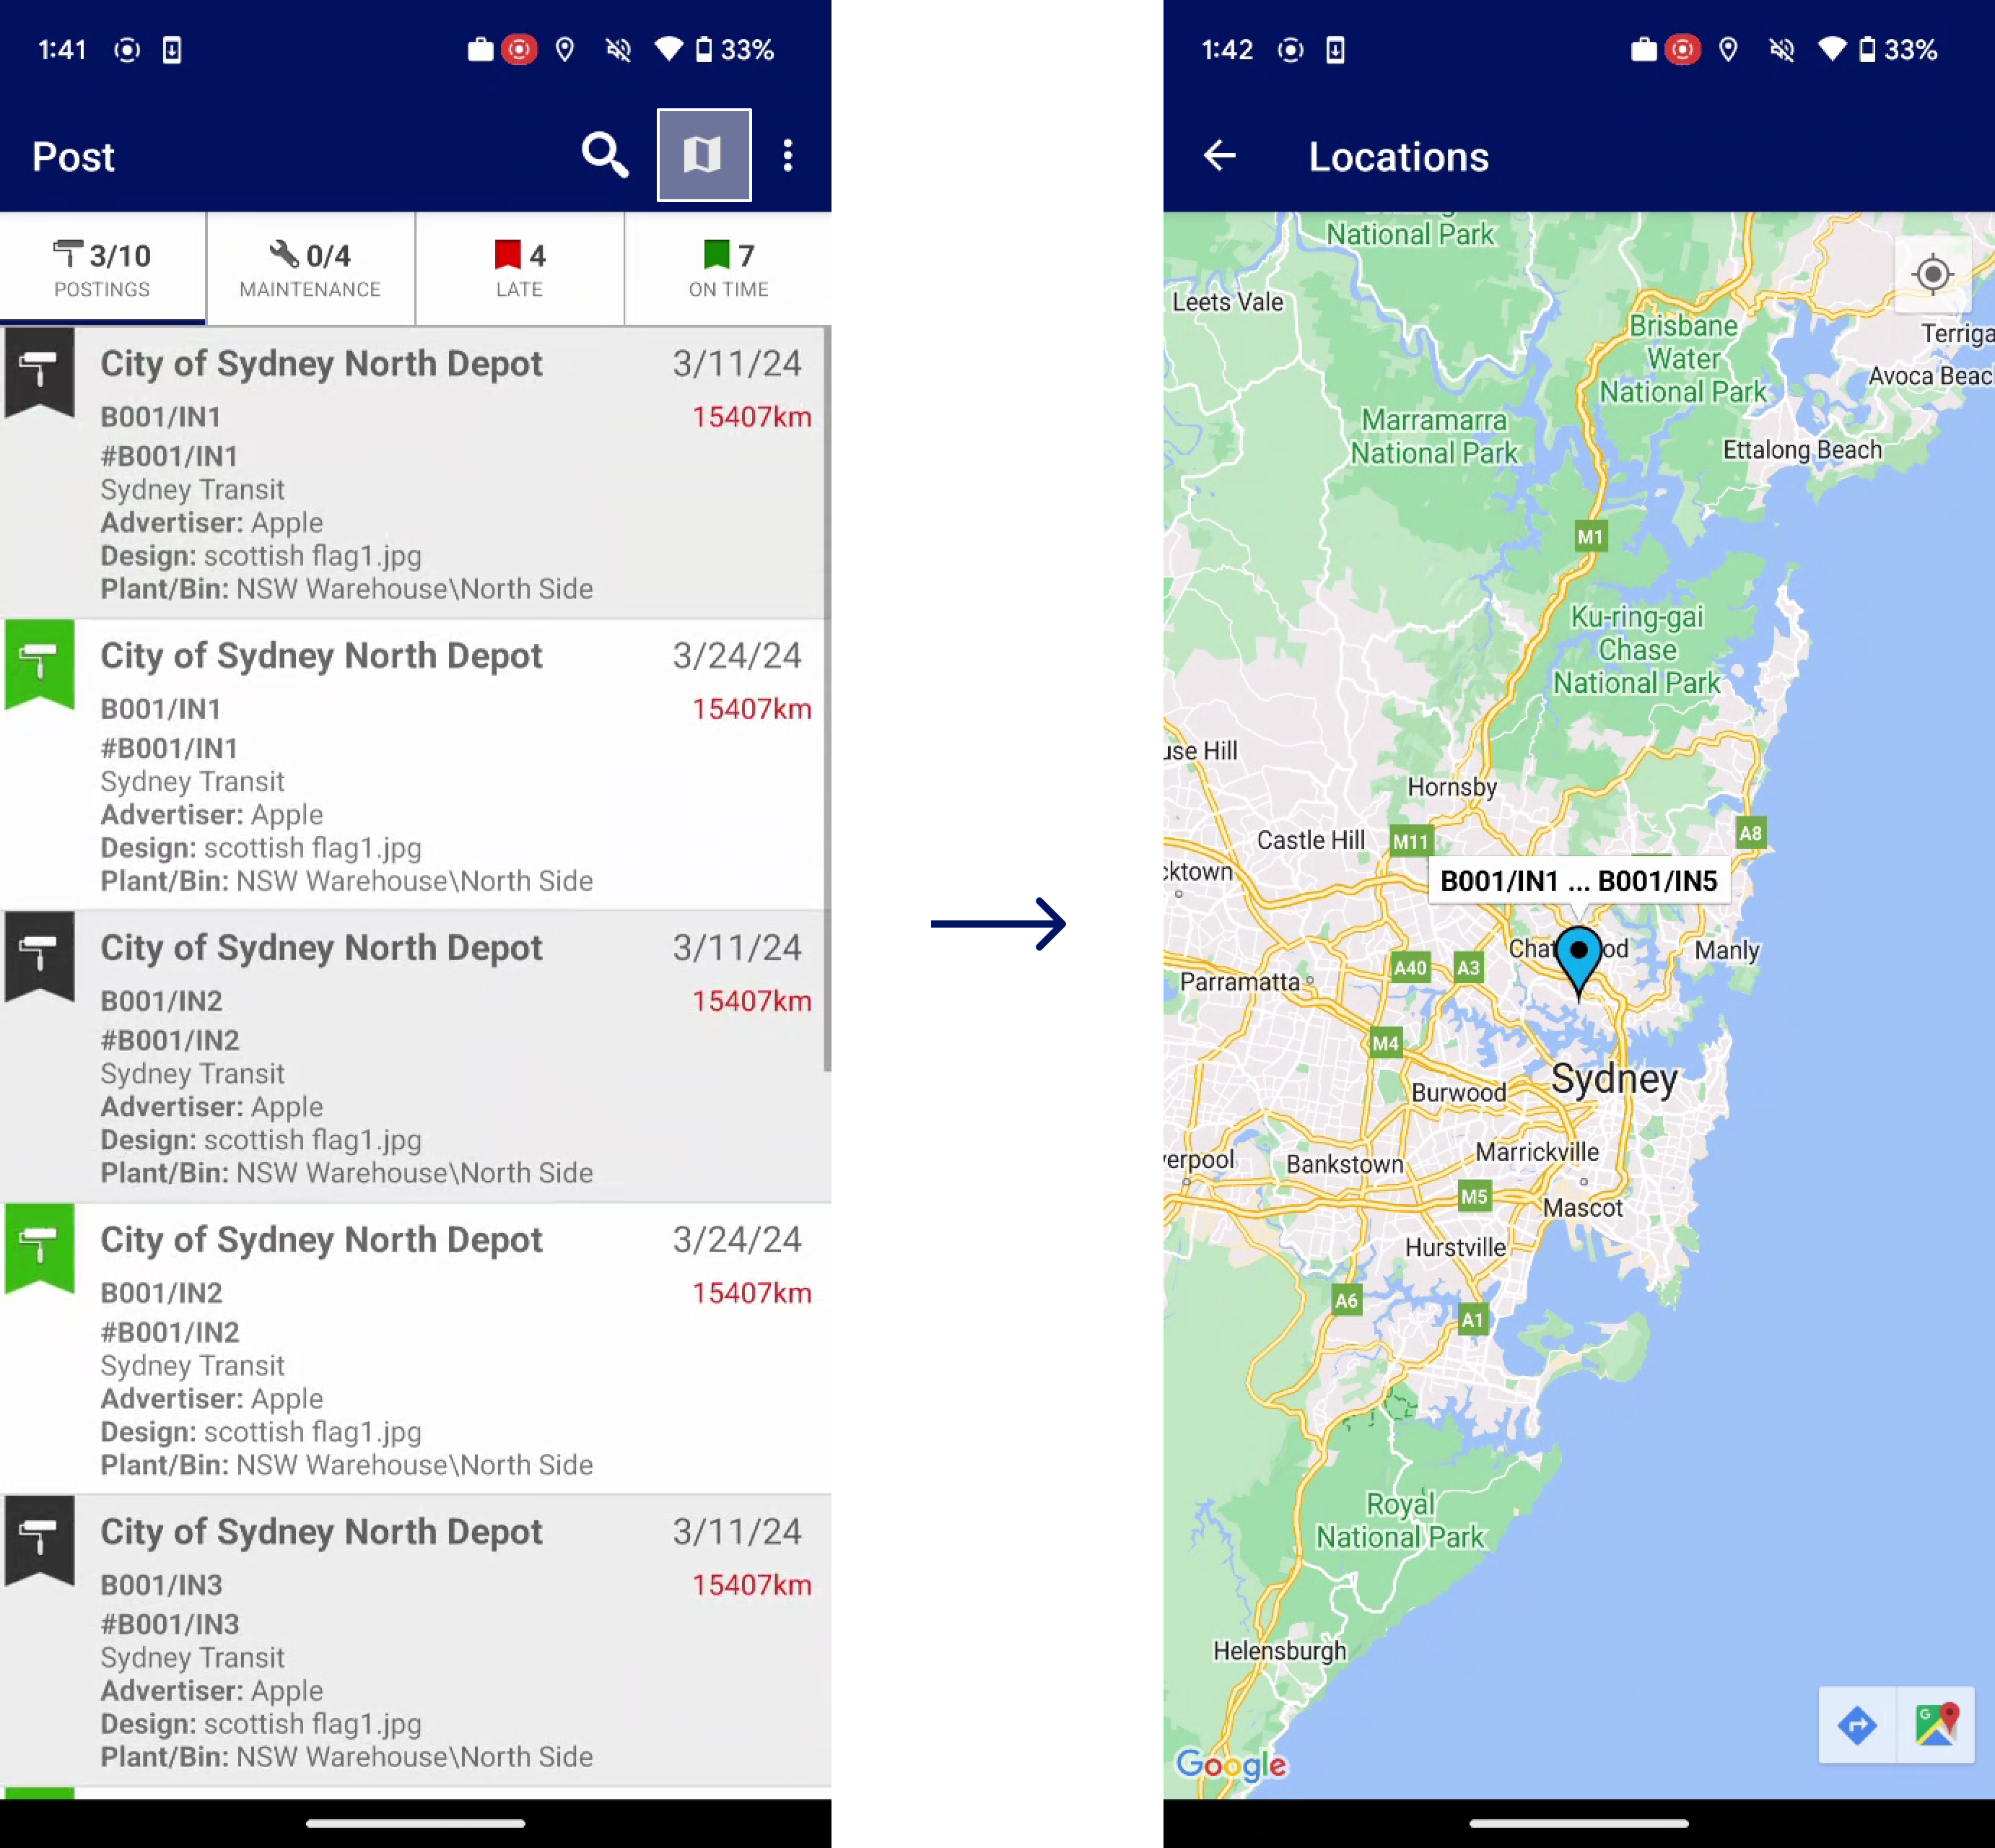
Allows the Bill Poster to see, on a map, the locations of the Faces for which they have Work Orders assigned (in the extent that those Faces have a defined location). |

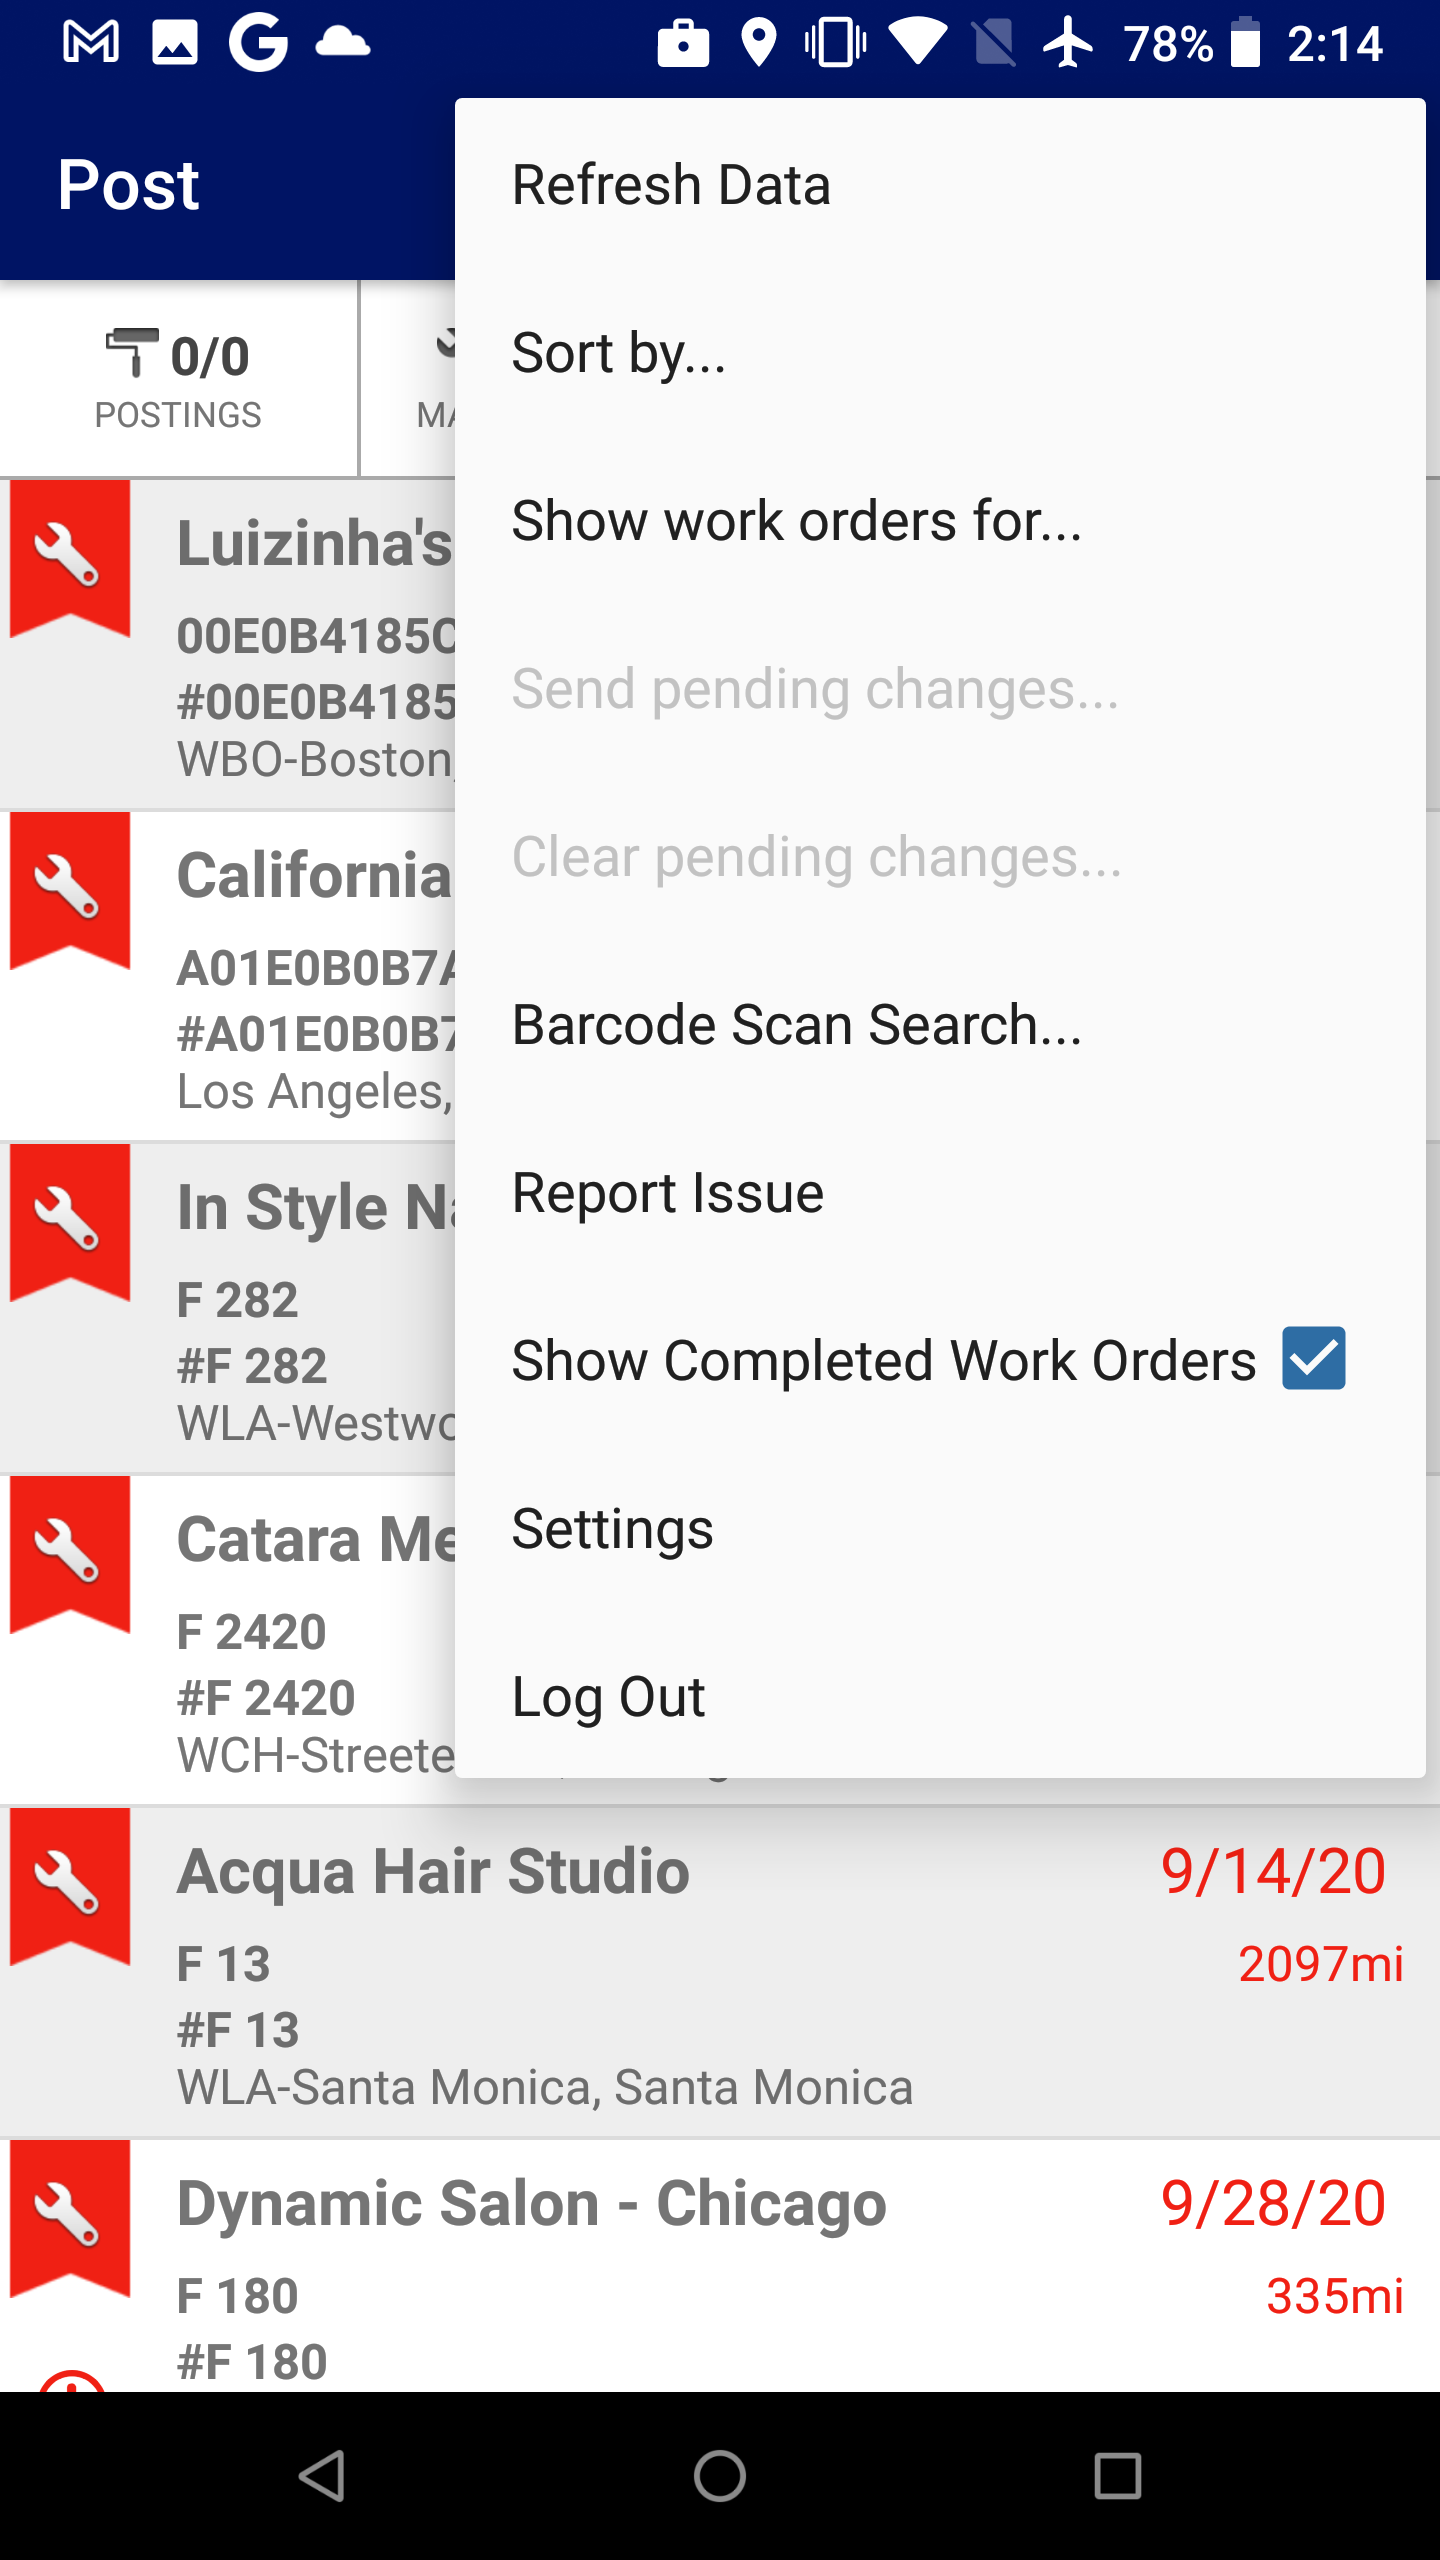
|
Gives further options and settings to the Bill Poster:
Note: If display settings for Work Orders are set at 30 days by default, Bill Posters will not be able to see Work orders forecasted in more than 30 days. |
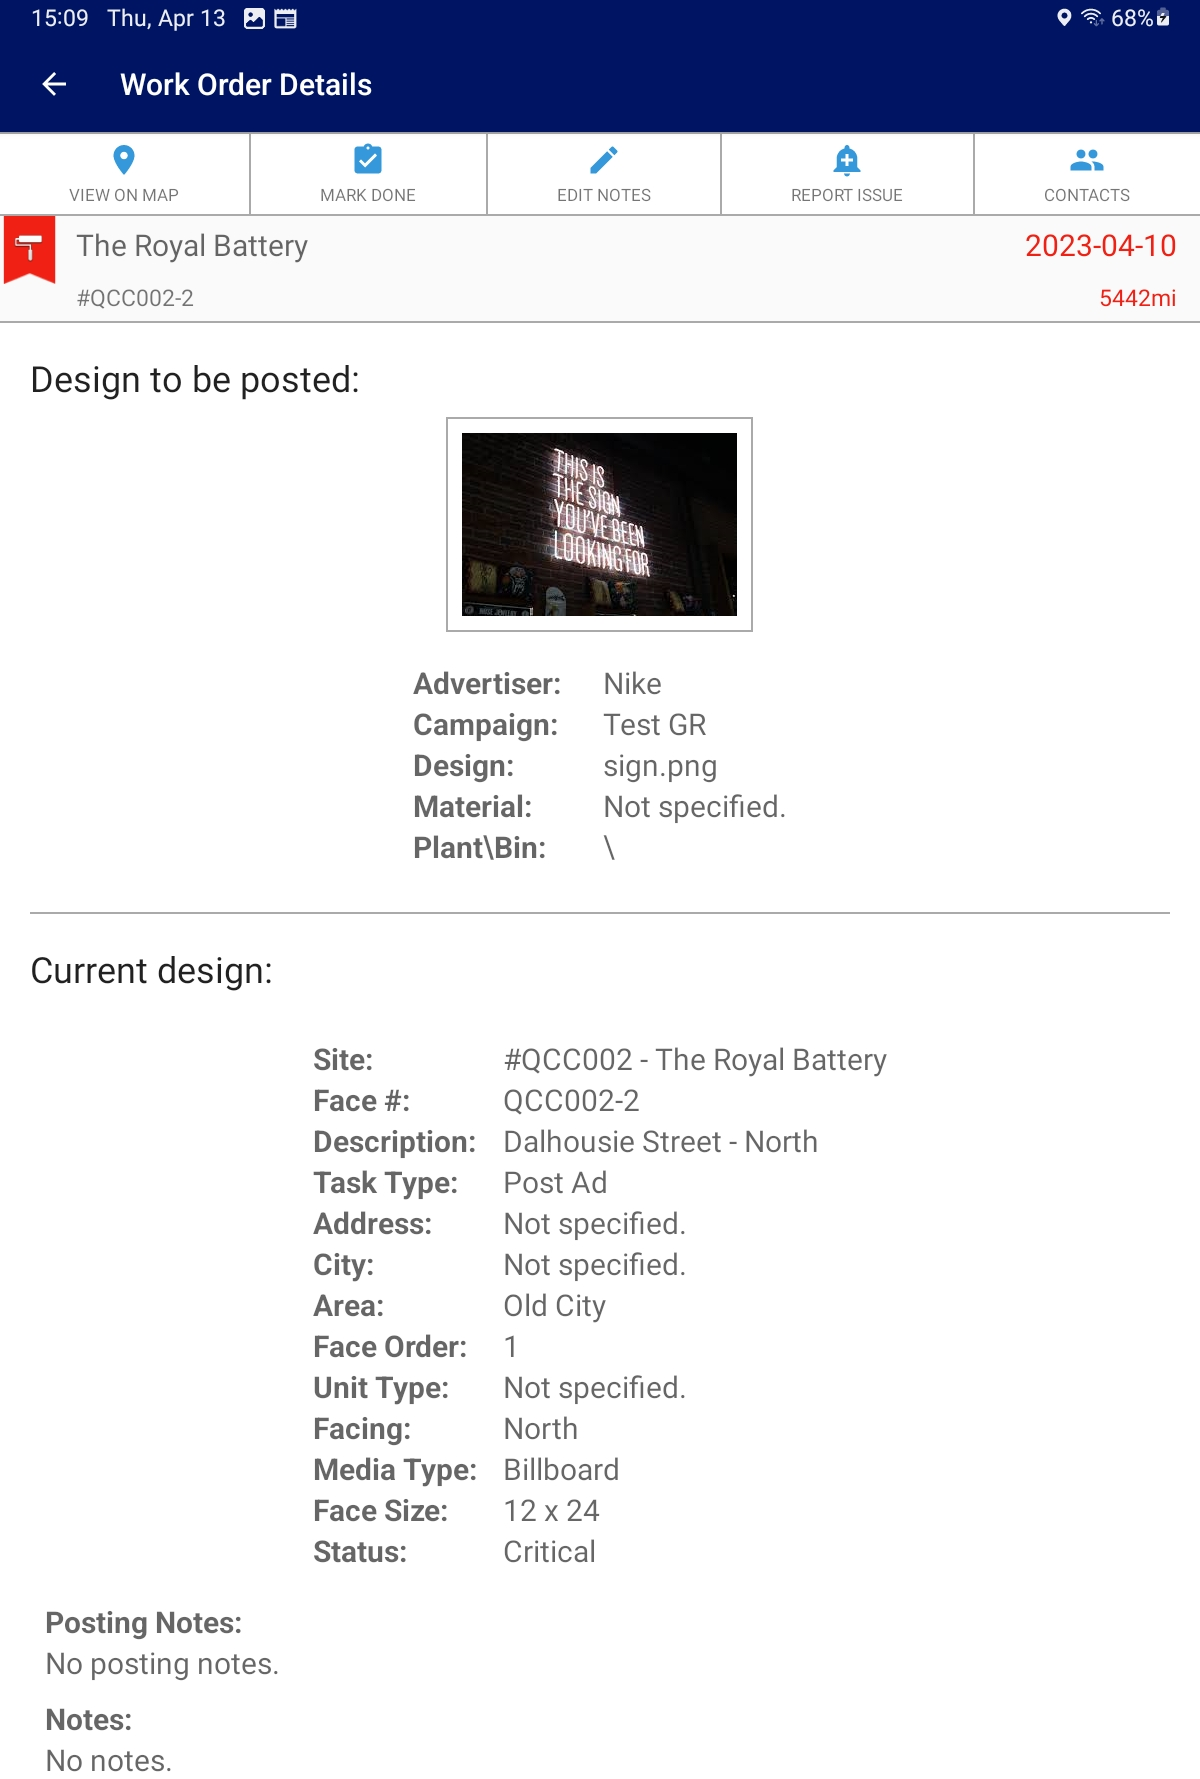
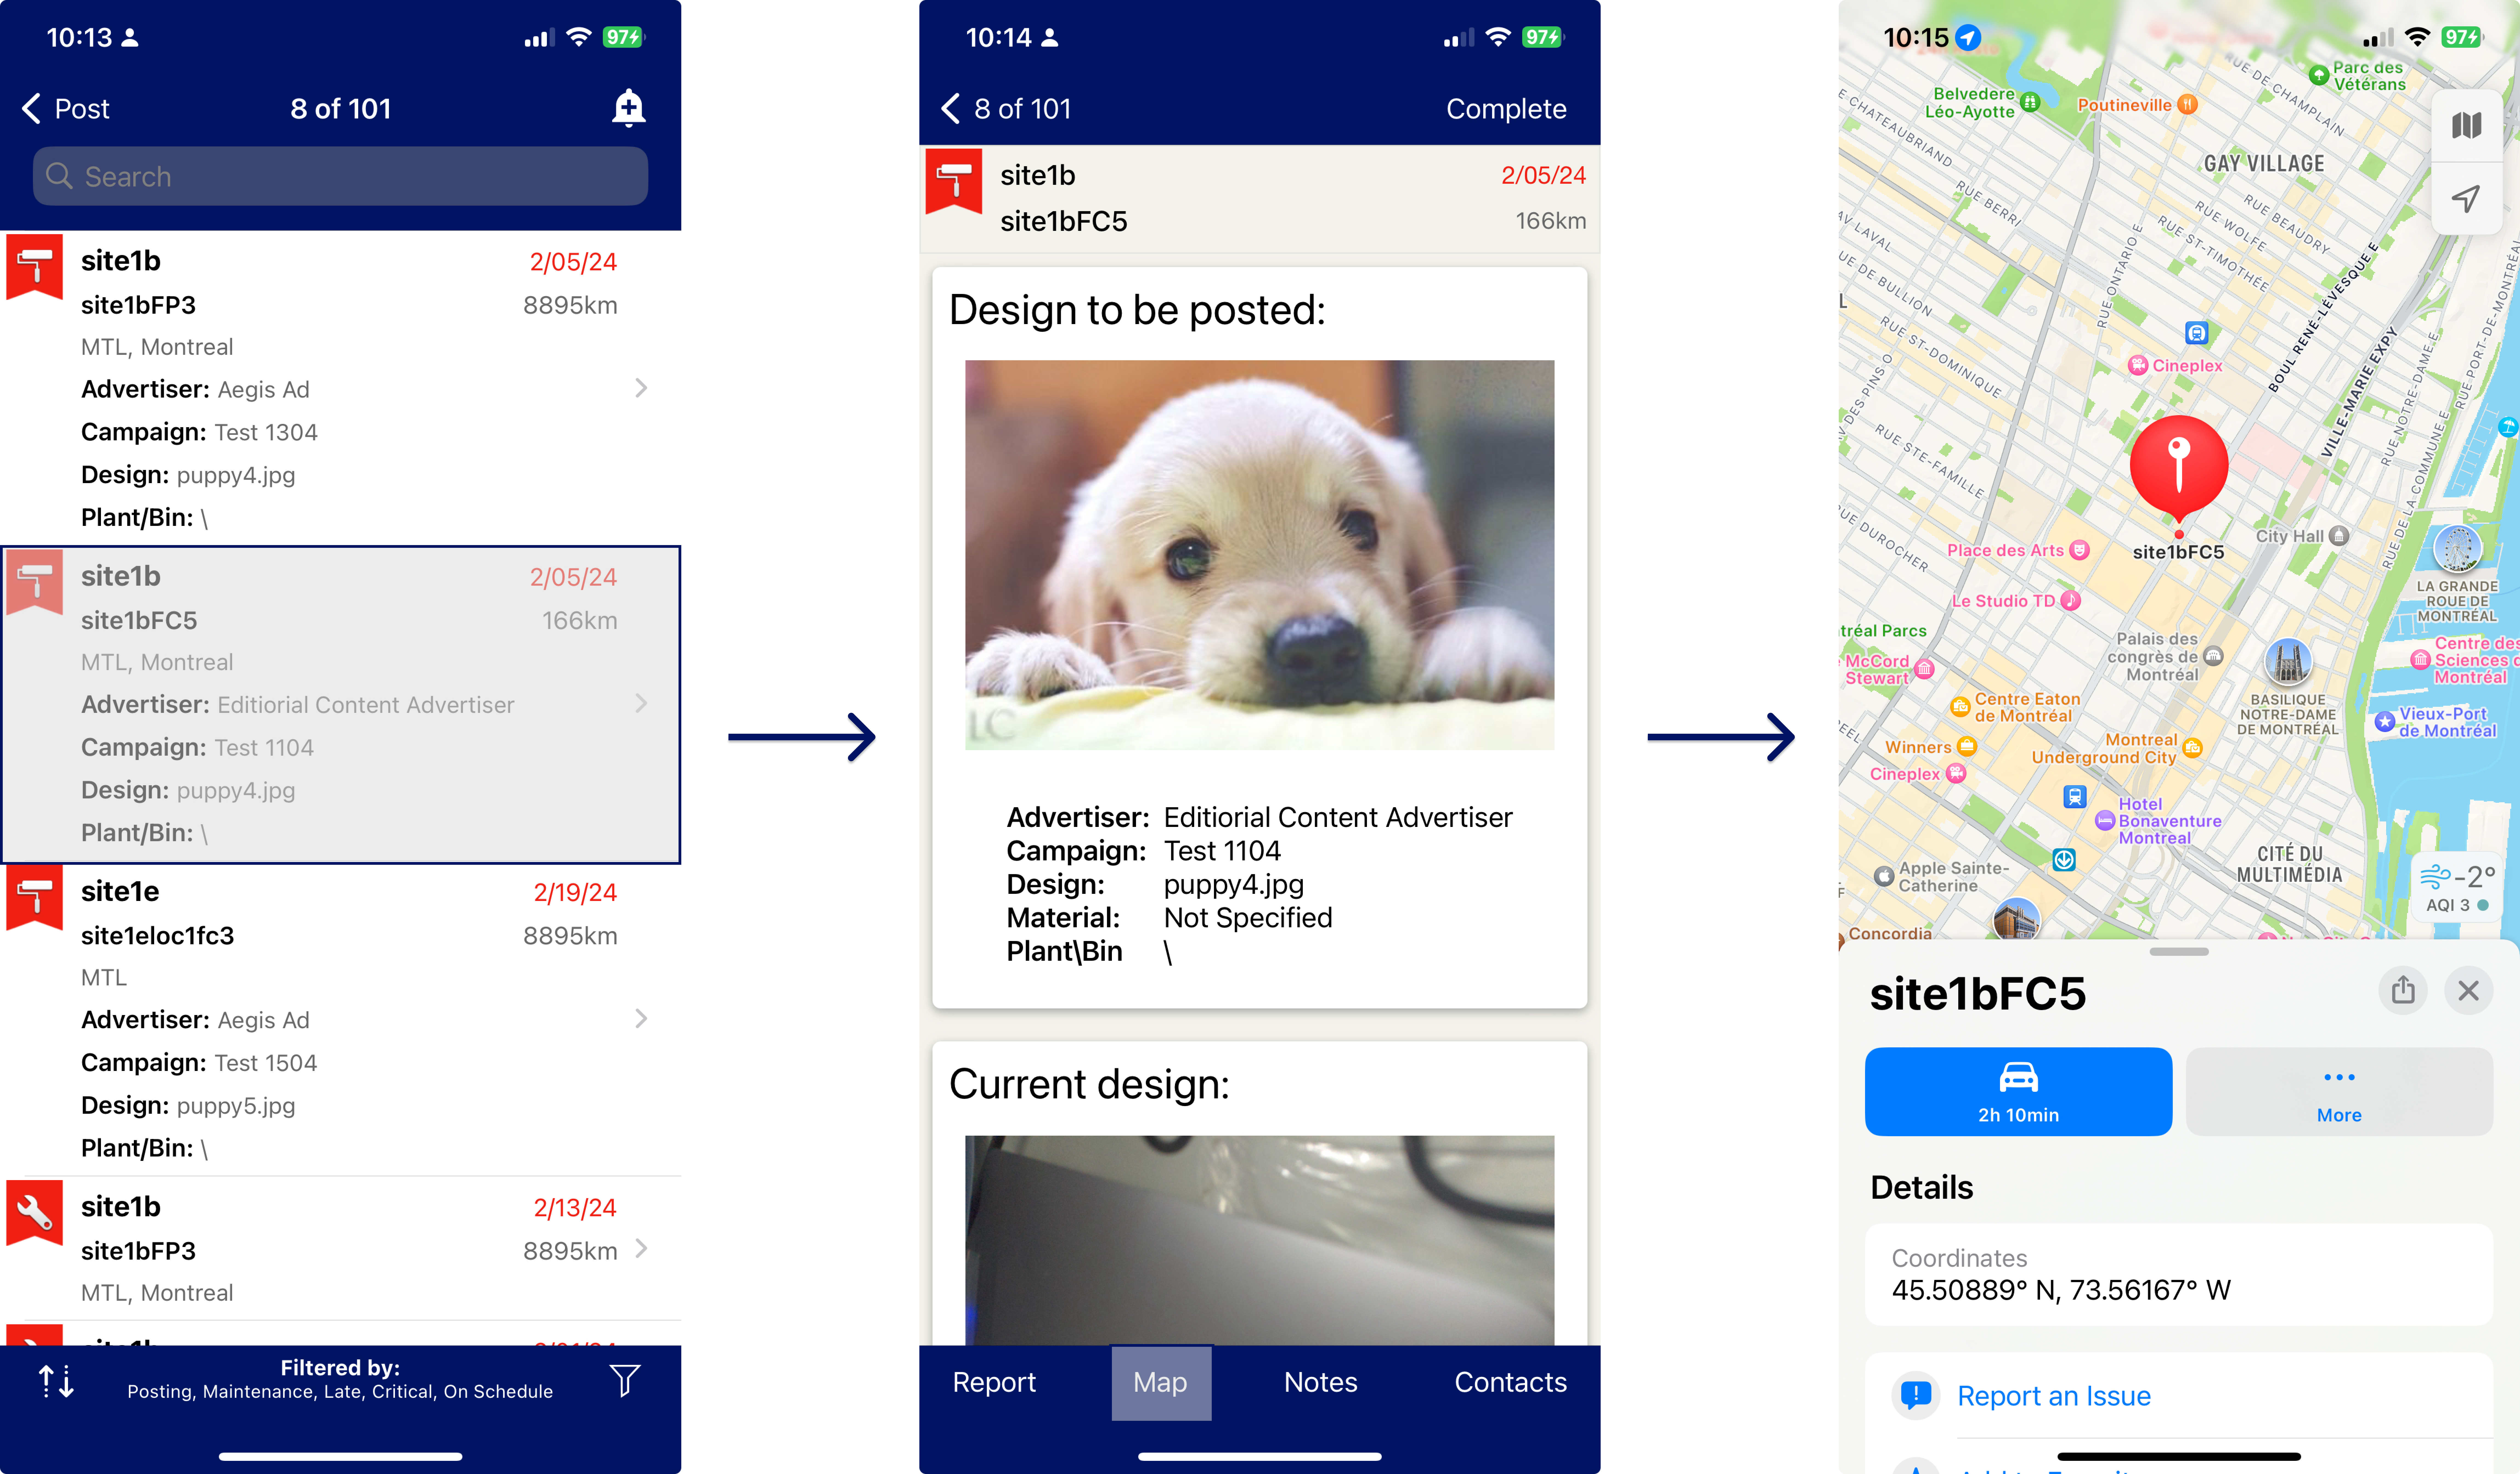
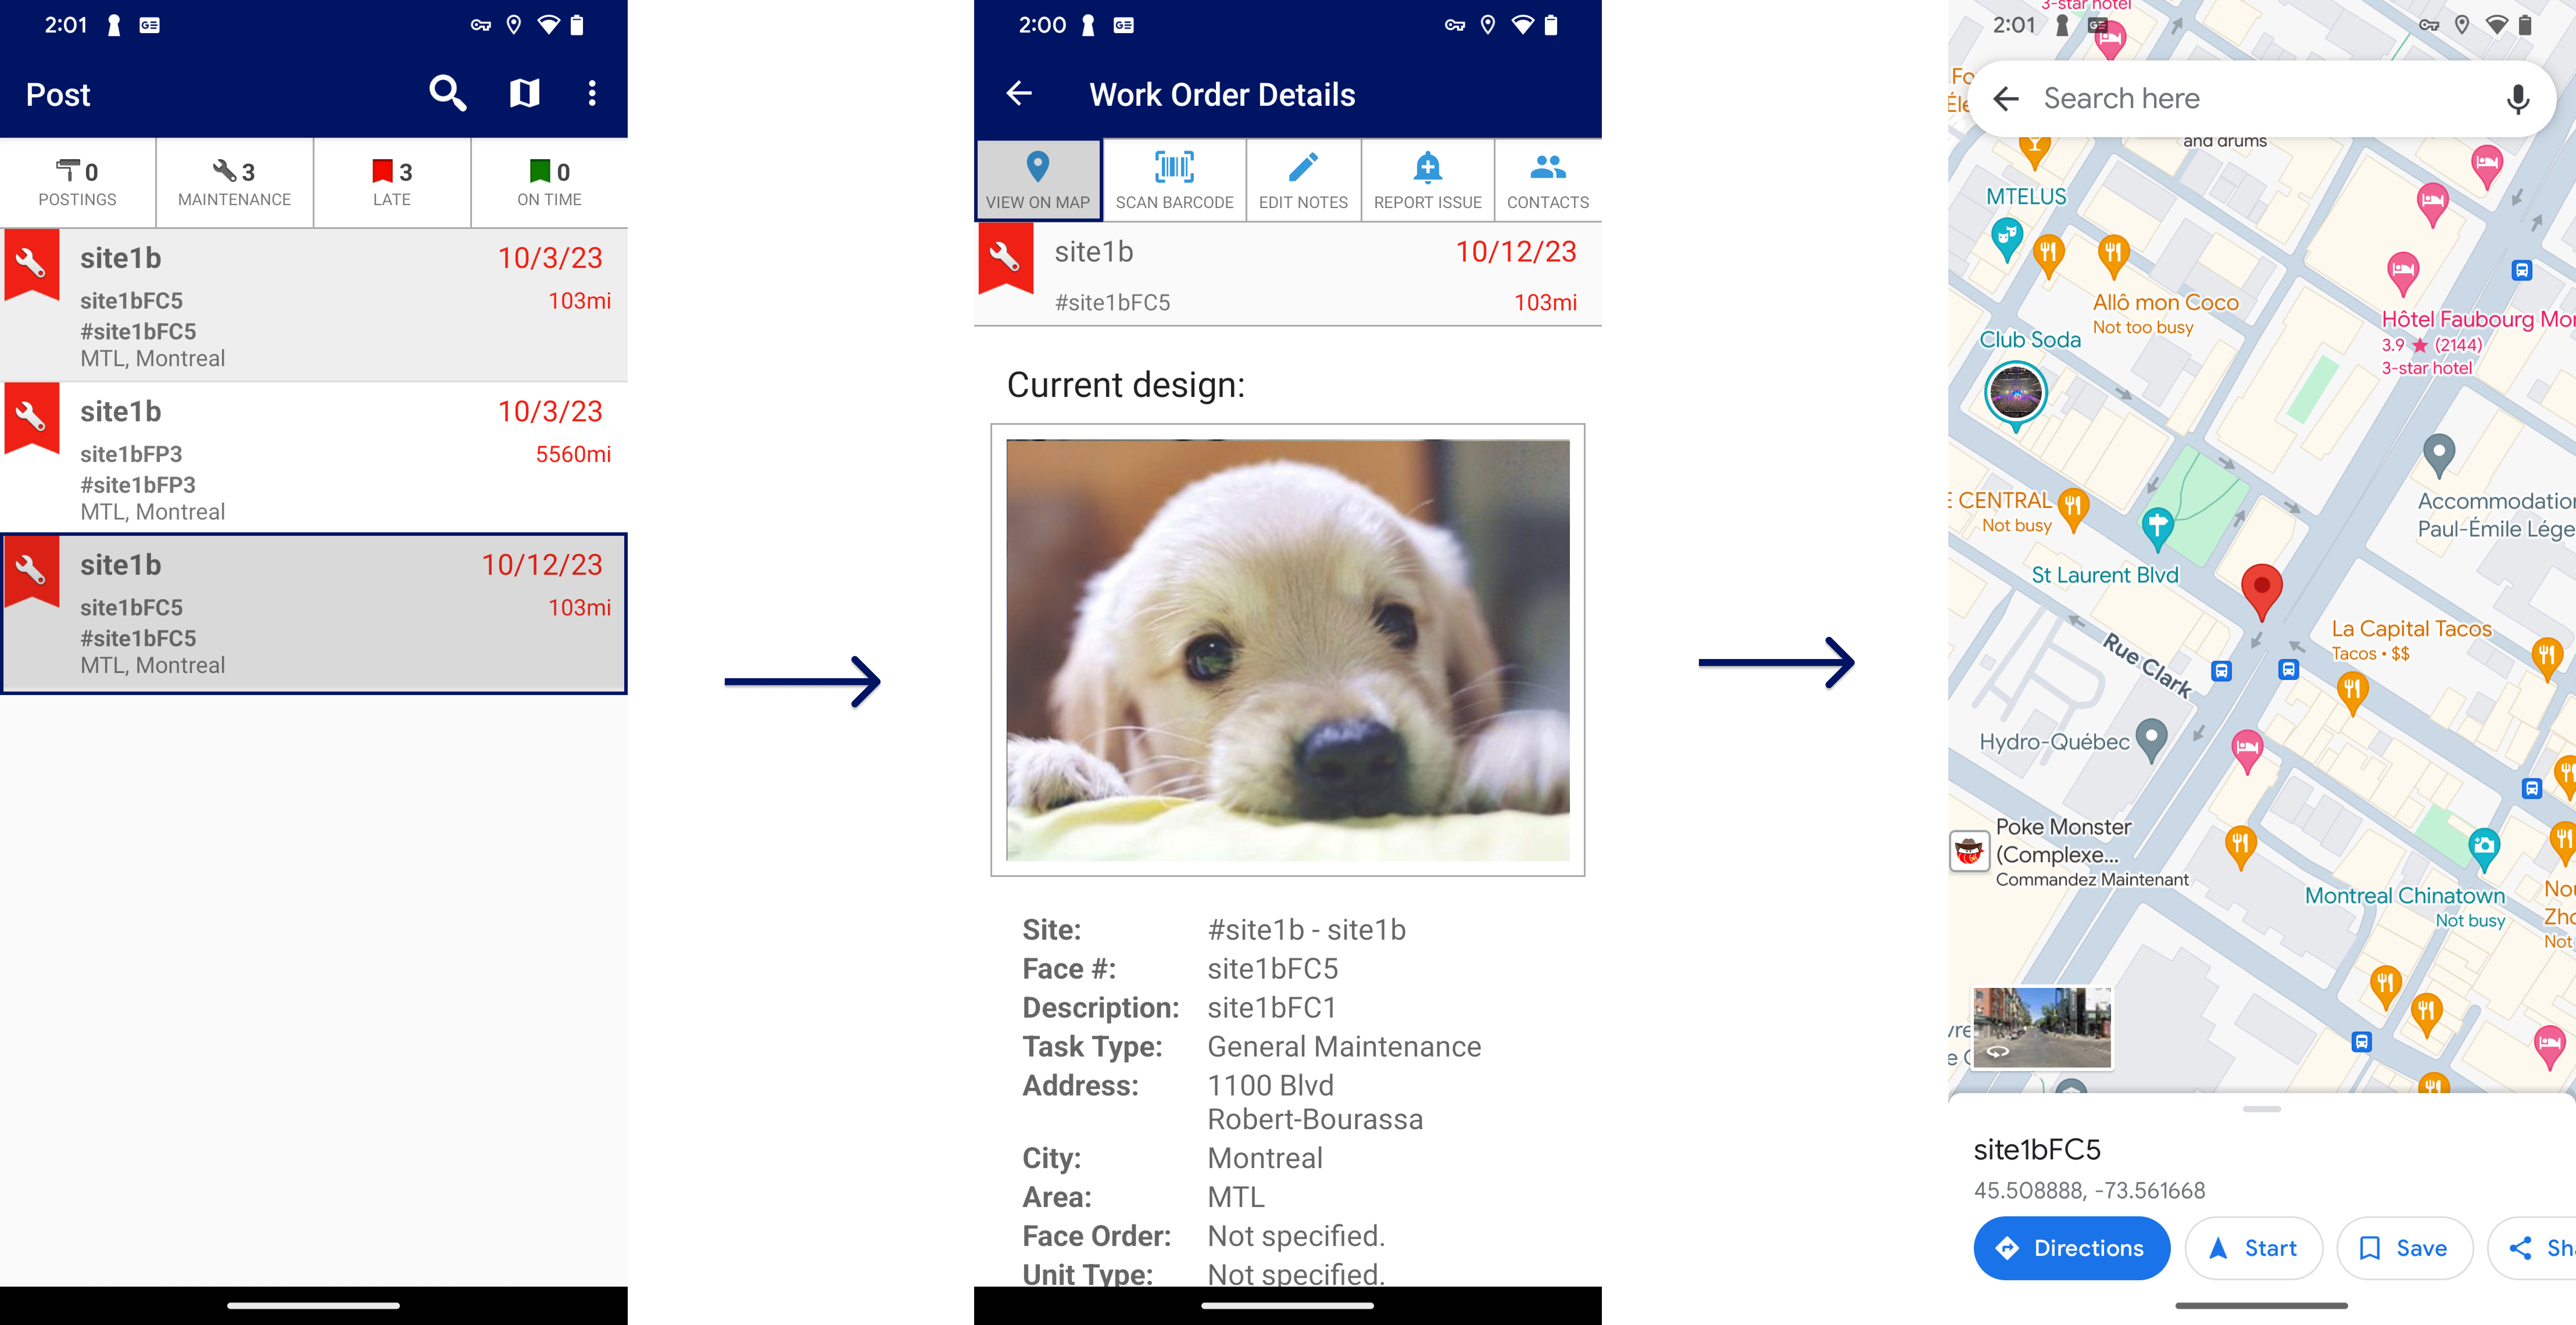
Extensive information is available for Work Orders and Faces.
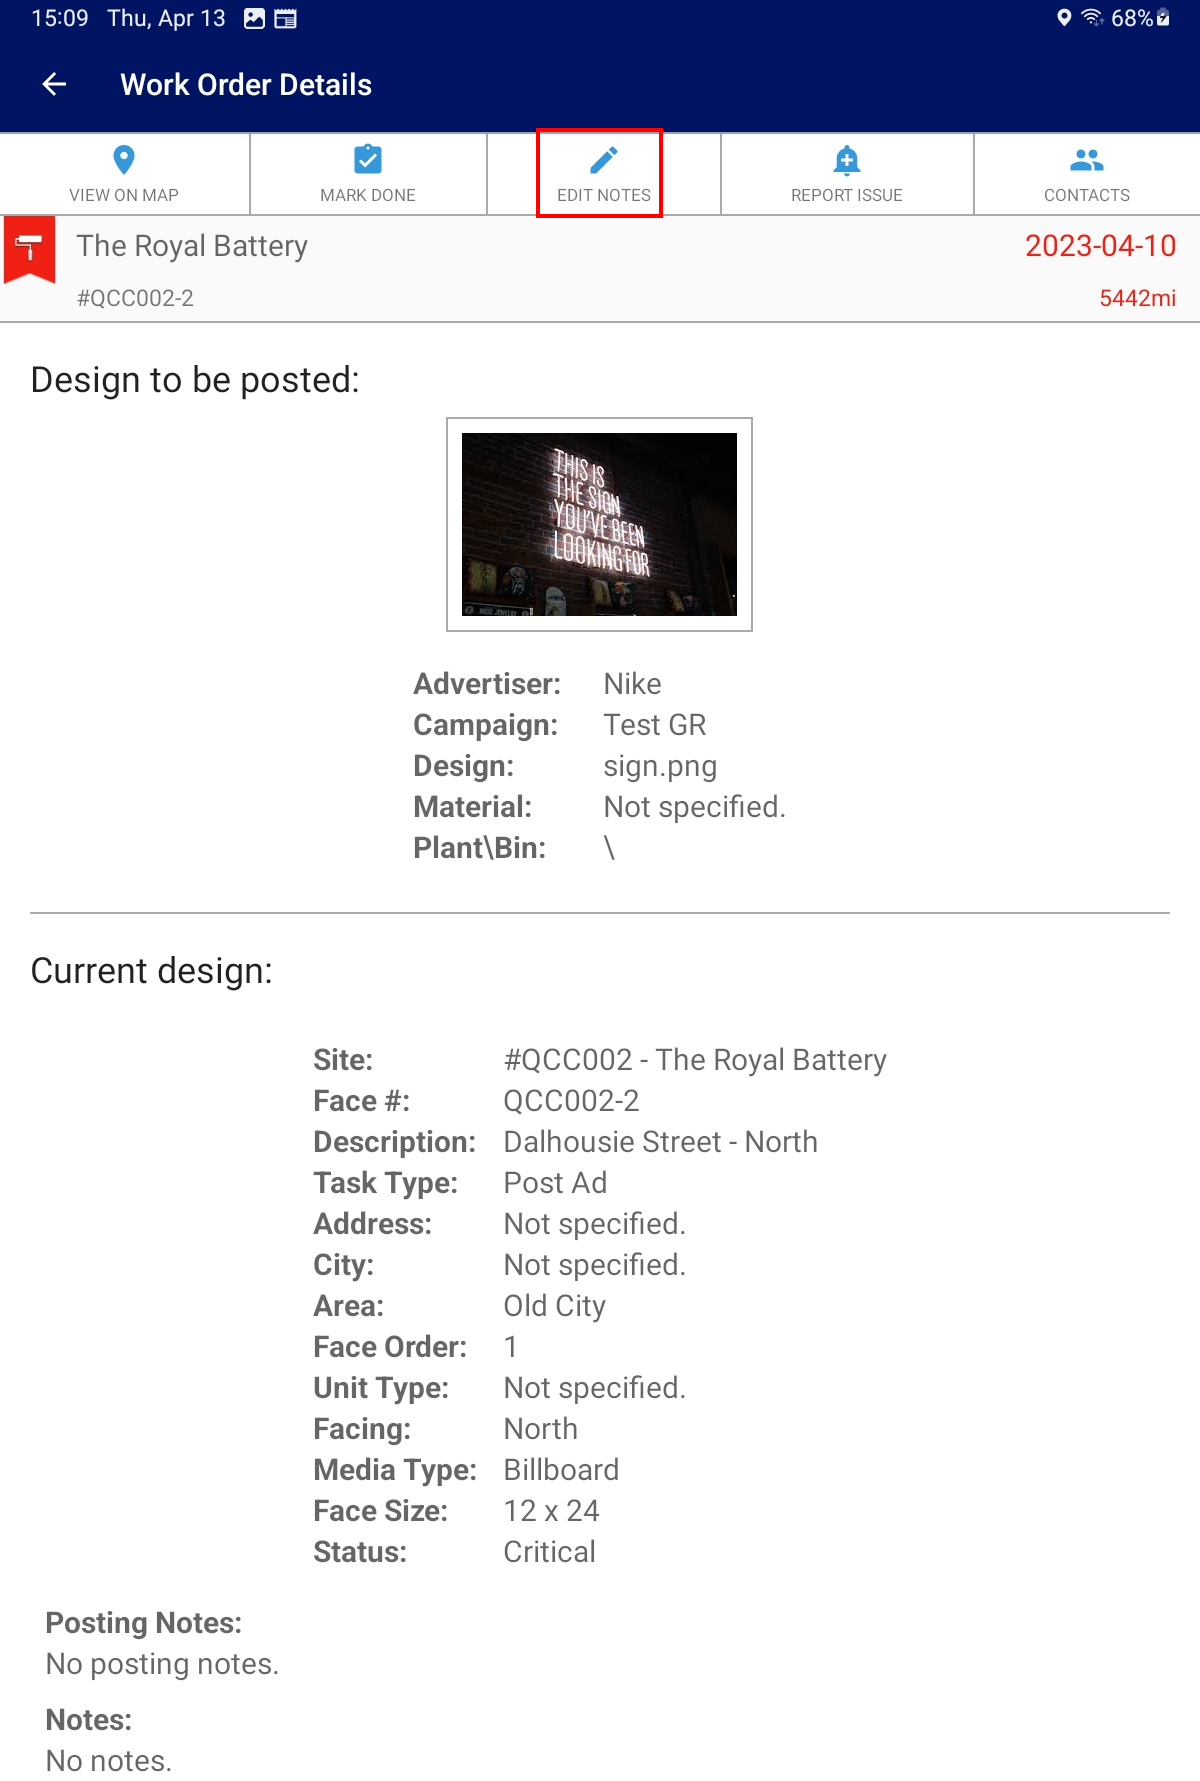
In addition to the picture of the Design to be posted, the advertiser and the Campaign name, you can define the material of the copy (whether it is Vinyl, paper, etc.) and the Plant that produced the copy.
When applicable, POST displays the Current Design in place on the Face.
Then, the information list includes:
- Site name
- Face number
- Site Description
- Task Type (either it is a posting or take down)
- Address
- City
- Area
- Face Order (applicable to Faces including several panels)
- Unit Type (location type)
- Facing (Compass direction of Face)
- Media Type
- Face Size
- Status
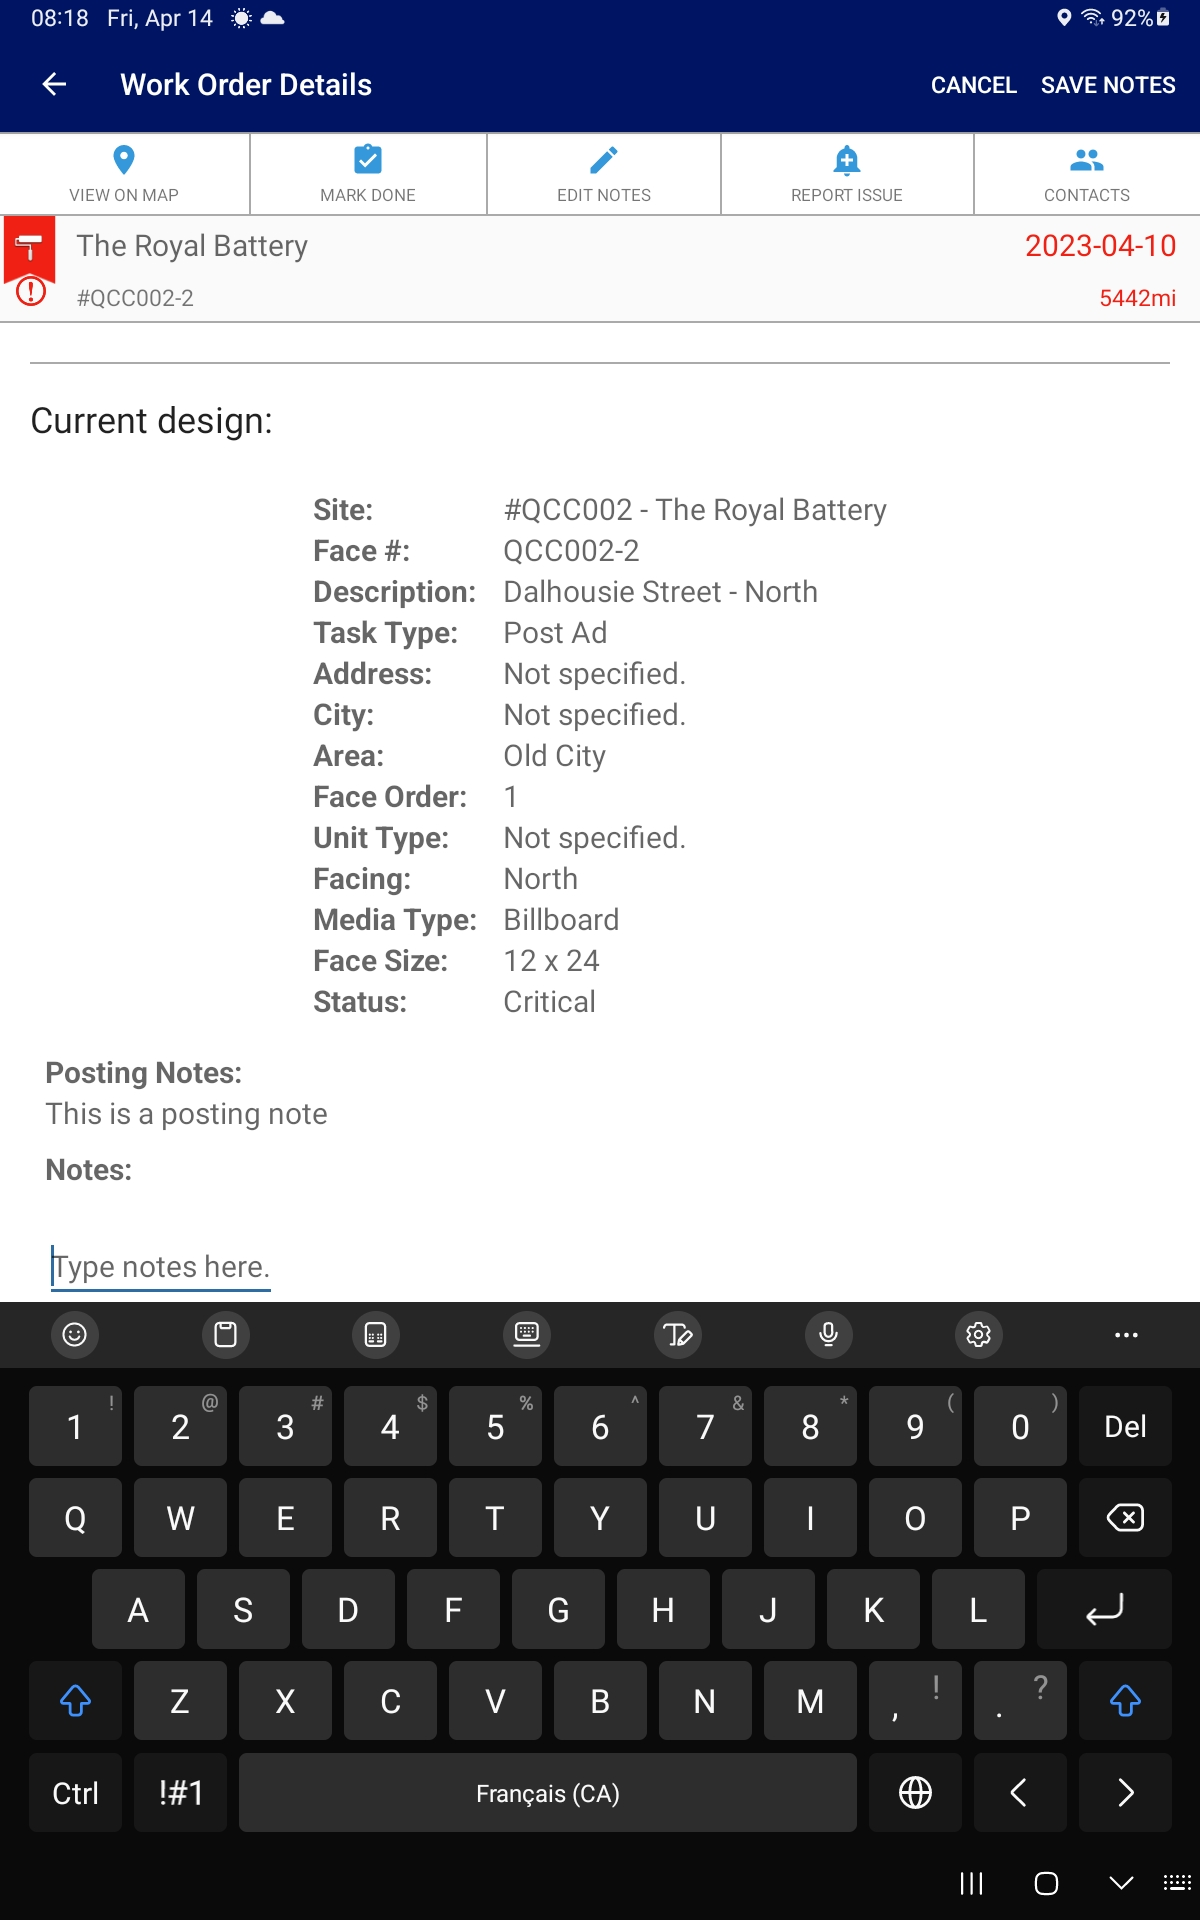
You can add Posting Notes (from the Face or Site pages themselves) to warn about potential Damage on Face/Site or other characteristics.
When Faces (or Sites) have Posting Notes, that will trigger a warning sign ![]() on the Work Order.
on the Work Order.
Notes can be added from Work Orders or by tapping the ![]() icon
icon
The following Bill Posting tasks are available:

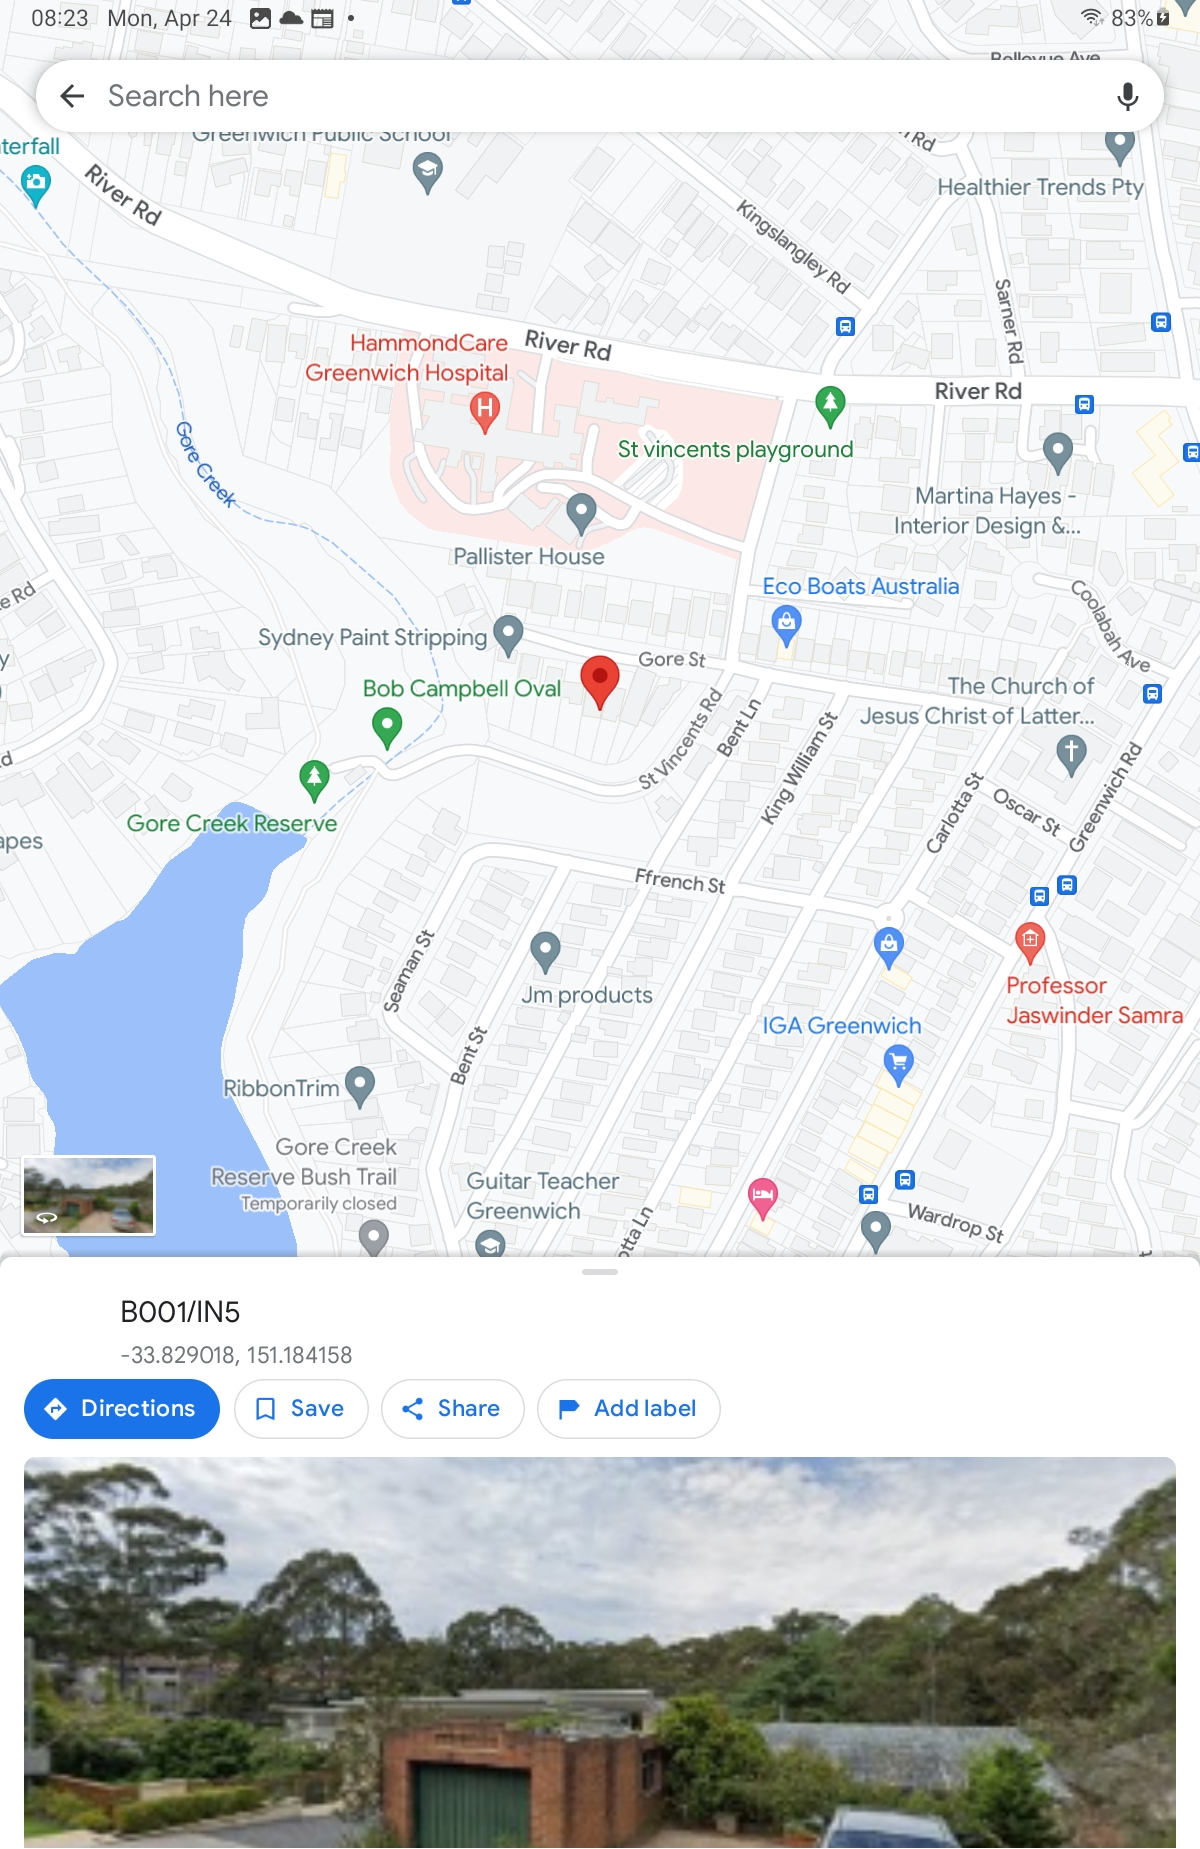
View on Map
Shows the location of the Face for which a Work Order has to be done.
Map View in the POST App
Bill Posters can use the map view to pinpoint the exact position of their work orders on the map.
On iOS and Android, upon opening the work order, tapping the map icon will reveal it on the map as a single red pin.
Android users also have the additional option to view all work orders on a single map by tapping the map icon at the top. If one or more work orders share the same latitude and longitude values, a blue pin will be displayed on the map. Tapping on this blue pin will present a list of work orders sharing the same location. Work orders with different locations will continue to be represented by a red pin on the map.
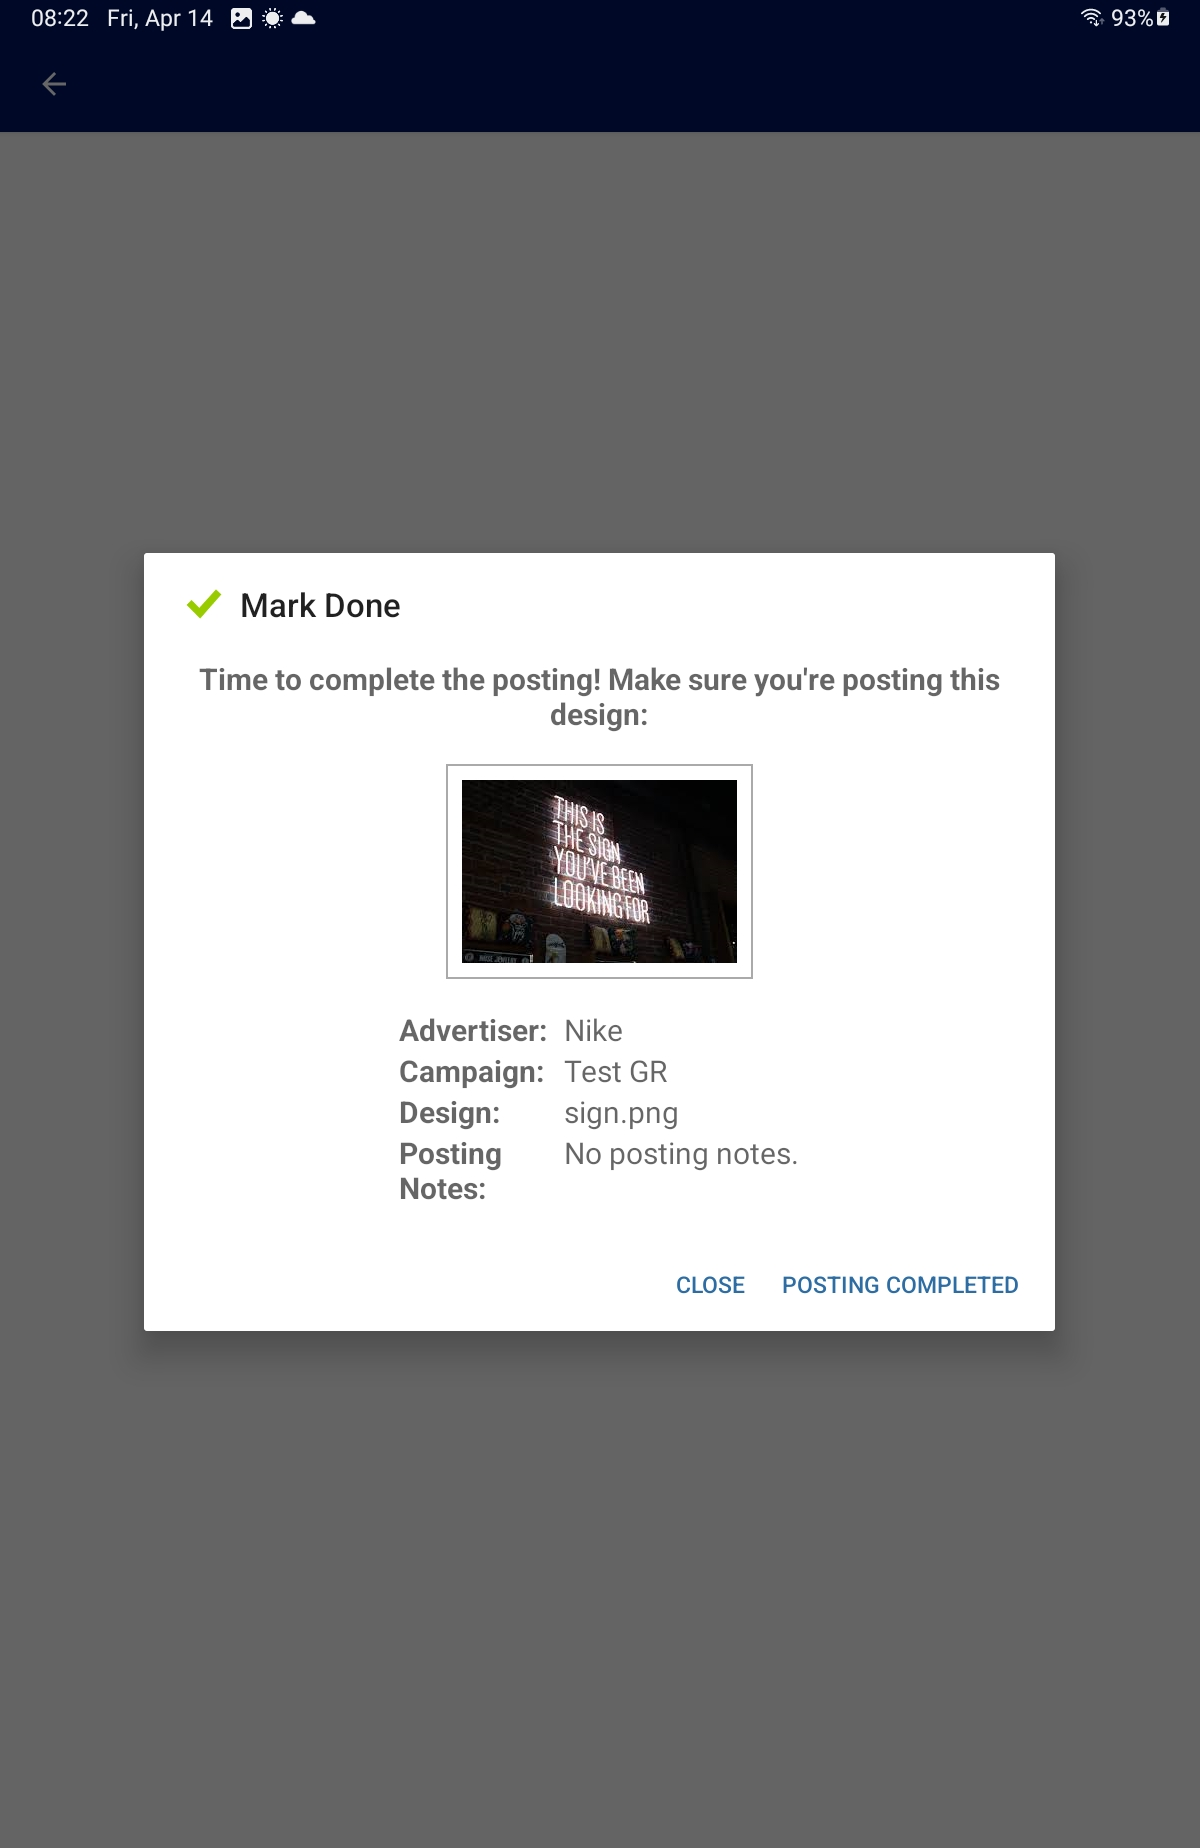
Mark Done
Carries out a Posting or Take Down task.
Note: Postings and Take Downs actually work the same way. In both cases, POST displays the design that needs to be posted or taken down, allowing the installer to make sure they post or take down the right poster.
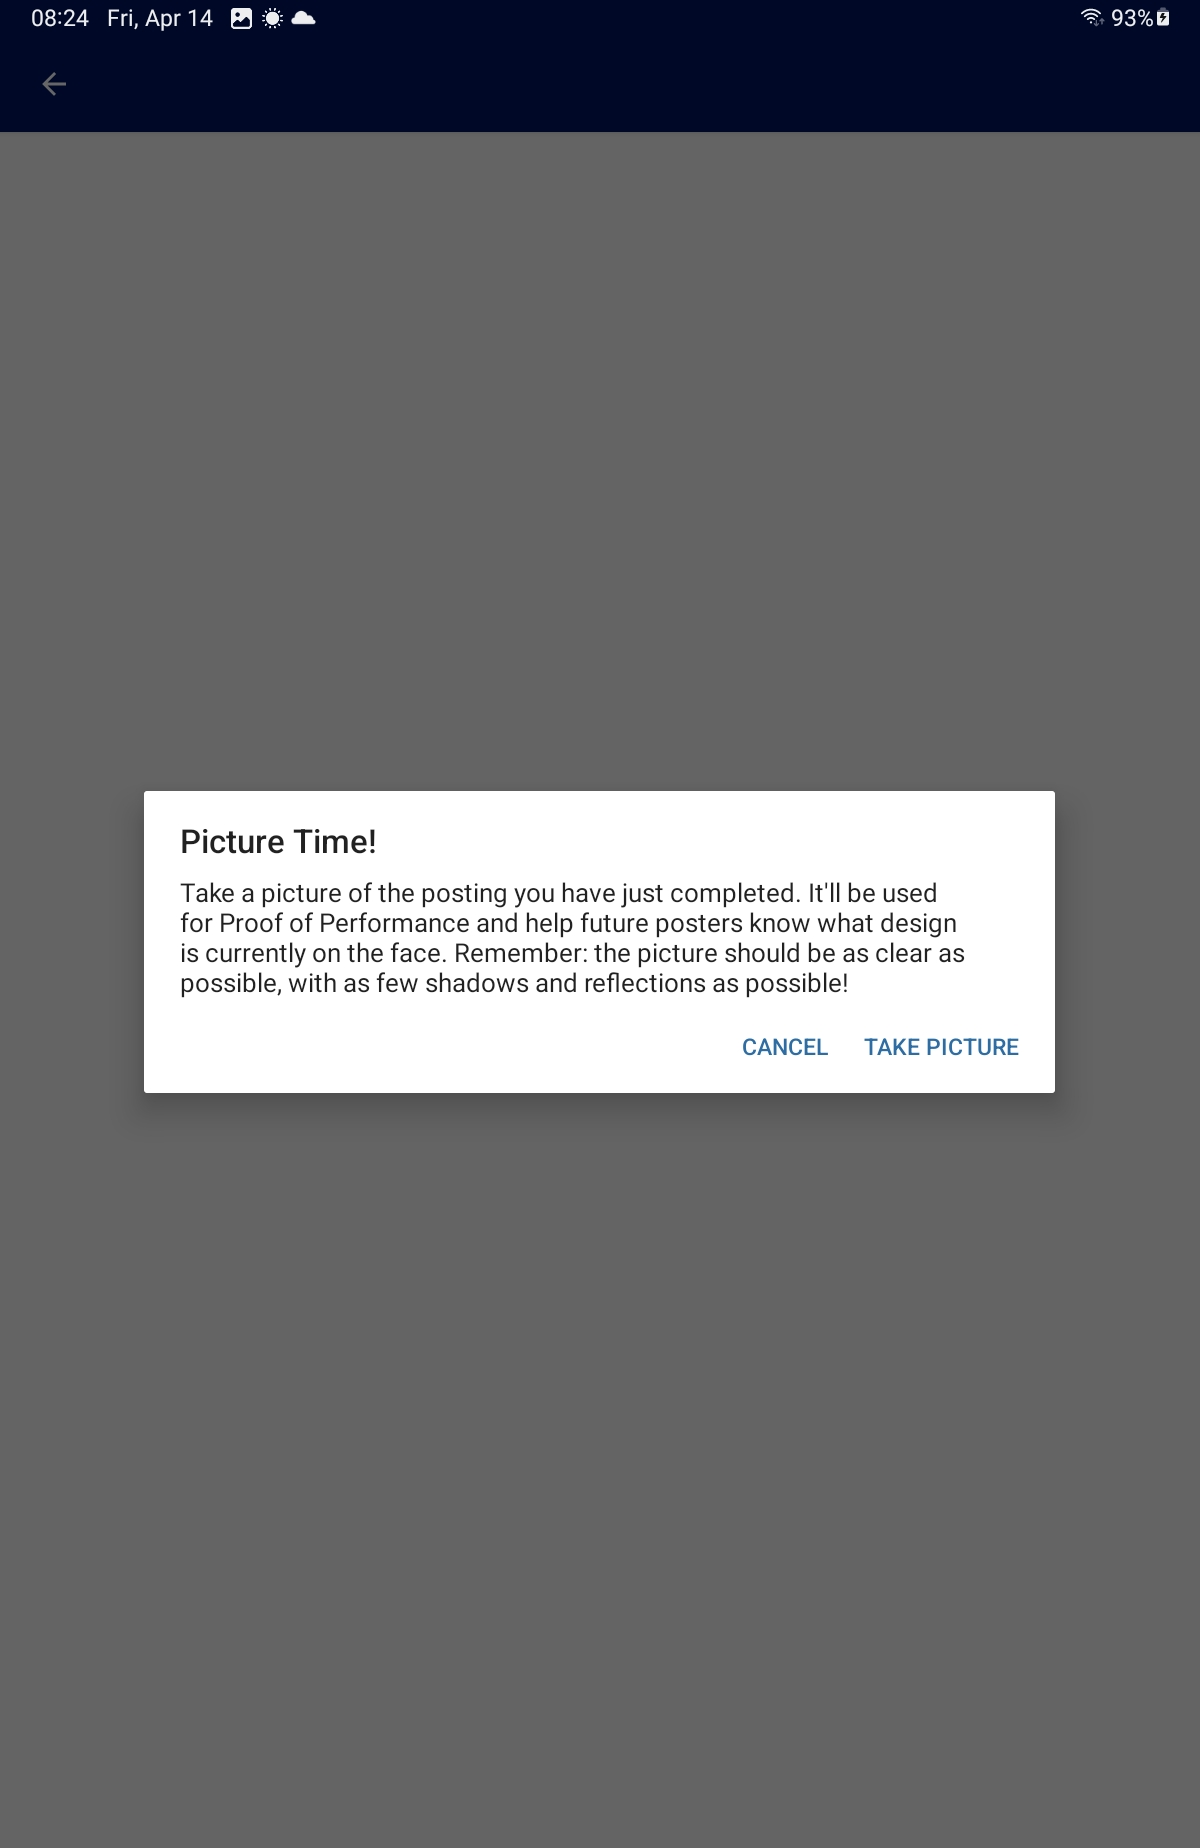
When you complete your Posting, tap Mark Done, then Posting Completed.
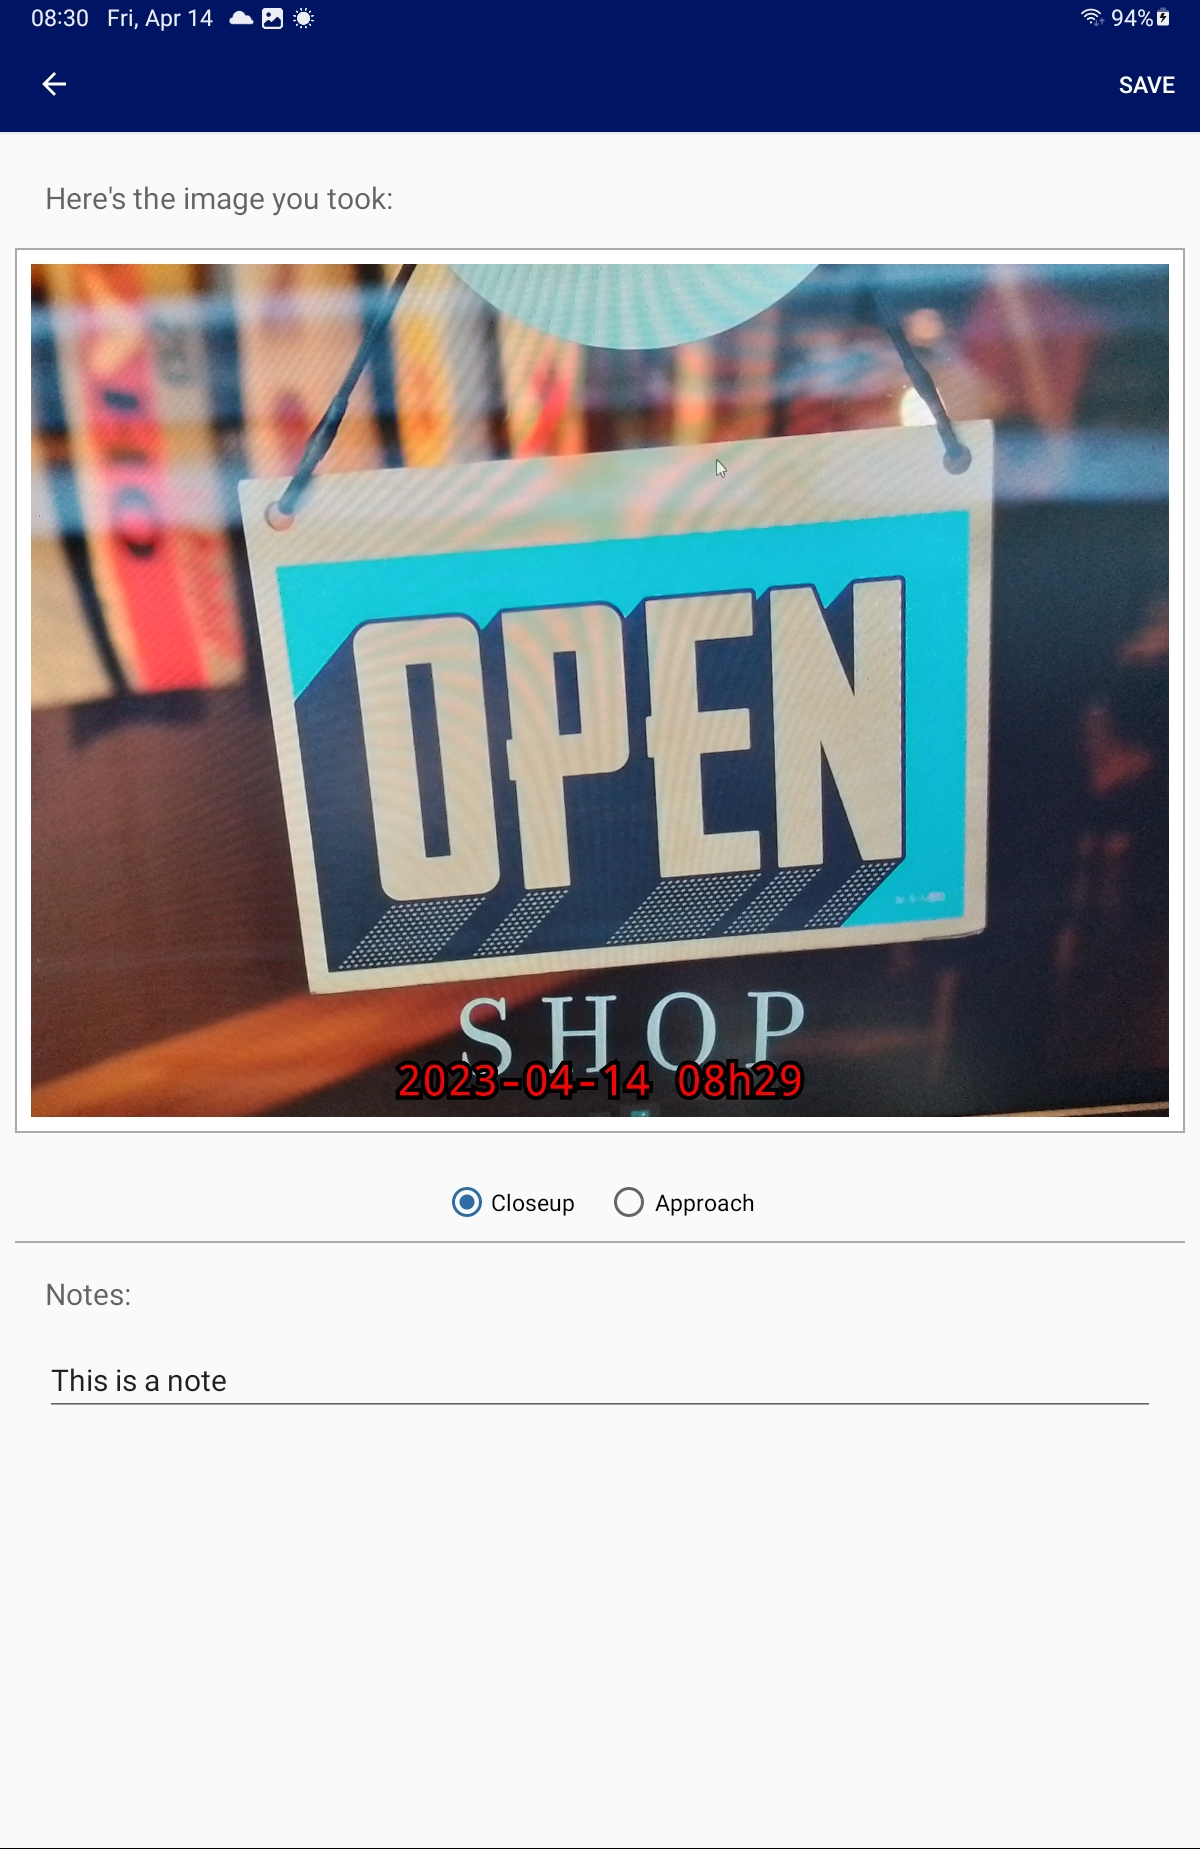
Then, you need to take a picture of your Posting as a proof of task completed.
Note: Photos will be compressed down to a max of 1 MB.
You can retake the picture if needed or crop it. You can also add a Note.
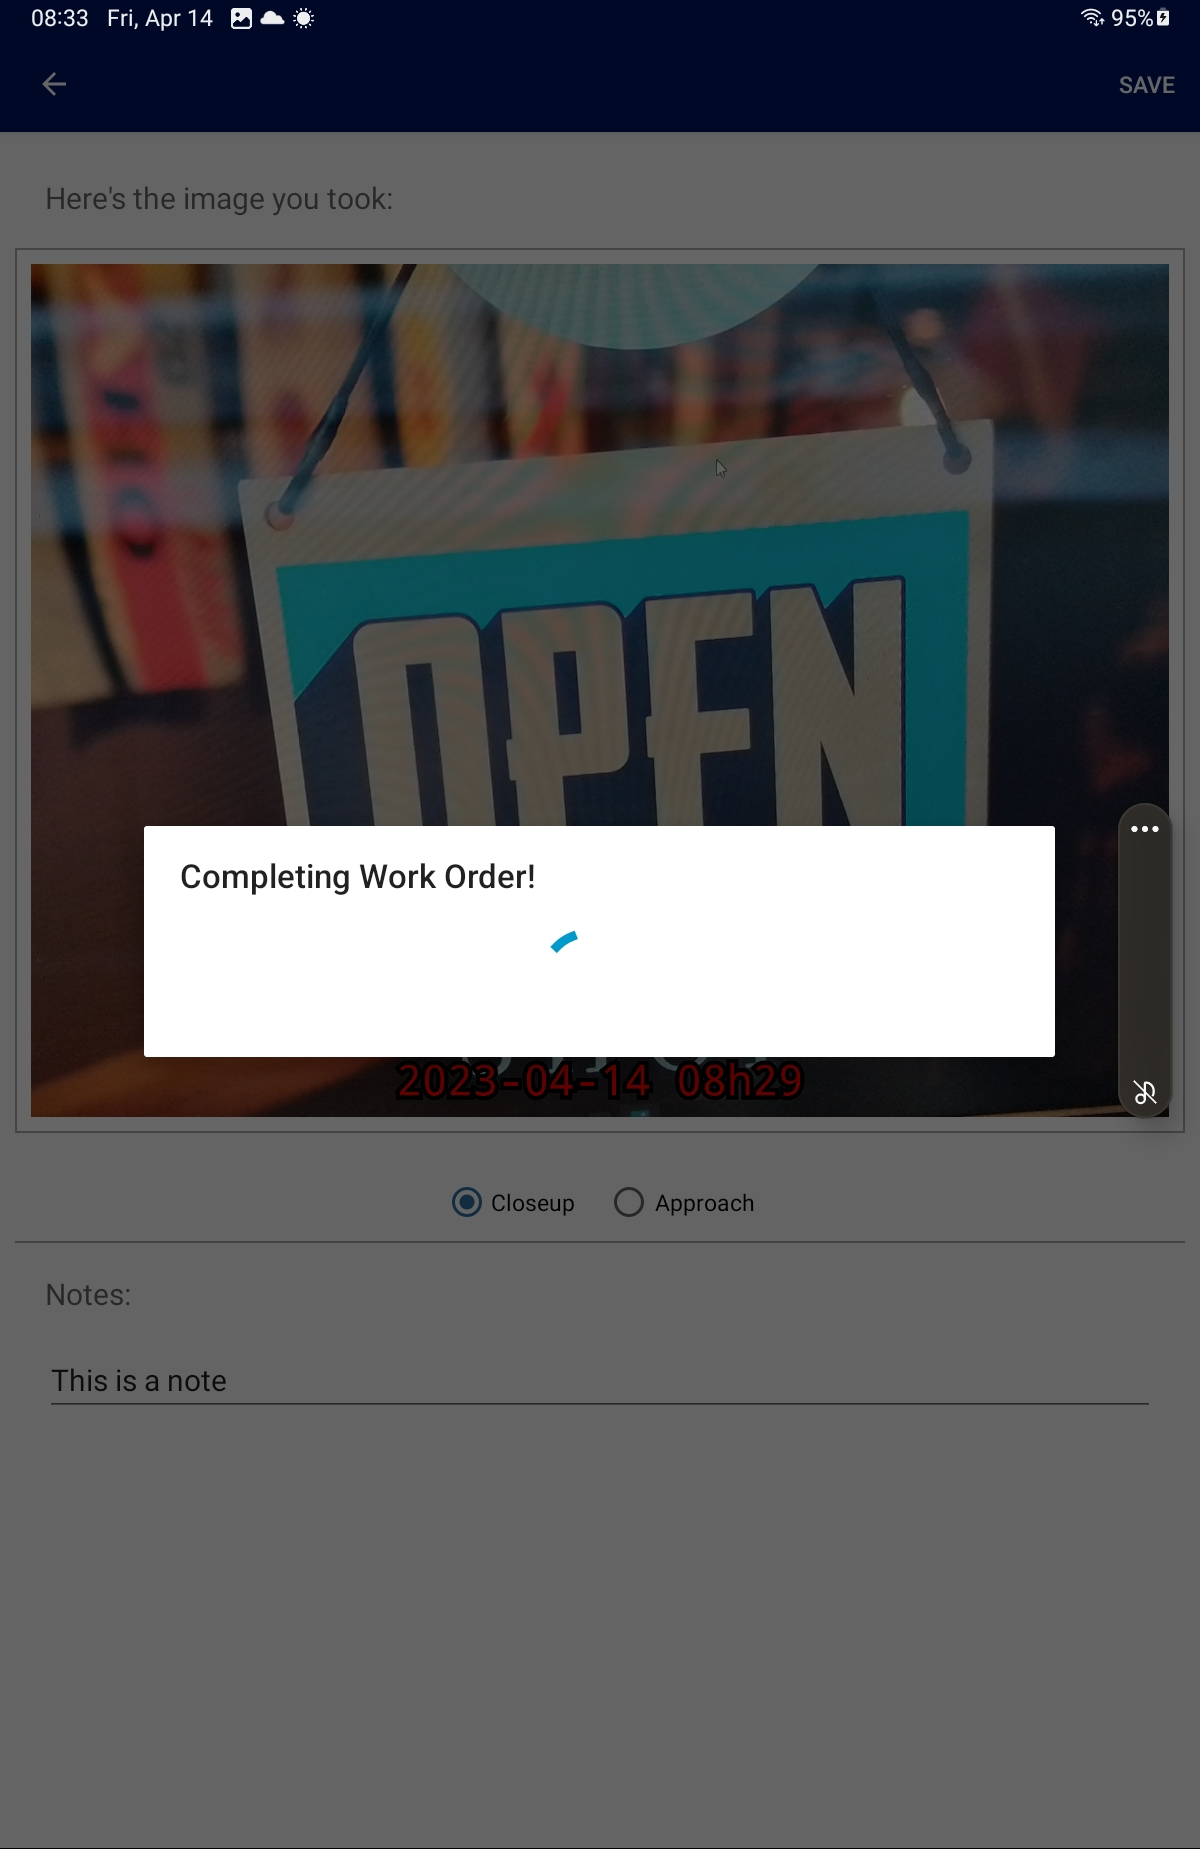
If you are happy with it, tap Save.
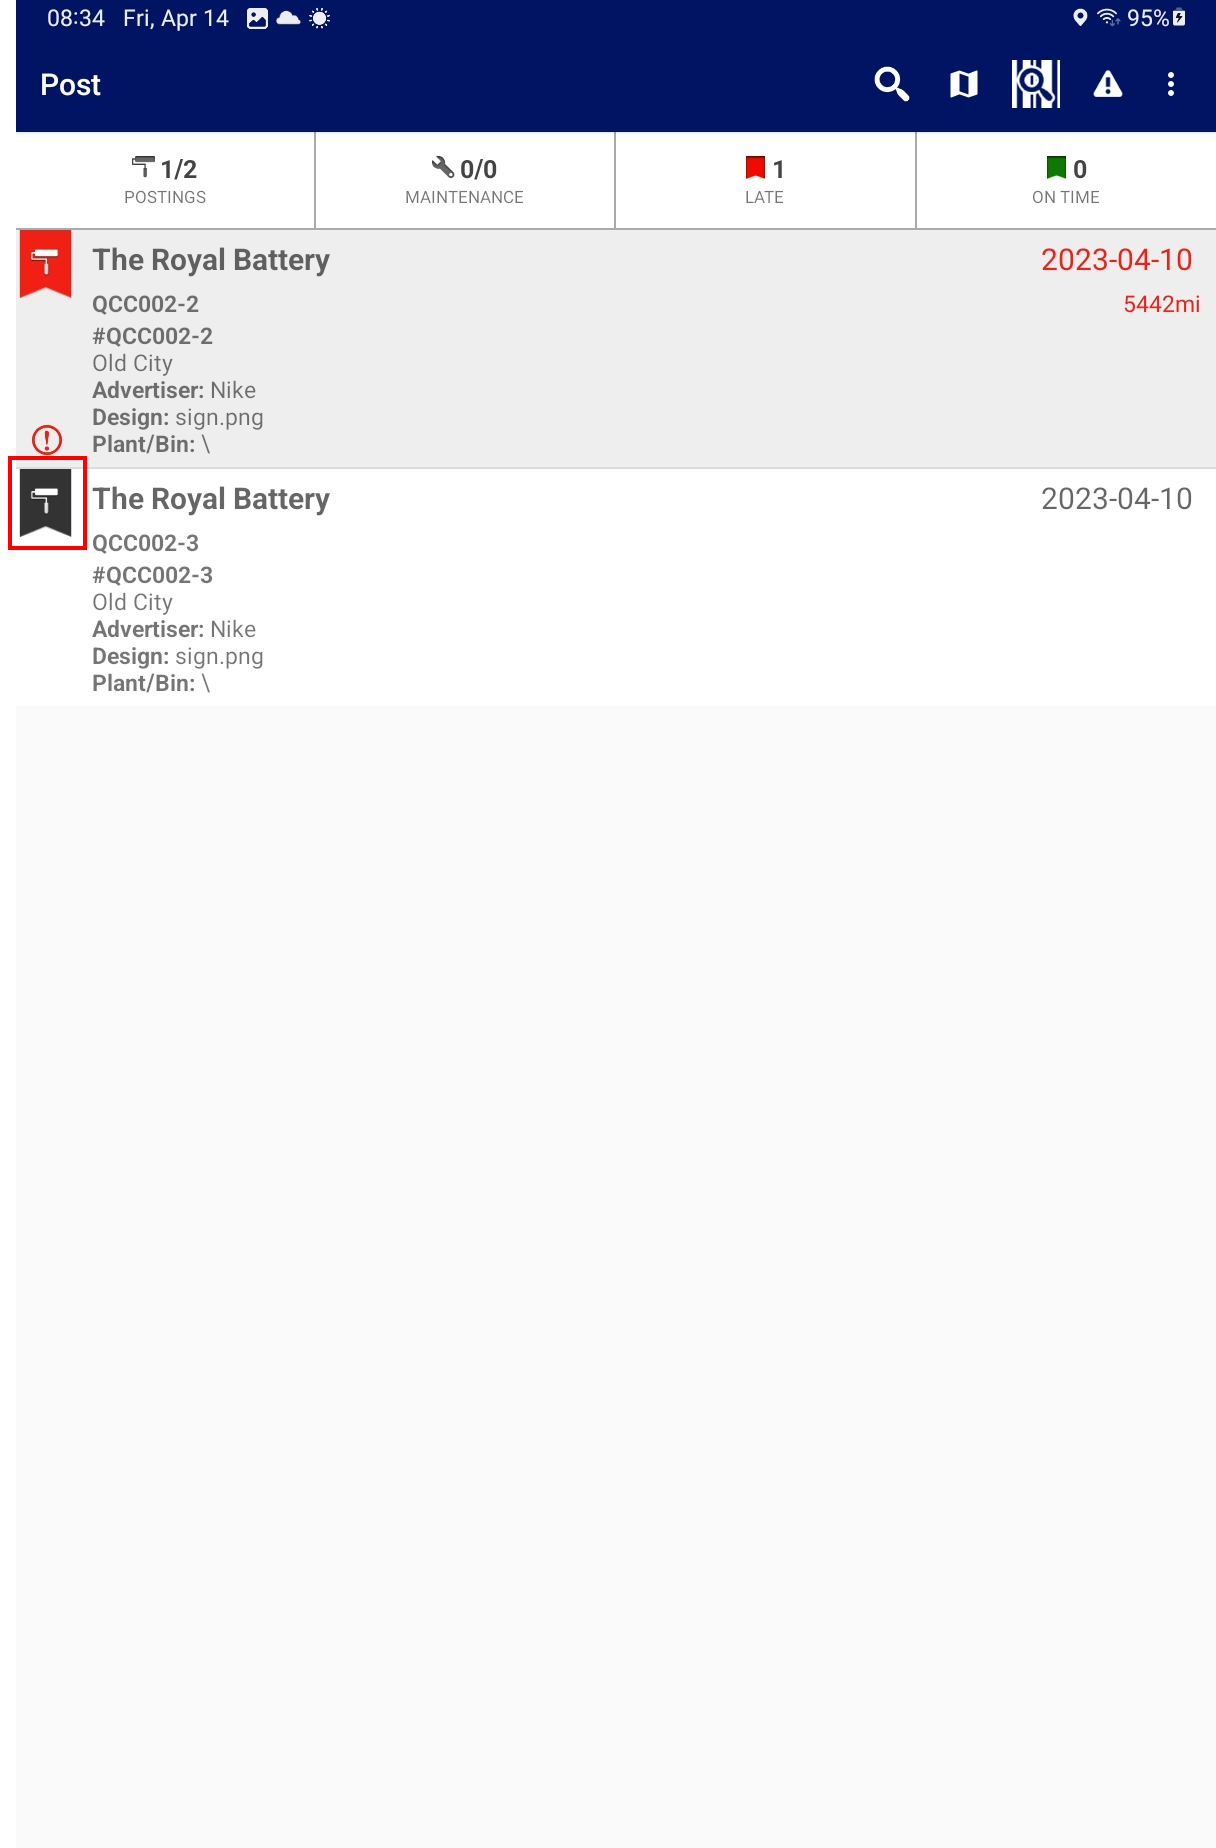
Your Work Order Status is now marked as completed. The Posting icon is Black ![]() .
.
SCAN BARCODE
Allows Bill Posters to locate and complete the work orders. See Using a Barcode Scan in the POST App.
Edit Notes
Adds Notes to the Work Order.
Report Issue
If you encounter any issue with the app or with the Work Order, you can report an issue.
Contacts
Allows a Bill Poster to reach the Contacts linked to the Work Order or Face.

