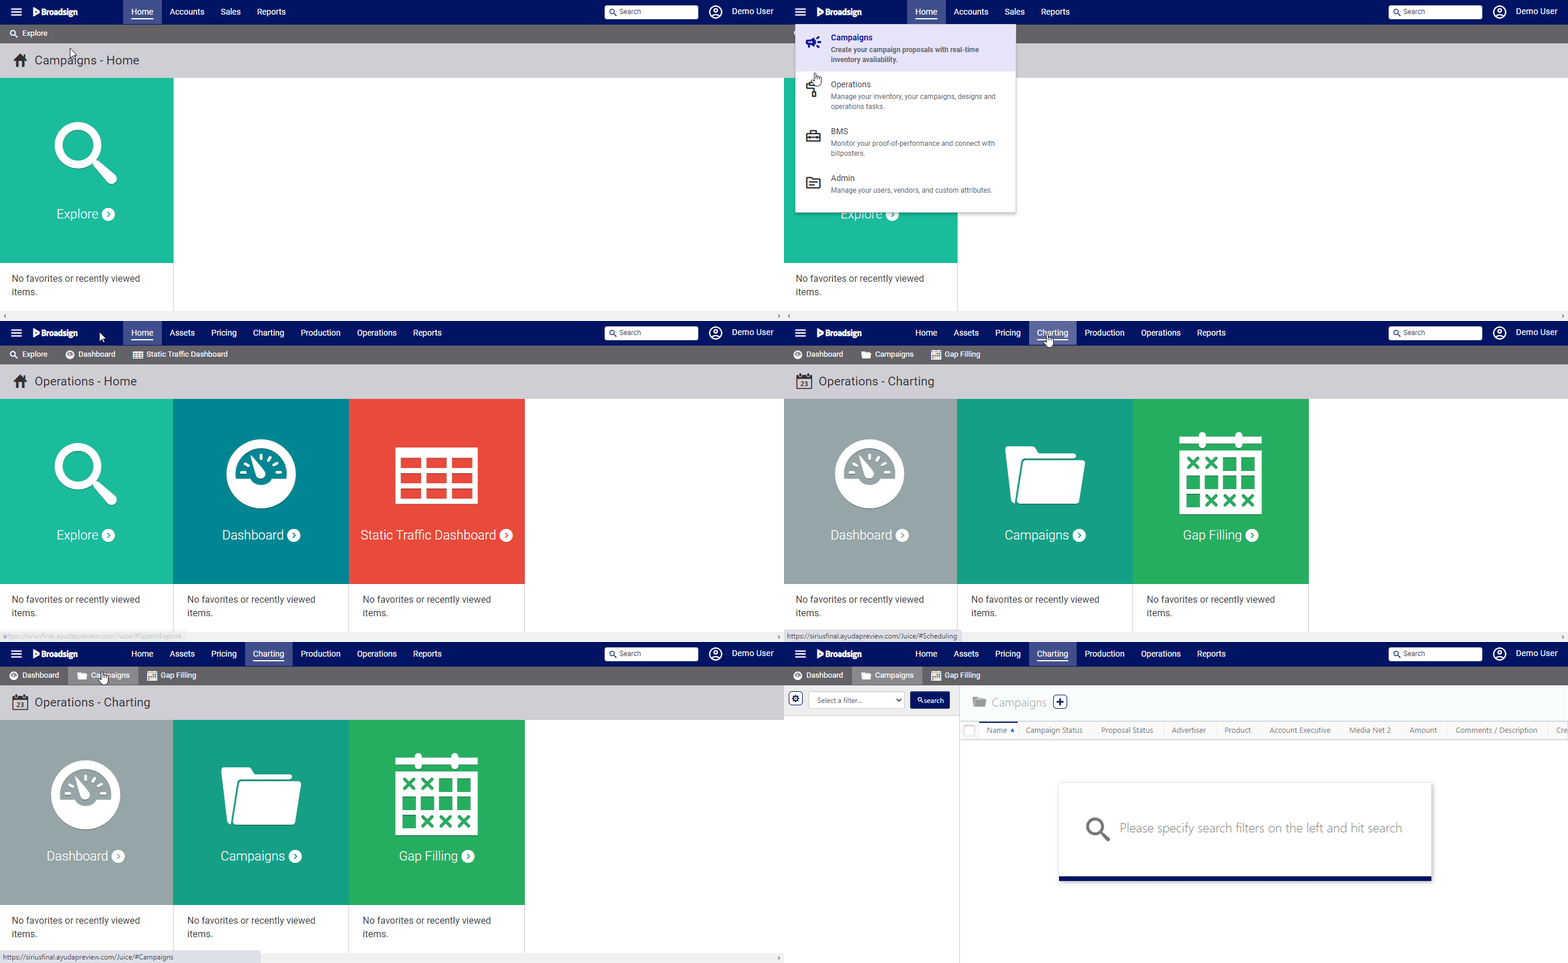
Chartists can create their own campaigns directly, without the help of sales users who submitted proposals in Campaigns.
To create a campaign:
Static Campaigns
- Access Operations in the top-left menu, click the Charting tab, and then the Campaigns tile.
- Click the
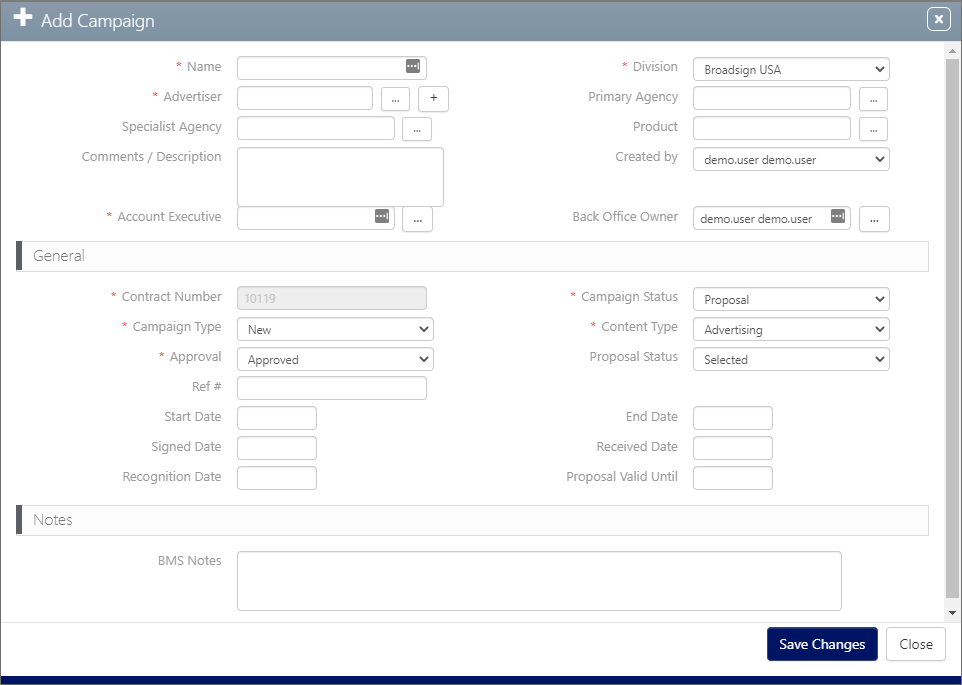
 icon to show the Add Campaign window.
 - Fill out the following mandatory information:
- Name – Title your campaign in a way that it will be understood easily by other users in your system.
- Division – Divisions are sub-sections of agencies. Select the division with which the contract was signed.
- Advertiser – Name the ultimate purchaser.
- Contract Number – An automatically generated number is supplied. It can be edited later.
- Campaign Status – To have your campaign become active immediately, choose Contracted.
- Campaign Type – Select from the list of types in the drop-down menu. You have the choice between New and Renewal.
- Content Type – Select from the list of types in the drop-down menu. You have the choice between Advertising and Editorial.
- Approval – Choose Pending or Approved.
- Click Save Changes to commit your changes.
This presents the filter search window.
A Difference
Unlike converting a proposal to a campaign, there is no cautionary message because no faces have yet been committed to the campaign.
This is unlike a proposal which may mark a significant amount of resources as sold.
What's Next?
Once designs have been uploaded, the chartist works in the Campaign Editor.


