A Plant is a physical location for managing printed media:
- Order Plants – Where posters get delivered.
- Posting Plants – Where the Bill Posters obtain the copy for posting.
To locate a plant:
Static Campaigns
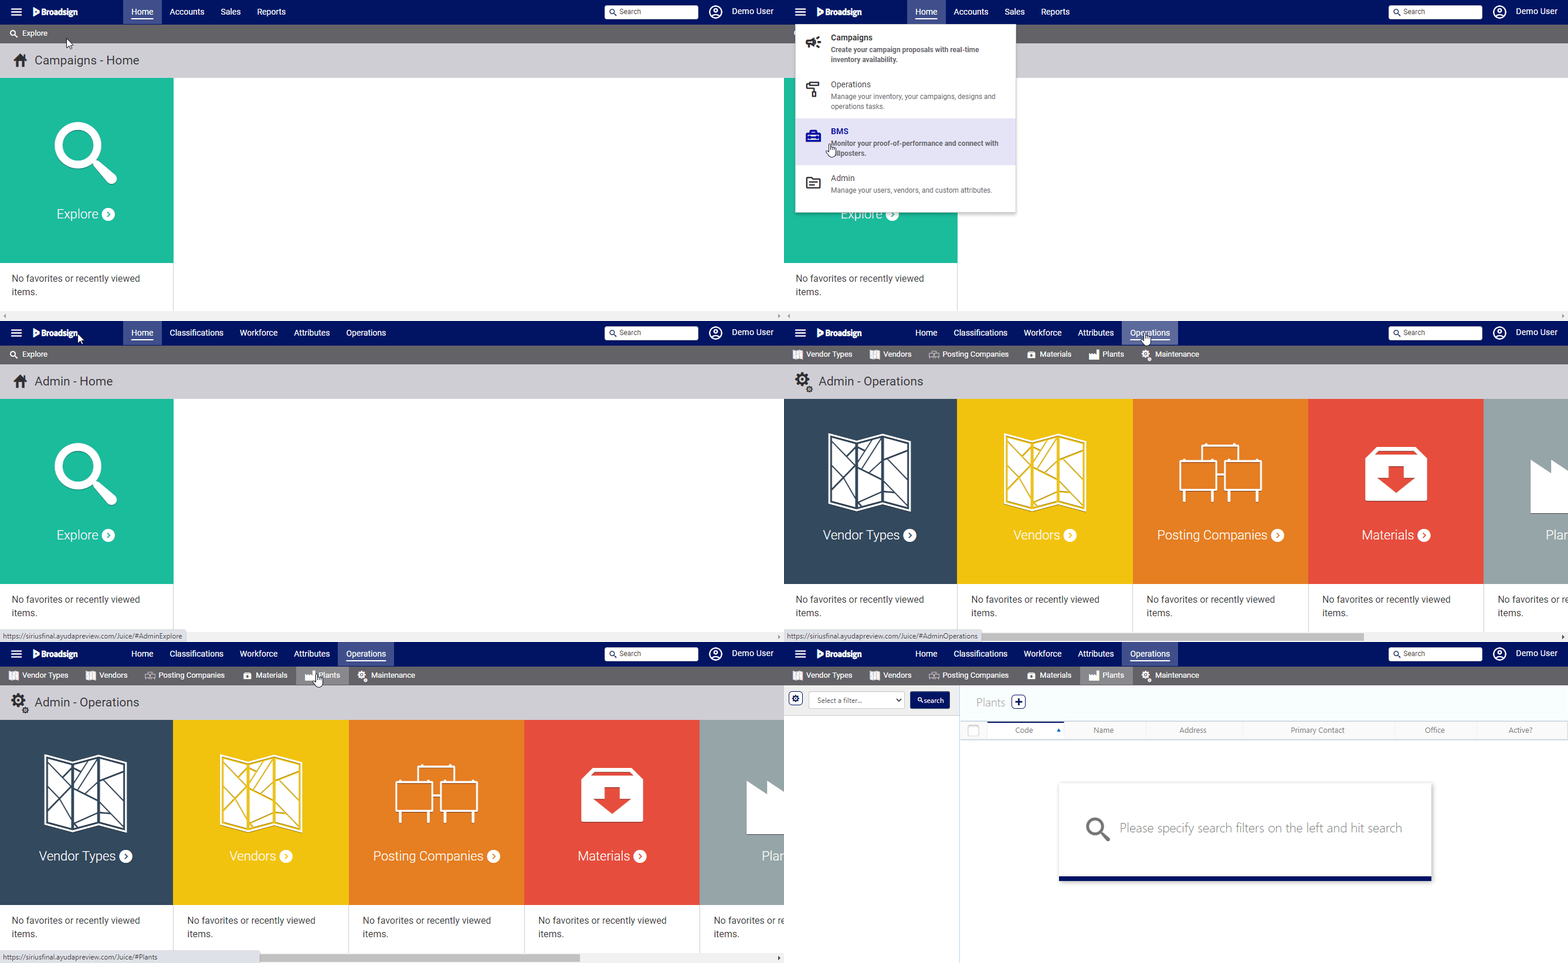
- Access Administration in the top-left menu, click the Operations tab, and then the Plants tile.
- Click Search.
- If applicable, click the
 button to add a Plant.
 - Enter a Name and Code to identify the Plant.
- Select to which Office the Plant is linked. See Create and Edit Offices.
- Enable the Active? check box to be able to use the Plant when defining your Static Copies.
- Click Save changes.
This presents the filter search window.
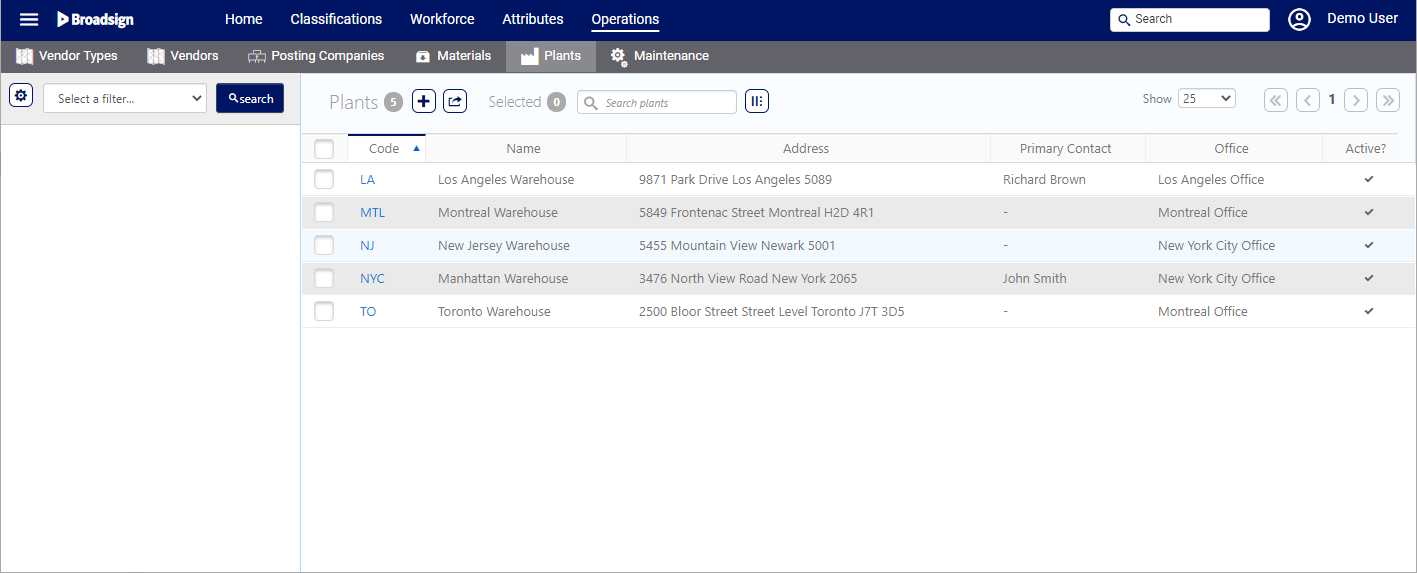
The screen will refresh to show the list of Plants available. You can filter Plants according to their name.
This presents the Add Plant dialogue box.
The Code for each Plant must be unique.
You can add as many Plants as you wish.
To add an address to a plant:
Static Campaigns
- In the Plant record, click the Address tab in the left navigation bar.
- Click the
 button to add an address.
 - Type – Headquarter or Mail.
- Address 1 – Enter the civic address.
- Town/City – Enter the municipality.
- Postal Code – Enter the district information.
- Country – Enter the nation state.
- Address 2 – Additional address information.
- District – Enter the District information.
- State – Select a state according to the Country selected.
- Latitude and Longitude coordinates.
- Click Save changes.
![]()
This presents the Address screen.
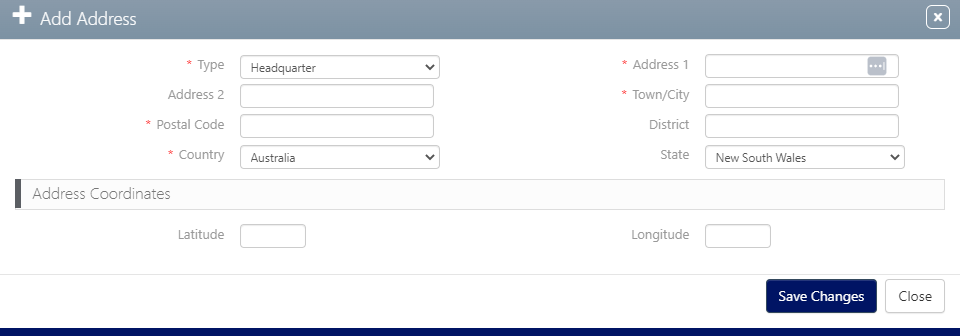
This presents the Add Address dialogue box.
Mandatory information is:
Additional information is:
This presents the Add Address dialogue box.
This section describes how to link a contact to a plant.
Contacts may be created throughout the system and linked to the following entities:
- Accounts
- Campaigns
- Plants
- Posting Companies
- Sites
- Vendors
To link a contact to a plant:
Static Campaigns
- In the Plant record, click the Contacts tab in the left navigation bar.
- Click the
 button to link a contact to this Plant.
 - Choose the contact to link by selecting the check box next to it, then click the Link button.
- Click the
 button to edit the Contact Type, and select the type of contact required. For example, it could be Primary or Payment.
 - Click Save changes.
![]()
This presents the Contacts screen.
This presents a filter search screen for available contacts.
Note: Make sure that the contact has a valid email address.
Plants might have different Bins (Warehouses). You can add some to the Plants directly.
To add a bin to a plant:
Static Campaigns
- In the Plant record, click the Bins tab in the left navigation bar.
- Click the
 button to add a Bin to this Plant.
 - Enter a Name and Code to identify the Bin.
- Enable the Active? check box to be able to use the Bin.
- Click Save changes.
![]()
This presents the Bins screen.
This presents the Add Bin dialogue box.
The Code for each Bin must be unique.


