This page describes how to add and edit user groups in Broadsign Publish. For more information about users, user groups, and permissions, refer to About Users and Groups.
Note: The Domain Admin page can only be accessed by users assigned the Administrator page access. See Level of Access.
User Groups
Broadsign Publish works with user groups. User groups are the cornerstone of Broadsign Publish's access control structure. As its name implies, a user group is used to regroup users together and to quickly assign permissions that are typical for a user role.
Members of a user group inherit the group's permissions. Being part of a user group also allows organizing and speeding up the access share process. If content is shared to a group, all its members have access to this content.
For example, instead of creating a local operator named "Mary" and assigning this user the permissions typical for the local operator role, you only need to add this user to the local operators group. The user inherits all the permissions associated with this group and has access to everything that is shared with this group.
You could also use groups to regroup your users on a geographical basis, for instance. You could share with these groups content that is specific to each geographical location. For example: 21st Avenue Mall does not share content with St-Paul's pharmacy.
In Broadsign Publish, you can create groups to assign permissions and access to specific users.
To add a user group:
-
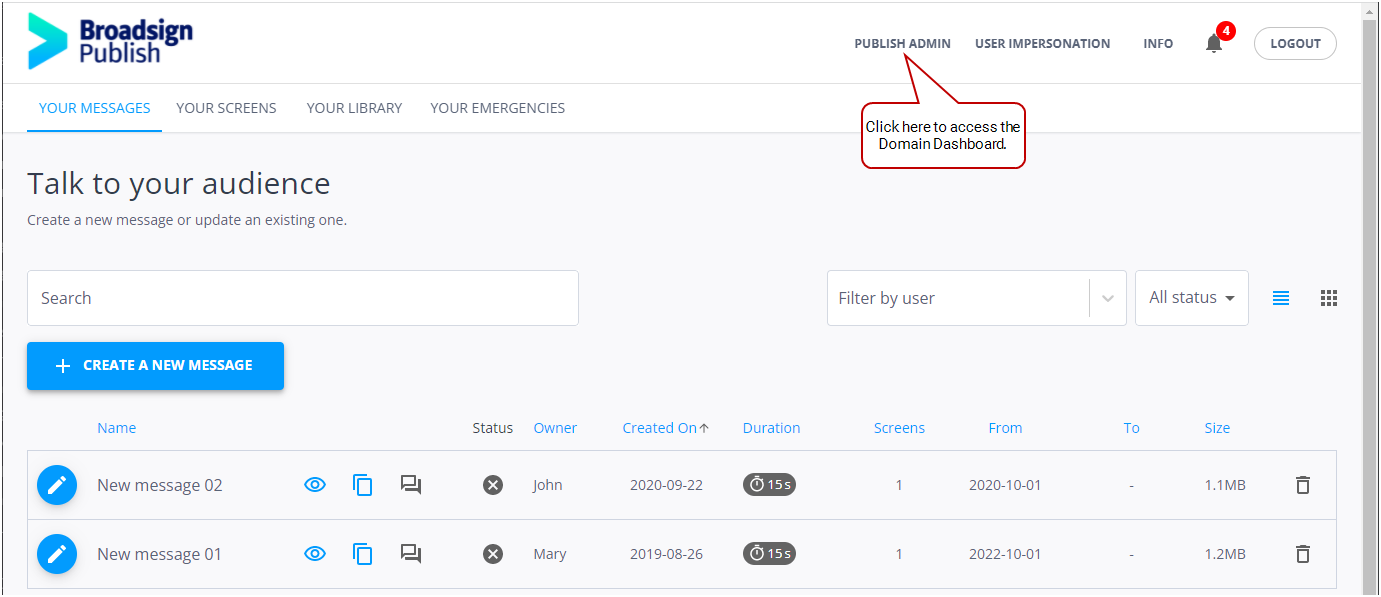
On the Broadsign Publish interface, click the Publish Admin link at the top right of the window.
The Domain Dashboard opens:
- Under Accounts, click User Groups. The User Groups page opens.
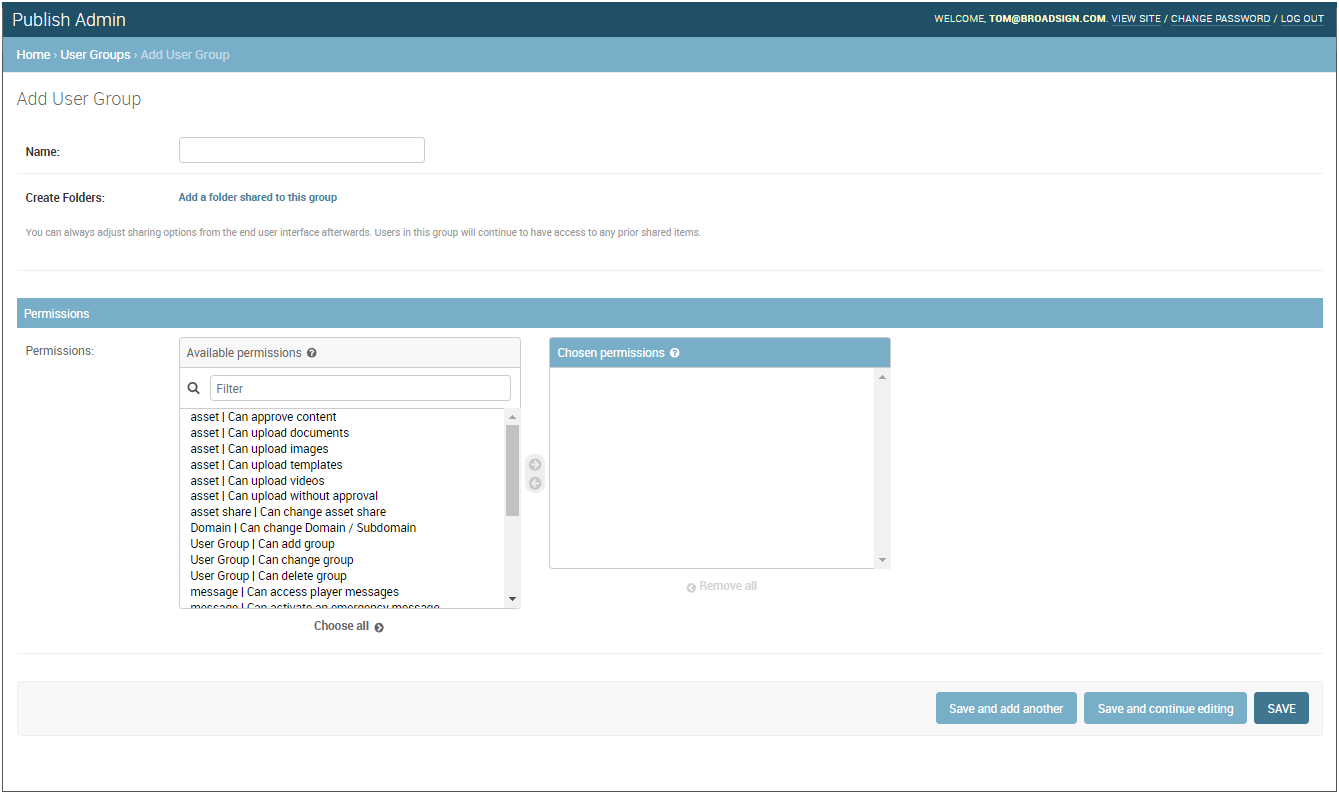
- To add a group, in the top-right corner click Add User Group. The Add User Group page opens.
- Enter the Name of the user group (e.g., "France - Local Operators").
- If applicable, click the Add a folder shared to this group link.
- A Screen folder in which you can put screens you want to share with the group.
- A Library folder in which you can put content you want to share with the group.
- Add Permissions to the user group by using the right arrow or double-clicking the permission. If you want to add all permissions, click Choose all. Every member of this user group will inherit the permissions that are set in this box. For more information on the permissions available, refer to Users and Groups Permissions.
- Click one of the Save buttons:
- Save and add another: Saves the current user group settings and prompts you to add another.
- Save and continue editing: Saves the current user group settings and allows you to continue editing it.
- Save: Saves your changes and returns you to the Groups page.
The Group Share Folder section is displayed. You can create and name the following folders that will be shared with the new user group:
Note: You can always adjust sharing options from the Broadsign Publish interface afterward. Users in this group will continue to have access to any prior shared items. For more information, see Add Content Sharing.
You can edit a user group's information at any time.
To edit a user group:
-
On the Broadsign Publish interface, click the Publish Admin link at the top right of the window.
The Domain Dashboard opens:
-
Under Accounts, click User Groups. The User Groups page opens.
-
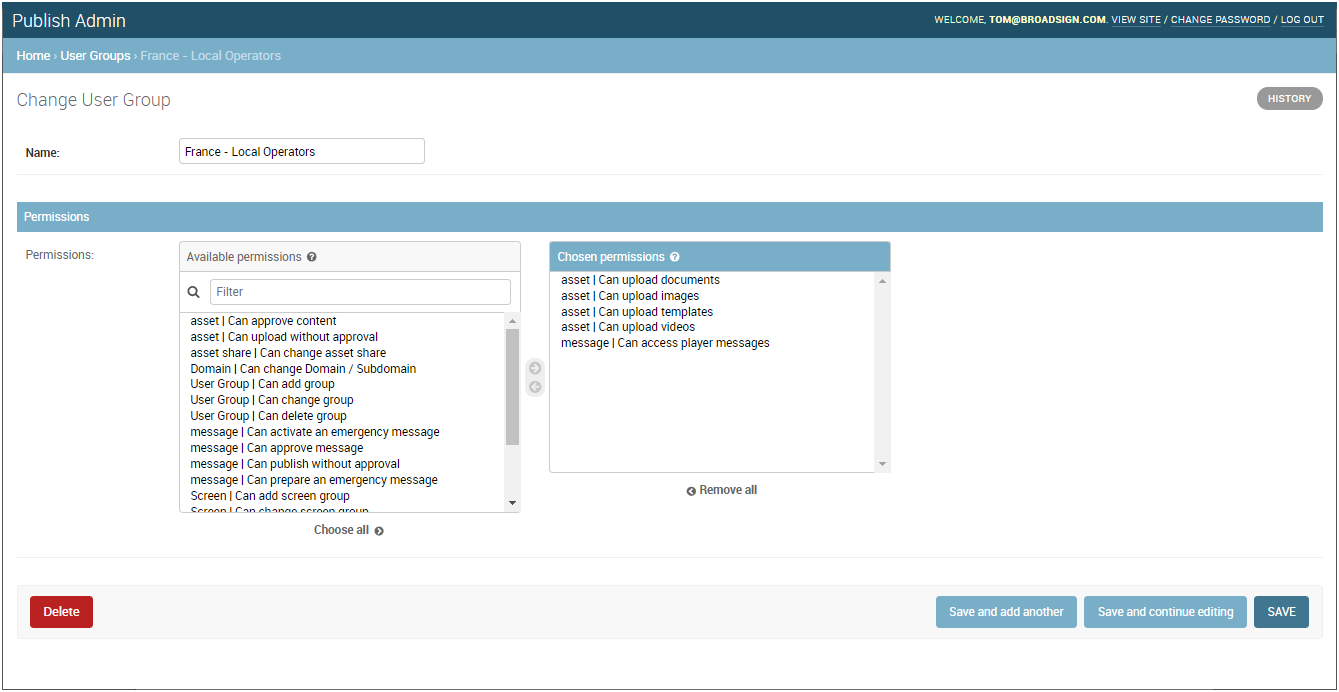
Click the name of the group that you want to modify. The Change User Group page opens.
-
Change the following information, if applicable:
- Name: Name the user group.
- Permissions: Modify permissions to the user group by using the left and right arrows. If you want to add all permissions, click Choose all. Every member of this group will inherit the permissions that are set in this box. For more information on the permissions available, refer to Users and Groups Permissions.
- If you want to delete the user group, click Delete.
- Click one of the Save buttons:
- Save and add another: Saves the current user group settings and prompts you to add another.
- Save and continue editing: Saves the current user group settings and allows you to continue editing it.
- Save: Saves your changes and returns you to the Groups page.
You can delete a user group at any time.
To delete a user group:
-
On the Broadsign Publish interface, click the Publish Admin link at the top right of the window.
The Domain Dashboard opens:
-
Under Accounts, click User Groups. The User Groups page opens.
-
Click the check box next to the group to delete.
-
In the Action menu, select Delete selected User Groups, then click Go.
A confirmation page is displayed. Review the impacts of removing the user group. If everything is correct, click Yes, I'm sure.
The user group is deleted.
After you have added and edited user groups on your domain, you could continue to set up your domain:


