Screen Group
Screen Groups allow you to bundle screens that will receive the same message. This ensures consistency and prevents local users from targeting screens independently. This is particularly useful when you have screens with synchronized content.
To effectively use Screen Groups:
-
Group Similar Screens – Combine screens that need to display the same content.
-
Share with Relevant Users – Ensure the Screen Group is accessible to the appropriate users and user groups who need to target it with messages.
-
Consider Frame Synchronization – For screens requiring synchronized content, refer to Frame Synchronization in the Broadsign Control Administrator documentation.
Note: Only users assigned the Network Operator role can manage screen groups. For more information, see Level of Access.
To create a screen group, you must have imported your screens and registered them. For more details, see Register Screens.
Once you have registered your screens, you can create screen groups. For more information on how to register screens, see Register Screens.
To create a screen group:
-
On the Broadsign Publish interface, click the Publish Admin link at the top right of the window.
The Domain Dashboard opens:
-
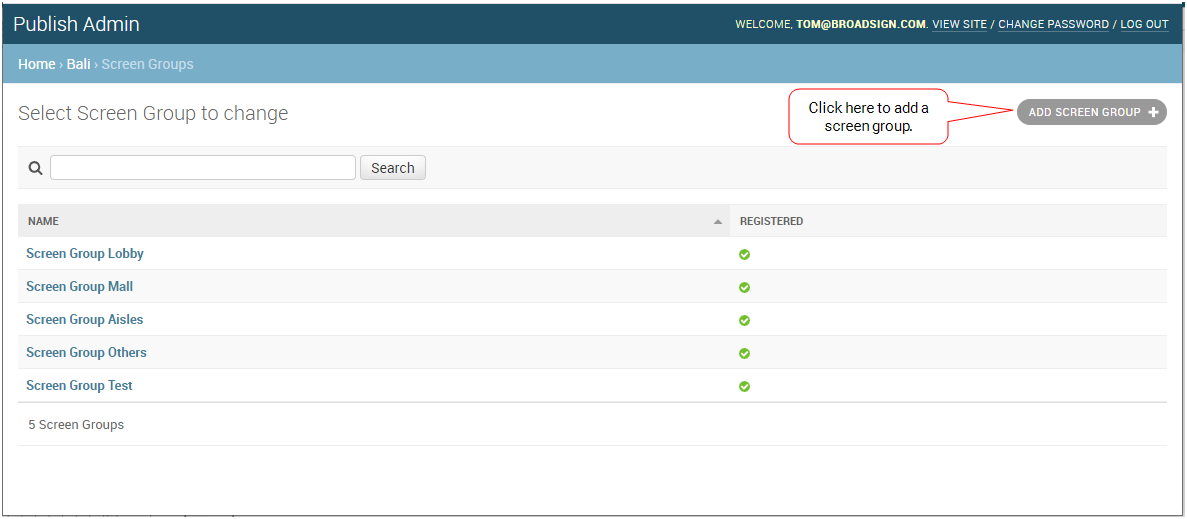
Under Resources, click Screens Groups. The Screen Groups page opens. If you have existing screen groups, they are listed here.
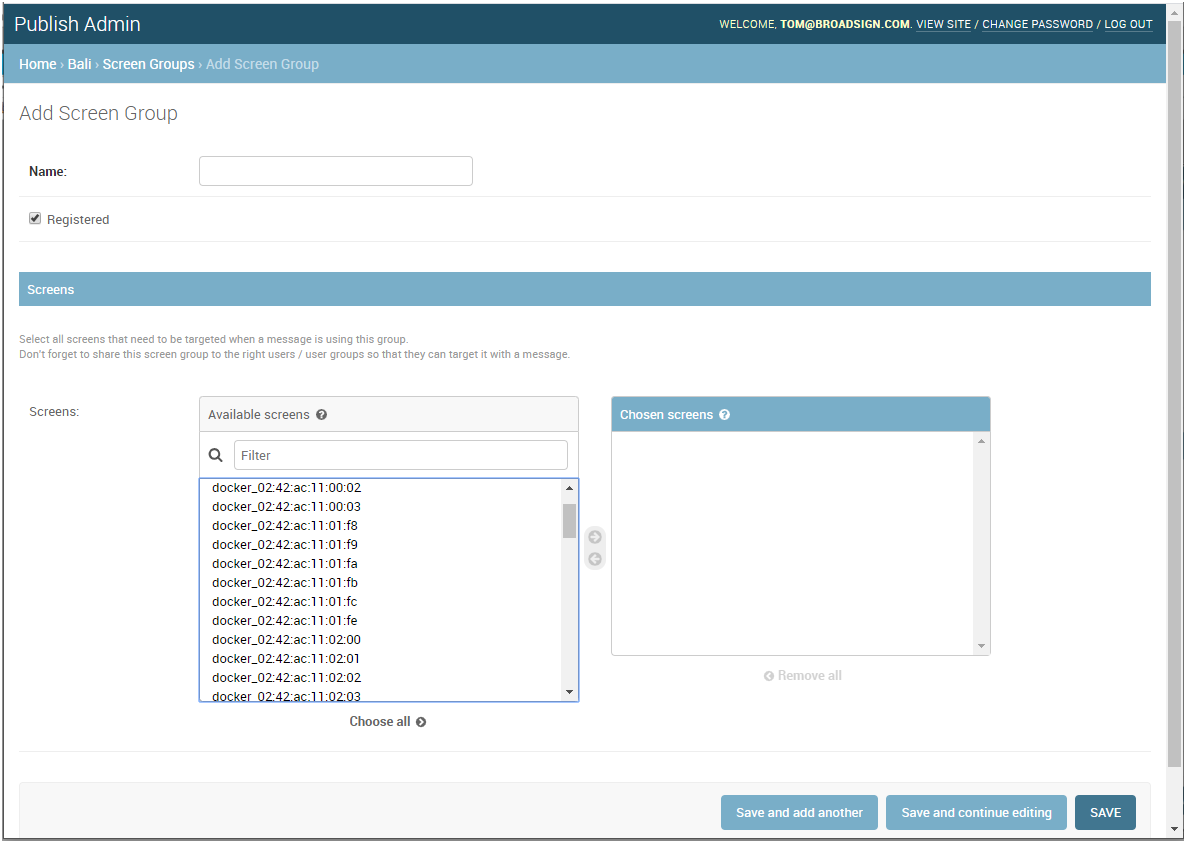
- To add a screen group, in the top-right corner click Add Screen Group. The Add Screen Group page opens.
- Enter the Name of the screen group (for example, "Screen Group Mall").
- If you want the screen group to be visible in the Broadsign Publish interface, check Registered.
- Add Screens to the group by using the right arrow or double-clicking the screen. If you want to add all screens, click Choose all.
- Click one of the Save buttons:
- Save and add another: Saves the current screen group settings and prompts you to add another.
- Save and continue editing: Saves the current screen group settings and allows you to continue editing it.
- Save: Saves your changes and returns you to the Screen Groups page.
You can edit a screen group's information at any time.
To edit a screen group:
-
On the Broadsign Publish interface, click the Publish Admin link at the top right of the window.
The Domain Dashboard opens:
-
Under Resources, click Screen Groups. The Screen Groups page opens.
-
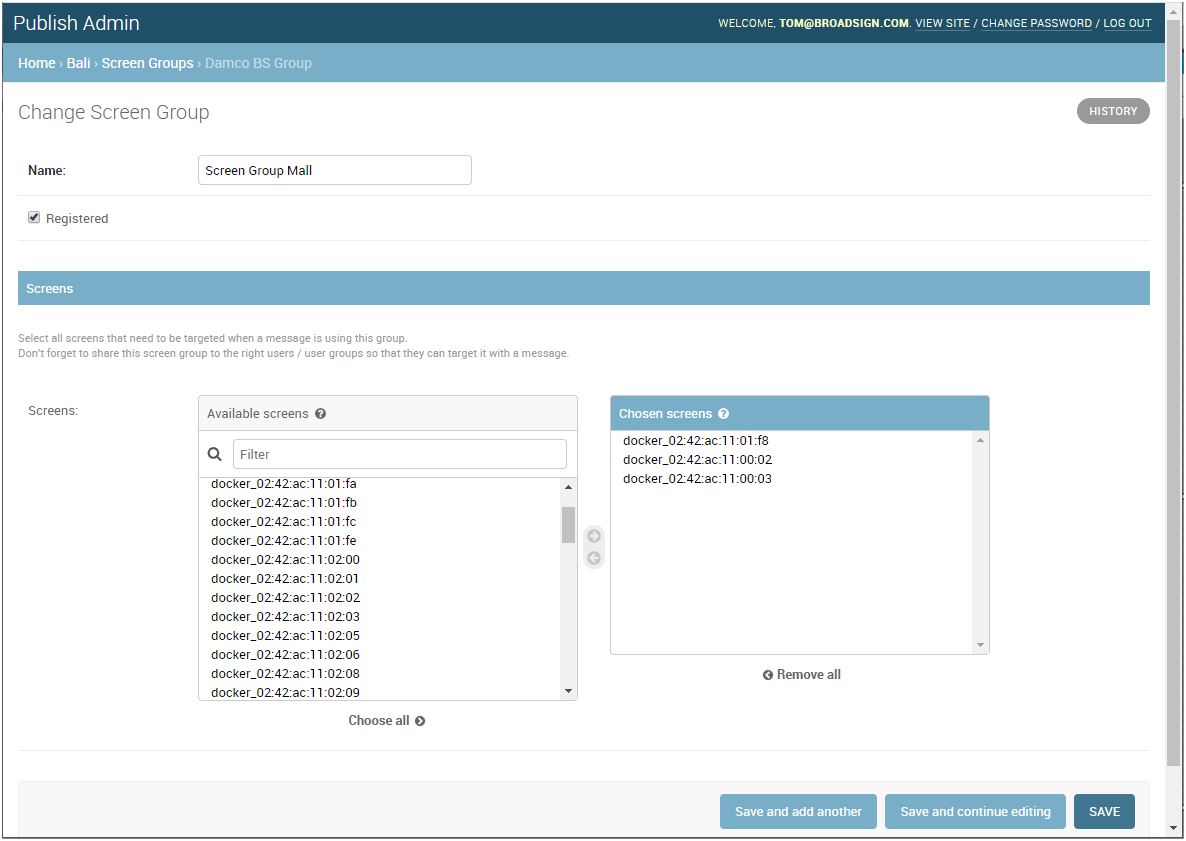
Click the name of the screen group that you want to modify. The Change Screen Group page opens.
-
Change the following information, if applicable:
- Name: Name the screen group.
- Screens: Modify the screens associated with the screen group by using the left and right arrows. If you want to add all screens, click Choose all.
- If you no longer want the screen group to be visible in the Broadsign Publish interface, uncheck Registered.
- Click one of the Save buttons:
- Save and add another: Saves the current screen group settings and prompts you to add another.
- Save and continue editing: Saves the current screen group settings and allows you to continue editing it.
- Save: Saves your changes and returns you to the Screen Groups page.
A screen group can be shared the same way as a screen. See Share a Screen or Screen Group for more details.


