An account is an Out of Home advertiser or agency.
To add an account:
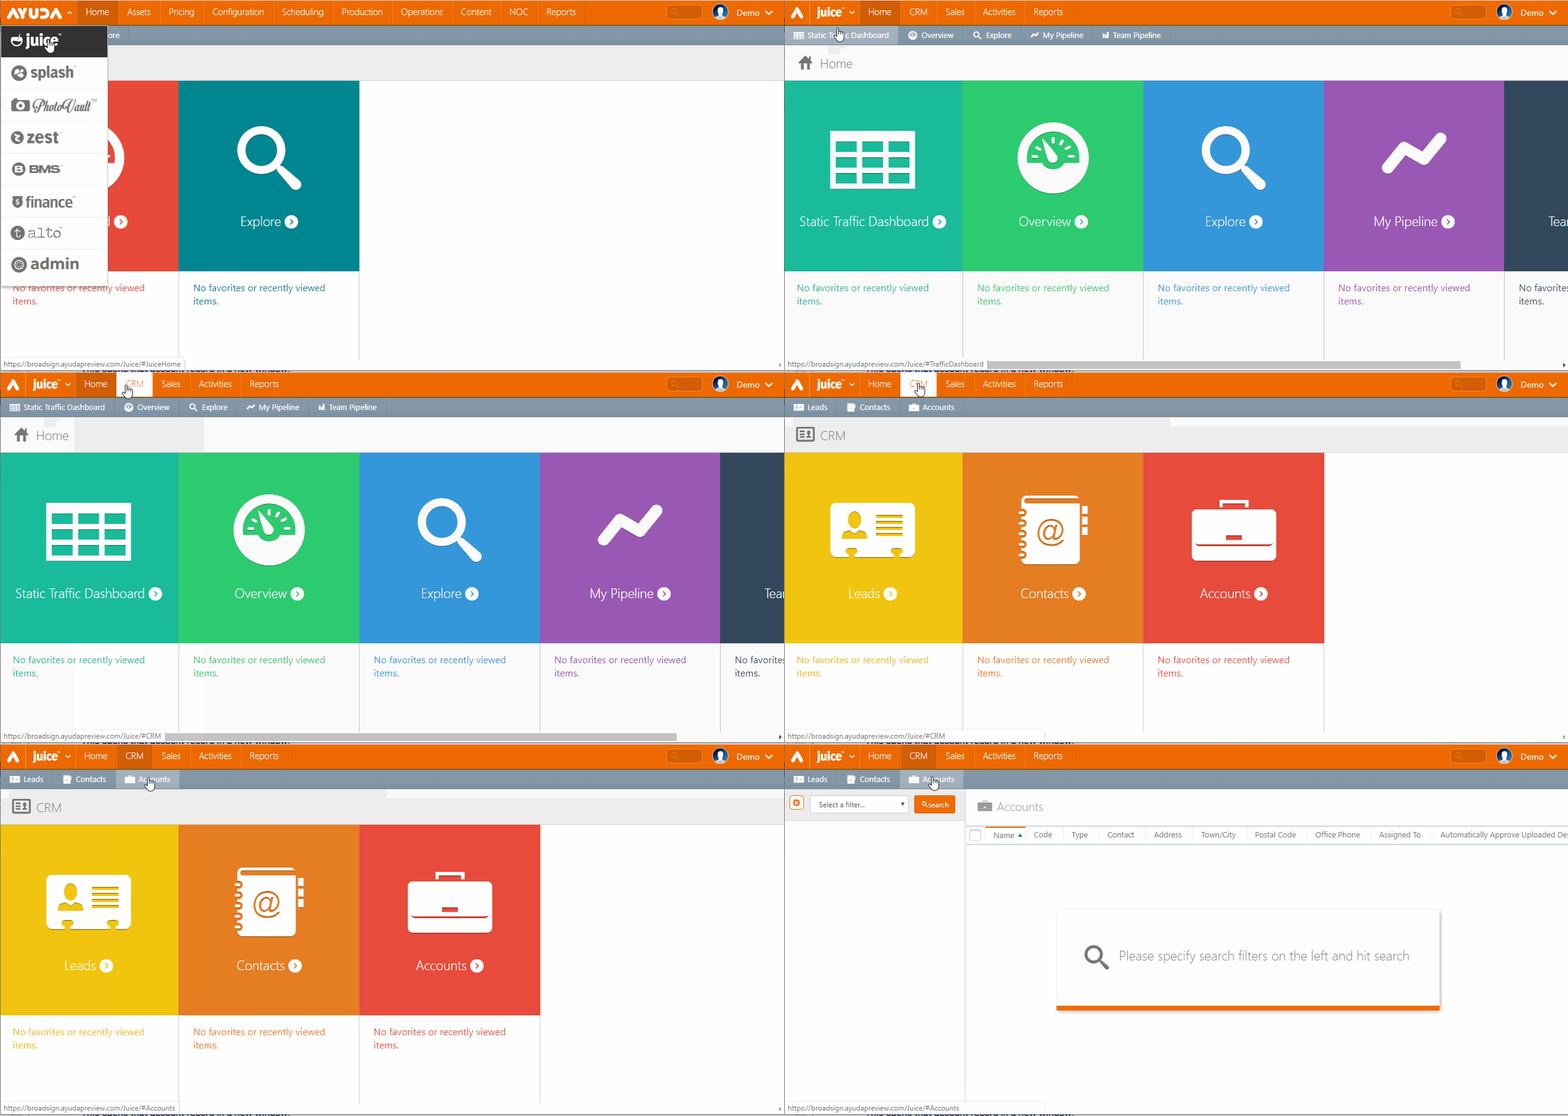
- Open Splash.
- Select Juice in the drop-down menu on the left.
- Click the CRM menu item in the top row, and then the Accounts tile.
- Click the
 icon to add an account.
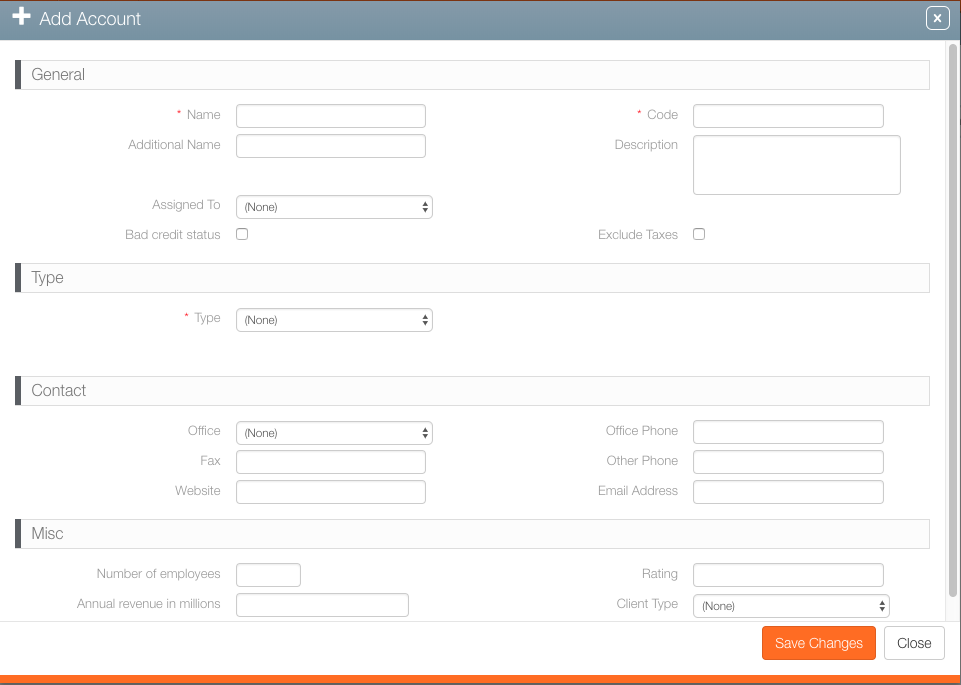
 - Enter a Name and Code to identify the Account.
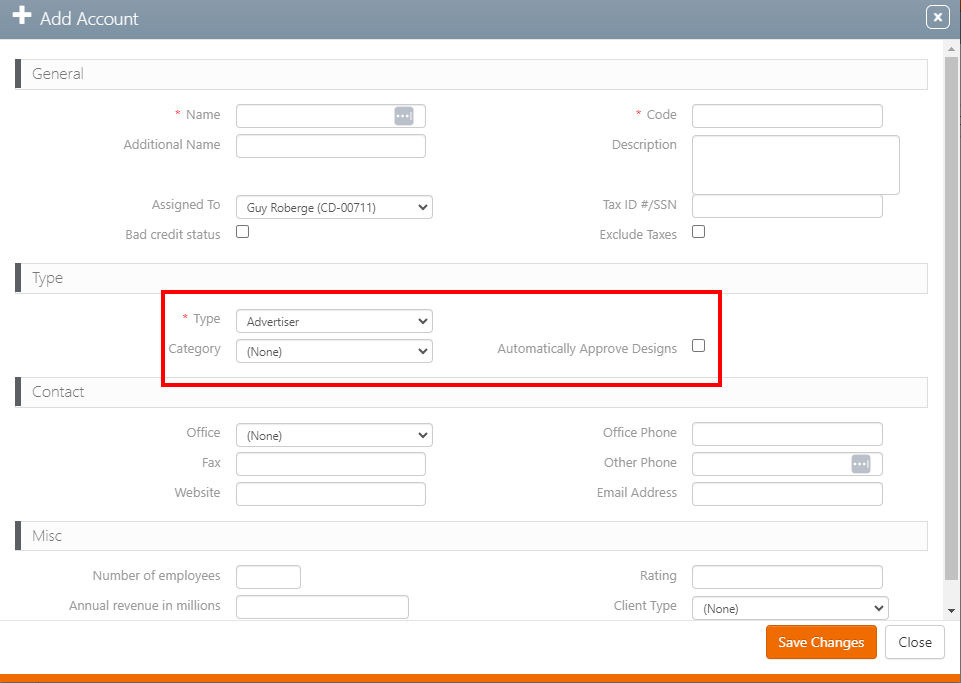
- Select an Account Type between Advertiser or Agency.
- Click Save Changes.
This presents a filter search screen for accounts.
This presents the Add Account dialogue box.
The Code for each Account must be unique.
When creating Advertisers, you can select Advertiser Category.
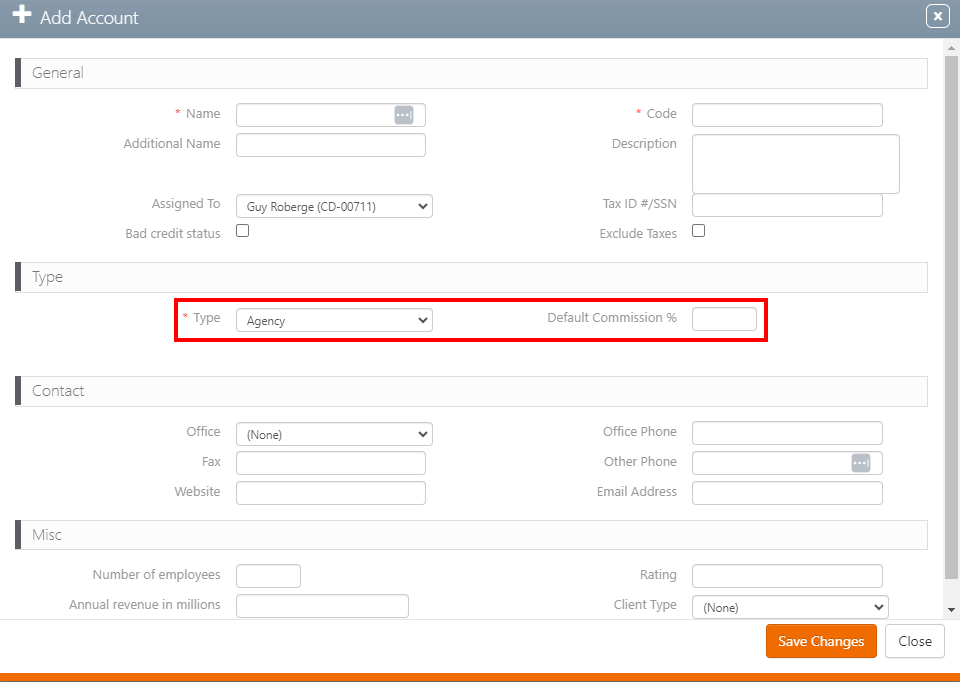
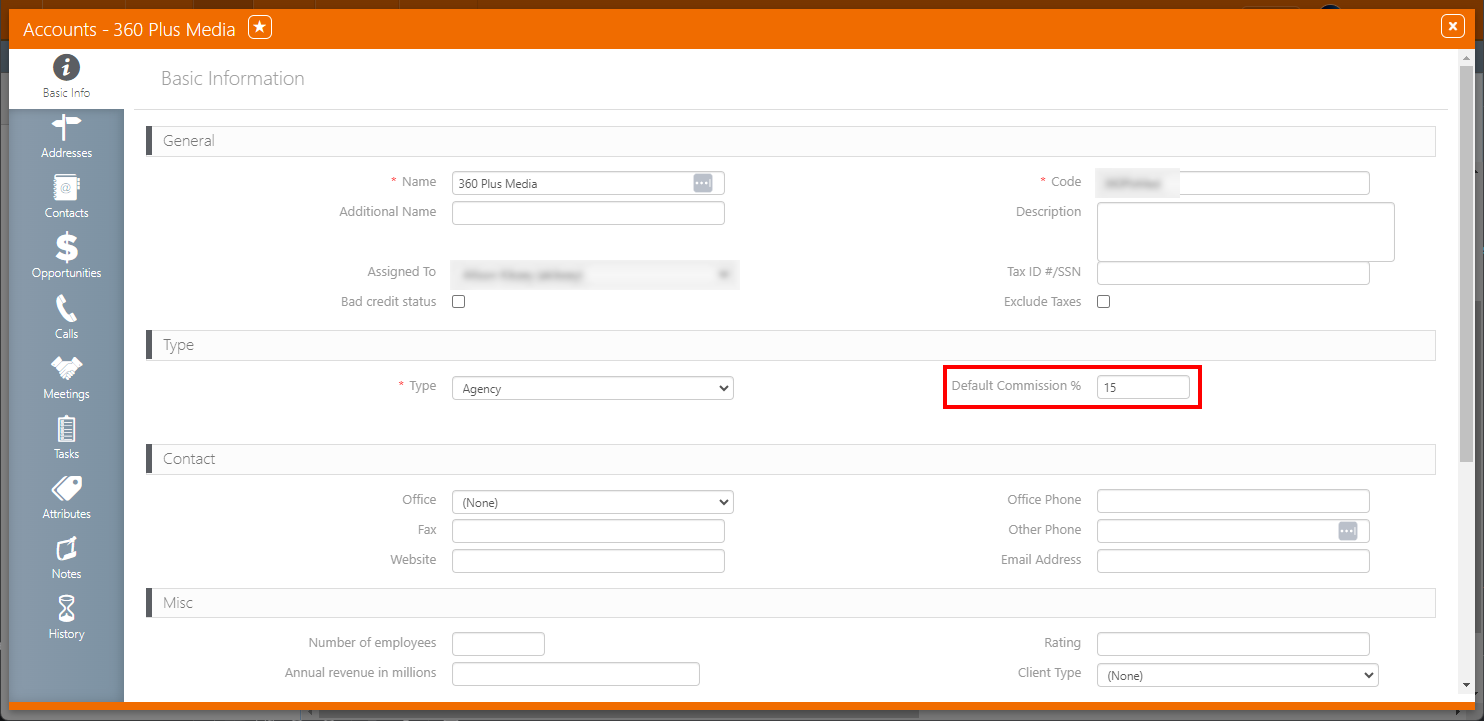
When creating Agencies, you can set the Default Commission %.
Once the account is created, it will be important to ensure that contacts and addresses are added to it.
Users with the Agency Commission Manager role can add or modify the default Agency Commission % for Agency account types. For more information, see Roles Overview.
- When a user creates a campaign and associates a primary agency with a default commission percentage, that percentage is applied to the media value of the campaign.
- When a user creates additional revenue with a primary agency and a default commission percentage, that default commission is applied to the additional revenue. Additionally, the user has the option to edit the default commission percentage as needed. For more information, see Entering Additional Revenues at the Campaign Level.
To modify the Default Agency Commission of an Account:
- Open Splash.
- Select Juice in the drop-down menu on the left.
- Click the CRM menu item in the top row, and then the Accounts tile.
- Locate the account using the filter search.
- When found, click the Account Name.
- Click the
 icon to edit the Account information.
 - In the Type section, enter a value in the Default Commission % field.
- Click Save changes.
This presents a filter search screen for accounts.
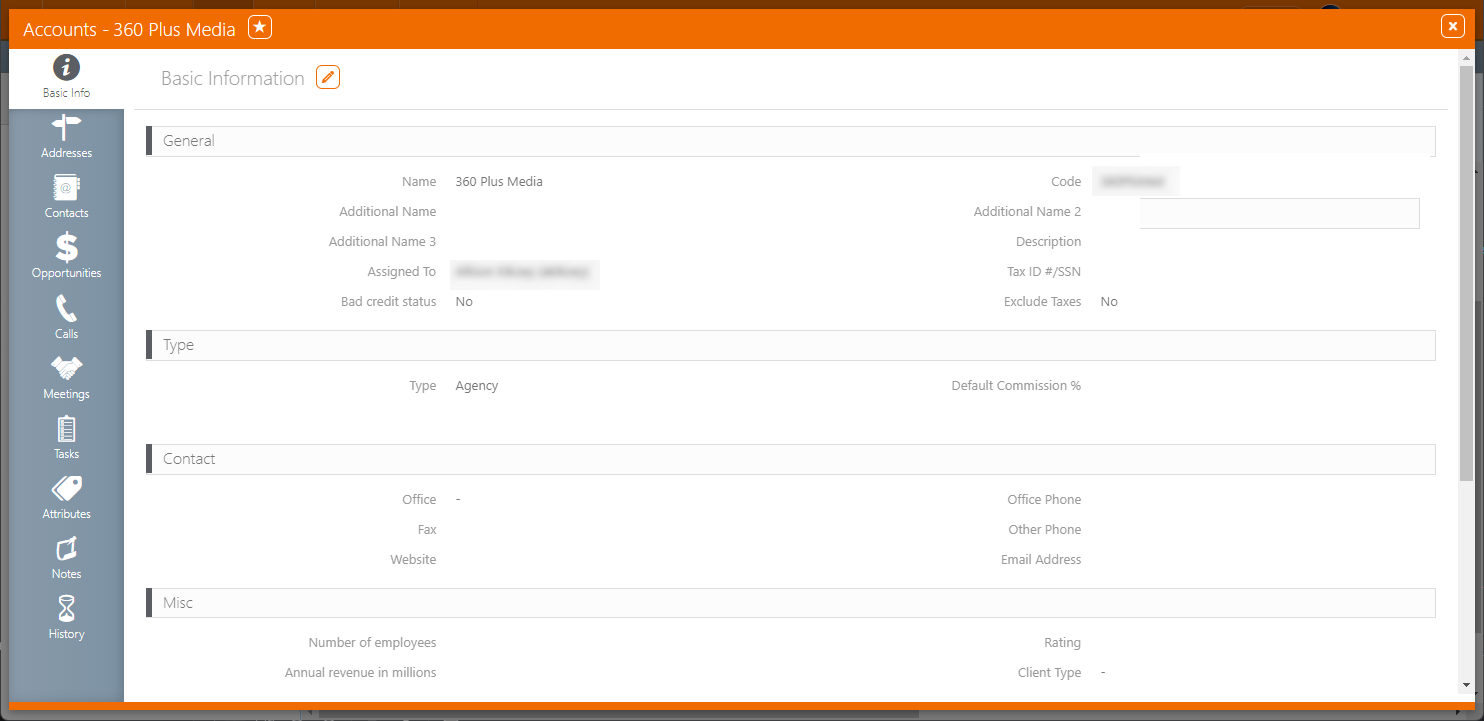
This presents the account record's Basic Info screen.
This field is available only if the Type drop-down menu is set to Agency.
To add an address to an Account:
- Open Splash.
- Select Juice in the drop-down menu on the left.
- Click the CRM menu item in the top row, and then the Accounts tile.
- Locate the account using the filter search.
- When found, click the Account Name.
- Within the account record, click the Addresses tab in the left navigation bar.
- If there is no address entered, click the
 icon.
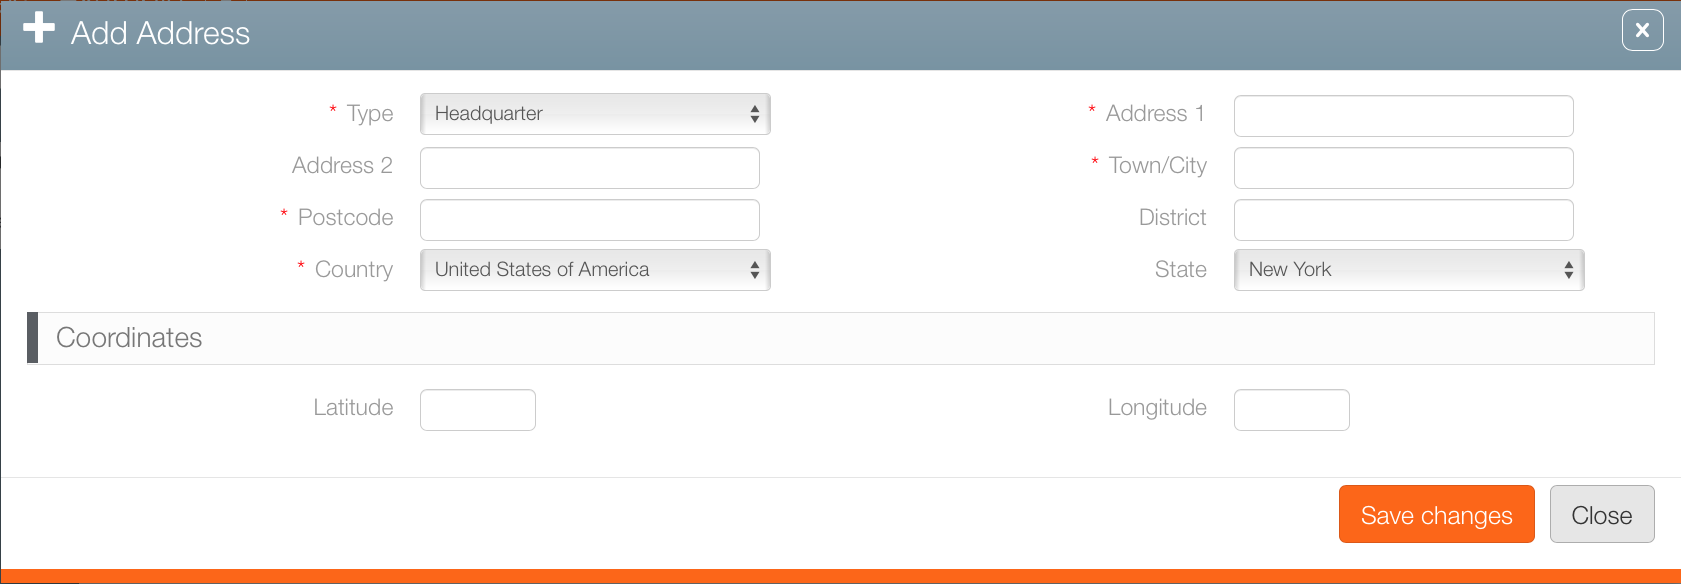
icon. - Enter the following Mandatory information:
- Type – Headquarter, Mail.
- Address 1 – Enter the civic address.
- Town / City – Enter the municipal region.
- Postal Code – Enter the postal zone.
- Country – Select a country.
- State – Select a state, provide or other region.
- Click Save changes.
This presents a filter search screen for accounts.
This presents the account record's Basic Info screen.
![]()
This presents the Add Address dialogue box.
The contact is the individual within the business that you talk to.
Contacts may be created throughout the system and linked to the following entities:
- Campaigns
- Plants
- Posting Companies
- Sites
- Vendors
To link a contact to an account:
- In the Account record, click the Contacts tab in the left navigation bar.
- Click the
 button to link a contact to this Account.
 - Choose the contact to link by selecting the check box next to it, then click the Link button.
- Click the
 button to edit the Contact Type, and select the type of contact required. For example, it could be Primary or Creative.
 - Click Save changes.
![]()
This presents the Contacts screen.
This presents a filter search screen for available contacts.
Note: Make sure that the contact has a valid email address.
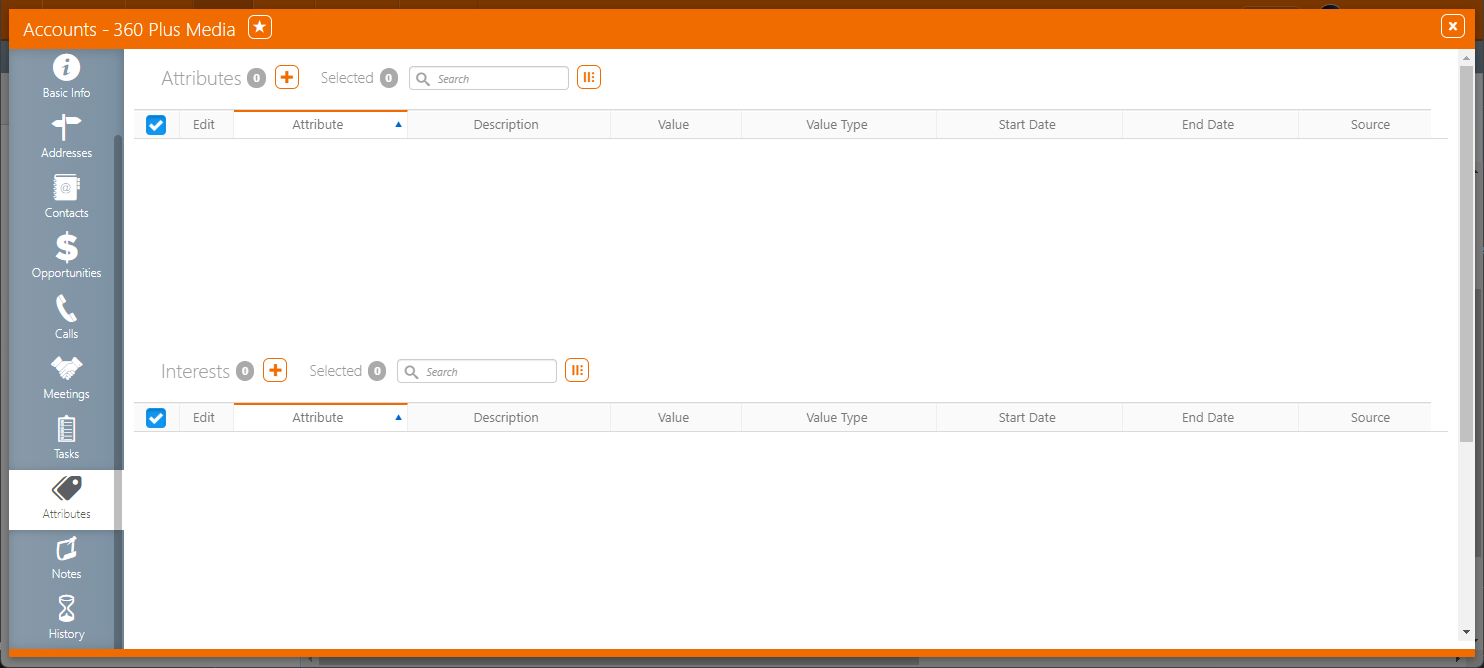
Attributes are additional customer specific labels that you can assign to the Account. For example, portrait or landscape may be configured as attributes. Demographic breakdowns may be another attribute. Attributes can then be used as filters, restrictions or sorts.
To add an attribute to an Account:
- In the Account record, click the Attributes tab in the left navigation bar.
- Click the
 button to add an Attribute to this Account.
 - Select an Attribute to add to the Account.
- Enter a Value for your attribute.
- Enter a Start Date and, optionally, an End Date.
- Click Save changes.
![]()
This presents the Attributes screen.
This presents the Add Attribute dialogue box.

