Sales users typically select a campaign's billing schedule during the creation of a proposal when the avails are created. Sales users can also change the billing schedule in an existing proposal, or like chartists and digital schedulers, add billing schedules to existing campaigns (see Within a Campaign).
Note: If the payment contact and address for the account connected to the proposal are missing, then the billing schedule cannot be saved.
- Log into Juice and select Sales.
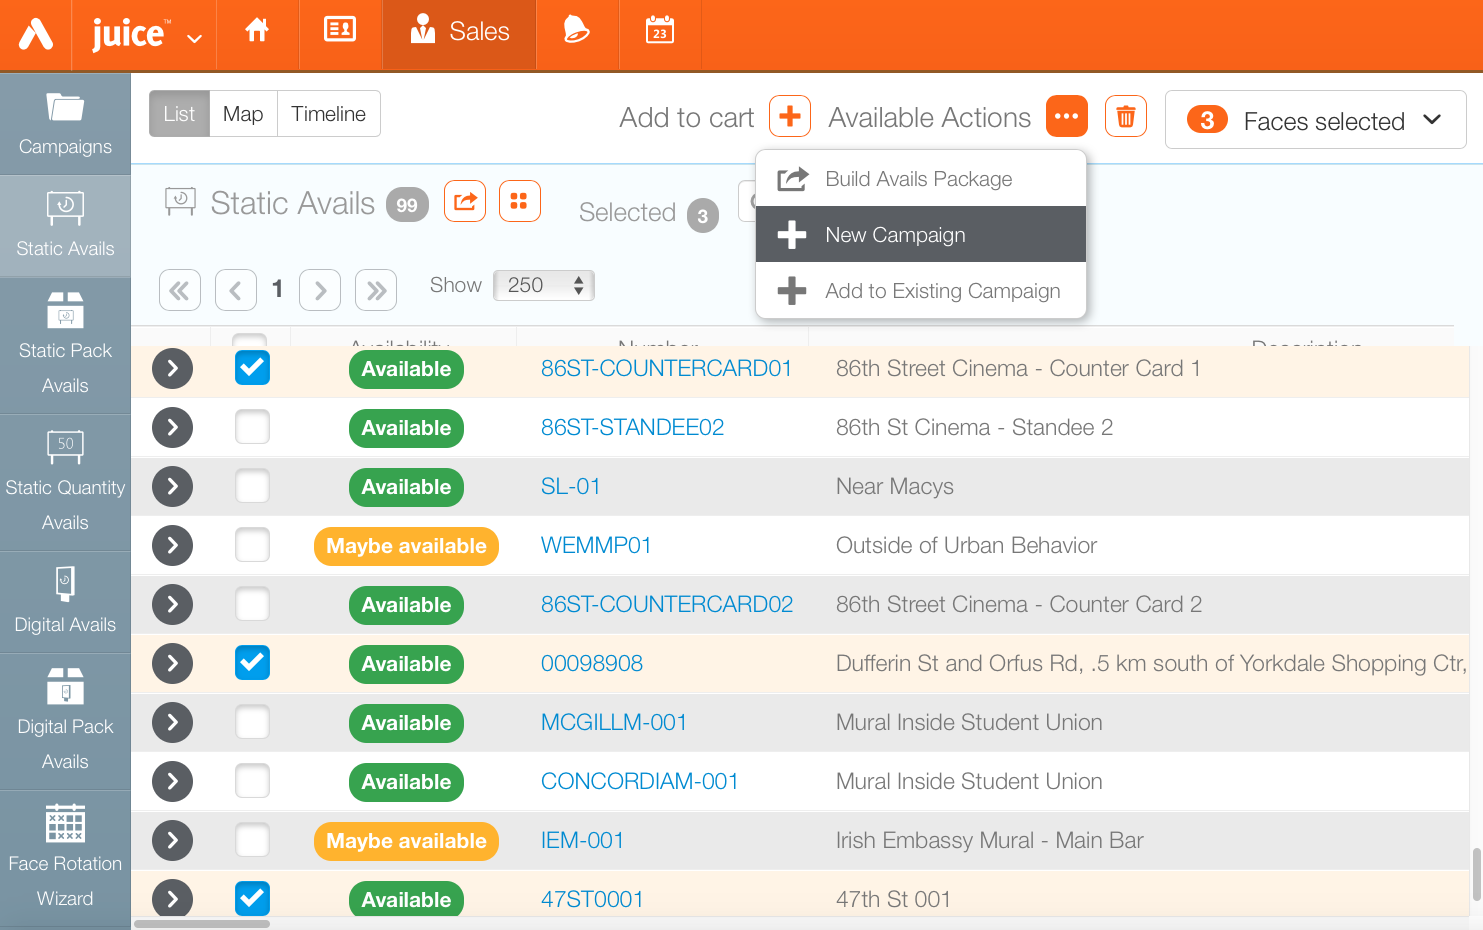
- Depending upon the requirements, click Static or Digital avails, or Static Pack or Digital Packs. Enter search criteria and click Search.
- Enable the check boxes next to the assets to be added to the proposal. Click the
 icon then Add to Cart.
 - Click the
 button to select New Campaign.
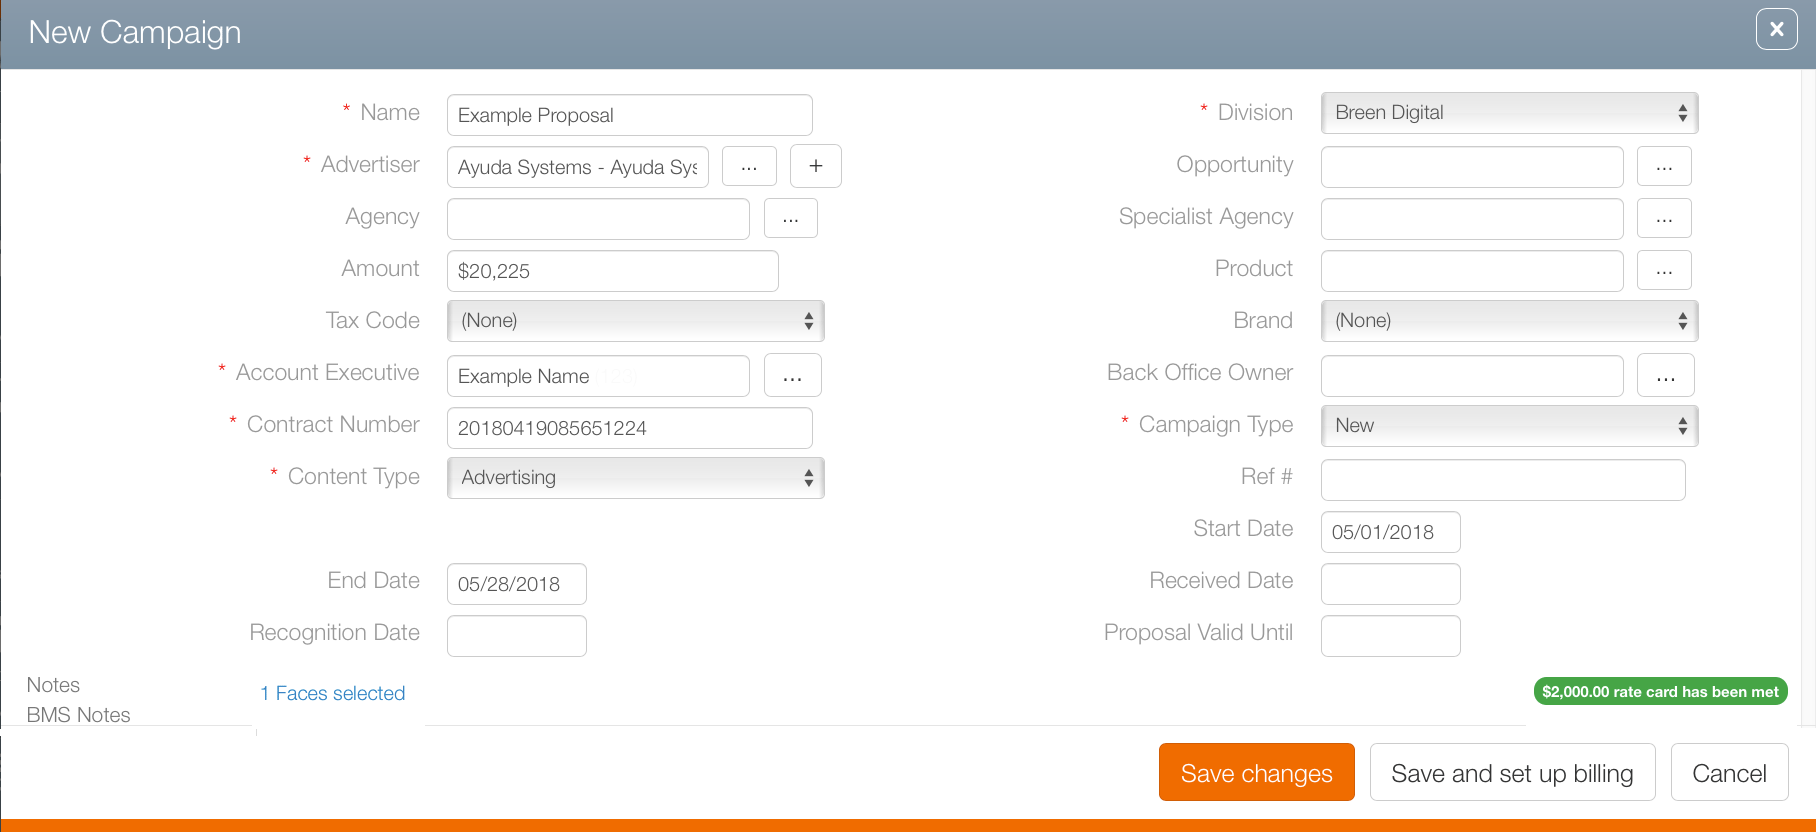
 - Enter the following Mandatory information:
- Campaign Name – Name the proposal or campaign.
- Account Executive – Select an account executive to manage the campaign.
- Contract Number – A contract number must be assigned (this can be automatic at some customers).
- Content Type – Select the content type from the drop down menu: advertising or editorial.
- Division – Select a division responsible.
- Campaign Type – Choose new or renewal.
- Click Save and set Up billing.
- Enter the following Mandatory information:
- Billing Schedule Template – Choose a billing schedule from the drop down menu. The options available will be different for each Broadsign Ayuda customer.
- Contact – Choose the person at the agency or advertiser to whom the invoice must be sent.
- Customer – Identify the agency or advertiser from the configured list of customers in your Broadsign Ayuda instance.
- Address – Choose the address where the invoice must be sent.
- Click Save changes.
This presents a filter search window.
This presents the New Campaign dialogue box.
This is where the campaign's fundamental parameters are set.
Scroll down to edit the purchase type and booking types if necessary.

This presents the Billing Schedule dialogue box.
- From within Juice, click the Sales tab, then the Campaign tile.
- Locate the needed campaign and open the campaign record.
- Within the campaign record click the Billing tab in the navigation bar on the left.
- Click the Billing Schedule
 button.
This presents the basic info screen.
![]()
This presents the Billing Schedule dialogue box as outlined above.
Once a proposal's billing schedule is selected the sales team, the chartist and digital scheduler creates the campaign that will generate the items that are billable and will eventually appear on the invoice or invoices for the campaign.


