A Site refers to the civic address where the media is located. Faces are the installation points at the site. A Site is one of two mandatory hierarchy levels for assets, the other one being a Face (see Asset Hierarchies).
An inventory's position in the asset hierarchy is set at the Site Category level. Site Categories define the way a certain type of Media will behave in the same way that categories change the details of agencies or designs.
To locate Sites:
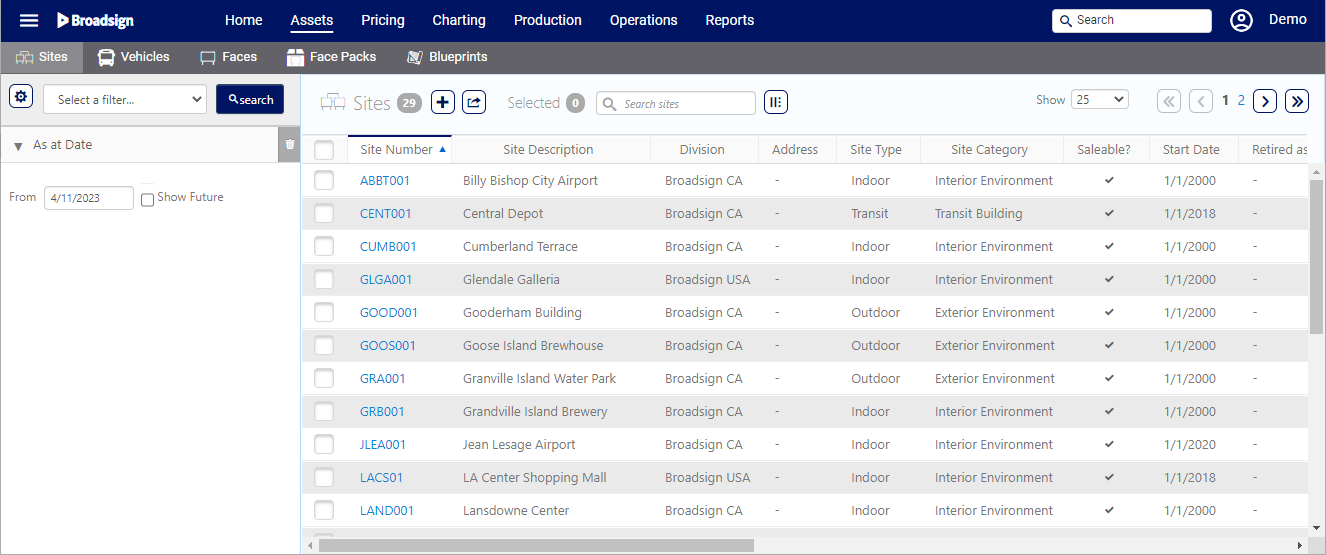
- Access Operations in the top-left menu, click the Assets tab, and then the Sites tile.
- Click Search.
This presents the filter search window.
The screen will refresh to show the list of Sites available.
A Site is one of two mandatory hierarchy levels for assets, the other one being a Face (see Asset Hierarchies).
Note: The Site inherits some of the information from the Faces, such as Saleability. For more information, see Asset Inheritance.
To create a Site:
Static Campaigns
- Access Operations in the top-left menu, click the Assets tab, and then the Sites tile.
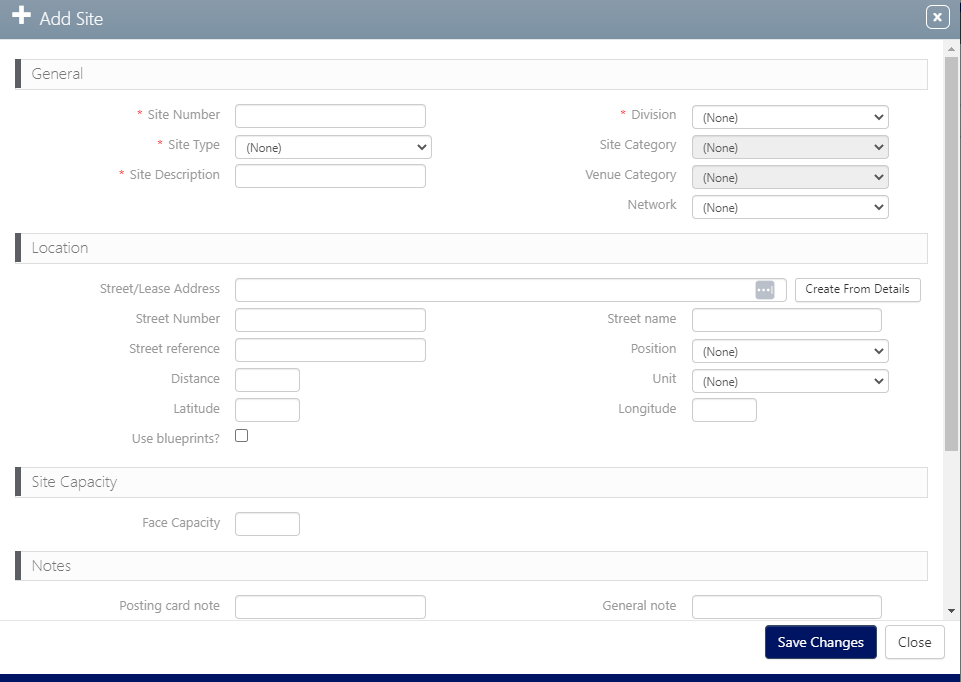
- Click the
 icon to add a site.
 - Enter the following mandatory information:
- Site Number – Unique number that identifies the Site. Must be unique per Division.
- Division – Select the Division for which the Site is operated.
- Site Type – Select between Indoor, Outdoor, or Transit.
- Site Description – A free form description to explain the Site. This field is searchable.
- Area – From the drop-down menu, select the Area to which the Site belongs.
- Click Save Changes.
This presents the filter search window.
This presents the Add Site window.
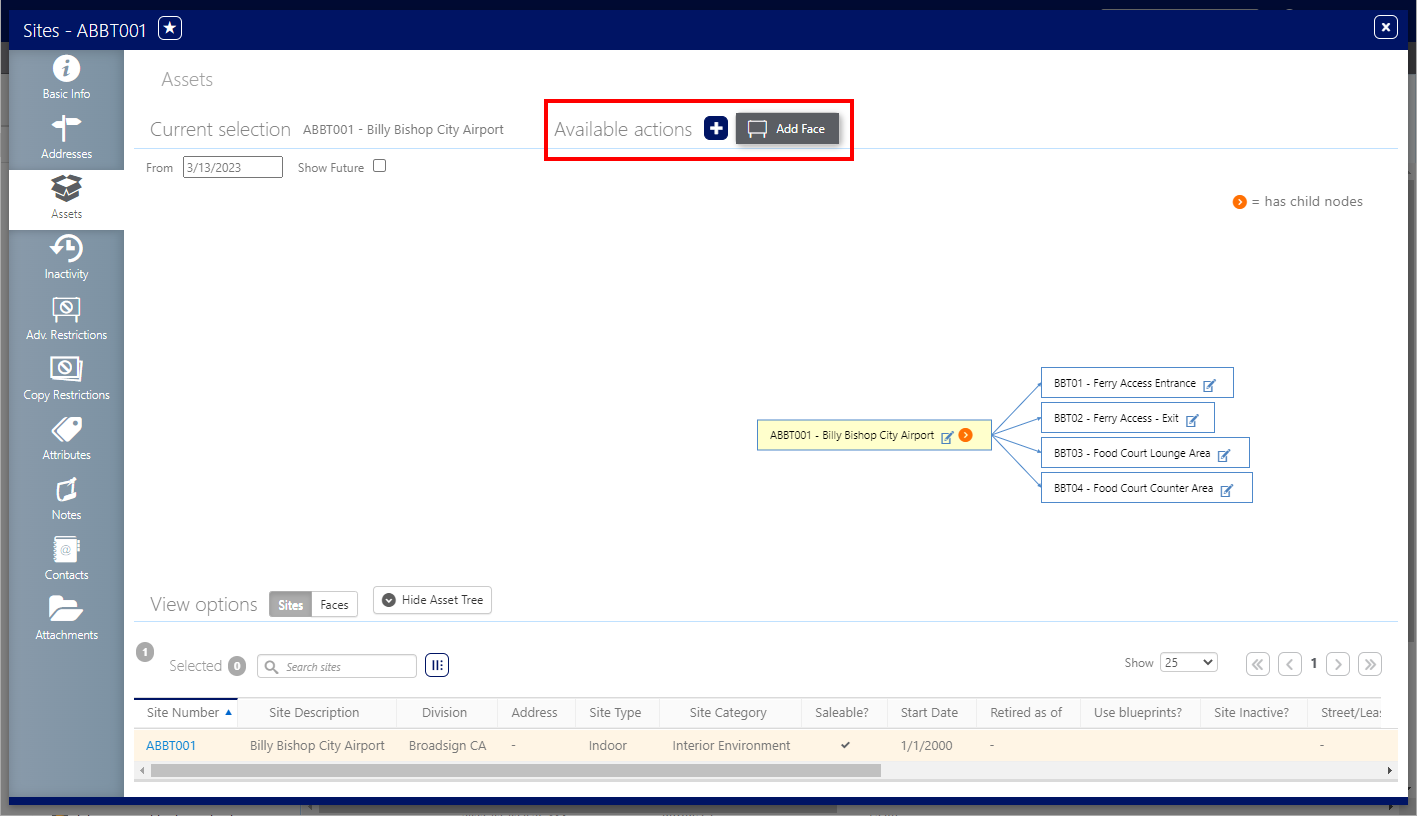
Within the site record, click the Assets tab in the left navigation bar.
![]()
This presents the site's details. This includes a flowchart illustrating the parent child relationship between the site and any faces it contains.
If the Asset is set to ‘mandatory’, then users will not be able to create a Face without at least one Location assigned to the Site.
Once your Site has been created, you can add one or more Faces to it.
To add Faces to a Site:
Static Campaigns
- In the Site tile, locate the Site created in Work with Sites by using the Site Number that you have attributed it.
- Open the Site by clicking the Site Number.
- Within the site record, click the Assets tab in the left navigation bar.
- Click the
 icon next to Available actions, then select Add Face.
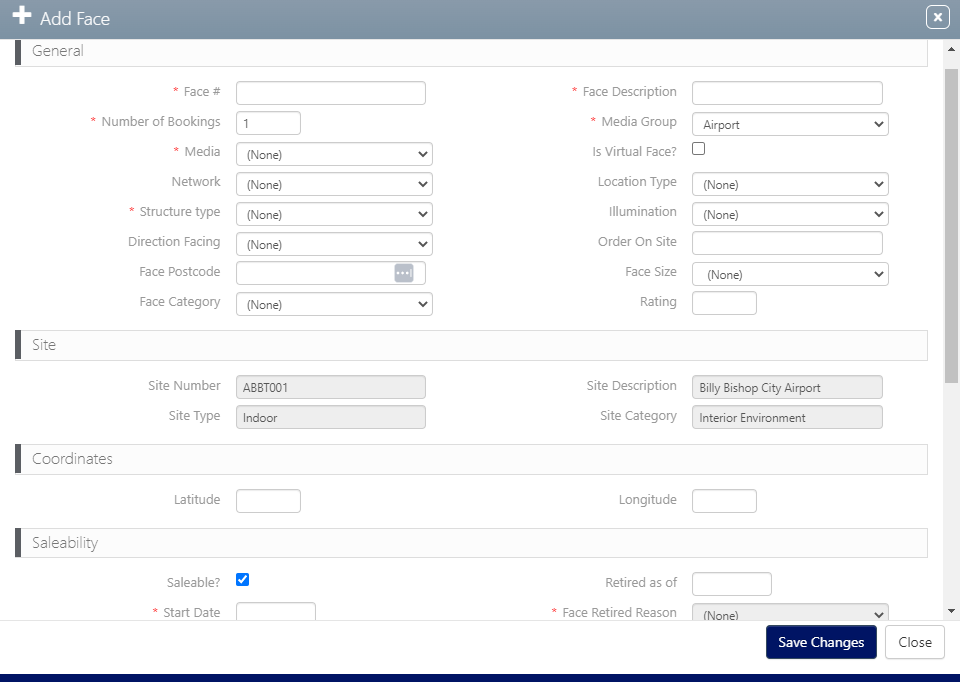
 - Enter the following mandatory information:
- Face # – Unique number that identifies this Site. Must be unique per Site.
- Face Description – A free form description to explain the Face. This field is searchable.
- Media Group – Each customer has a different hierarchy of media groups. These are used to organize the inventory of assets into logical groups. For example, all bus shelters might be one group and restaurants might be another.
- Media – The media format of your face.
- Saleability/Start Date – The Face will be available for sale starting at this date.
- Saleability/Face Retired Reason – Enter a date in the Retired as of field. This enables the Face Retired Reason drop-down menu. Select a reason from it. The reasons will differ for each client.
-
Click Save Changes.
This presents the Site's Basic Info page.
![]()
This presents the site's details. This includes a flowchart illustrating the parent child relationship between the site and faces that it contains.
This presents the Add Face window.


