- From within Splash, click the Pricing tab in the top row.
- Click the Media Rate Card tile.
- Click the
 button to add a new rate card.
 - Enter the following mandatory information:
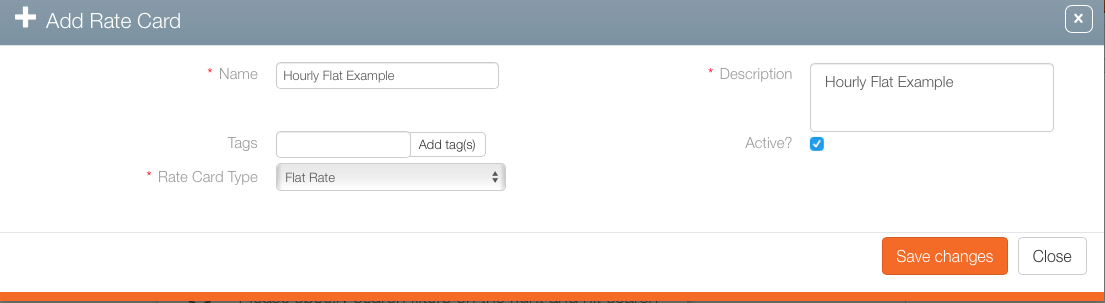
- Name – Provide a purposeful name that is well differentiated from other rate card names.
- Description – A free form description to explain the rate card's usefulness. This field is searchable and must be unique per rate card type.
- Rate Card Type – Choose Flat Rate from the drop down menu. Flat rates are constant prices. These will be used in most cases.
- If applicable, define the following additional options:
- Active? – Enable this check box to make the rate card available for use.
- Tags – Tags can be used to organize content by some Broadsign Ayuda customers. These are short searchable identifiers that your team can use at their discretion.
- Click Save Changes.
- In the Values tab, click the icon to add a new value.
- Enter the following mandatory information:
- From Date – When this rate card goes into effect.
- To Date – You can set up an end date, but this is not mandatory. It will define the date at which the base rate card will expire.
- Rate Card Amount – The flat value charged.
- Duration Type – Select the duration type.
Single – Fixed price for the whole booked period. This is typically used for additional revenue rate cards. See Adding an Additional Revenue Rate Card.
Fixed Month – Days of booked period are prorated to each month, which has fixed day count set up by Broadsign Ayuda according to your needs.
Week – Days of booked period are prorated to a week.
4 Weeks – Days of booked period are prorated to 4 weeks.
Month – Days of booked period are prorated to each month, with their exact number of days.
2 Weeks – Days of booked period are prorated to 2 weeks.
Hour – Booked hours are rated individually. See Adding a Flat Hourly Rate Card.
- If applicable, select a Segment Type. You have the following choices:
- None – The Rate Card will be applicable to any faces.
- National – A National Rate Card can be applied on a large territory area. They are mostly used for advertisers that launch campaigns on a national level, and therefore book a consequent number of faces.
- Local – A Local Rate Card is used for district or regional areas. They usually are used for small advertisers (local shops, etc.) which will potentially book only a reduced number of faces, on a small area.
- Click Save Changes.
- Select the Faces or the Face Packs tab on the left.
- Click the
 button.
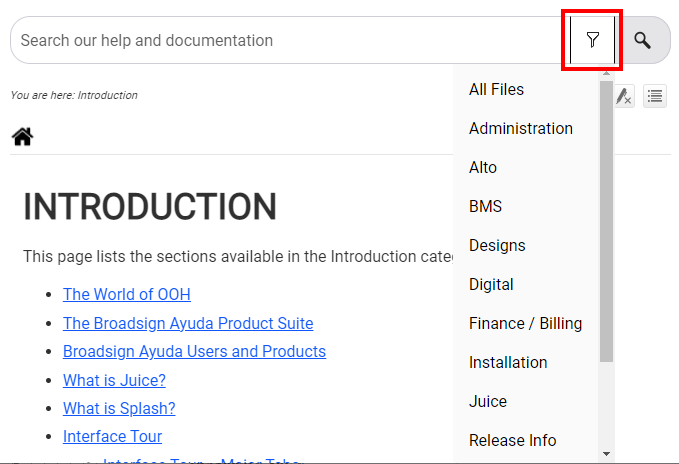
 - Select a search filter to locate the needed faces or face packs.
- Select the faces or face packs by enabling the check boxes in the rows in the search results and clicking the Link button.

This presents a filter search screen for rate cards.
This presents the Add Rate Card dialogue box.
This closes the Add Rate Card dialogue box and presents the Basic Info screen. It contains the information entered in the Add Rate Card dialogue box. If there was an error, click the Pencil icon to edit it.
![]()
This presents the Add Rate Card Value dialogue box.
Warning: Be very careful with the Segment Type you chose for your Rate Card value. If it does not match the Segment Type in your Campaigns' Segments, you won't be able to use the Rate Cards for those Segments. If you are not sure, select None as it will not restrict the use of the Rate Cards.
This closes the dialogue box.
The next step is to choose the assets to which the rate card applies.
![]()
This presents a filter search for locating the faces or face packs to be assigned to the rate card. This can be done individually or in groups.

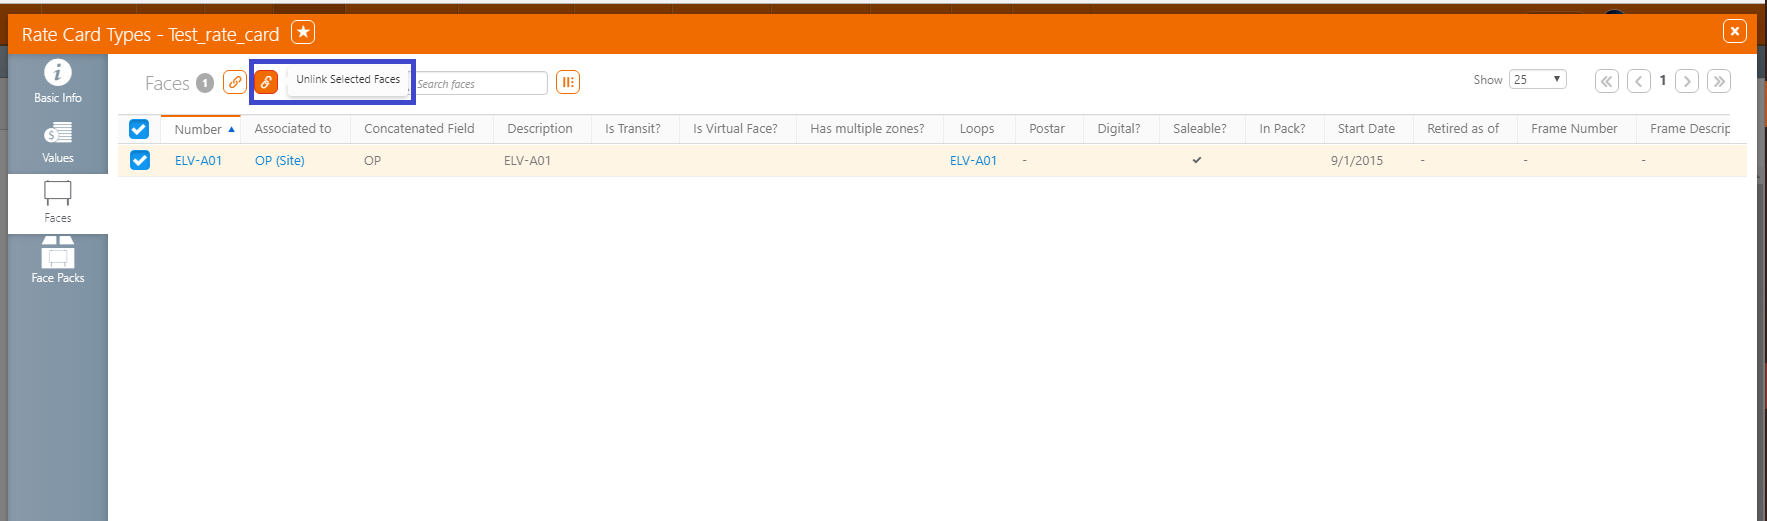
Note: You cannot link Faces (or Face Packs) that are already linked to another Rate Card. If you want to link them to this new Rate Card, you need to unlink them first from the other.
You have now linked a Face, which you can unlink at any moment in selecting it and clicking on the  button.