A single billable item can be added to a campaign record in BMS.
To add a billable item:
- In BMS, load the Invoicing Package.
- Click the Billing Connector, and then click Billing.
This presents a search filter window.
- Enter search parameters and click
 .
. - Click the required campaign.
- Click the Billing tab.
- Select an invoice, then, click the Invoice tab.
The search results will appear in the pane on the upper right.
This refreshes the campaign record window in the bottom pane.
The screen will display the billing schedules.
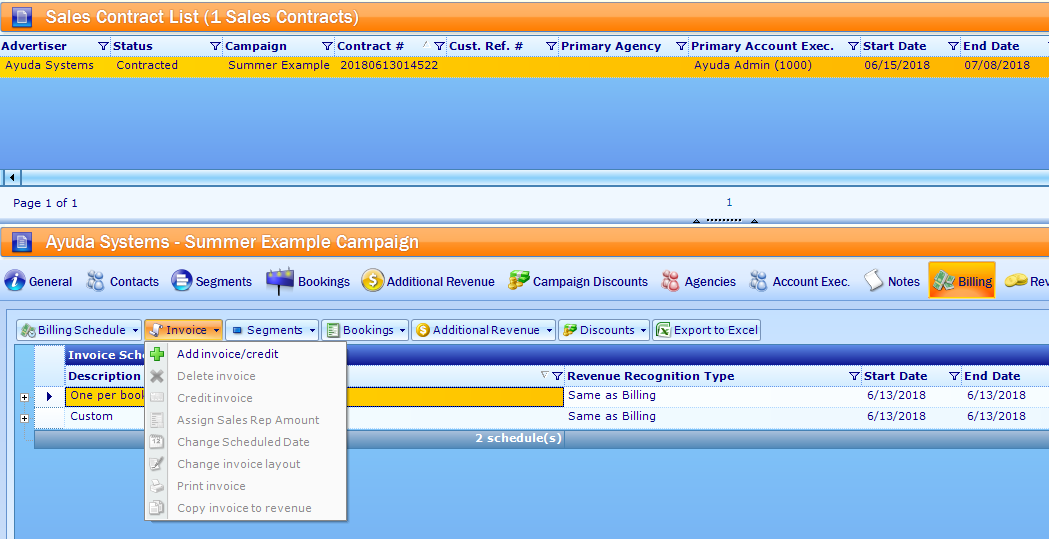
Two paths: Invoice or Billing Schedule
- Select Add Invoice/Credit to add an invoice and its details manually.
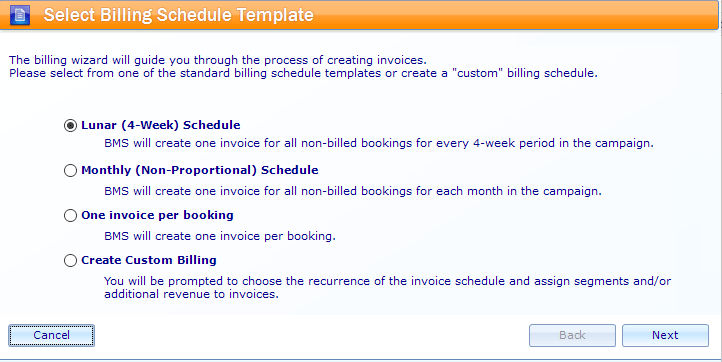
- Choose a Billing Schedule template from the schedules configured for your company.
- Click Next.
- Select the segments to be included in the invoice.
- Using the radio buttons, choose either:
- Invoice proportionally based upon the booking level amounts or
- Invoice proportionally at the booking level within the segment based upon rate cards
- Click
 .
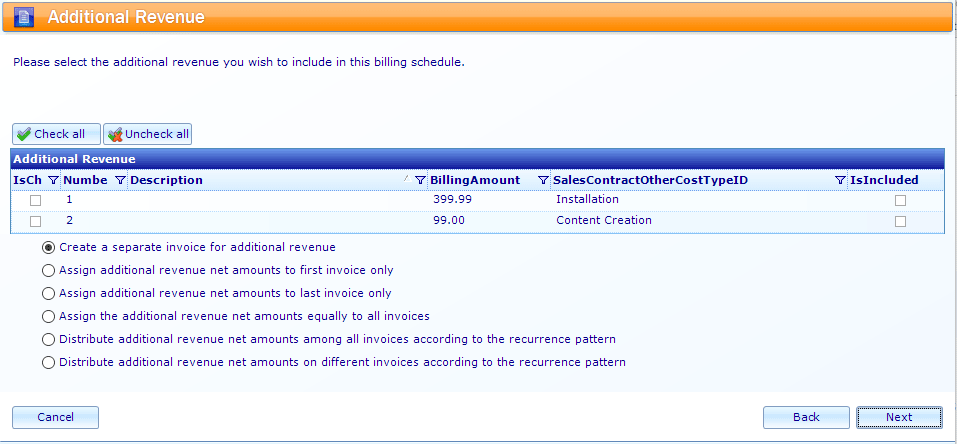
. - Click the Create a separate invoice for the additional revenue radio button, then click Next.
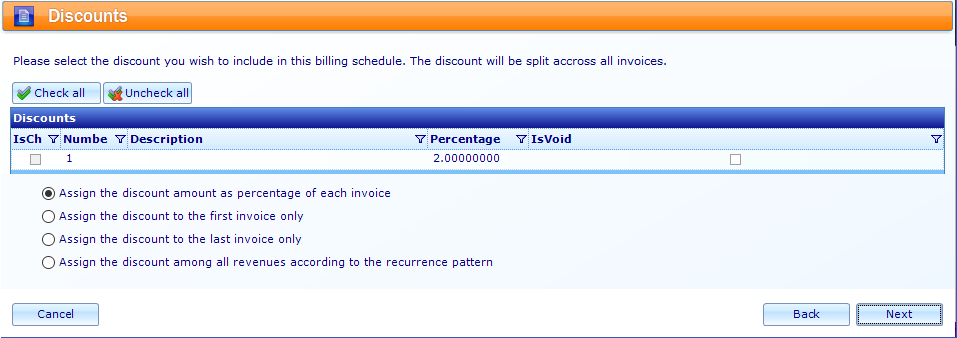
- Select the rows to be discounted, if any, by enabling the check boxes. Then choose one of the following using the radio buttons:
- Assign the discount amount as a percentage of each invoice
- Assign the discount to the first invoice only
- Assign the discount to the last invoice only
- Assign the discount among all revenues according to the recurrence pattern
- Click .
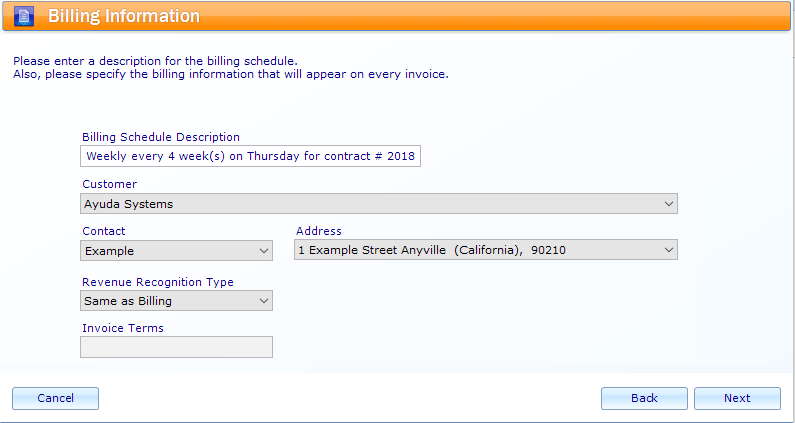
- Ensure that the Contact and Address fields are filled out correctly.
- For Revenue Recognition type, select Same as Billing from the drop down menu in that field. Click .
- Select the segment and face information layout from the options.
- Click .
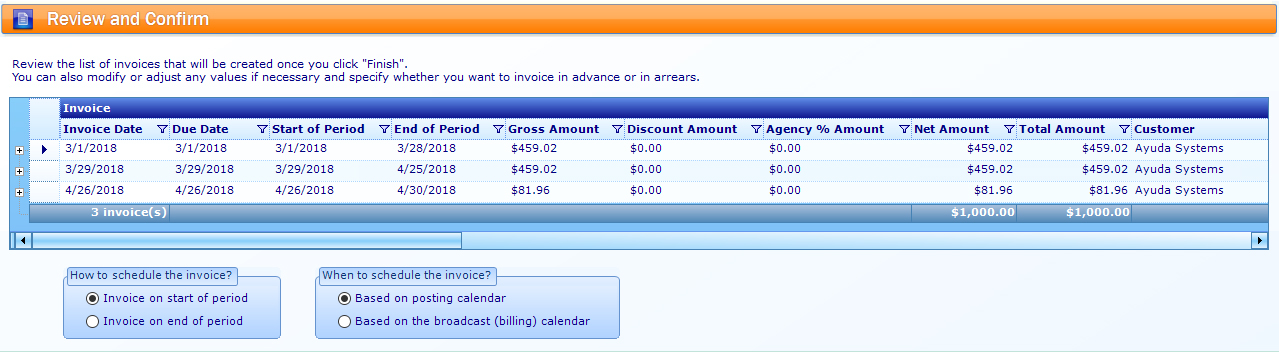
- Choose How and When to schedule the invoice: at the Start or End of the period, and based upon the posting or broadcast calendar.
- Click
 .
.
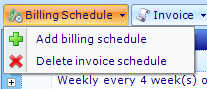
The other option is to select a billing schedule for the whole campaign. Do this by using the billing schedule tab and selecting Add Billing Schedule.
This opens the Invoice Wizard in a new window.
This advances the wizard to the segments selection page.

The screen refreshes to present the Additional Revenue screen.
This presents the Discounts screen.
This presents the Billing Information screen.
This presents the Invoice Template page.
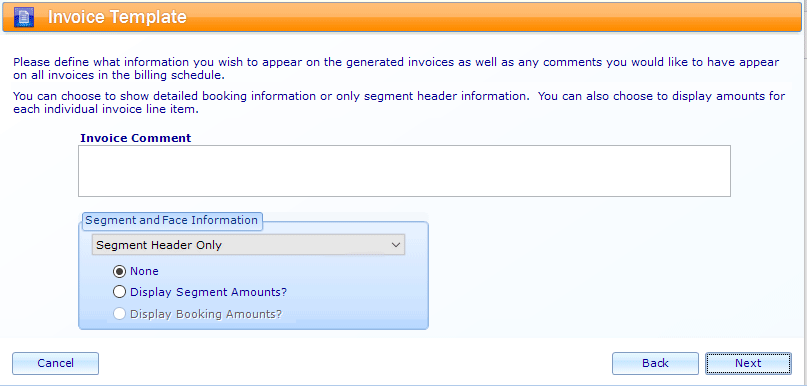
Invoice Comment is an optional text field that will appear on the invoice and be readable by the client.
This presents the Review and Confirm screen. Ensure that the data is correct.