With Broadsign Direct, you can create rate cards and assign them to screens on your domain. The rate card data will appear in both the Package Builder and the Proposal Builder.
Also, you can set the slot duration, flight duration, and price.
Note: The Rate Card Management section only appears to users assigned the Admin role. However, users assigned the Manager role can associate rate cards with screens. See User Privileges by Role.
Note: Screens on your domain combine display units and display types (among other resources) in Broadsign Control.
For a detailed description of this section of the domain settings, see Digital Rate Card Management Section
To add a digital rate card, you will need to access the Domain Settings (see Digital Rate Card Management Section).
Note: There is no limit to the number of rate cards you can add to your domain.
To add a digital rate card:
-
From the domain settings options on the left, select Digital Rate Card Management.
-
Click New Rate Card. A new line appears at the top of the rate card list panel.
- Enter your rate card information, from left to right:
- Name: The name of the rate card. For our example, we will enter "Subways".
- Ad Flight: The duration of the rate card's flight. For our example, we will enter "1".
- Flight Type: The unit of the rate card's flight length. For our example, we will enter "Months".
- Ad Duration: The duration of the rate card's ad slot (in seconds). For our example, we will enter "12".
- Price: The price of the rate card, using your domain's currency. For our example, we will enter "75,000". (The currency will default to that which you set in the General section. In our case, it will be "USD". See Configure your Domain).
- CPM: The Cost per Thousand.
-
Once you have entered the rate card information, to confirm, click the
 icon. To cancel, click the
  icon.
icon.
Note: We will assign our rate card to individual screens, (see Associate Screens with a Rate Card).
Next, we will edit our new rate card.
You can edit a rate card at any time. In our example, we will adjust the name, slot duration and price.
Note: We will assign our rate card to individual screens, (see Associate Screens with a Rate Card).
To edit a rate card:
- In the search bar, enter "Subways" to find our new rate card.
-
Click the
 icon at the far right.
 - Change the following information:
- Name: "Subways - Escalators"
- Ad duration: "10"
- Price: "65,000"
- Click the
 icon to confirm your changes. To delete your changes and revert to your last "explicit" save, click the
  icon.
icon.
Next, we will associate some screens to our rate card.
Next, we will associate a rate card with a few screens. As a result, as you add screens to a proposal (see Select Inventory) or package (see Description, Synchronized Screens, Ad Flight, and Price), the rate card pricing information will appear in them.
To associate screens with a rate card:
- From the rate card list panel, locate our new rate card.
- Click the box that says, Choose screens.
A list of your screen inventory appears.
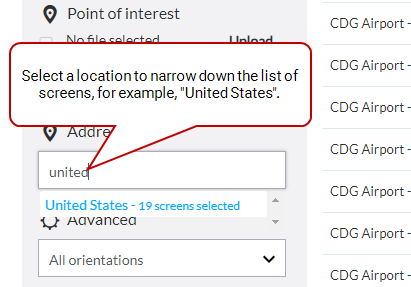
- Narrow down your list to only those screens in a specific location, for example, in the United States. In the Address box, start typing "United States".
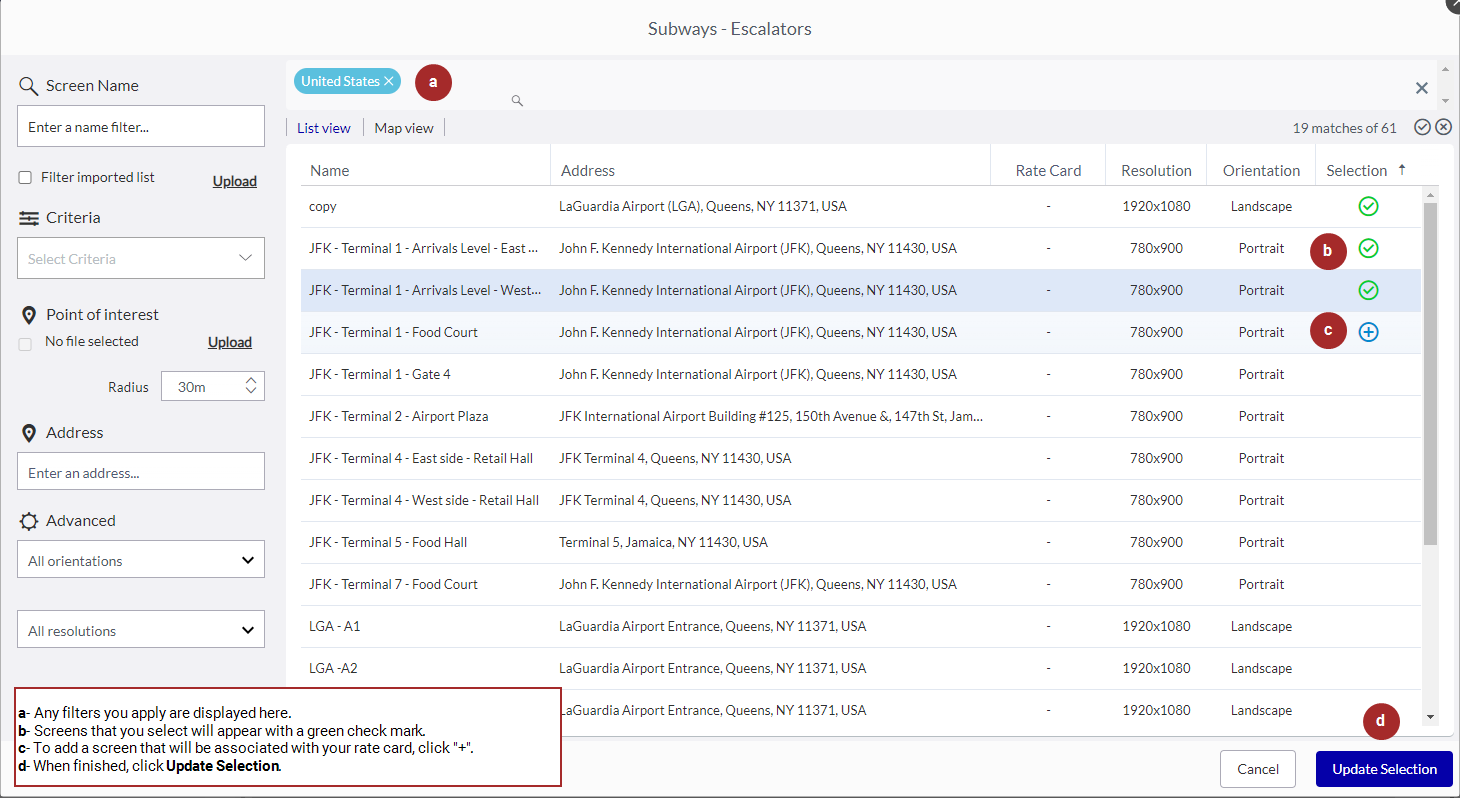
- Select your criterion. It appears at the top of the page. This helps you track which filters are narrowing the search.
- Select specific screens. With your mouse, point to one of the screens. The selection icon will appear.
- Select the screen. A green check mark appears next to it. Select the remainder.
- Once you have selected the screens you want, click Update Selection.
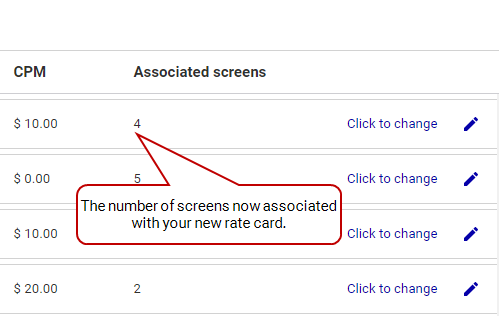
- In the Associated Screens column, you will see the number of screens you selected.
- To edit the screens associated with the rate card, click on the box that says Click to change.
After you have set a rate card for your domain, and assigned some screens to it, you could continue to set up your domain:


