Message Wizard
The "message wizard" allows you to create and schedule messages. You can access it from the Messages or Emergencies pages.
The message wizard offers the following pages:
- Campaign (only in the Messages page), see Create a Message in an Existing Campaign.
- Content
- Screens (may not be available in certain circumstances)
- Schedule
- Confirm
For a brief, detailed tutorial, see Message Creation Tutorial or Create a Message in an Existing Campaign.
Note: Once you have accessed a page in the message wizard, you can advance and reverse pages as needed with the Previous and Next buttons.
Note: Only users with the Can prepare an emergency message permission can view the Emergencies page. If you need this permission, contact your domain administrator. For more information, see Users and Groups Permissions.
To access the message wizard:
- Log in to Broadsign Publish with the credentials your Admin provided.
-
On the Messages or Emergencies page, select Create a new message.
The message wizard opens on one of two pages:
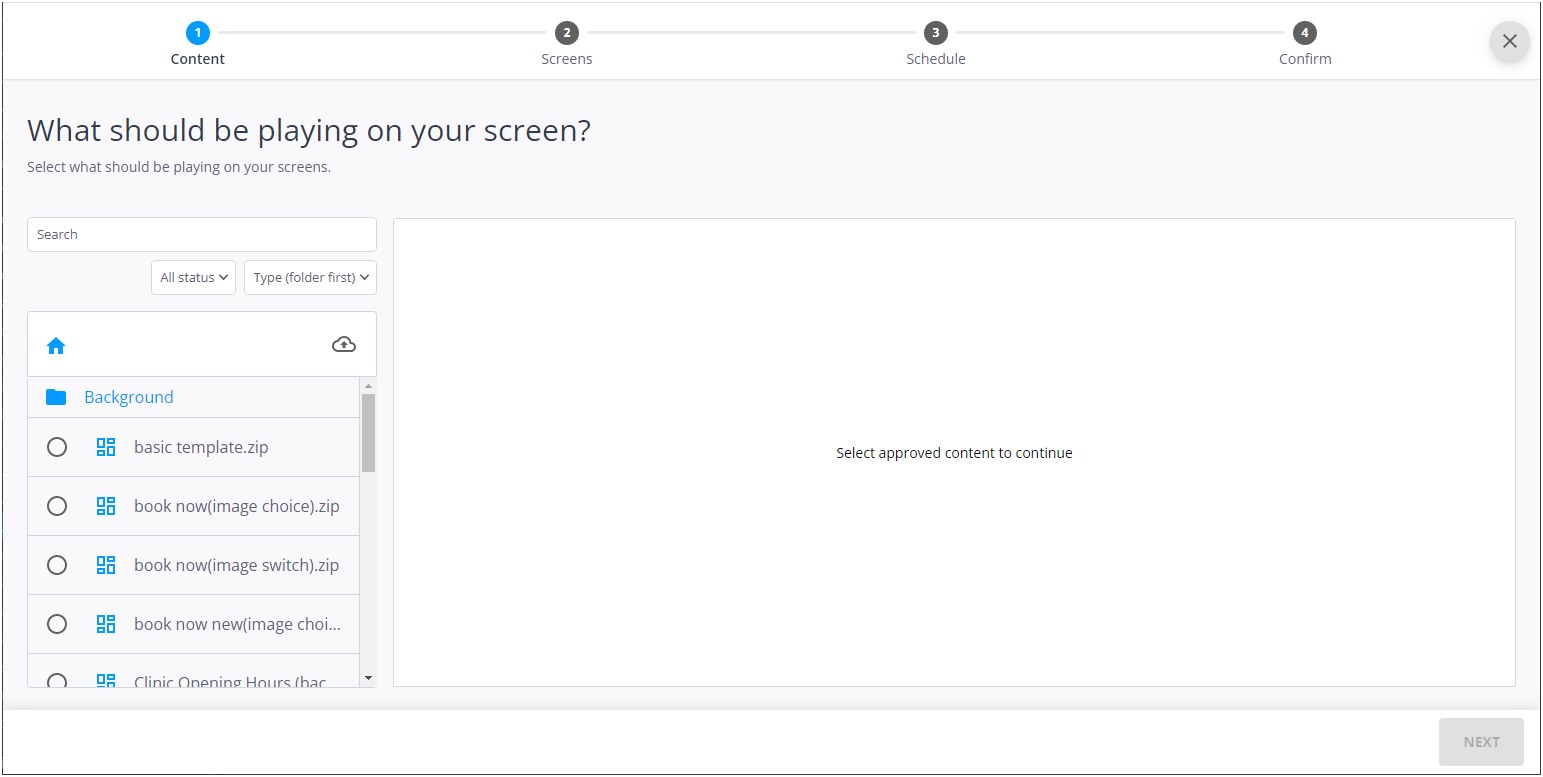
- If you do not belong to a Client group, the wizard opens on the Content page. You must select the content that you want to use for your message to continue with the wizard. For more information, see The Content Page.
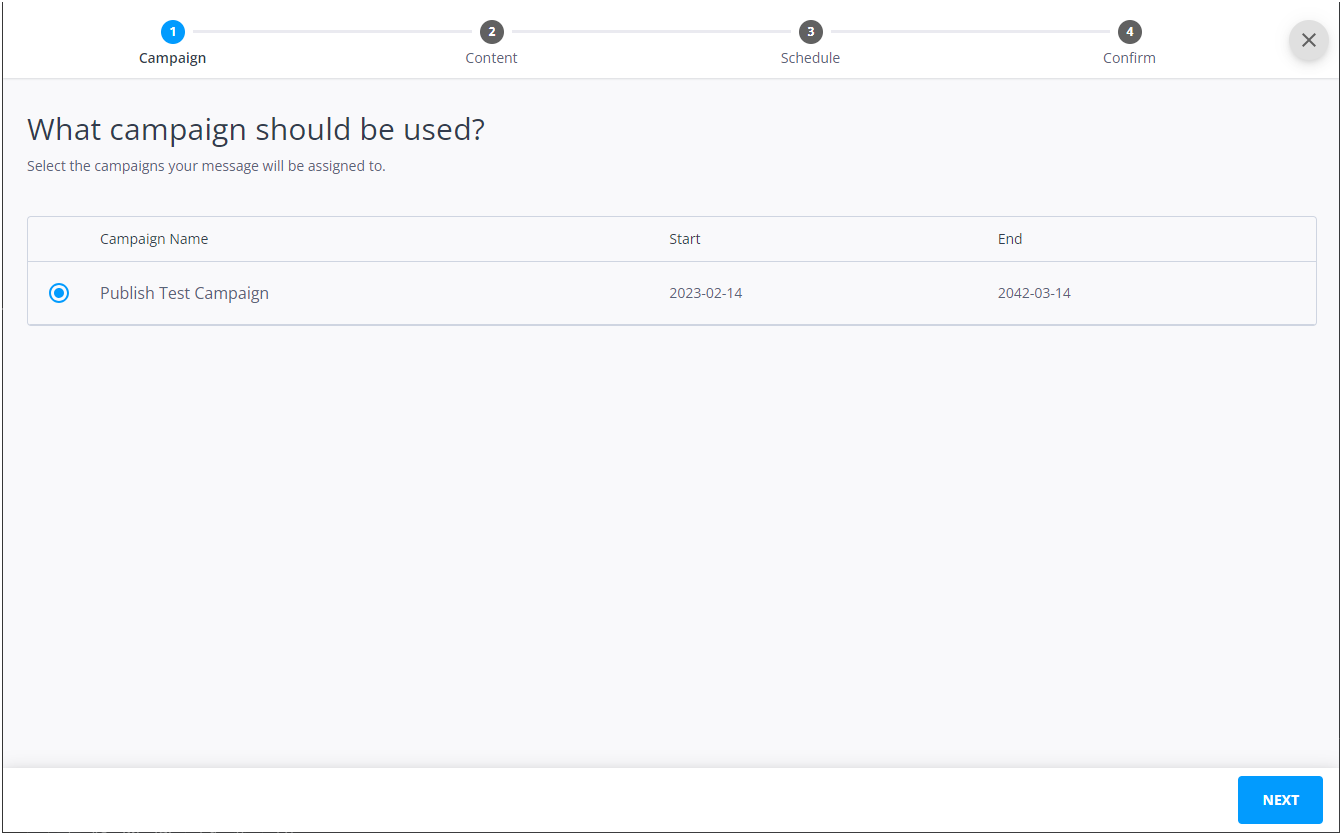
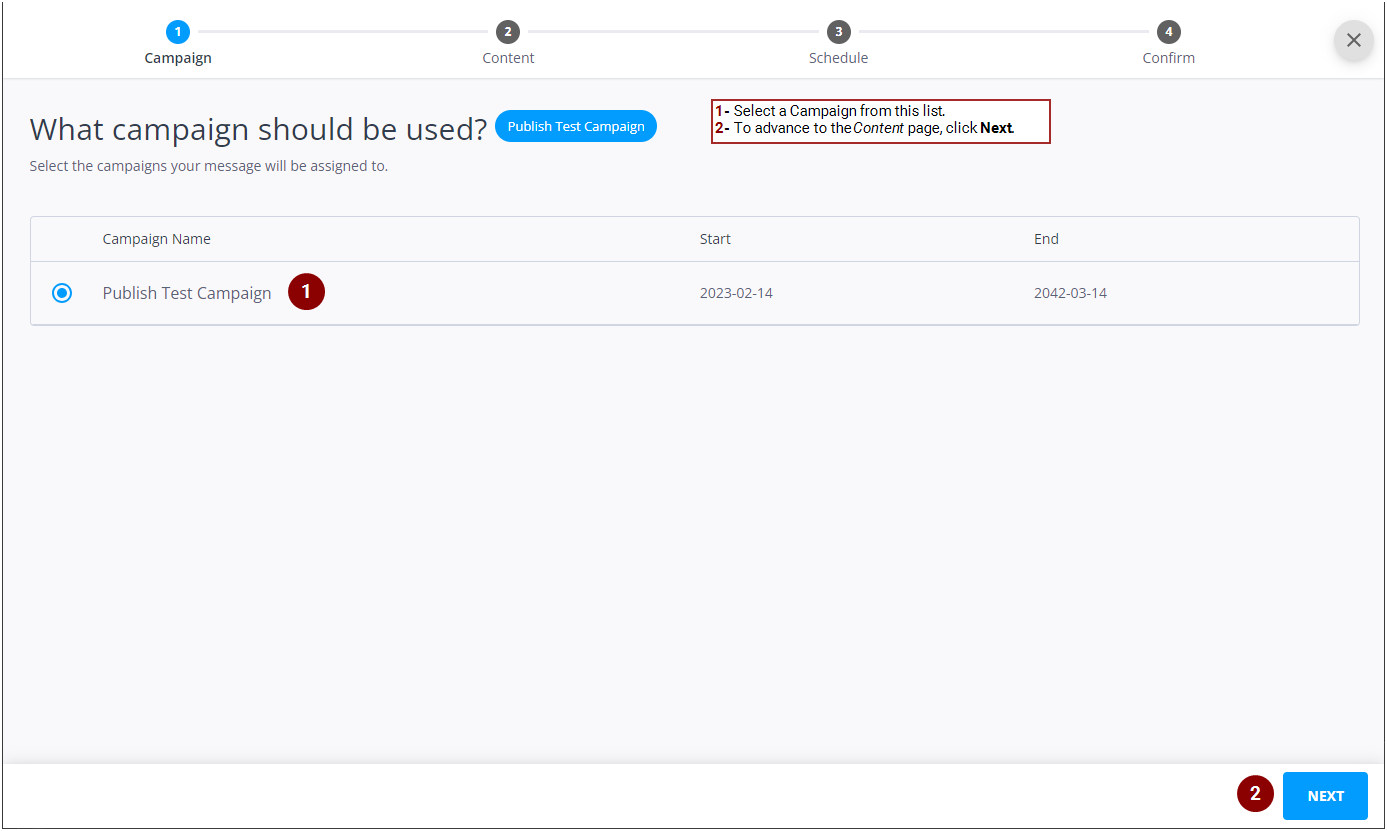
- If you belong to one or more Client groups, the wizard opens on the Campaign page. You must select a Campaign to continue with the wizard. For more information, see The Campaign Page.
Note: Once you have accessed a page in the message wizard, you can advance and reverse pages as needed with the Previous and Next buttons.
On the Campaign page, you can select a Campaign in Broadsign Control if you belong to one or more Client groups. Your message will be scheduled in the selected Campaign.
Note: Once you have accessed a page in the message wizard, you can advance and reverse pages as needed with the Previous and Next buttons.
For a brief, detailed tutorial, see Create a Message in an Existing Campaign.
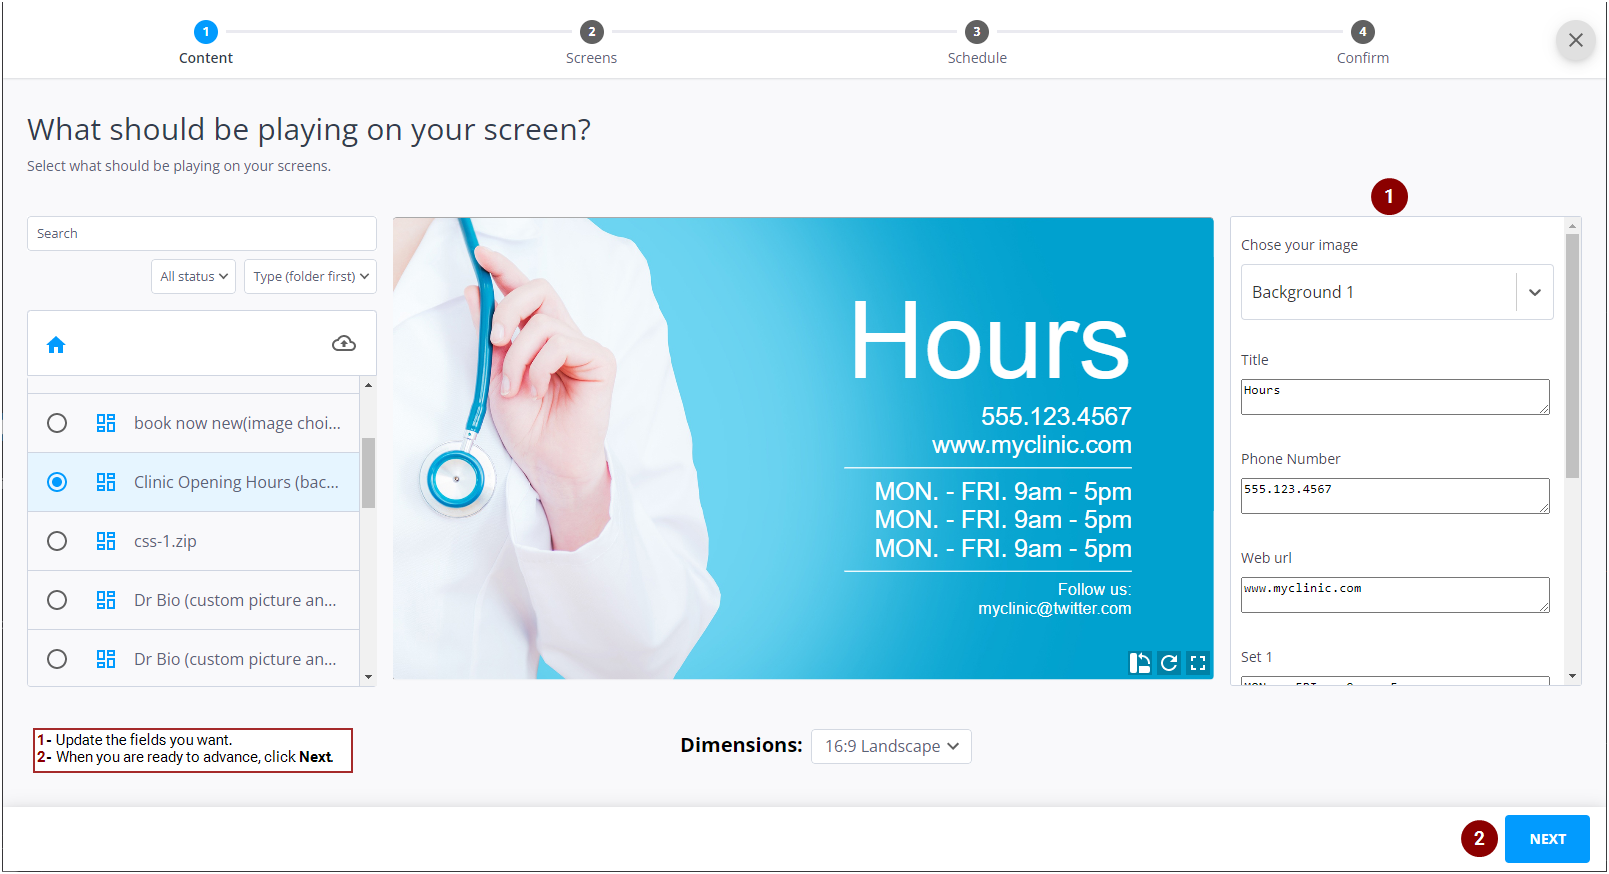
On the Content page, you can select the content that will appear in your message. You can search through a list of existing content, and sort them by name, type, date or folder. You can also sort them by their status: unapproved, approved, or rejected.
Once you select a content, you can update the fields that your Admin supplied (for example, title, sub-title, dates, time, etc.).
Note: Once you have accessed a page in the message wizard, you can advance and reverse pages as needed with the Previous and Next buttons.
For a brief, detailed tutorial, see Message Creation Tutorial or Create a Message in an Existing Campaign.
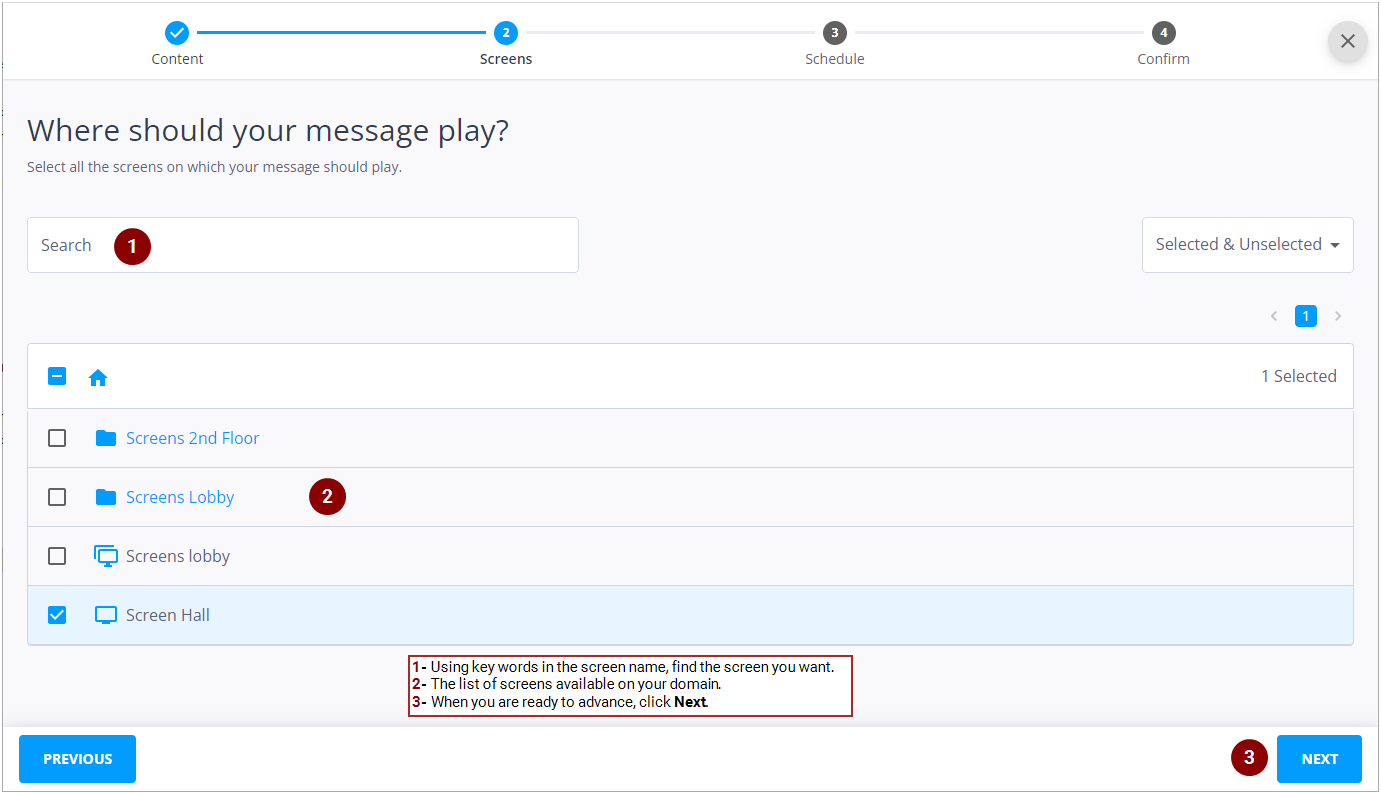
On the Screens page, you can select the screens on which you want the message to play.
Note: Your Admin will set up your list of available screens.
Tip: The Screens page is not be visible if Media Owners allow their clients to manage their campaign creatives or if you are a member of one or more Client groups. For more information, see Create a Message in an Existing Campaign.
Note: Once you have accessed a page in the message wizard, you can advance and reverse pages as needed with the Previous and Next buttons.
For a brief, detailed tutorial, see Message Creation Tutorial.
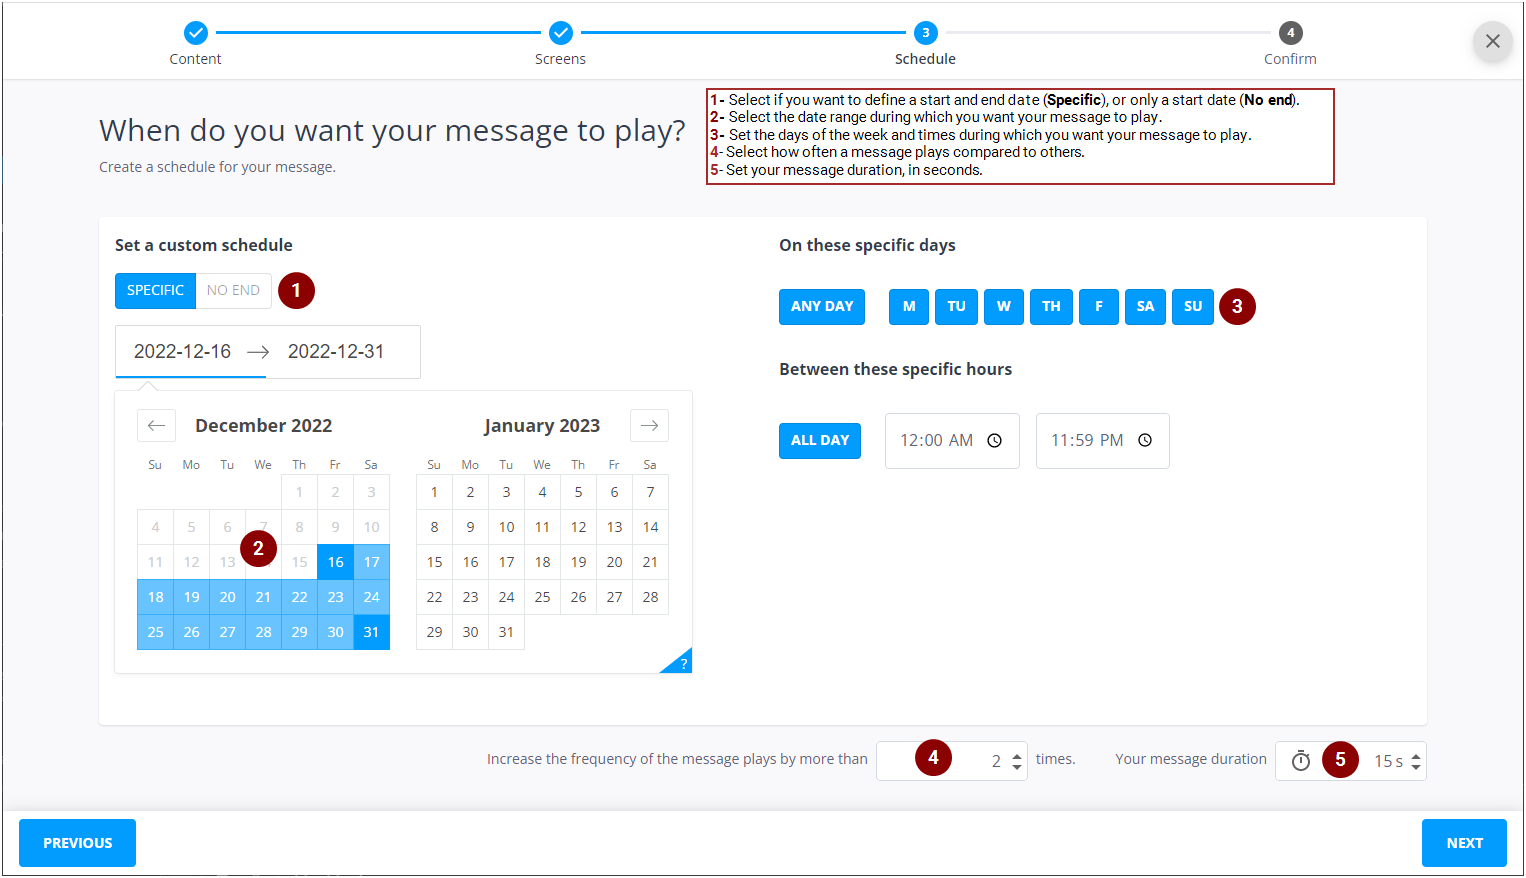
On the Schedule page, you have the flexibility to customize various parameters for message playback:
- Message Duration and Timing
- Choose the message duration, specify the date range, and define the days of the week and times during which the message is scheduled to play.
- Frequency Setting
- Set the frequency of how often the message will play in comparison to others in the schedule.
- Date Range Options
- You can choose from the following date range options:
- Specific Dates (Default) – Set a specific start and end date by clicking the Specific button.
- No End Date – Click the No end button if you want your message to play indefinitely until you either provide specific start and end dates or choose to delete it.
Note: Once you have accessed a page in the message wizard, you can advance and reverse pages as needed with the Previous and Next buttons.
For a brief, detailed tutorial, see Message Creation Tutorial or Create a Message in an Existing Campaign.
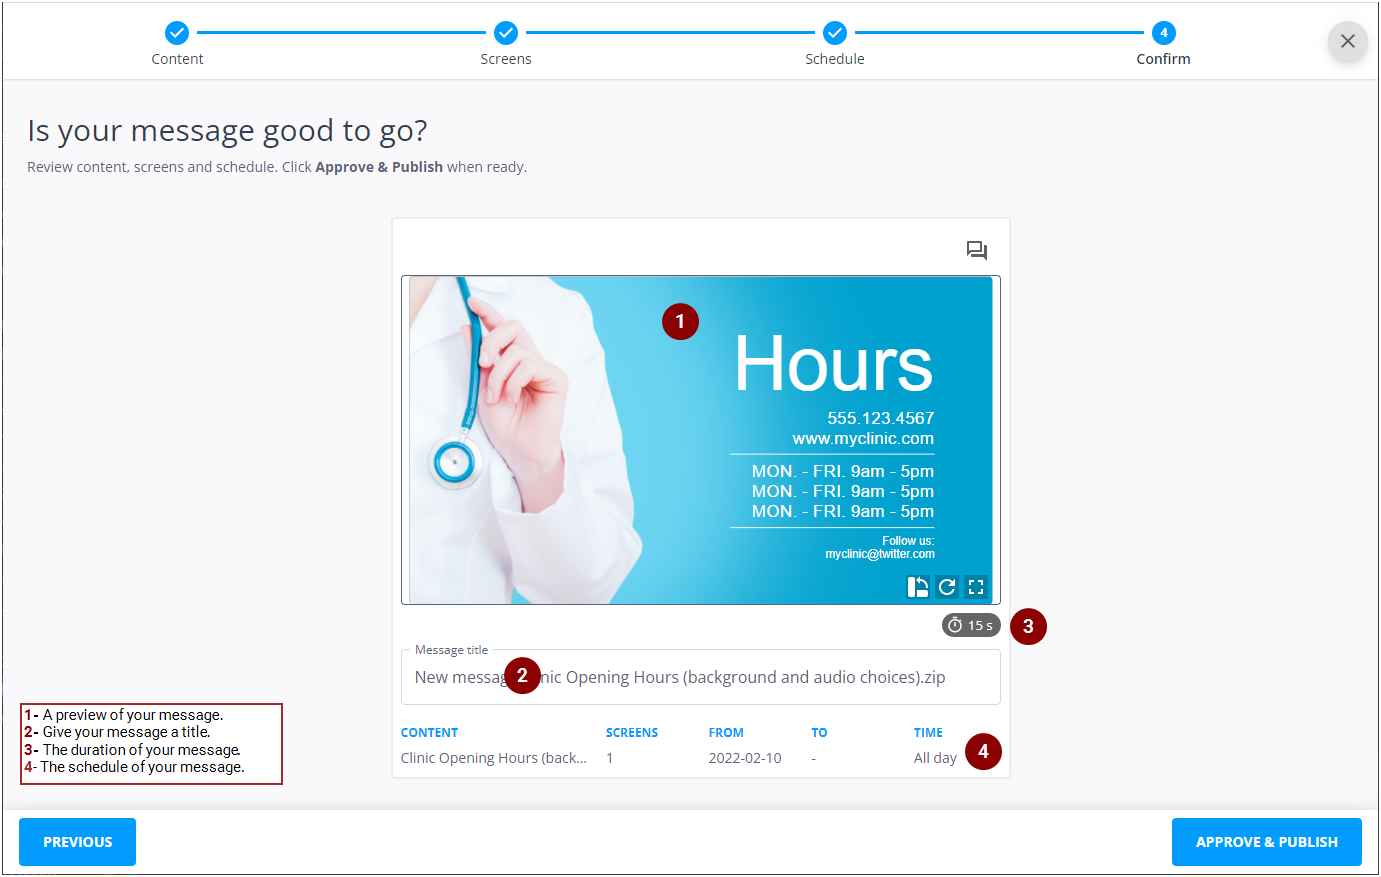
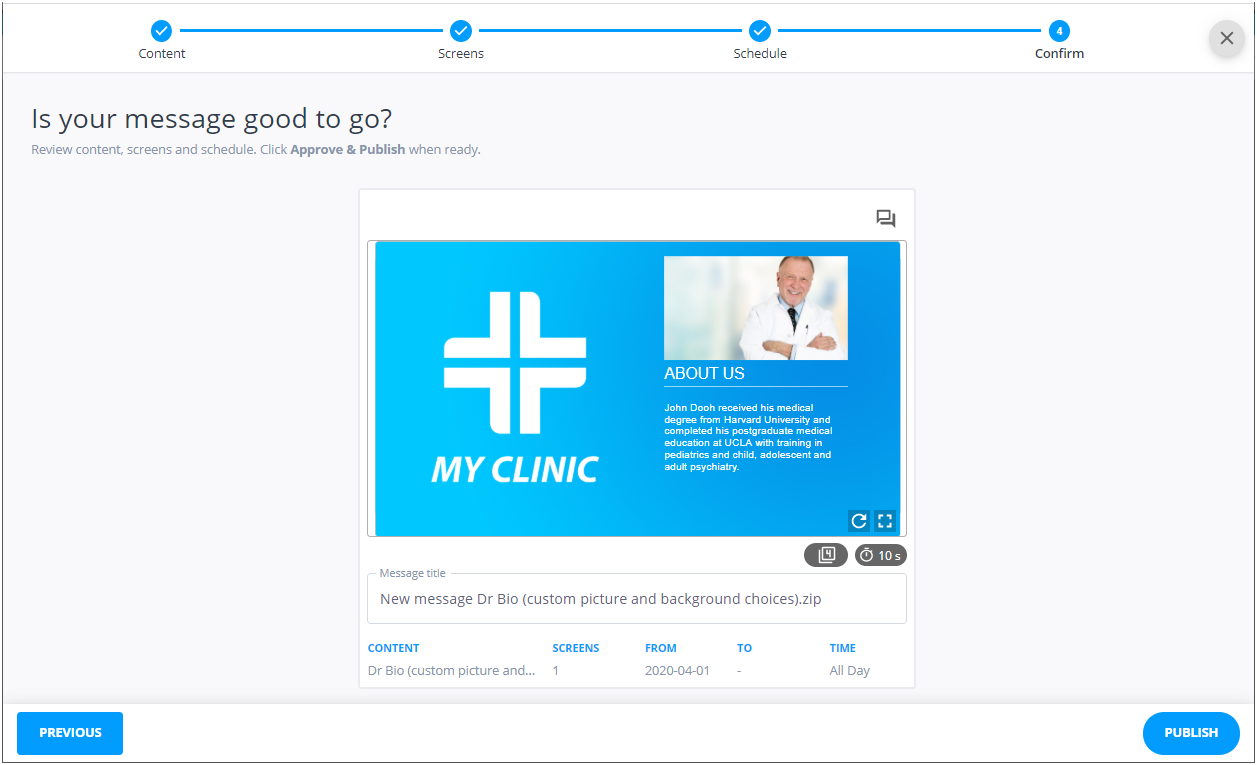
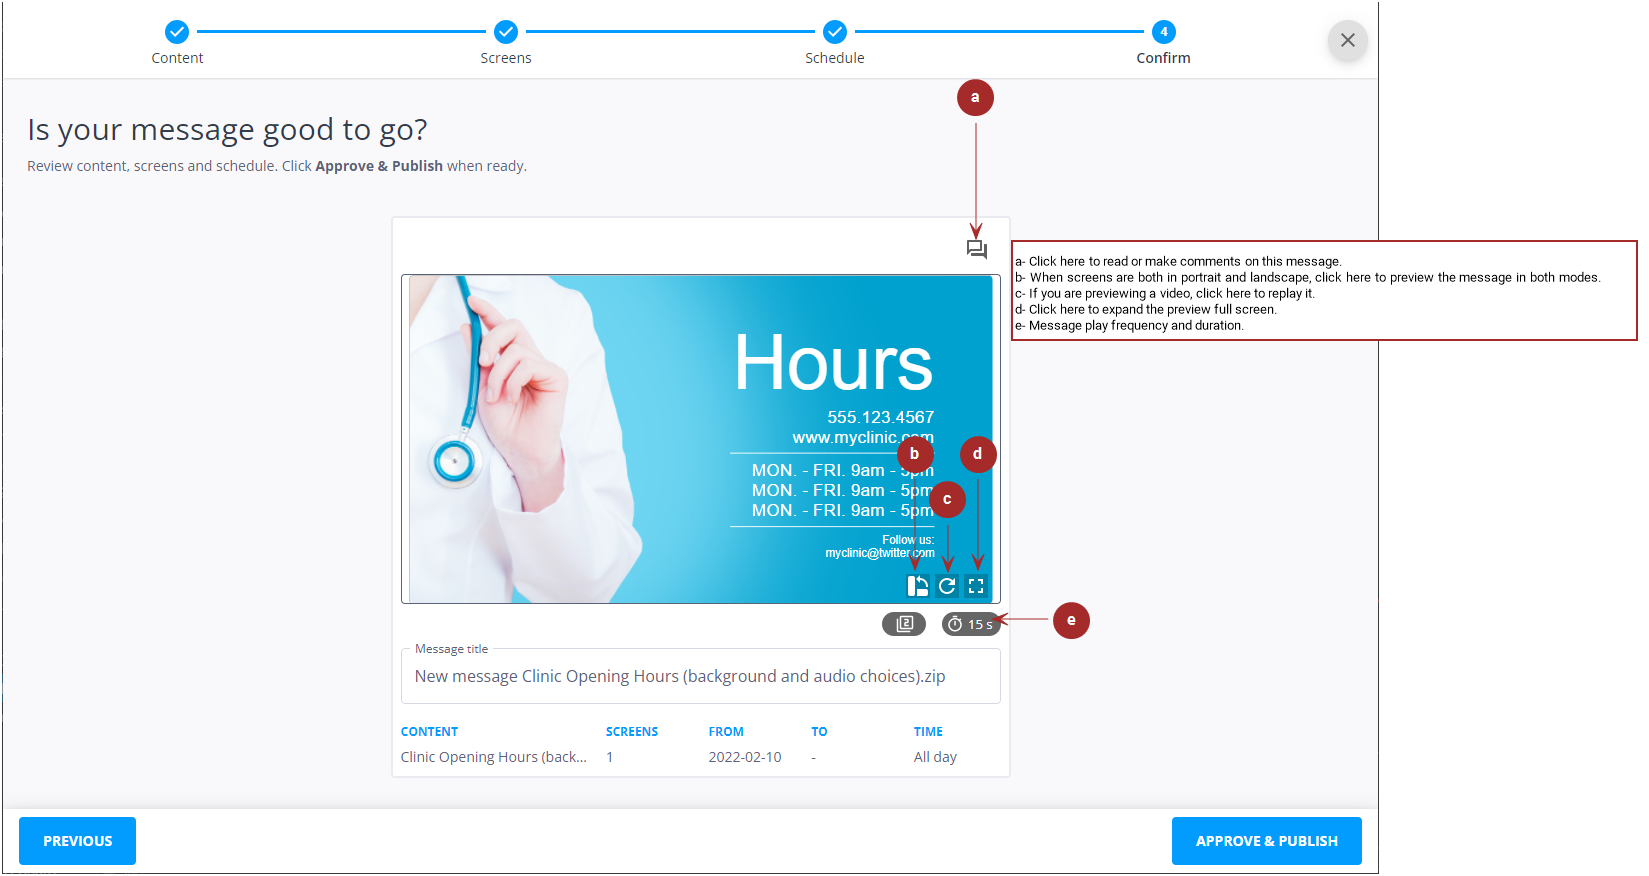
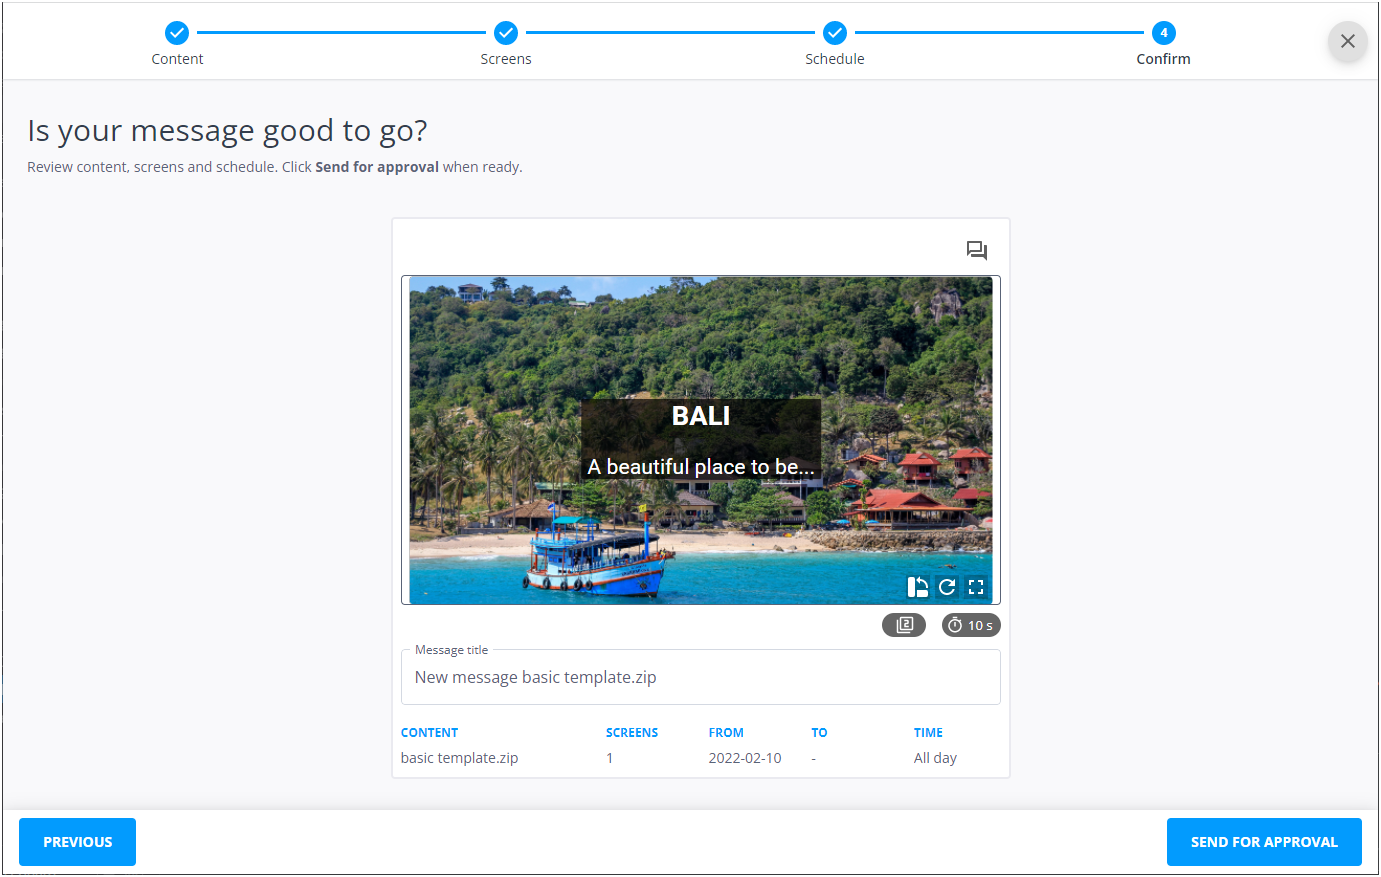
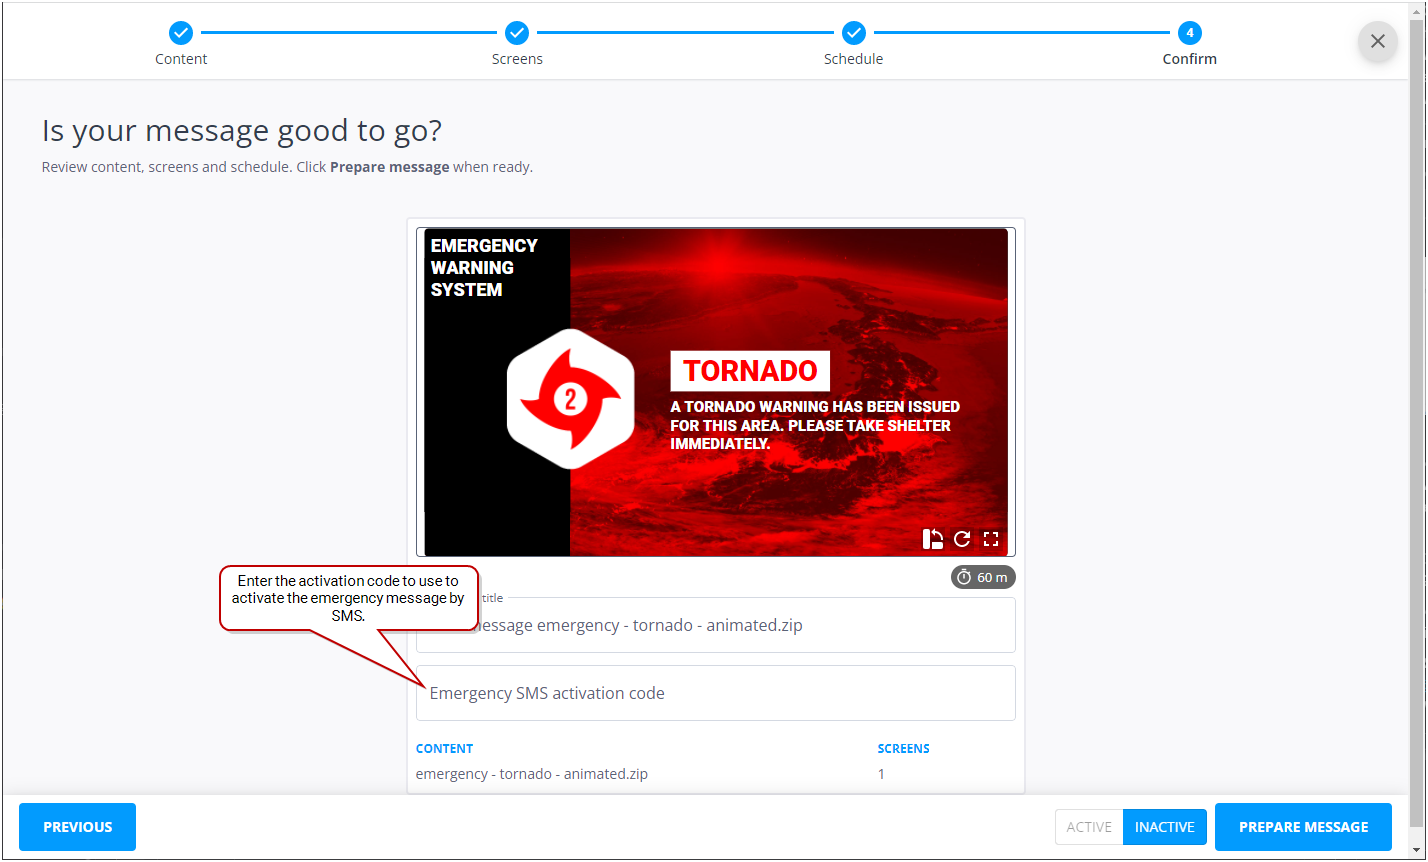
On the Confirm page, you will have a chance to review your message and give it a title (for example, Midwest malls medical offices). If you want to make any changes, you can select Previous or choose a numbered step at the top of the page.
Once your message is ready to go, click one of the following buttons, depending on what is available on your screen:
Publish
You have the permission to publish a message without approval.
The Messages page opens and your new message appears in the list.
Approve & Publish
You have the permissions to approve a message and publish it.
The Messages page opens and your new message appears in the list.
Send for Approval
You do not have the permission to publish a message without approval. The Messages page opens and your new message appears in the list with the ![]() icon. Your admin will need to approve the message before it is published.
icon. Your admin will need to approve the message before it is published.
Prepare Message
You are preparing an emergency message. You cannot publish it right away. It can only be saved for later publishing when it is activated. For more information, see Activate an Emergency Message.
For a brief, detailed tutorial, see Message Creation Tutorial or Create a Message in an Existing Campaign.
You can use the mobile version of Broadsign Publish to create a message directly from your mobile.
The message wizard steps are similar to those of the regular Broadsign Publish web page.
You will be able to upload a photo or video from your mobile and use it to create a message, as described in Upload a Photo or Video from a Mobile.


