This page describes how to manage Client groups in Broadsign Publish.
Note: The Domain Admin page can only be accessed by users assigned the Administrator page access. See Level of Access.
Client Group
Client Groups allow Media Owners to segment content by selecting which users can manage which Advertiser Campaigns.
Note: Messages created for Broadsign Control campaigns will not be affected by the domain Maximum Message Duration and Time Group features.
A Client group in Broadsign Publish serves several important functions in managing users and content access:
- Content Management:
Client groups allow different Advertisers on the same domain to manage their own content.
- Control Over Access:
- Users must belong to a specific Client group to manage the content of the campaign associated with that Client group.
- Users in a Client group will not be able to see messages from users outside of their Client group.
- Messages:
- To see messages from other users in the same Client group, certain conditions must be met.
- Users within the same Client group can view messages from other users in that group.
- Access Control:
- Access to players' messages is controlled by Client group membership.
- Users must belong to the appropriate Client group to have access to players' messages.
- This level of access control allows for more granular management of content and user permissions.
- User Flexibility:
- Users can belong to multiple Client groups simultaneously.
- When a user is part of multiple Client groups, they have visibility into all messages within those groups.
- Additionally, they can select specific campaigns in which to create new messages, providing flexibility in content creation and management. See Create a Message in Existing Campaigns.
- User Settings:
- You can easily determine which Client group a user belongs to in the User settings (Manage Users).
Any Network Operator can identify users and assign them to a Client group.
To create a Client group:
-
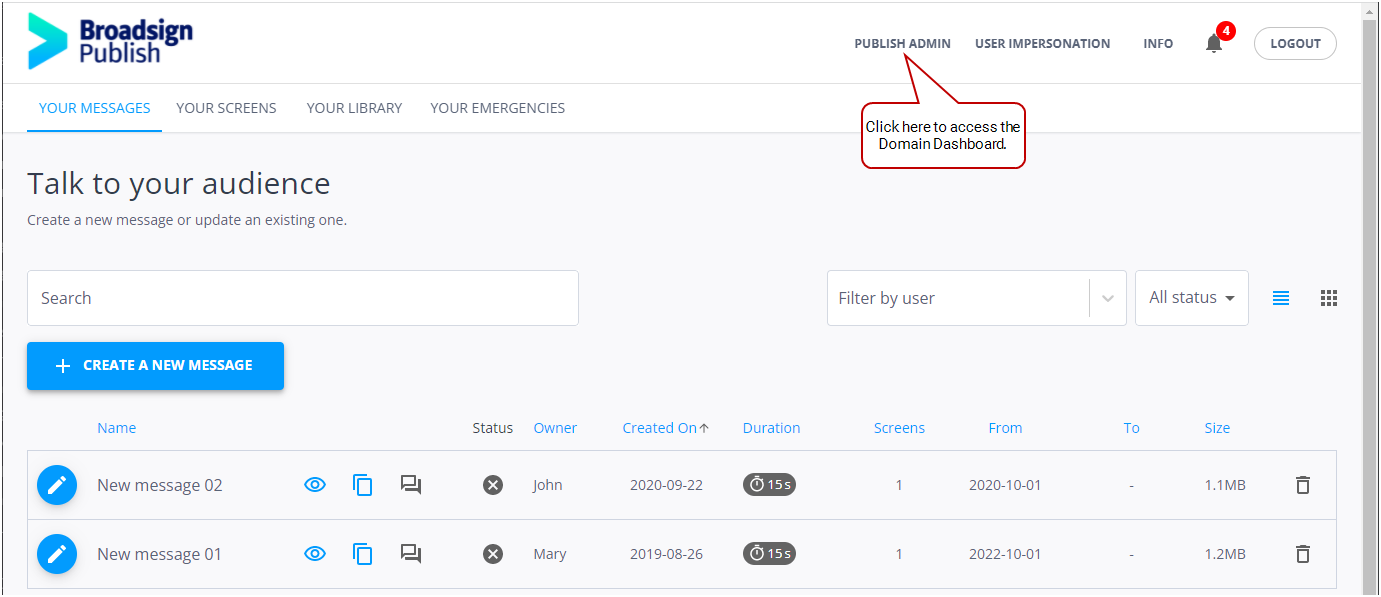
On the Broadsign Publish interface, click the Publish Admin link at the top right of the window.
The Domain Dashboard opens:
-
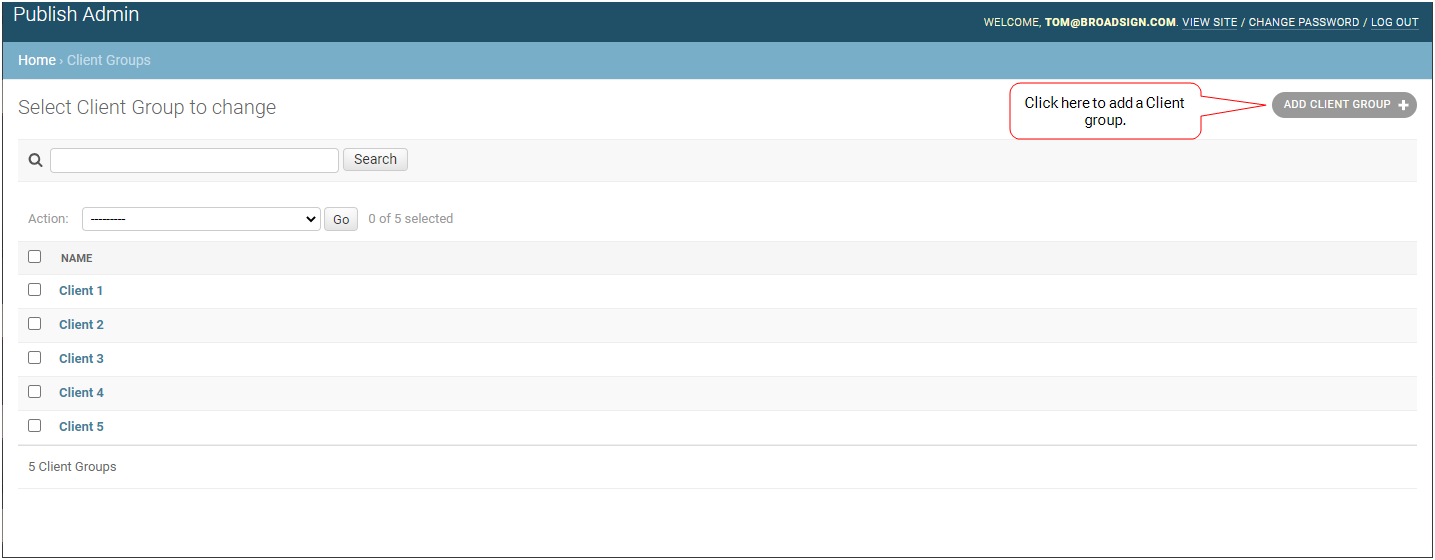
Under Accounts, click Client Groups. The Client Groups page opens. If you have existing Client groups, they are listed here.
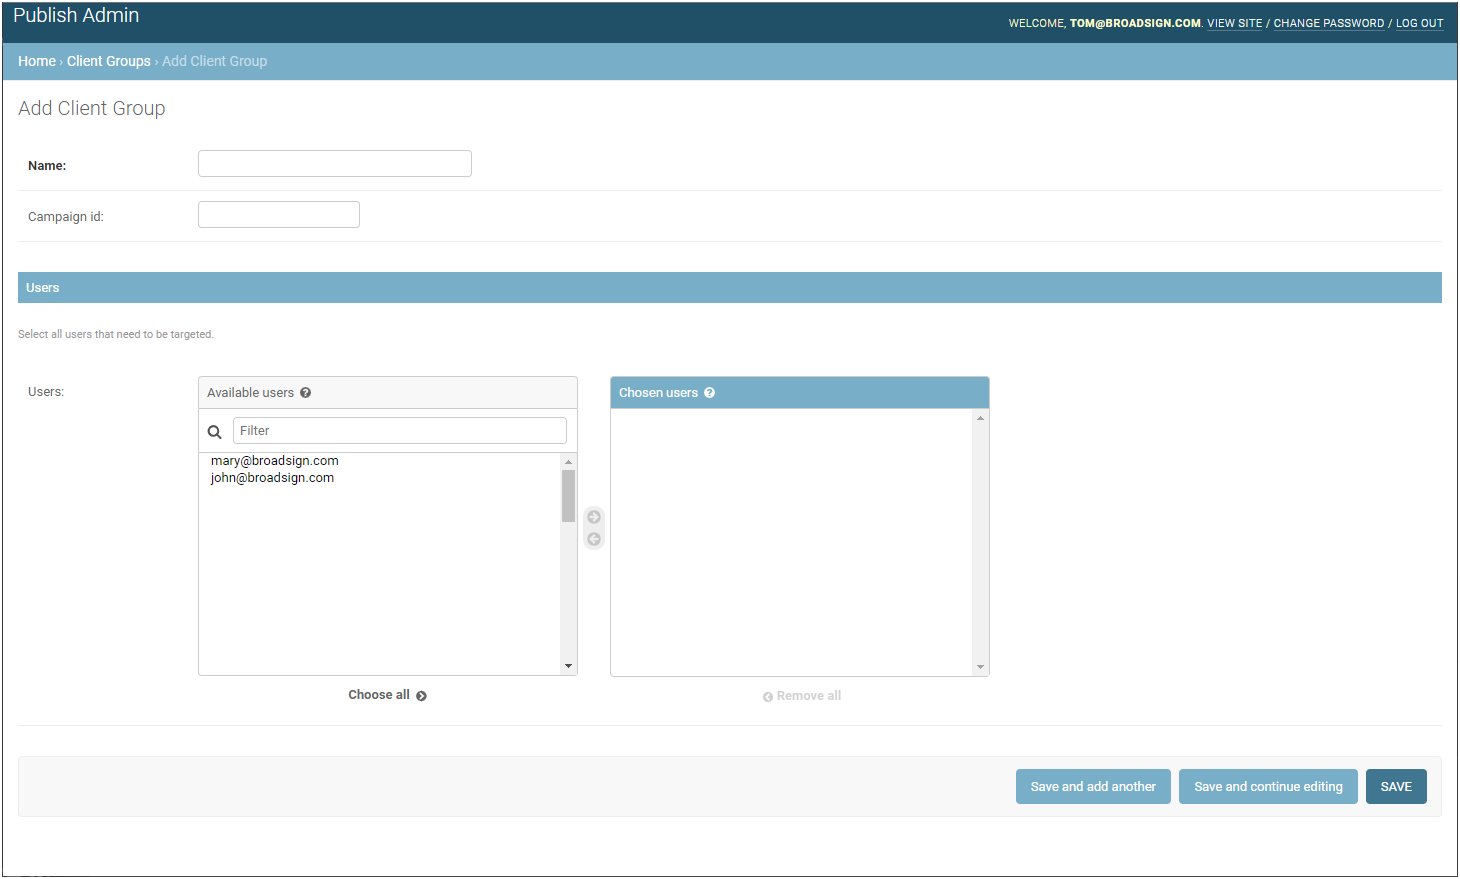
- To add a Client group, in the top-right corner click Add Client Group. The Add Client Group page opens.
- Enter the Name of the Client group (for example, "Client Group Mall").
- Assign a Broadsign Control campaign to this Client group by entering its ID in the Campaign id field.
- You can assign only one campaign id to a Client group.
- A campaign can be associated with only one Client group by domain.
- Once the campaign id is set, it cannot be changed.
- The campaign must be in the same Broadsign Control domain as the Broadsign Publish domain.
- Add users to the group by using the right arrow or double-clicking the user. If you want to add all users, click Choose all.
- Click one of the Save buttons:
- Save and add another: Saves the current Client group settings and prompts you to add another.
- Save and continue editing: Saves the current Client group settings and allows you to continue editing it.
- Save: Saves your changes and returns you to the Client Groups page.
Members of the Client group will be able to manage the campaign's creatives and associated schedules.
You can edit a Client group's information at any time.
To edit a Client group:
-
On the Broadsign Publish interface, click the Publish Admin link at the top right of the window.
The Domain Dashboard opens:
-
Under Accounts, click Client Groups. The Client Groups page opens.
-
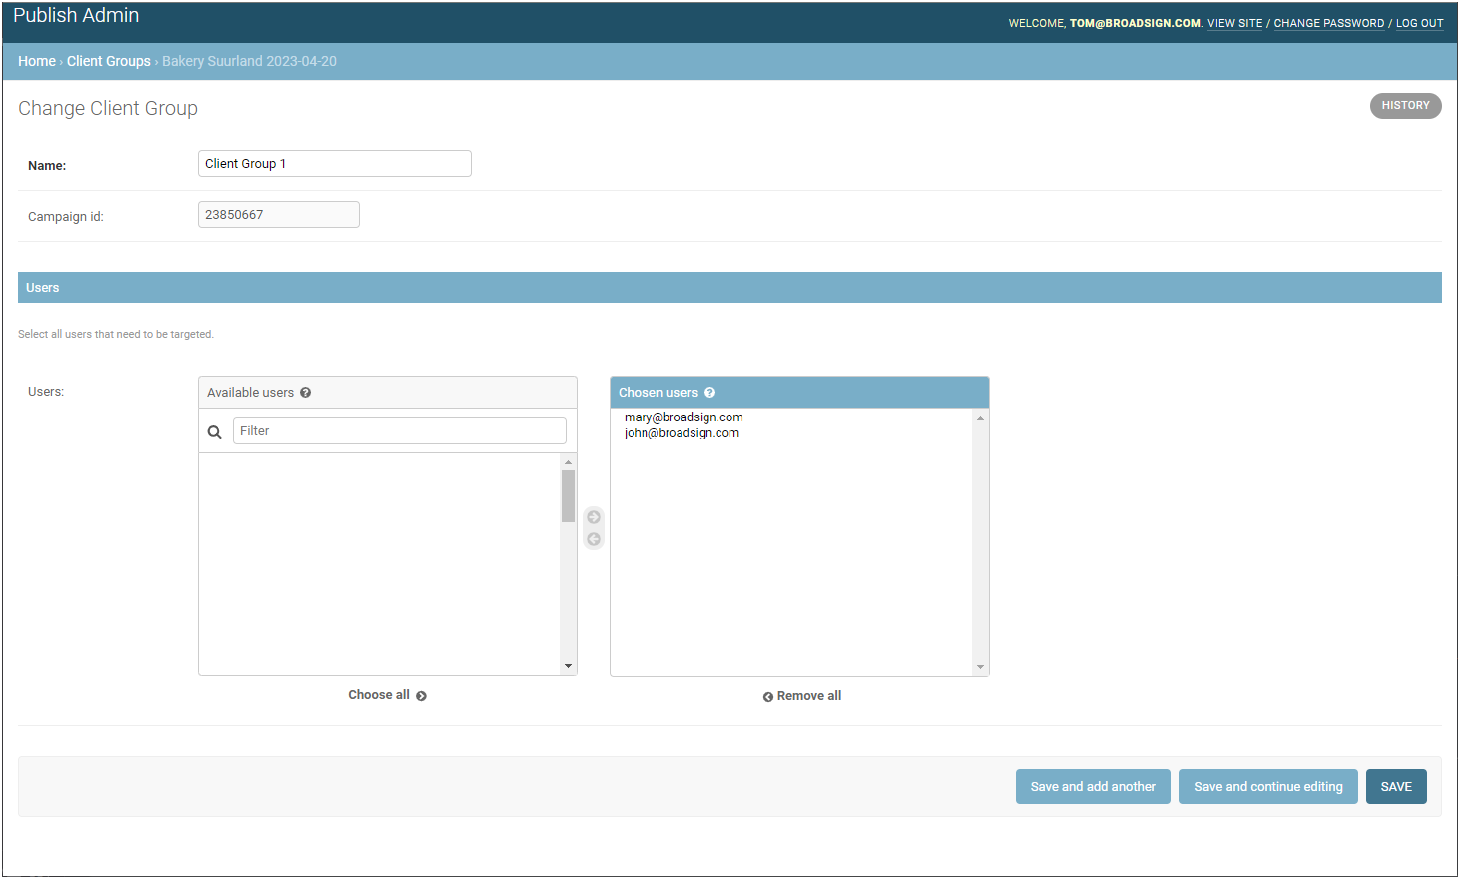
Click the name of the Client group that you want to modify. The Change Client Group page opens.
-
Change the following information, if applicable:
- Name: Name the Client group.
- Users: Modify the users associated with the Client group by using the left and right arrows. If you want to add all users, click Choose all.
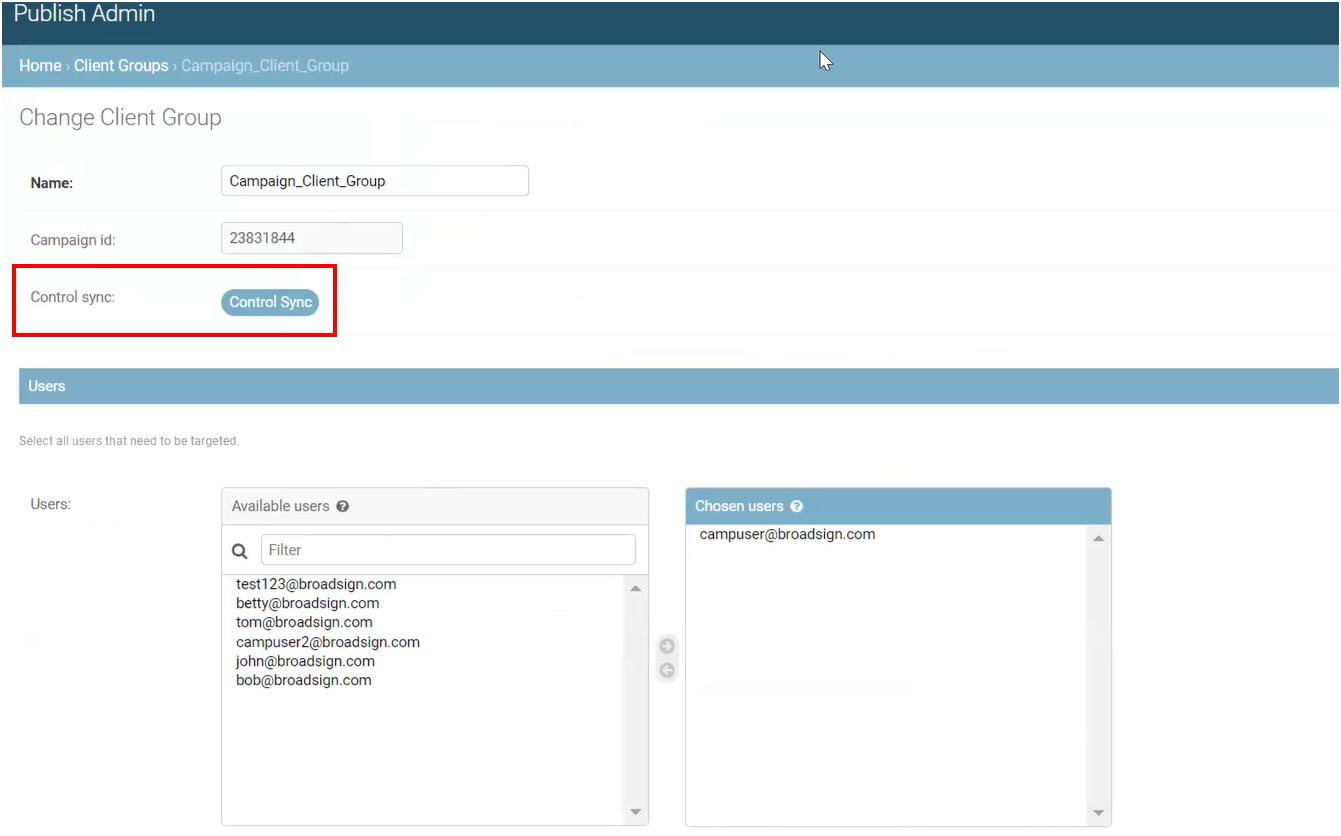
- If applicable, synchronize campaign data between Broadsign Control and Broadsign Publish. For more information, see Sync Campaign Data.
- Click one of the Save buttons:
- Save and add another: Saves the current Client group settings and prompts you to add another.
- Save and continue editing: Saves the current Client group settings and allows you to continue editing it.
- Save: Saves your changes and returns you to the Client Groups page.
You can delete Client groups at any time.
Tip: A Client Group cannot be deleted if it contains users. If a Client Group contains users, you must remove them first.
To delete a Client group:
-
On the Broadsign Publish interface, click the Publish Admin link at the top right of the window.
The Domain Dashboard opens:
- Under Accounts, click Client Groups. The Client Groups page opens.
- Select the Client group that you want to delete. You can select more than one.
- In the Action drop-down menu, select Delete Selected Client Groups, then click Go.
The group is deleted.
Sync Campaign Data
Manually synchronizing campaign data between Broadsign Control and Broadsign Publish is used when Media Owners delegate campaign management to their Advertisers. Since Advertisers usually do not have access to Broadsign Control, the synchronization process transfers the campaign management capabilities to Broadsign Publish. The process ensures that Advertisers can manage their campaigns through Broadsign Publish with the most current and accurate data from Broadsign Control.
Note: An Advertiser can run the synchronization process once. After that, it is no longer available.
To initiate the synchronization process, ensure that:
- The campaign already exists in Broadsign Control.
- The Network Operator user has created a client group in Broadsign Publish and assigned the Broadsign Control Campaign Id.
-
If these two conditions are not met, the Control Sync button is not available.
Note: The Control Sync button is disabled if the Client Group has messages.
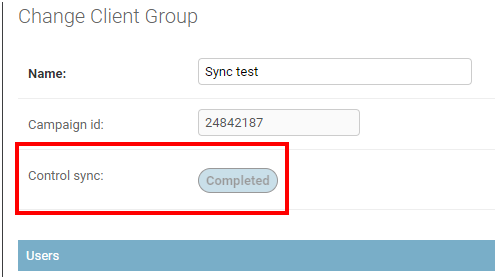
Upon completing the synchronization, the Network Operator user receives an email notification, and they can also see a notification in their Notification Center. The Control Sync button now reads Completed.
The synchronization process updates the following information in Broadsign Publish:
- Campaign Name
- Campaign Start and End Time
- Campaign Start and End Date
- Days of the week schedule
- Creatives of the campaign
The starting page and available options in the Message Wizard are adjusted based on the user's Client group affiliations for a more streamlined message creation process.
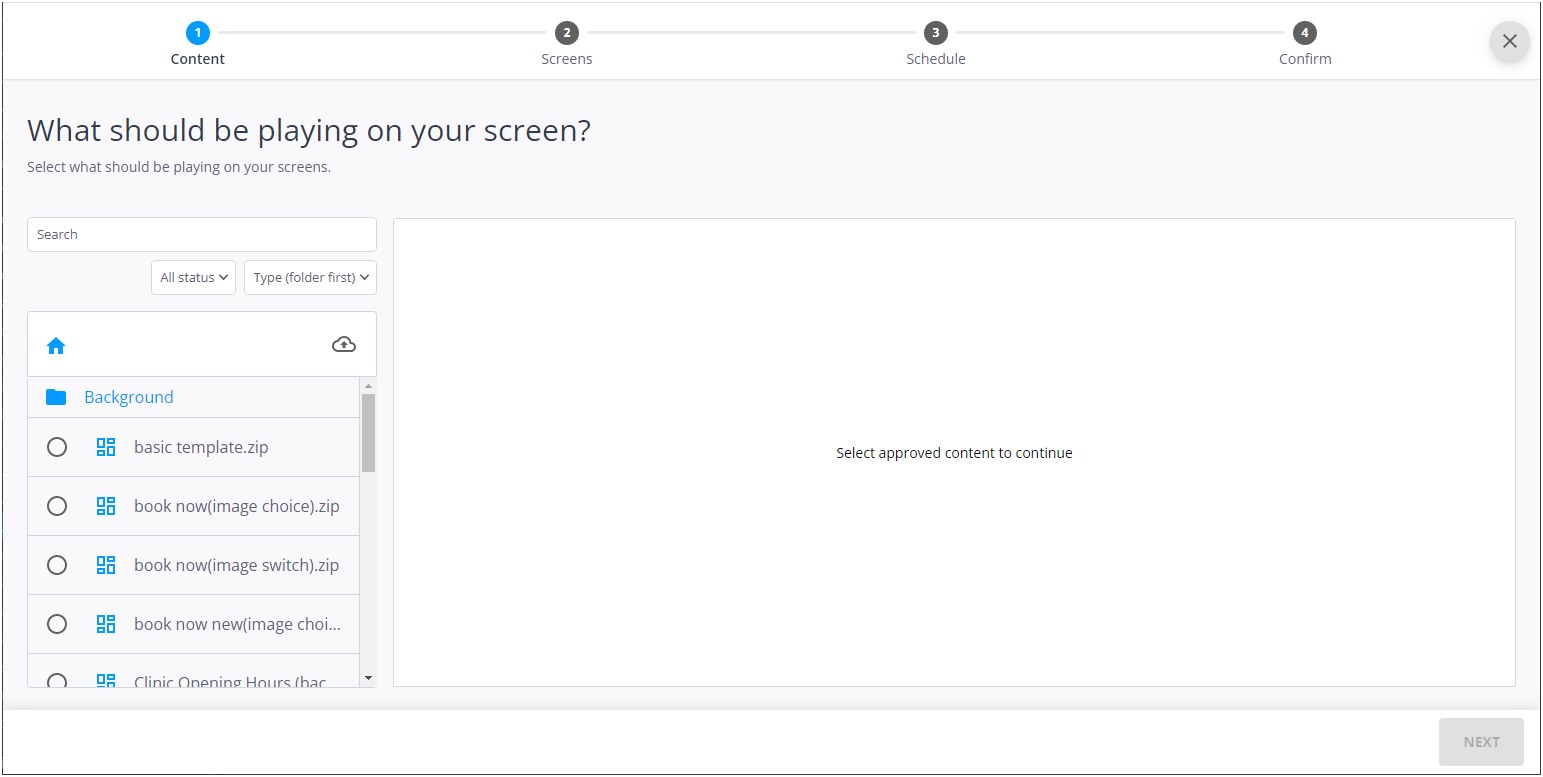
- When a user does not belong to a Client group, the Message Wizard starts with the Content page. For more information, see Step 1 – Select Content.
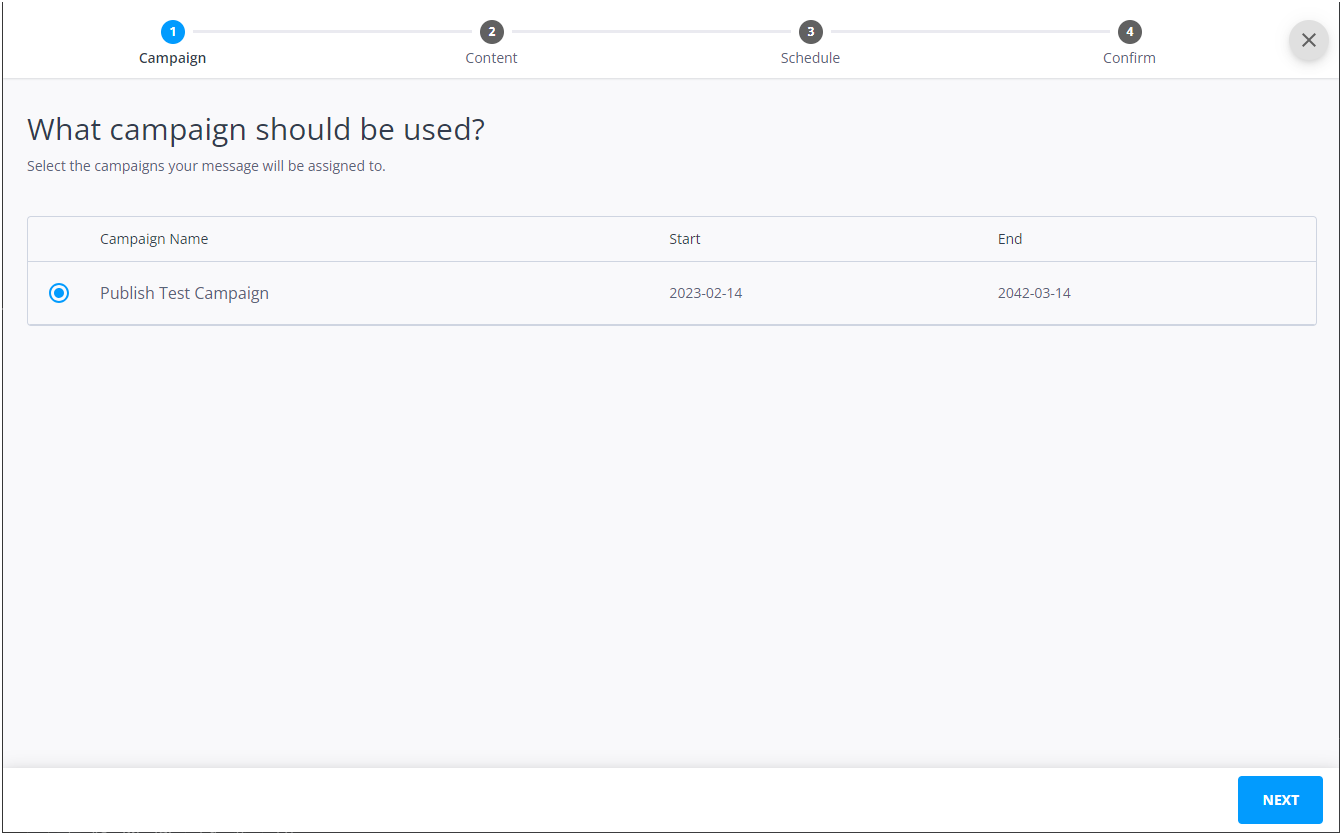
- When a user belongs to one or more Client groups, the Message Wizard starts with the Campaign page, allowing them to select a Campaign from Broadsign Control in which to add a message. The Screens page is removed in this scenario. For more information, see Step 1 – Select a Campaign.

