User groups have two purposes: assigning resource privileges and providing folder access. You can arrange users into groups for simpler user management.
Note: We recommend that you add privileges to a group, instead of an individual user. Then, add users to the groups with the relevant privileges. Each user can be a member of multiple groups.
The "Users and User Groups" training video is part of the "Network Operations" playlist:
- 1 of 5: Users and User Groups (below)
- 2 of 5: Contacts
- 3 of 5: Scoping
- 4 of 5: Monitoring
- 5 of 5: Reporting
Note: If you are new to Broadsign Control, we suggest you start with the Network Setup playlist.
Users and User Groups – Describes how to create users; how to create and organize user groups; and how to assign privileges.
Users and User Groups
If you select "User Groups" from the resource tabs on the left, then right-click anywhere in the work area, you will see this menu:
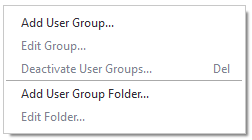
- Add User Group – Opens the Add User Group Wizard.
- Edit Group – Opens the User Group Properties dialogue box.
- Deactivate User Groups – Deactivates any selected user groups.
- Add User Group Folder – Opens the Add Folder Wizard dialogue box.
- Edit Folder – Opens the User Group Folder Properties dialog box.
For general information about adding, editing and deactivating resources, see Overview - Resources.
To add a user group, use one of the following methods:
-
Go to the Operations ribbon, and at the lower-right of the User icon, click on the arrow. From the drop-down menu, select User Groups.
- From the resource tabs on the left, select User Groups. Then, right-click anywhere in the work area. From the contextual menu, select Add User Group.
By default, the Add User Group Wizard contains the following pages:
- Welcome – Name the user group.
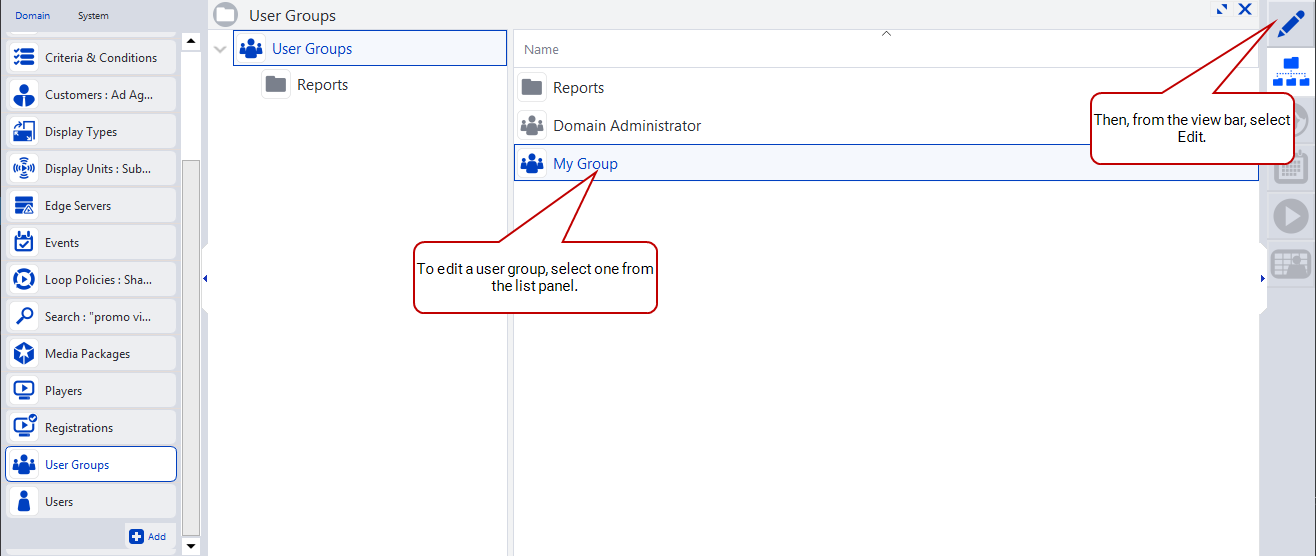
To edit a user group, use one of the following methods:
-
From the list panel, select a user group. Then, from the view bar, select Edit.
- From the list panel, double-click on a user group.
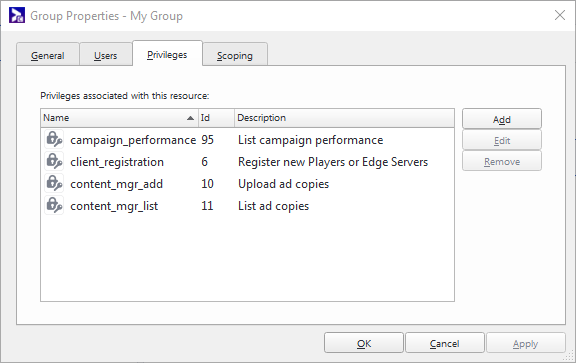
A user group is defined by the set of privileges granted to it. In the Privileges tab of the User Group Properties dialog, privileges can be added or removed from a user group.
Any changes made to a user group that is already assigned to users will be applied to those users on their next log in.
Privileges are resources in the Broadsign International network that govern access to perform specific network tasks. They are assigned to users and user groups to define their roles and capabilities, without granting them access to other functionality that they do not require to do their work, to preserve maximum network security.
Privileges can be assigned to both user and user groups. To assign a privilege to one of these resources, double-click the resource to open its editor and navigate to the Privileges tab. The privileges for this resource can be modified with the Add, Edit and Remove buttons.
A description of each privilege is shown in the Privilege List box once the privilege has been assigned.
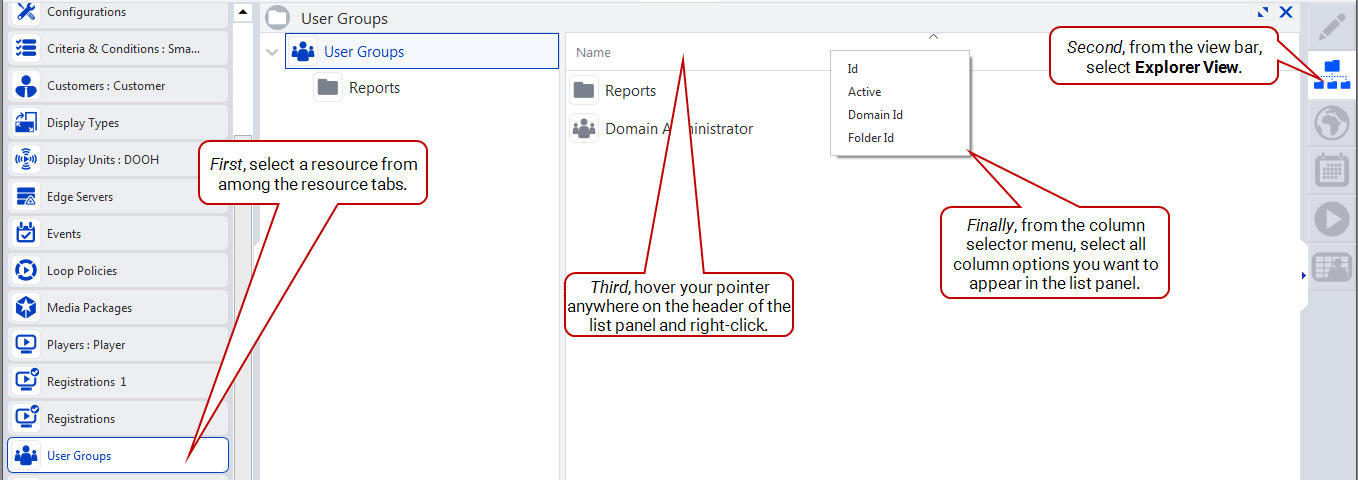
In the list panel of explorer view, each resource has a column selector menu. With this menu, you can configure the list panel to display information you want.
To access a resource's column selector menu:
- From the view bar, select Explorer view.
- In the list panel, hover your pointer over the panel header.
- Right-click, and the column selector menu will appear.
-
Select as many column options as you want.
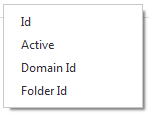
- Id – Indicates the unique ID number of the resource. See Overview - Resources.
- Active – Indicates whether the resource is in an "active" or "inactive" state. See Overview - Resources.
- Domain Id – Indicates the unique ID number of the domain. See The General Section.
- Folder Id – Indicates the unique ID number of the resource folder.
After you have created some user groups in your network, you can then move on to other basic steps:

