The Operations work must only be done for Campaigns that:
- Have been signed and contracted. See Getting Started – Sales Setup.
- Have been charted. See Getting Started – Charting Setup.
Note: The Static Campaigns module is available to users with the Admin, Static Admin, or Static Campaign Manager role.
The following prerequisites must be done before proceeding with Operations work:
Set Operations Master Data
Posting Companies and Maintenance Tasks
You can add details of the Posting Companies that you are dealing with. See Posting Companies.
You can also add addresses and contacts if needed. See Add an Address to a Posting Company and Link a Contact to a Posting Company.
There is one default maintenance task that is General Maintenance but you can create as many as you require.
Plants
Plants are warehouses in which copies are printed or at least stored and from which installers will be managing their work orders.
You can create as many as you wish. Make sure that the Active? box is selected.
See Locate Plants
Bins
Once Plants are created, you can add addresses but also Bins.
Bins
Static Campaigns
Bins are specific locations of Plants, and can be useful when Plants are very big and have different entrances.
Make sure that the Active? box is selected.
See Add a Bin to a Plant.
Materials
There are two default materials: Paper and Vinyl.
You can add your own material. Make sure that the Active? box is selected.
See Materials.
Set Ops Data at the Site or Face Level
Face Level
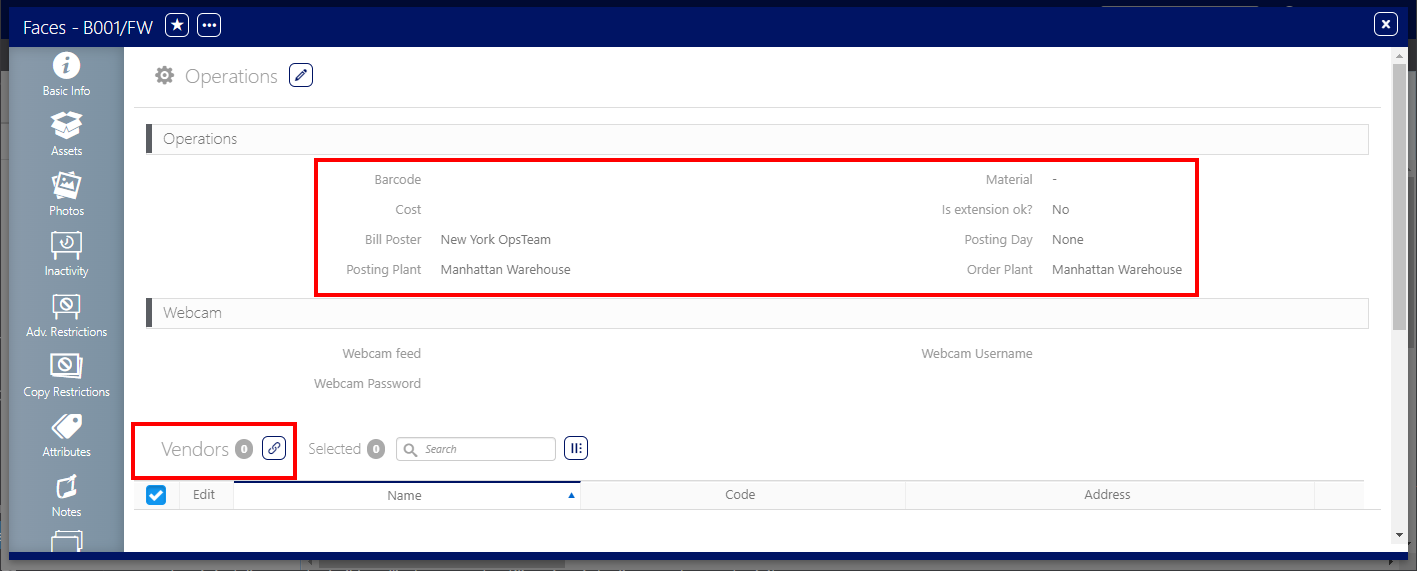
At the Face level, Operations tab, you can set:
- Barcode
- Default Material for the face (predefined list)
- Cost
- Default Posting Company (predefined list)
- Default/preferred Posting Day
- Default Posting Plant
- Default Order Plant
You can also link specific vendors to their faces.
Site Level
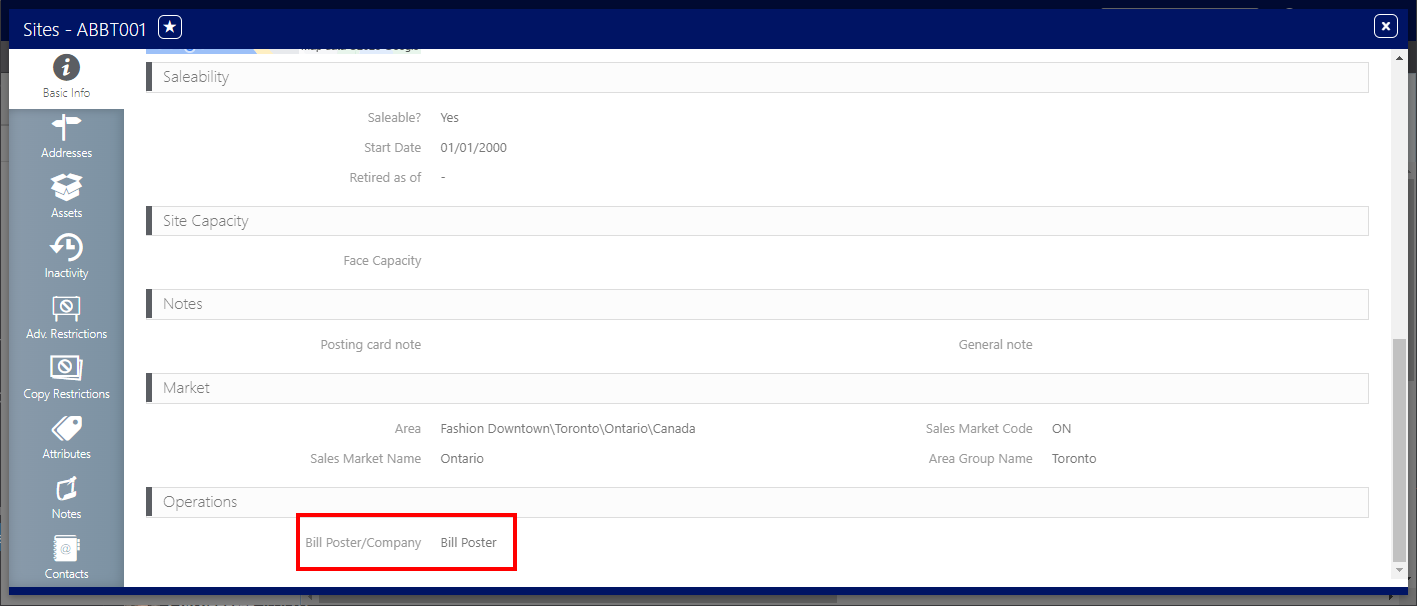
At the Site level, you can assign a default Posting Company. Faces belonging to the Site will inherit from the Posting Company, but that can be overridden at the work order level itself.
Posting tasks are automatically generated when a posting is added to a contracted campaign and will appear in the work orders list for the Ops Management User to oversee them.
See Getting Started – Charting Setup for scheduling postings.
To locate work orders:
Static Campaigns
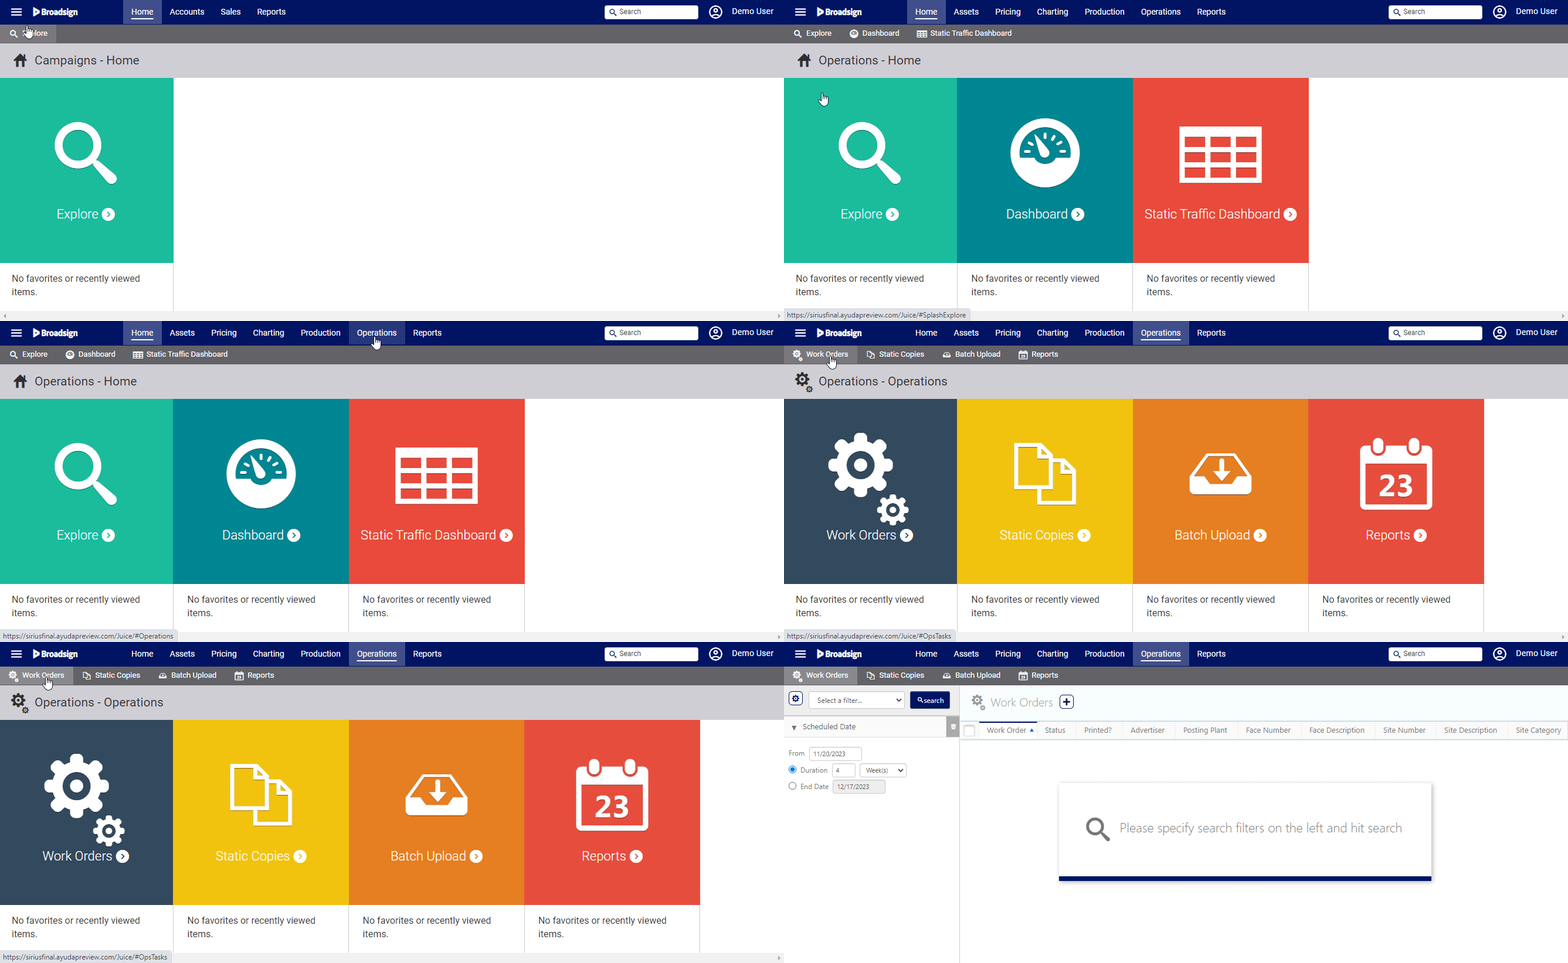
- Access Operations in the top-left menu, click the Operations tab, and then the Work Orders tile.
- Click Search.
- Work Order type: a Posting or a Take Down, or a Maintenance Task.
- Status of the Work Order: On Schedule, Critical, Late, or Completed.
- The Advertiser for which the Work Order has been created.
- The Posting Plant to which the Work Order is associated.
- The Face on which the Work Order must be done.
- The Site related to the Face and its Description.
- Click the needed record.
- Click the
 button to edit the work order.
 - Click Save changes.
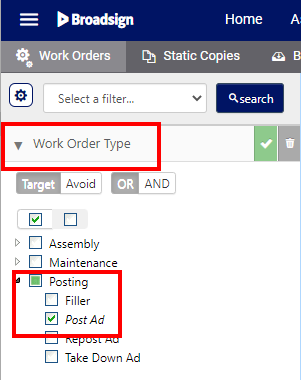
This presents the filter search window.
Filters can be enabled to locate specific types of work orders. To locate a specific work order campaign posting, it may be helpful to enable the POST Ad filter.
Other filters that may be helpful when searching for work orders may include Current Advertiser and Current Design.
The screen will refresh to show the search results.
The following information is available:
The following tasks are available:
| Task | Description |
|---|---|

|
Adds a new Work Order. |

|
Exports the Work Order list to an Excel document (Getting Started – Operations Setup). |

|
Allows to bulk edit selected Work Orders. You can modify the Requested Post Date, the Date of Completion, the Bill Poster assigned to the Work Order, the Bin from which the Poster has been taken, and whether the Design has been Scrapped after use. (Edit Work Orders in Bulk) |

|
Allows you to schedule a Take Down (Schedule Take Downs from Operations). |

|
Allows you to schedule a Repost (Schedule a Repost). |

|
Allows you to mark a Work Order as Completed (Mark Work Orders Complete). |

|
Deletes the selected Work Orders (Delete Work Orders). |

|
Selects all Work Orders. |

|
Allows you to export either a summary or detailed Work Order to PDF (Getting Started – Operations Setup). |
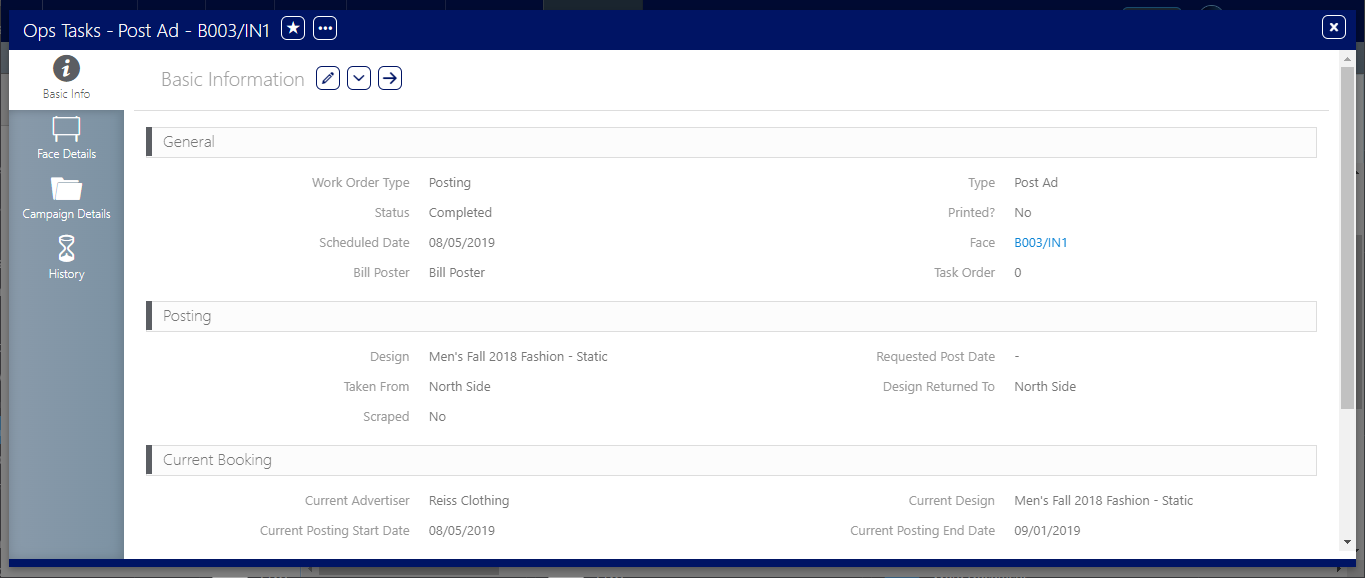
The Work Order opens showing the Basic Info screen.
Note: Not all of the work order fields are editable from this location.
Ops Management Users can manage their work orders one by one or in bulk. They can:
- Schedule a take down, repost or complete work order
- Change scheduled date
- Change Bill Poster / Posting Company
- Check posting to install and current posting
- Check status
- Add notes
Users can also look at the Face and Campaign details as well as generate the work order summary and detailed reports.
To bulk edit work orders:
Static Campaigns
- Access Operations in the top-left menu, click the Operations tab, and then the Work Orders tile.
- Click Search.
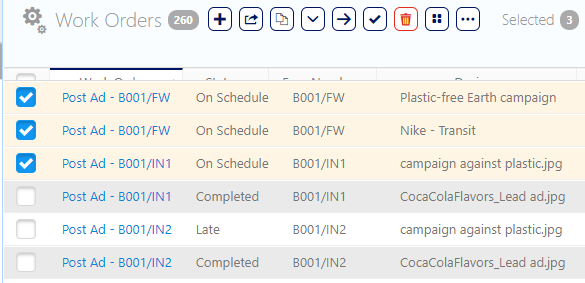
- To bulk edit work orders, enable the check boxes next to the work orders that must have their details altered.
- Click the
 button.
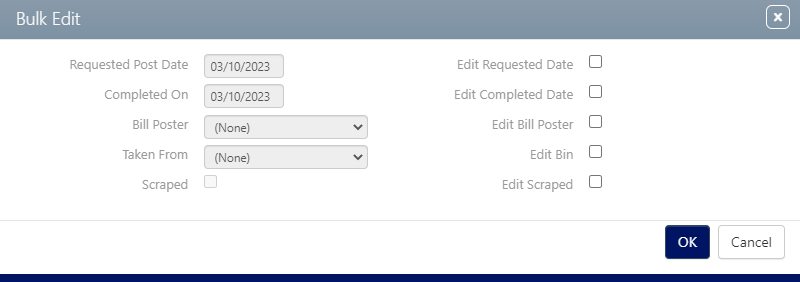
 - Requested Posting Date
- Completed On
- Bill Poster
- Taken From
- Scrapped
- To edit these enable the check boxes. This will make the drop down menus active.
- Once the necessary changes have been made, click OK. This closes the dialogue box and shows the updated work order list.
This presents the filter search window.
Filters can be enabled to locate specific types of work orders. To locate a specific work order campaign posting, it may be helpful to enable the POST Ad filter.
This opens a dialogue box.
Values that can be edited on this screen include:
Changing the Complete On date either marks it complete or change the completion date if it was already completed. If nothing else is edited then the default bill poster and posting plants will be selected.
There are two main ways of completing work orders: through the POST app or directly in the software.
Users can select work orders in the list and mark them as complete. This is usually the case where work orders are printed out and completed outside the system.
To mark work orders as complete:
- Access Operations in the top-left menu, click the Operations tab, and then click the Work Orders tile.
- Click Search.
- Enable the check boxes next to the needed records.
- Click the
 icon.
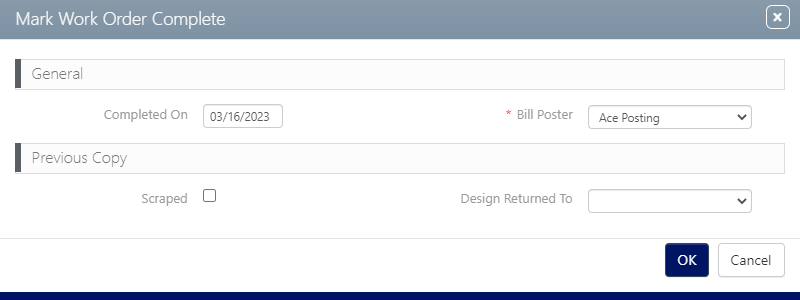
icon. - Enter the following Mandatory information:
- Completed On – Choose a date and time from the date and time choosers.
- Bill Poster – Identify the person or team who completed the work.
- Use Previous Work Order's Bill Poster? – This assigns the bill poster that was assigned to the last work order for this face.
- Return to the Work Order's Posting Plant – This instructs the operations team to return the copy to the posting plant associated with the posting work order.
- Click OK.
This presents the filter search window.
Filters can be enabled to locate specific types of work orders. To locate a specific work order campaign posting, it may be helpful to enable the POST Ad filter.
The screen refreshes to show the search results.
This presents the Mark Work Order Complete dialogue box.
The disposition of the previous copy can be indicated. Use the Design Returned To drop-down menu to select the location for sending the old copy.
If the Scrapped check box is enabled, none is selected automatically. Depending upon the configuration for your deployment, two additional check boxes may be available.
Users can also access the POST app and mark a work order as done.
Note: POST allows bill posters to access their work orders list and complete them. POST syncs with the software and automatically updated the work orders' status without the need for the Ops Management User input.
POST will require a picture to confirm posting.
To mark a work order as complete in POST:
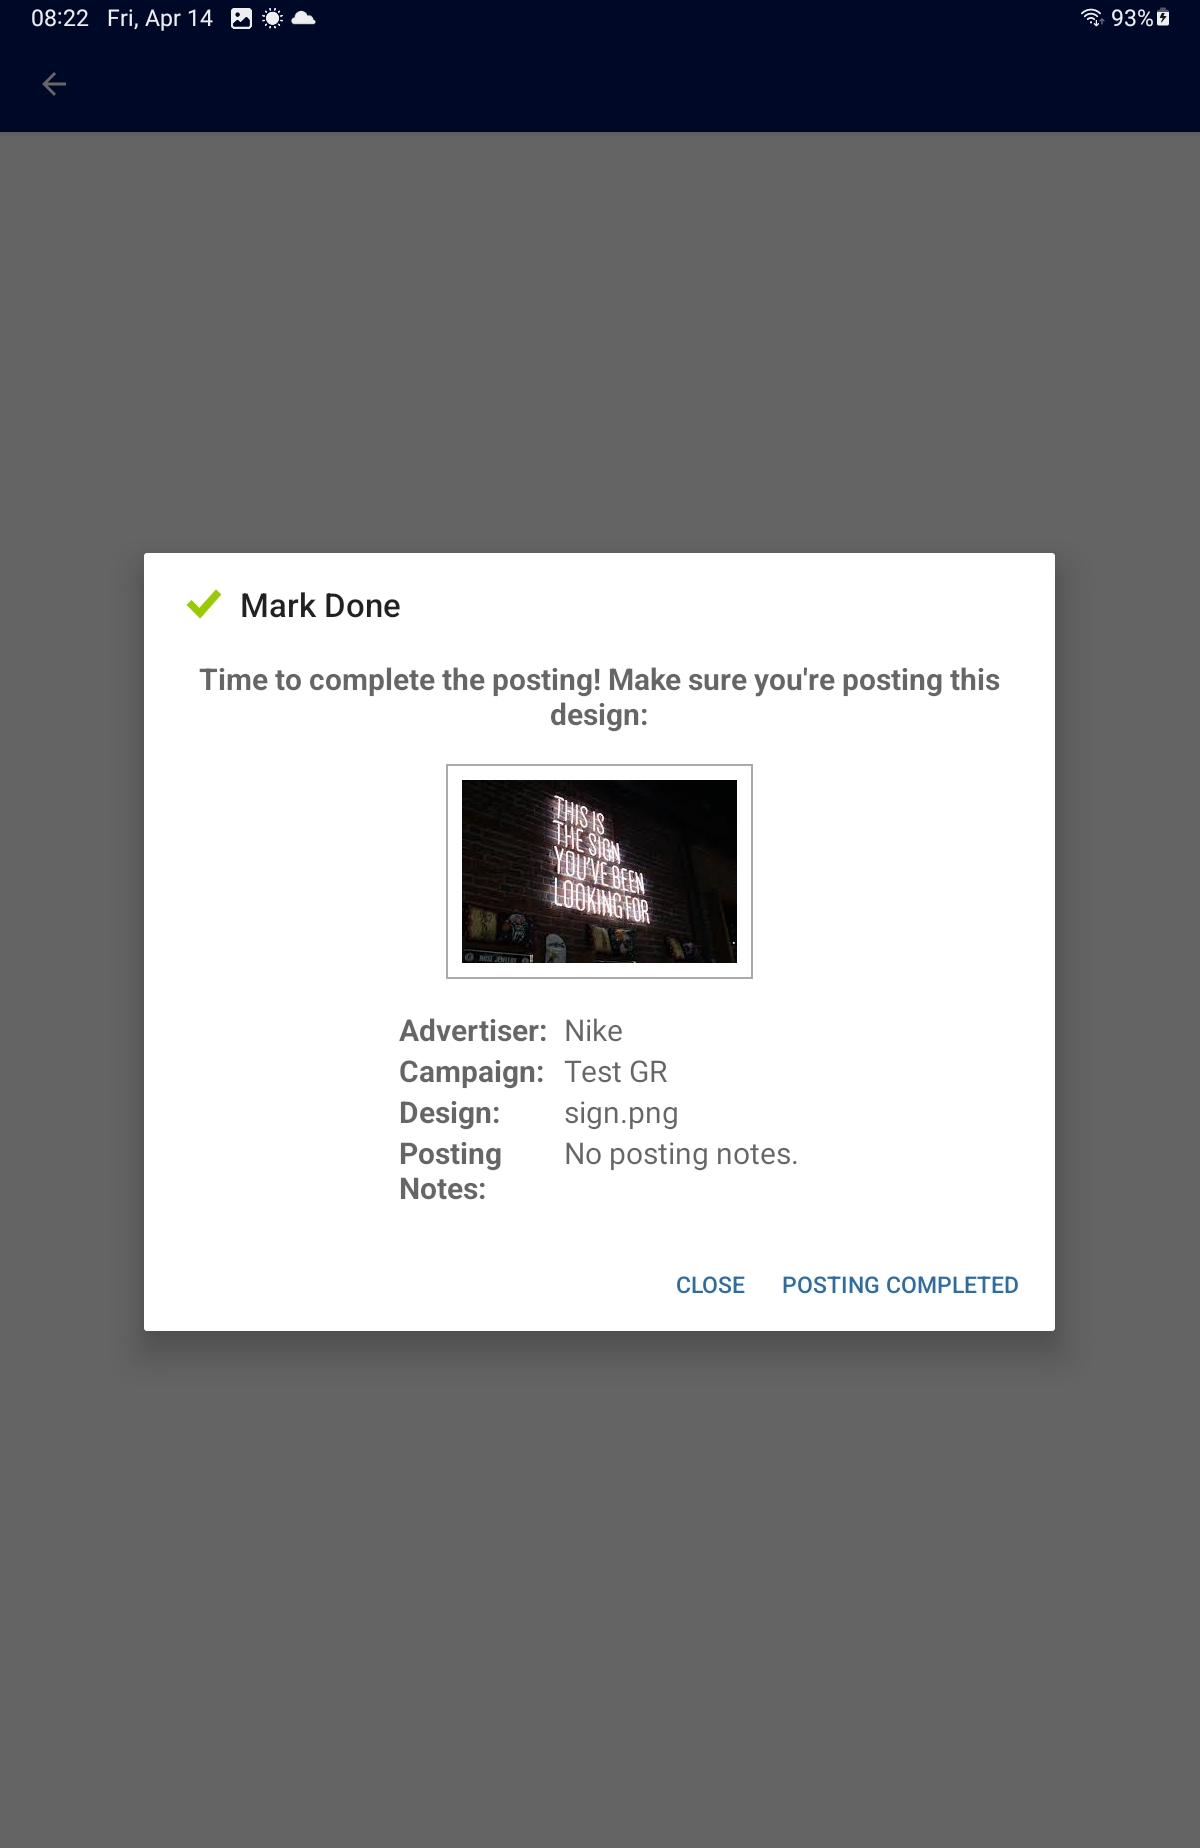
- When you complete your Posting, tap Mark Done, then Posting Completed.
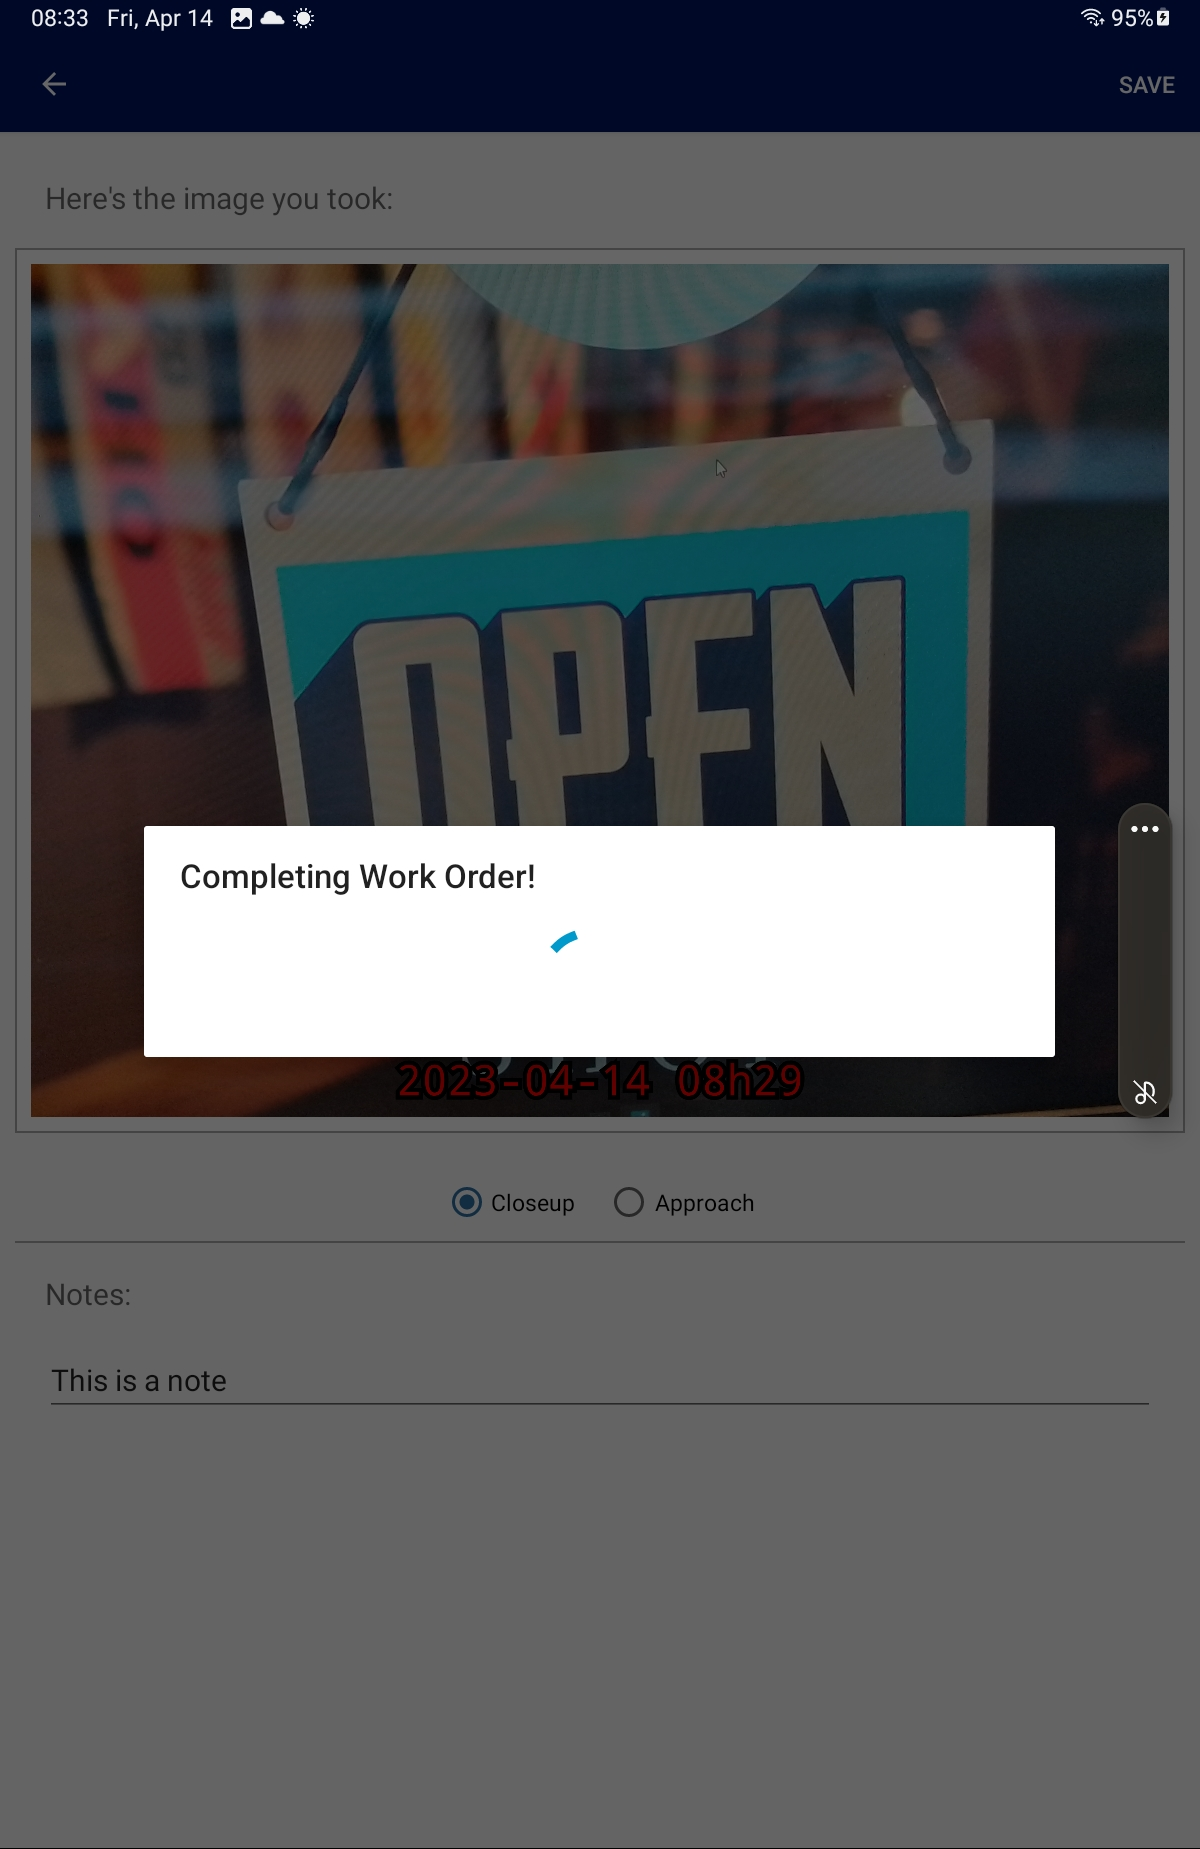
- Take a picture of your Posting as a proof of task completed.
- If you are happy with it, tap Save.

Note: Photos will be compressed down to a max of 1 MB.
You can retake the picture if needed or crop it. You can also add a Note.
Your Work Order Status is now marked as completed. The Posting icon is Black ![]() .
.
For more details, see POST App.
There are two main ways to add maintenance tasks: through the POST app or directly in the software.
Users can create maintenance tasks directly from the Operations tab.
To create a maintenance task:
Static Campaigns
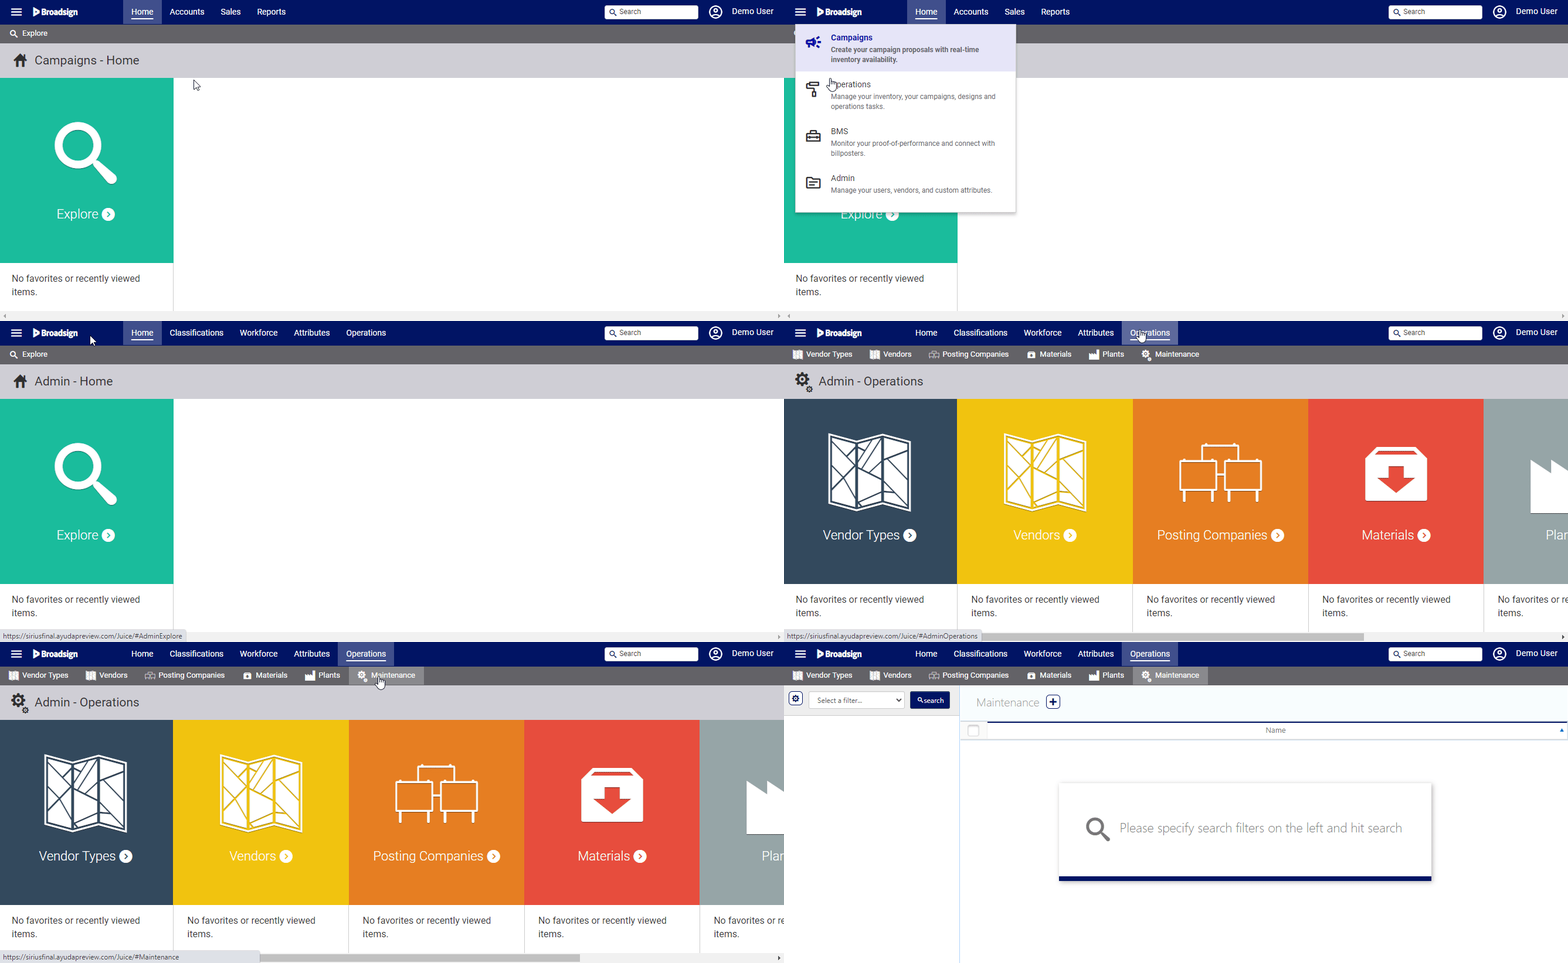
- Access Administration in the top-left menu, click the Operations tab, and then the Maintenance tile.
- Click the
 button to add a maintenance task.
 - Click Save changes.
This presents the filter search window.
This presents the Add Maintenance Work Order window.
You can add as many sorts of Maintenance as you want.
If a problem is spotted while on site, the user can report an issue on the faces and create a maintenance task through POST. The task will be automatically added to the work orders list.
Ops management related reports are available in Operations.
They include:
- Posting Performance
- Work Order Report by Site
- Work Order Summary by Bill Poster
For more information, see Reports.
Now that your operations tasks are ready, you can install and set up the BMS tool. See Getting Started – BMS Setup.
