Note: Broadsign Direct is the next-generation proposals (aka "media packages") sales tool offered by Broadsign. If you want to learn more about Broadsign Direct, contact your Sales representative or Broadsign Services.
Media packages are designed to be sold by the advertising sales representative in your firm. Also, scheduling or traffic departments can reserve campaigns based on the media packages that are pre-defined.
When a media package is defined, and the purchasing terms agreed upon, the information is passed along to the scheduling team at your firm to reserve the time on your network and link the media file to the campaign.
You can create a campaign in Broadsign Control Administrator based on the media package. The targeting and unique properties of the media package will be inherited automatically and the only values to specify are:
- customer
- campaign name
- start date
- number of flights
- a duration multiplier
- the ad copies used by the campaign
- any special targeting required by the campaign
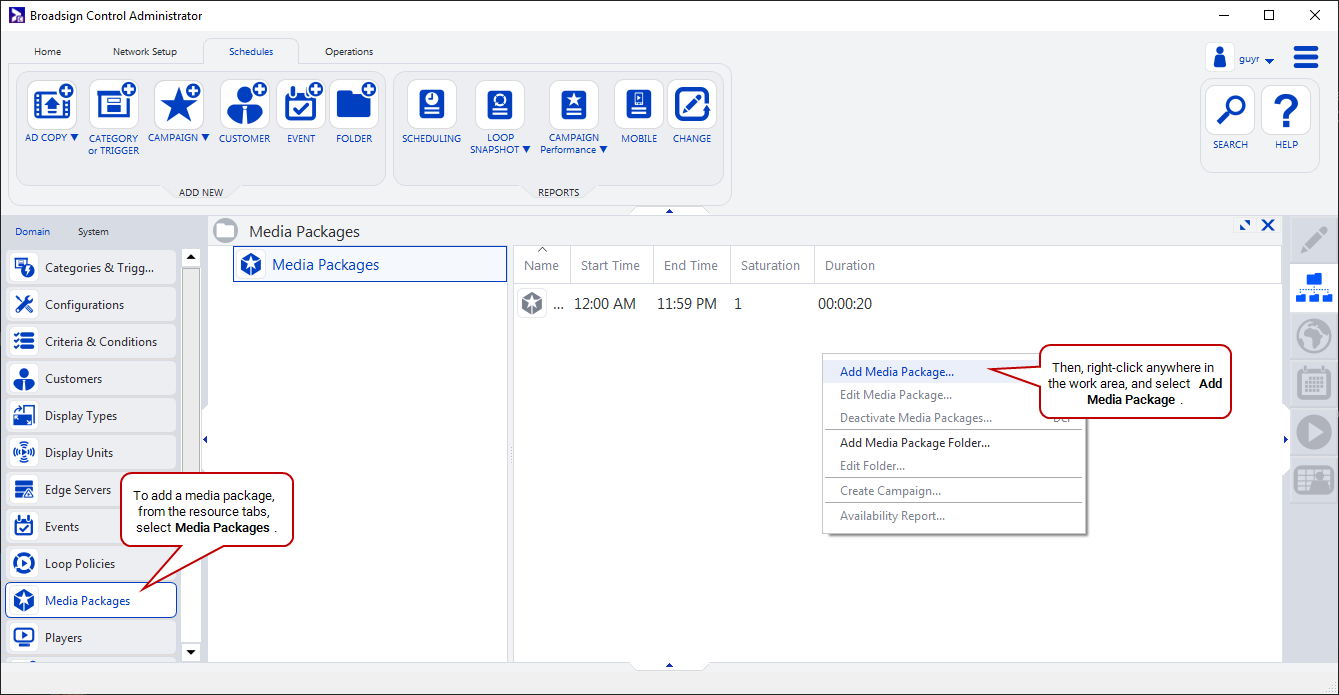
If you select Media Packages from the resource tabs on the left, then right-click anywhere in the work area, you will see this menu:

- Add Media Package – Opens the Add Media Package Wizard.
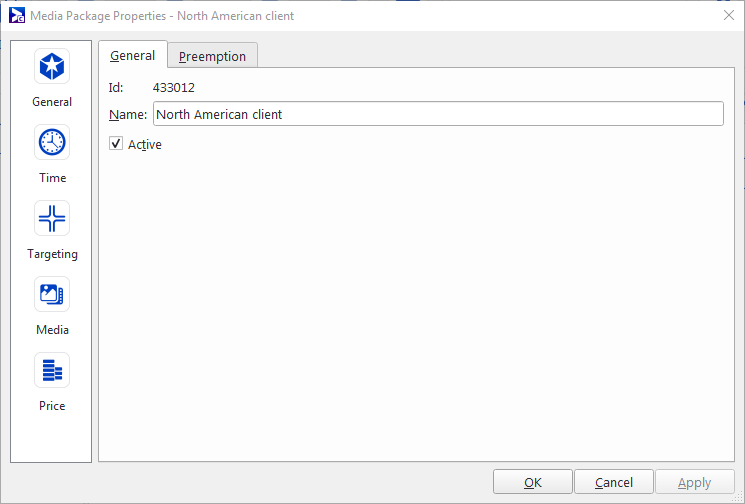
- Edit Media Package: – Opens the Media Package Properties dialogue box.
- Deactivate Media Packages: – Deactivates any selected media packages.
- Add Media Package Folder: – Opens the Add Folder Wizard dialogue box.
- Edit Folder: – Opens the Media Package Folder Properties dialog box.
- Create Campaign: – Opens the Add Campaign Wizard, enabling you to book a campaign from the selected media package. See Campaign Booking.
- Availability Report: – Generates the availability report. See Availability Report.
For general information about adding, editing and deactivating resources, see Overview - Resources.
To add a media package, from the resource tabs on the left, select Media Packages. Then, right-click anywhere in the work area. From the contextual menu, select Add Media Package.
By default, the Add Media Package Wizard contains the following pages:
- Welcome – Name the media package.
-
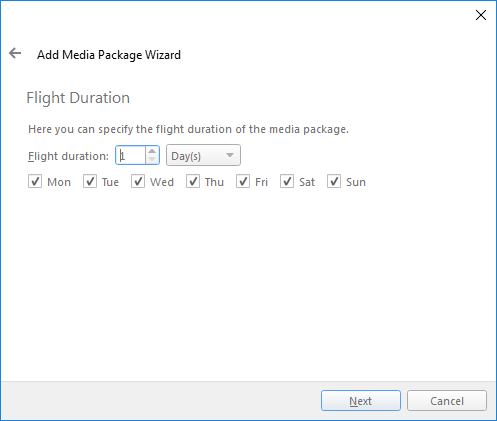
Flight Duration – Specify the flight duration of the media package.
- Display Unit Targeting – Define the display unit targeting for the media package. See Criteria and Conditions.
- Frame Targeting – Define frame targeting criteria for the media package. See Criteria and Conditions.
- Duration – Specify the duration and saturation of the media package.
- Category Separation – Select the category to use for separation (and, if you want, a secondary category). See Categories & Triggers.
- Locale Selection – Enter the language and country for the default unit price. This feature is similar to events. See Events.
-
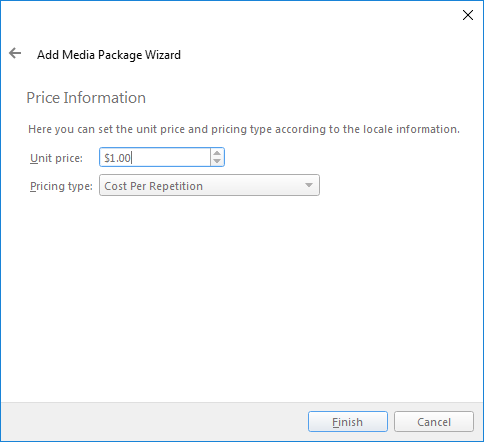
Price Information – Set the unit price (monetary value per unit) and pricing type (cost per repetition, screen, or thousand impressions; or fixed cost).
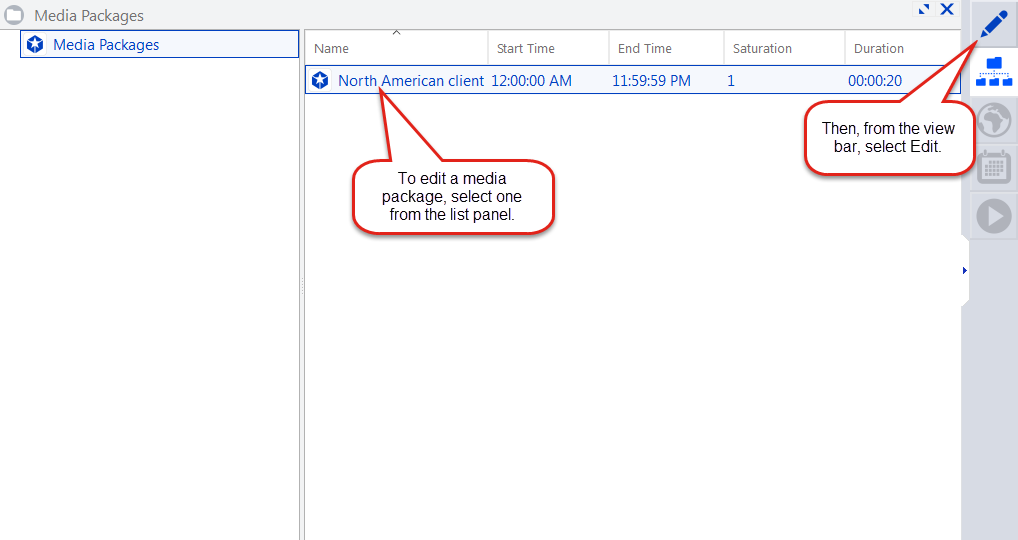
To edit a media package, use one of the following methods:
-
From the list panel, select a media package. Then, from the view bar, select Edit.
-
From the list panel, double-click on a media package.
Promoting the Campaign
When a campaign is created from a media package it is not immediately active on the display units it is targeting since it in the Held state. This allows you to review the campaign properties or set up a different level of responsibility to a user with sufficient privileges to activate the campaign. To release the campaign from the Held state, edit it and from the General tab select Promote.
Media Settings
When a campaign is created from a media package it will inherit the properties defined in the media tab group, namely, the separation, segment, and trigger categories as well as the full-screen property. Note that these properties only apply to newly created campaigns, changing these properties will not affect existing campaigns.
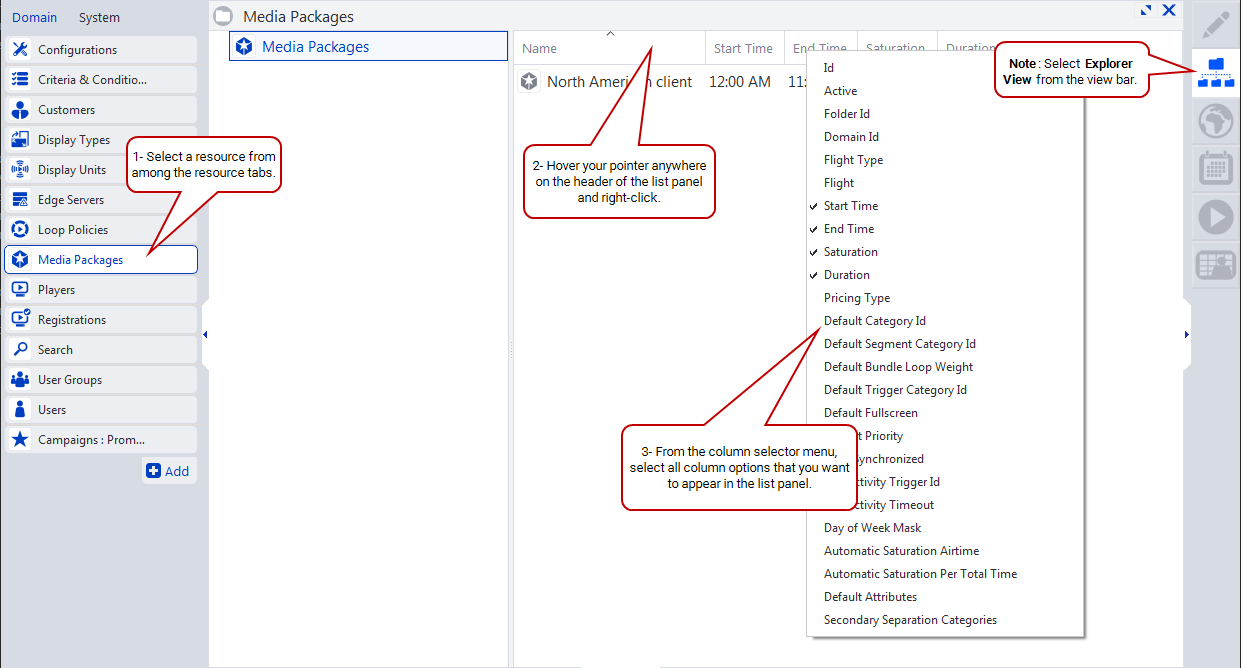
In the list panel of explorer view, each resource has a column selector menu. With this menu, you can configure the list panel to display information you want.
To access a resource's column selector menu:
- From the view bar, select Explorer view.
- In the list panel, hover your pointer over the panel header.
- Right-click, and the column selector menu will appear.
-
Select as many column options as you want.
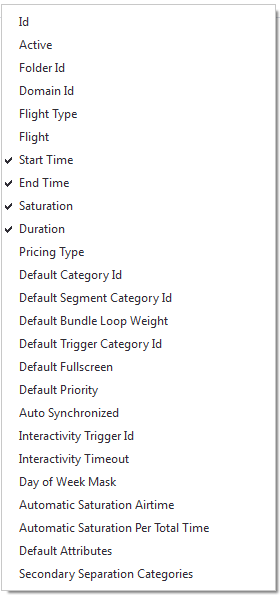
- Id – Indicates the unique ID number of the resource. See Overview - Resources.
- Active – Indicates whether the resource is in an "active" or "inactive" state. See Overview - Resources.
- Folder Id – Indicates the unique ID number of the resource folder.
- Domain Id – Indicates the unique ID number of the domain. See The General Section.
- Flight Type – Indicates the unit of measurement for the duration of the flight, for example days, weeks or months.
- Flight – Indicates the number of flights per unit of measurement, for example, "2 flights per week" or "10 flights per month".
- Start Time – The start time of the flight.
- End Time – The end time of the flight.
- Saturation – Indicates whether or not you have enabled saturation on this media package. Go to Media Package Properties > Time > Duration.
- Duration – The duration of the flight (HH:MM:SS).
- Pricing Type – Indicates the pricing type: cost per repetition, cost per screen, cost per thousand impressions or fixed cost.
- Default Category Id – Indicates the unique ID number of the campaign's default category, if applicable. See Edit Category Properties.
- Default Segment Category Id – Indicates the unique ID number of the campaign's segment category, if applicable. See Overview.
- Default Bundle Loop Weight – Indicates the weight of the default bundle, if applicable. See Edit Bundle Properties.
- Default Trigger Category Id – Indicates the unique ID number of the campaign's default trigger category, if applicable. See Overview.
- Default Fullscreen – Indicates whether the you have set the custom geometry of the campaign as full screen or not. See Geometry Page.
- Interactivity Trigger Id – Indicates the unique ID number of the campaign's interactivity trigger, if applicable. See Interactive Campaigns.
- Interactivity Timeout – Indicates the timeout value, if the campaign is interactive. See Interactive Campaigns.
- Day of Week Mask – Indicates the days of the week for which you have scheduled the campaign to appear. See Date Range Page.
- Secondary Separation Categories – Displays the secondary separation categories associated with the campaign, if applicable. See Second-Level Separation.
After you have created a media package on your network, you can then move on to other basic steps:

