Once you have configured your Campaign Wizard options, you can book a campaign.
Note: This page is one of several in the Campaigns section of our online documentation. For general information about campaigns, see Campaigns. For a basic tutorial about booking a campaign, see Quick Start Tutorial - Book a Campaign. For an intermediate tutorial about booking a campaign, see Content & Scheduling Tutorial - Book a Campaign.
Along with display units, campaigns are the central mechanism in Broadsign Control Products. Use them to target and schedule content to your display units. Rather than define playlists manually, each Broadsign Control Player dynamically builds its own playlist based on the campaigns that are targeted to it.
An unpromoted campaign locks down a portion of the available airtime of one or more frames. That way, you reserve the airtime until negotiations to purchase it wrap up. Once these negotiations are complete, you can promote the campaign and deploy content. Content that you schedule to the campaign displays on all its booked frames.
Broadsign Control Administrator can auto-promote campaigns, immediately upon creation. Organizations that avoid reserving time on the network will find this useful. For more details, see Automatic Options.
Note: You can reserve an entire branch of your network, so are not forced to reserve display units individually. Right-click a display unit folder, and select Reserve to Display Unit Folder... This function is extremely helpful when dealing with particularly large networks containing many display units.
In this section, we describe the different methods for opening the Add Campaign Wizard. The wizard guides you through the process of booking a campaign.
Once it's open, you can use the default settings – see Default Pages in the Add Campaign Wizard – and add optional pages – see Optional Pages in the Add Campaign Wizard. To add optional pages to the wizard, see Campaign Options.
To open the Add Campaign Wizard:
Use one of the following methods:
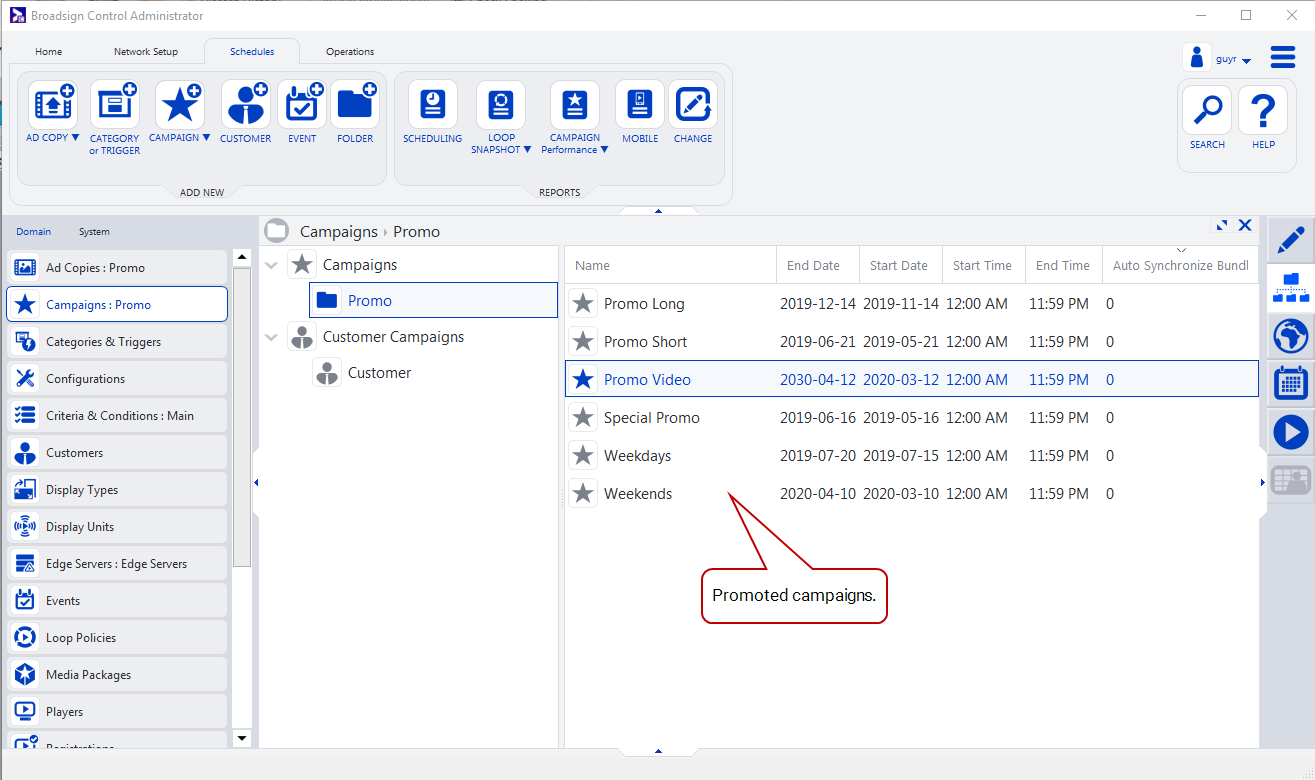
- Go to the Schedules ribbon, and then select the Campaign icon.
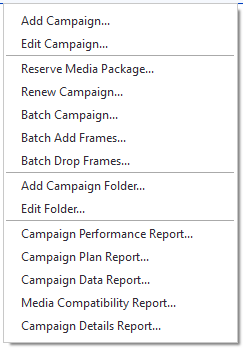
- From the resource tabs on the left, select Campaigns. Then, right-click anywhere in the work area. From the contextual menu, select Add Campaign. For more information, see The Contextual Menu.
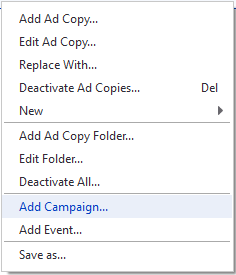
- From the resource tabs on the left, select Ad Copies. Then, right-click on an ad copy. From the contextual menu, select Add Campaign. For more information, see Ad Copies.
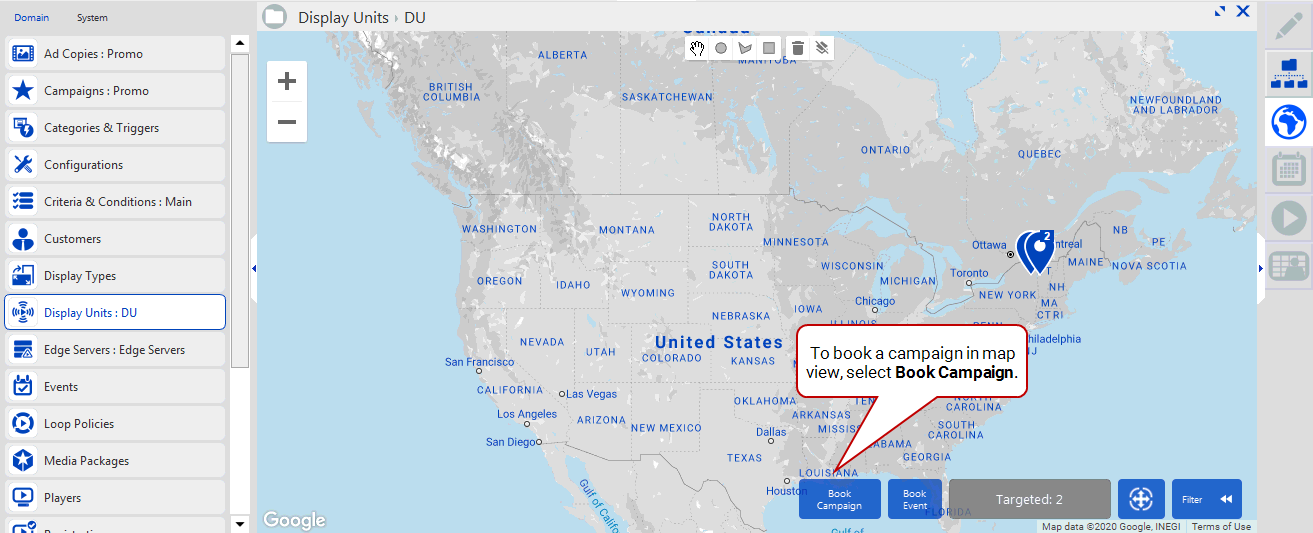
- From the resource tabs on the left, select Display Units. In map view, select the Book Campaign icon. For more information, see Display Units in Map View.
The Add Campaign Wizard, which guides you through the process of booking a campaign, has several default pages. We describe them, at length, in this section:
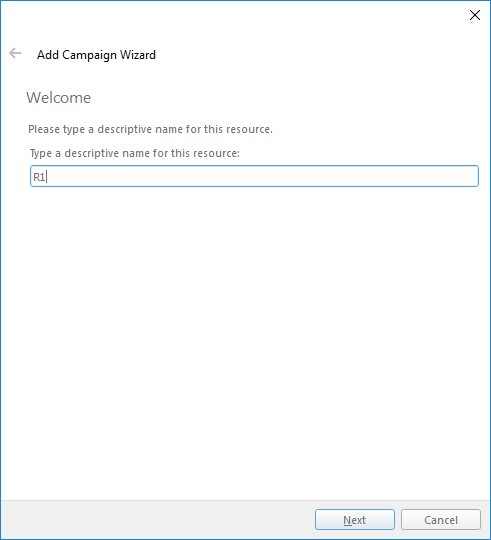
- Welcome Page
- Display Unit Targeting Page
- Ad Copy Selection Page
- Date Range Page
- Duration Page
- Campaign Results Page
Notes:
Note: For a tutorial using only the default pages, see Quick Start Tutorial.
Note: For descriptions of optional wizard pages, see Optional Pages in the Add Campaign Wizard. For details about configuring the optional wizard pages, see Campaign Wizard Options.
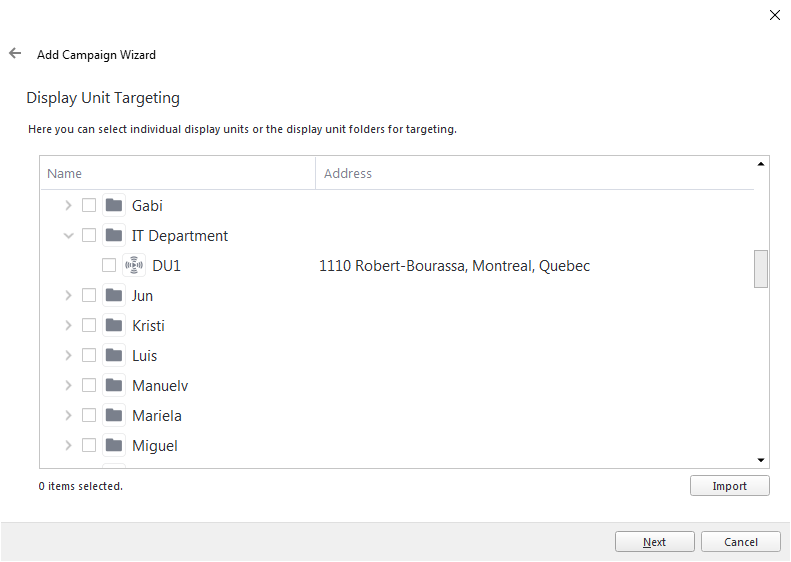
With this page, you can select display units: either parent folders (whole branches in the tree structure) or individual display units.
If the Show address in Display Unit Targeting domain option is enabled, then this page shows the display unit’s address field. For more information, see Automatic Options.
If you have many individual display units to manage, you can use the Import button. Use .csv file format with one display unit ID per line.
For more information, see Display Units and Criteria and Conditions.
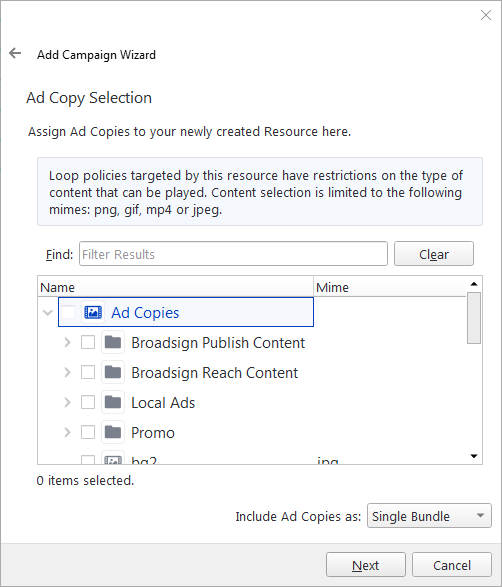
With this page, you select the ad copy for the campaign.
You can use the Find field to search for specific ad copies.
When adding content to a campaign with restrictions (see Content Scheduling Restriction), a message informs you that some of the selected display units have restrictions on the type of content that can be played. This information is collected from the loop policies of all active and targeted screens. The message also lists the content types that are acceptable to all loop policies and can be added to a campaign using this wizard.
- The content list displays the MIME type.
- The content list can be filtered by MIME type.
When multiple Ad Copies are selected, the Include Ad Copies as option allows you to choose how these Ad Copies are added:
- Add the Ad Copies as multiple individual Bundles. This is the default behavior.
- Add all the Ad Copies in a single Bundle. The wizard creates one Bundle named “New Multi Bundle” with all selected Ad Copy included.
The option that you select will be retained and selected the next time you open the wizard.
For more information about ad copies, see Ad Copies.
Campaign Date Range
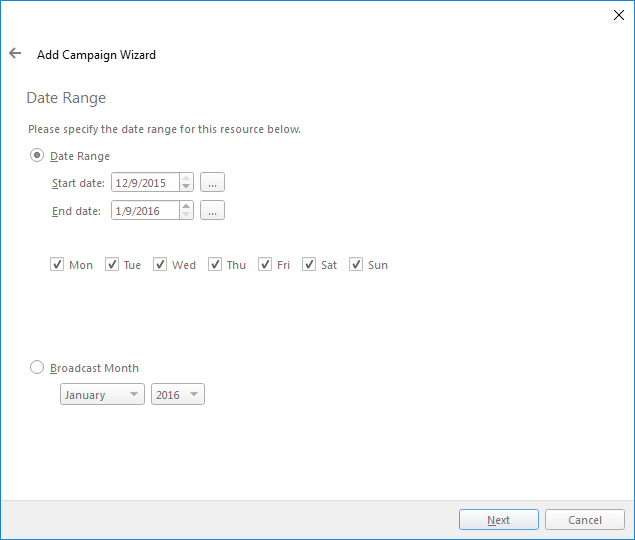
When booking a campaign, you must add its start and end dates. These dates reserve time on the frames of the display unit.
If the campaign is to play on only certain days of the week, you can specify those days as part of its date range. For example, a campaign may run for 30 days but only on weekdays. Just select the days on which the campaign will execute: Mon, Tue, Wed, Thu, Fri.
Once you have booked the campaign, you can view the start and end dates under the Schedules section of the campaign's properties. See The Schedules Section.
Note: Once you book a campaign, you are unable to change the date range. If you must end a campaign early, you can cancel it in the campaign's properties, in the General section, under the General tab. If you want to extend a campaign beyond its original end date, you can renew the campaign. See The General Section and The Contextual Menu.
After the campaign expires, for reference purposes you can still access the bundles that played, the schedules you set or the targeted display units. See Campaign Editing.
Once specified, the date range (aka the "day-of-week mask"), will impact the following:
- Campaign Calendar Report: Shows which campaigns are active in a display unit daily. The report takes into account a campaign's day-of-week mask, that is the hours in a day in which it will run.
- Campaign Performance Report: Lists a campaign's repetitions as displayed over the course of its lifetime, as well as its saturation. The report does not show estimated repetitions or impressions for the inactive days of a campaign. It skips the days not part of the campaign's day-of-week mask.
- Campaign Plan Report: Contains a field in the header that shows which days of the week are active for the campaign. Also, the campaign performance report has the same information in its header.
If you book a campaign to play only a few days a week, the corresponding default schedule will also have only those days of the week enabled. Invalid days will appear greyed-out. You would be unable to change the schedule to a day mask that exceeds the owning campaign's day mask.
Warning: When using schedules, upgrade all installations of Broadsign Control Administrator in your network. If you avoid doing so, you risk Broadsign Server rejecting your schedules. The reason: a campaign created with a day-of-week mask in the current version, could have its schedule edited in a prior release and set to include invalid days. Broadsign Server rejects invalid days. It blocks schedules with day masks that exceed the owning campaign's day mask.
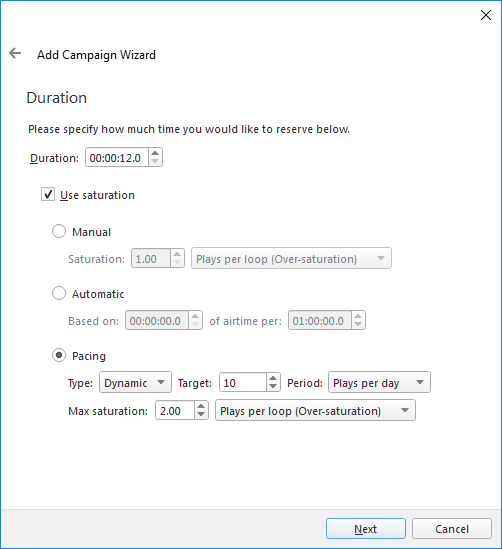
Duration indicates the maximum duration of the ad(s) scheduled to this campaign. If you schedule an ad with a duration longer than the value entered here, Broadsign Control Player truncates it to the duration you enter. The only exception to this rule is Slot Duration Override: enable it on the scheduled bundle.
If the duration of the campaign is longer than the loop time used in the frames targeted by the campaign, then those frames will not be included.
Loop Saturation
The Duration page of the Add Campaign Wizard also allows you to set the campaign's loop saturation options (see Playlist Generation) so that they can be interpreted by Broadsign Control Player. This covers options such as increasing the number of times a campaign is played per loop or setting a campaign to play after a given amount of loops.
Any loop saturation changes that you make by increasing or decreasing the number of times a campaign is played in a loop will have a direct effect on the campaign's estimated number of repetitions; said effect will increase the estimated number of repetitions when increasing the number of times a campaign is played per loop, and decrease said number when setting a campaign to play once after a given amount of loops.
When using either over or under saturation on a campaign you must ensure that any loop policy using that campaign has the proper Loop Transformation configuration.
When specifying the desired saturation for any given campaign, the following options are available:
- Manual: When entered manually, you will specify the number of plays per loop or loops per play as specified above. It is also possible to specify it in a fractional way where for example an over-saturation of 2.2 would cause Broadsign Control Player's loop transform to account for the unused fractions, so the first 4 loops will have two slots, the 5th loop will have 3 slots, loops 6 to 9 will have 2 slots, the 10th loop will have 3, etc.
- Automatic (Share of Voice-Booking): Rather than specifying the value for the over or under saturation, you can also specify the desired airtime per time. The default values for the automatic saturation will be based on the duration specified for the campaign, and the airtime per time (in the image it is 30 sec per hour).
- Choose between the following options:
- Static: Calculates a pacing value that includes all targets of the campaign. Similar to saturation, without the need to manually derive the desired value. Can set static pacing to various periods: daily, hourly or over the total duration.
- Dynamic: A comprehensive pacing solution. For more details, see Dynamic Pacing.
Note: The saturation value of a campaign is static at the time it is reserved. This is a requirement to guarantee availability calculations and to prevent overbooking. Once a saturation value has been derived using automatic saturation and the campaign has been reserved, changing the loop policy's maximum duration will have no effect on the already booked campaign's saturation value. Furthermore, automatic saturation will only be possible when all the targeted loop policies have the same duration. A verification will be made to ensure this is the case before the campaign can proceed. If the saturation value cannot be automatically calculated, an error will be displayed and the user will have to calculate it manually.
Note: All loop policies of all targeted frames must be of the same duration.
Note: You can enable and edit dynamic pacing on existing campaigns. See The General Section.
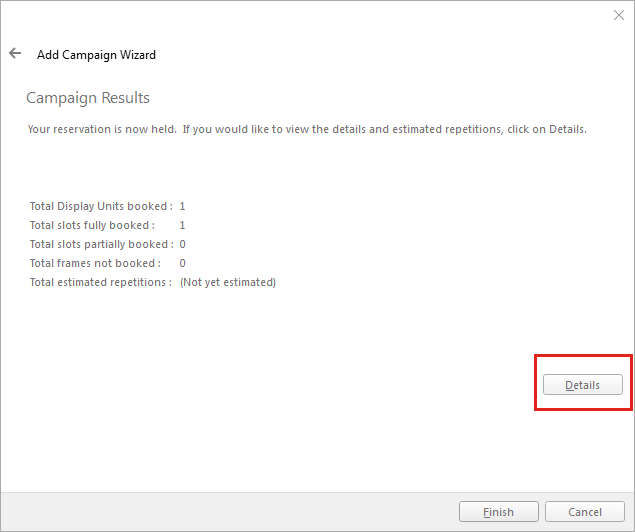
As you arrive at the final page – Campaign Results – Broadsign Control Administrator calculates the following:
- Total Display Units booked
- Total slots fully booked
- Total slots partially booked
- Total frames not booked
- Total estimated repetitions
Using these details, you can assess if the campaign will provide the coverage you want.
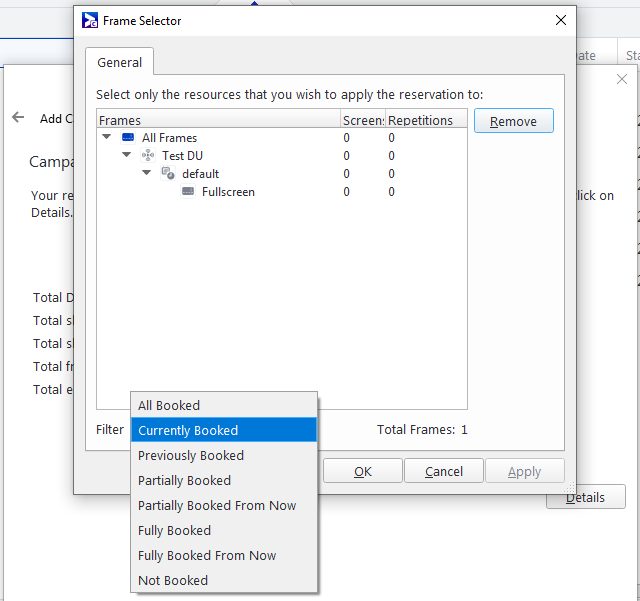
Also, if you click on Details, you will have access to the frame selector. You can select only those resources to which you want to apply the campaign. For more information, see Overbooking Protection.
The pages we describe in this section are optional: you can add them to the Add Campaign Wizard if you want.
For more information about configuring campaign wizard options, see Campaign Wizard Options.
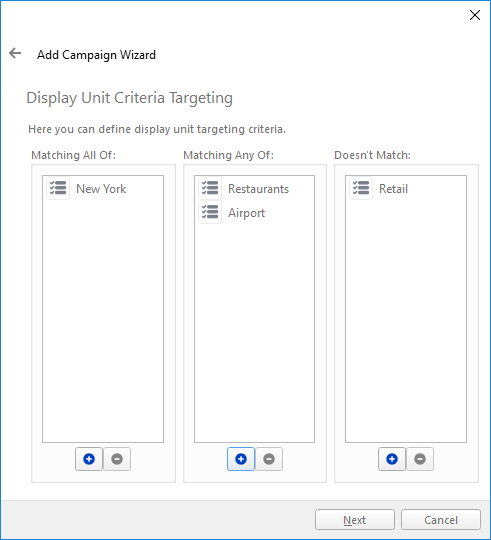
When targeting by display unit criteria, you can create expressions using these Boolean operators:
- AND (Matching All Of)
- OR (Matching Any Of)
- NOT (Doesn't Match)
For example, you can target all display units that have the "New York" criteria, and among those, match those that have either "Restaurants" OR "Airport" criteria, but NOT those with the "Retail" criteria.
For more information, see Criteria and Conditions.
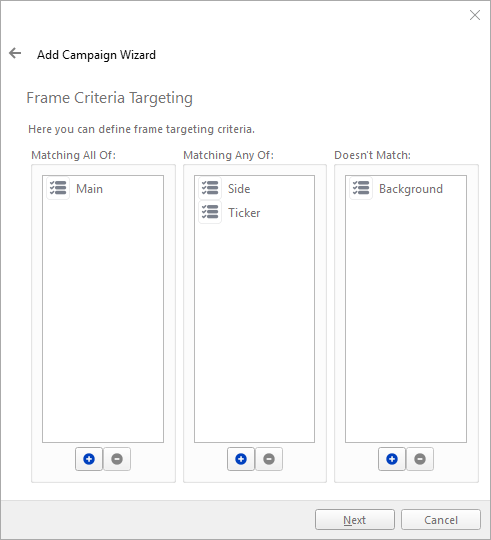
When targeting by frame criteria, you can create expressions using these Boolean operators:
- AND (Matching All Of)
- OR (Matching Any Of)
- NOT (Doesn't Match)
For example, you can target all frames that have the "Main" criteria, and among those, match those that have either "Side" OR "Ticker" criteria, but NOT those with the "Background" criteria.
For more information, see Frames and Criteria and Conditions.
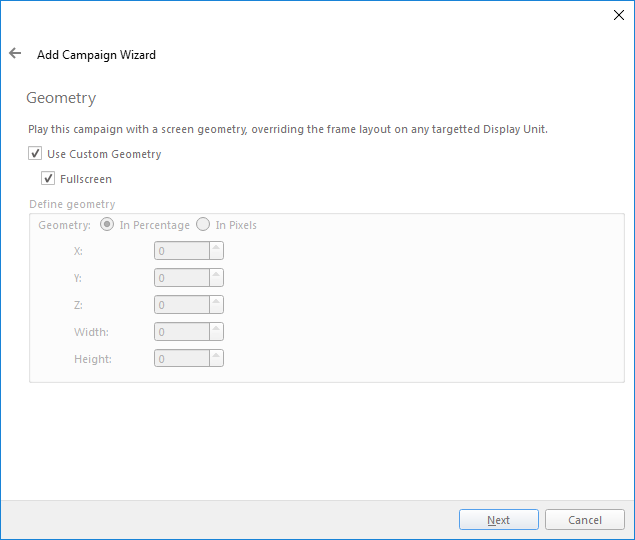
When a campaign is created targeting a frame criteria that has a custom geometry defined, those settings will be inherited so the user will not have to fill them out every time. The geometry page in the campaign options can be disabled entirely and this page will not be shown although the settings will still propagate. If more than one frame criteria with custom geometry is selected, a warning will be issued and you will be prompted to select which criteria to use for this campaign’s geometry settings to proceed.
When a custom geometry is called, the campaign will take over the designated area of the screen for the duration of its playback and then return to the original size (unless another custom geometry is called). Frames on different Z layers will not be affected by the changing geometry; however, frames on the same Z-layer that the new custom geometry conflict with will be stopped for the duration of the campaign.
Note: We advise against using custom geometry with both frame synchronization and transitions at the same time, because this combination might produce unexpected playback.
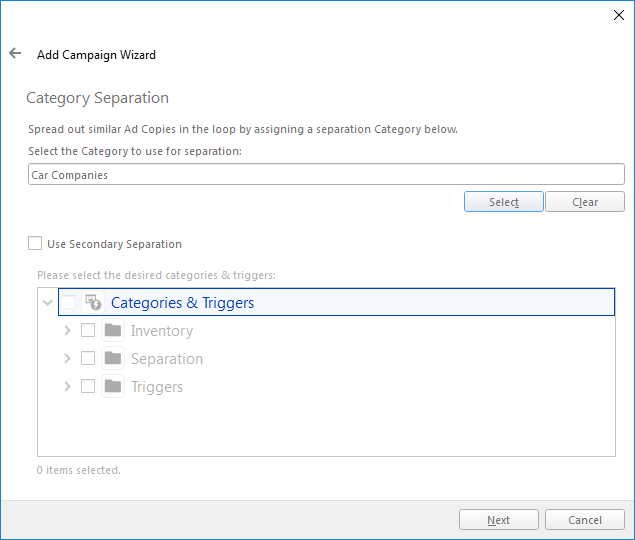
This page allows you to spread out similar ad copies in the Loop by assigning a separation category. For example, you can separate competing automobile brands. By using secondary levels of separation, you can further separate auto ads from alcohol ads.
For more information, see Categories & Triggers.
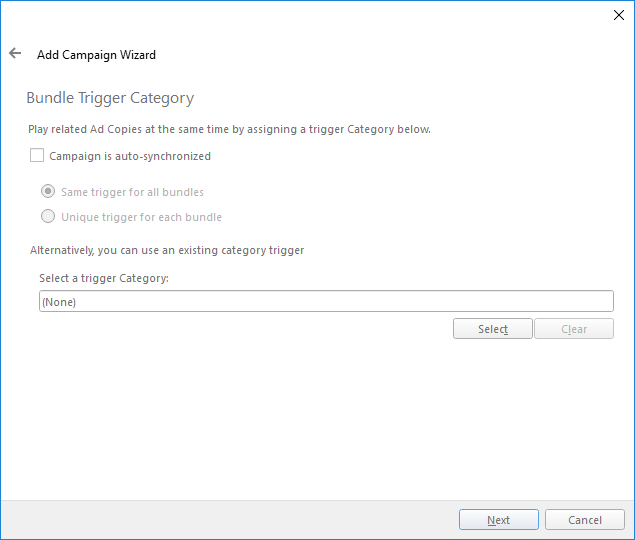
If you check Campaign is auto-synchronized with the Same trigger for all bundles option in the campaign wizard, it will automatically create an implicit trigger category for use with this campaign. This trigger category will be automatically associated with all bundles added to the campaign. The trigger will be named “Trigger for Campaign Id XXXX” and it will appear in the root of the Categories and Triggers section.
In the same fashion, in the case where there is a requirement to synchronize multiple bundles of the same campaign, it is possible to make use of the auto-synchronized feature and specify the Unique trigger for each bundle option. The result of this would be to automatically generate and assign a different trigger category to each of the bundles in that campaign and hence achieve multi-bundle synchronization.
It is possible to make a campaign interactive by attaching an interactivity trigger to it. When a campaign is set to be interactive, it reacts to any touch event that occurs during its execution by firing the trigger attached to it and hence triggering the playback of content with matching trigger. It is also possible to get the interactive events counts information from the proof of play reports (Campaign Performance report). To include the "Interactivity" option in the campaign creation wizard, it needs to be enabled from the Options dialog in Broadsign Control Administrator, under Campaigns & Events.
For more information, see Interactive Campaigns.
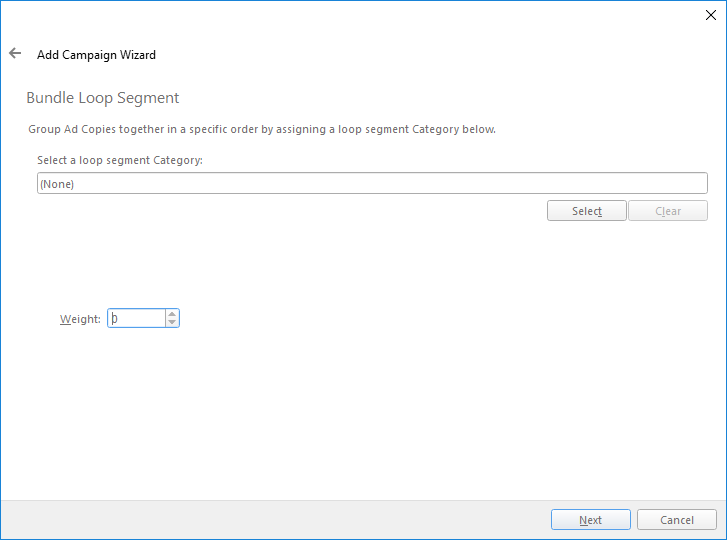
You can group ad copies together in a specific order by assigning a loop segment category to a campaign.
For more information, see Categories & Triggers.
You can specify if the campaign is interactive, that is, if a user touches the screen, Broadsign will issue a trigger.
Also, you can set a timeout value for the interactive content. For example, your interactive content could be an interactive file that is open-ended. By setting a timeout value, you can limit the duration of the content. The player would then resume the loop.
For general information about triggers, see Categories & Triggers. For content about triggers aimed at developers, see Triggers Action.
You can add Conditions to a campaign. If you do, the player will not play the Bundle unless the conditional rules are met. Conditions are toggled on the player side using remote commands.
For more information, see Criteria and Conditions.
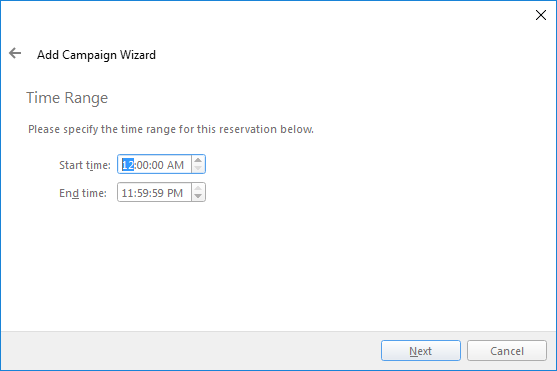
A campaign's time range cannot begin before 12:00:00 AM or end after 11:59:59 PM. A time range cannot wrap around midnight.
Note: It is not possible for a campaign to begin at 10:00:00 PM and end at 03:00:00 AM. Two campaigns would be necessary to do that: one campaign that stretched from 10:00:00 PM to 11:59:59 PM, and another that covered 12:00:00 AM to 03:00:00 AM.
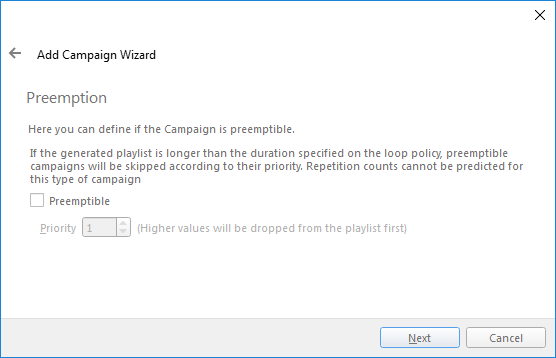
When this wizard step is enabled, you have the option of specifying that a campaign is preemptible. When a player’s loop is not completely full with normal campaigns, it will fill it up as much as it can using preemptible campaigns. Lower priorities are filled first, until all preemptible campaigns are exhausted or the loop duration has been met. If the loop is still not full, then filler content will be used to fill the loop. Broadsign Control Player must use the Preemption transformation on the loop policy to achieve this effect. It is enabled by default.
Priority values can range between +999 and -999, excluding 0.
If the campaign is booked or managed by Broadsign Direct or the Guaranteed Campaigns module in the Broadsign Platform, the priority value is synced between Broadsign Direct / Broadsign Platform and Broadsign Control.
Note: Filler content is unable to respect triggers or synchronization (for example, Frame Synchronization). If you would like to synchronize filler content, use the same ad copies in a preemptible campaign, instead.
For a detailed description of how to book a preemptible campaign, see Preemptible Campaigns.
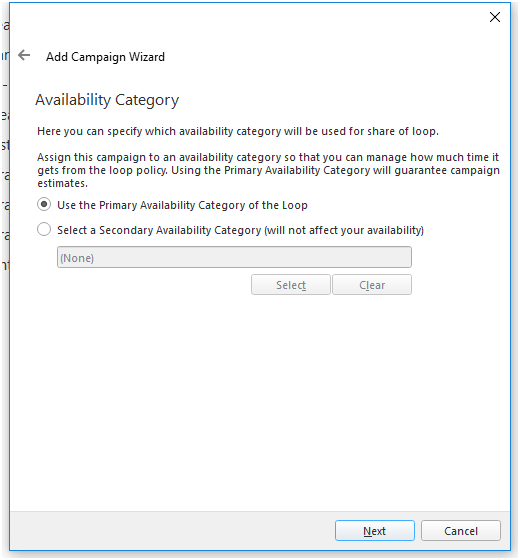
On this page, you can specify which availability category will be used for share of loop.
For more information, see Share of Loop.
The Notes tab contains a text field for recording any pertinent information about the campaign. The notes can be edited at any time and their main function is to keep track of any relevant information that can also be shared between schedulers or any Broadsign Control Administrator users with access to the resource in question.
You can create a campaign with or without a customer.
When created for a customer, the campaign should reside within the proper customer in the resource tree pane. This will allow you to specify settings such as taxes, pricing, and various booking rules that are specific to that customer.
However, in many cases, a campaign is unrelated to a customer; rather, it exists for self-promotional reasons. In this case, you can create the campaign at the top level of the resource tree pane (under Campaigns).
For more information, see Customers.
Renew a Campaign
Renewing a campaign involves creating a clone of an existing campaign.
This makes it possible to re-use a Campaign that has ended or is close to ending by copying its scheduling information and targeted Display Units and Frames to a new Campaign.
Note: Renewing a Campaign targets the same Display Units and Frames. If you want Broadsign Control Administrator to evaluate the targeting requirements, looking for conflicts, you should rebook the Campaign. See Rebook Campaigns (In-Place Editing).
When renewing the Campaign, you need to only specify the new name, date range, and time of day range. The remaining properties of the Campaign such as Ad Copies, Media Bundles, Display Units, Day Parts, and Frames are copied exactly from the existing Campaign while the Schedules are adjusted for the new start and end date using a Δt computed as follows:
- Δt = (renewed campaign start date) – (original campaign start date)
- renewed schedule start date = (original schedule start date) + Δt
- renewed schedule end date = (original schedule end date )+ Δ t
Note:
- If the campaign is renewed for a shorter date range than the original, the renewed schedule end dates will be limited to the end date of the campaign.
- If the campaign is renewed for a longer date range than the original, the extra date range will be included in the renewed schedule if either of the following conditions are met:
- The original schedules start and end dates were the same as the original campaigns start and end dates.
- The original schedule was the only one in the campaign.
- The only resources that are not copied to the new Campaign are any Day Parts that have expired and were targeted by the original Campaign.
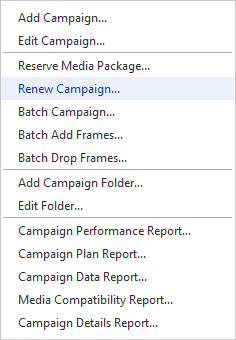
You can renew an existing campaign by right-clicking the campaign and selecting Renew Campaign in the drop-down menu.
An Add Campaign Wizard specific for renewing a campaign is displayed. This wizard contains pages that work exactly like the regular Add Campaign Wizard. See the following regular Add Campaign Wizard pages for more information:
Mandatory pages:
Optional pages:
The following pages will help you set up, book, edit, and maintain your campaigns:
- Campaign Options: You can configure the Add Campaign Wizard, which takes the user through the booking process.
- Campaign Booking: We show you how to book a campaign through the Add Campaign Wizard, page-by-page (assuming that you selected all of the wizard options during set-up).
- Overbooking Protection: Overbooking allows network operators to prevent campaigns from targeting display units that have already had their available time booked.
- Batch Campaigns: The Add Campaign Batch Wizard allows network operators to schedule multiple similar campaigns in one process.
- Campaign Editing: Once you have created a campaign, you can access its properties to edit some of its settings.
- Bundles: Bundles are groups of ad copies that are scheduled as a whole in the Broadsign Control Administrator.
- Schedules: Schedules are the resources that tell campaigns which content to display and during which block of time to display it.
- Interactive Campaigns: It is possible to specify an interactivity trigger on a Campaign so that if the screen is touched when it is playing, it will trigger supplementary content such as a catalog or web page.
After you have booked a campaign to your network, you can then move on to other basic steps:

